


1. 相关配置
系统:win 10
YOLO版本:yolov5 6.1
拍摄视频设备:安卓手机
电脑显卡:NVIDIA 2080Ti(CPU也可以跑,GPU只是起到加速推理效果)
2. 测距原理
单目测距原理相较于双目十分简单,无需进行立体匹配,仅需利用下边公式线性转换即可:
D = (F\*W)/P
其中D是目标到摄像机的距离, F是摄像机焦距(焦距需要自己进行标定获取), W是目标的宽度或者高度(行人检测一般以人的身高为基准), P是指目标在图像中所占据的像素

了解基本原理后,下边就进行实操阶段
3. 相机标定
3.1:标定方法1
可以参考张友正标定法获取相机的焦距
3.2:标定方法2
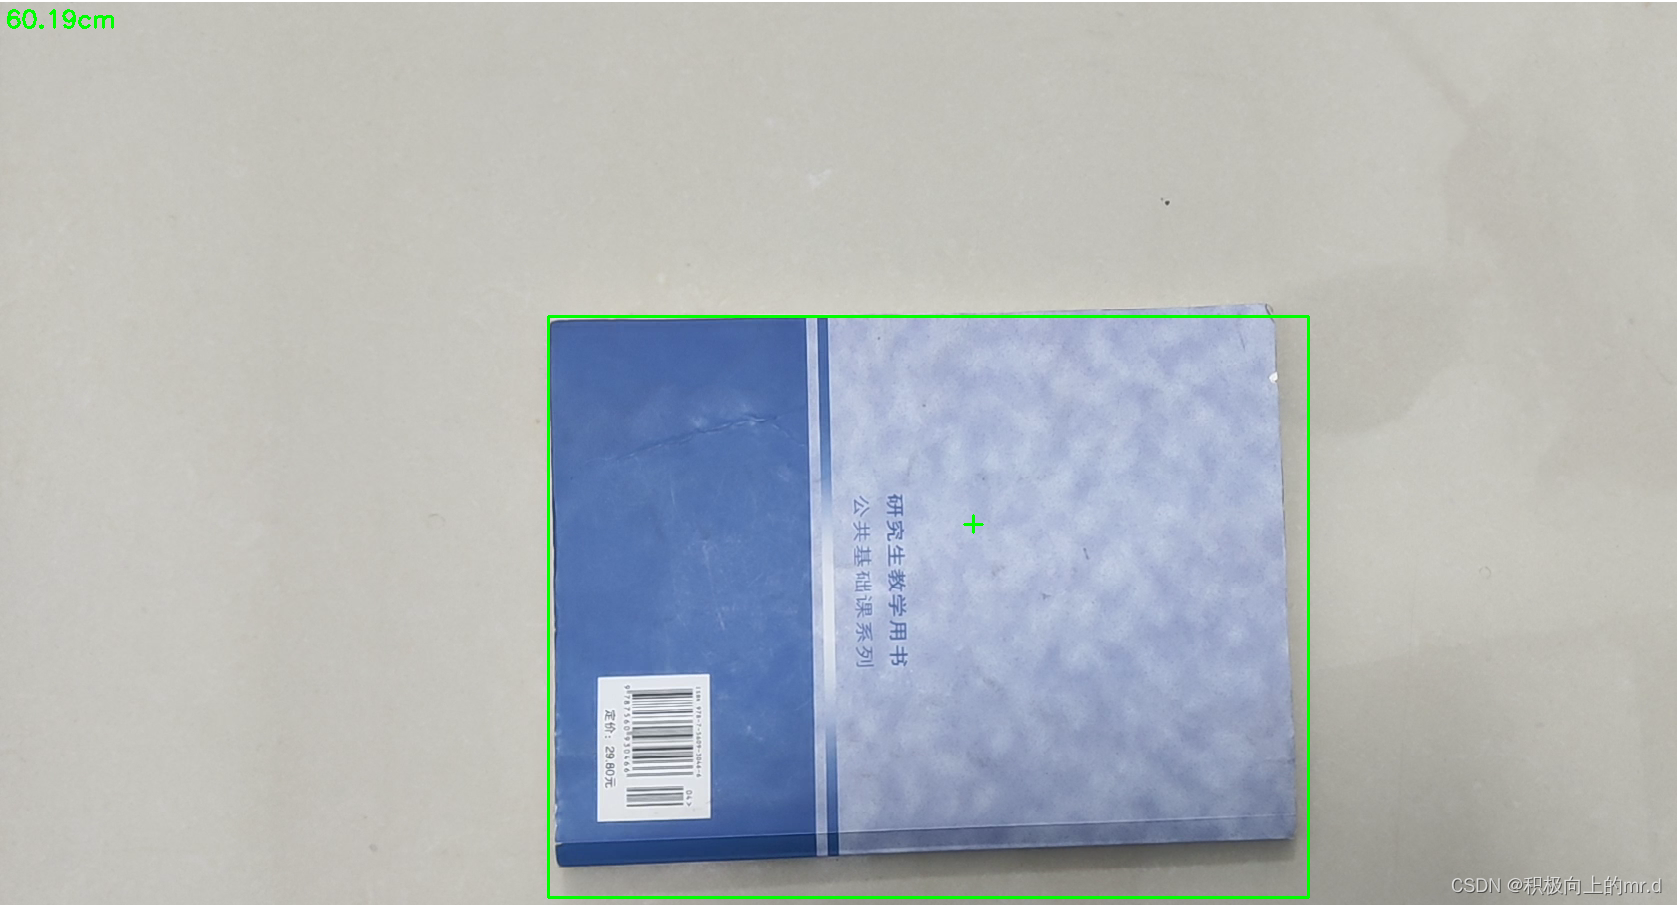
直接使用代码获得焦距,需要提前拍摄一个矩形物体,拍摄时候相机固定,距离被拍摄物体自行设定,并一直保持此距离,背景为纯色,不要出现杂物;最后将拍摄的视频用以下代码检测:
import cv2

win_width = 1920
win_height = 1080
mid_width = int(win_width / 2)
mid_height = int(win_height / 2)

foc = 1990.0       # 根据教程调试相机焦距
real_wid = 9.05   # A4纸横着的时候的宽度,视频拍摄A4纸要横拍,镜头横,A4纸也横
font = cv2.FONT_HERSHEY_SIMPLEX
w_ok = 1

capture = cv2.VideoCapture('5.mp4')
capture.set(3, win_width)
capture.set(4, win_height)

while (True):
    ret, frame = capture.read()
    # frame = cv2.flip(frame, 1)
    if ret == False:
        break

    gray = cv2.cvtColor(frame, cv2.COLOR_BGR2GRAY)
    gray = cv2.GaussianBlur(gray, (5, 5), 0)
    ret, binary = cv2.threshold(gray, 140, 200, 60)    # 扫描不到纸张轮廓时,要更改阈值,直到方框紧密框住纸张
    kernel = cv2.getStructuringElement(cv2.MORPH_RECT, (3, 3))
    binary = cv2.dilate(binary, kernel, iterations=2)
    contours, hierarchy = cv2.findContours(binary, cv2.RETR_TREE, cv2.CHAIN_APPROX_SIMPLE)
    # cv2.drawContours(frame, contours, -1, (0, 255, 0), 2) # 查看所检测到的轮框
    for c in contours:
        if cv2.contourArea(c) < 1000:  # 对于矩形区域,只显示大于给定阈值的轮廓,所以一些微小的变化不会显示。对于光照不变和噪声低的摄像头可不设定轮廓最小尺寸的阈值
            continue

        x, y, w, h = cv2.boundingRect(c)  # 该函数计算矩形的边界框

        if x > mid_width or y > mid_height:
            continue
        if (x + w) < mid_width or (y + h) < mid_height:
            continue
        if h > w:
            continue
        if x == 0 or y == 0:
            continue
        if x == win_width or y == win_height:
            continue

        w_ok = w
        cv2.rectangle(frame, (x + 1, y + 1), (x + w_ok - 1, y + h - 1), (0, 255, 0), 2)

    dis_inch = (real_wid \* foc) / (w_ok - 2)
    dis_cm = dis_inch \* 2.54
    # os.system("cls")
    # print("Distance : ", dis\_cm, "cm")
    frame = cv2.putText(frame, "%.2fcm" % (dis_cm), (5, 25), font, 0.8, (0, 255, 0), 2)
    frame = cv2.putText(frame, "+", (mid_width, mid_height), font, 1.0, (0, 255, 0), 2)

    cv2.namedWindow('res', 0)
    cv2.namedWindow('gray', 0)
    cv2.resizeWindow('res', win_width, win_height)
    cv2.resizeWindow('gray', win_width, win_height)
    cv2.imshow('res', frame)
    cv2.imshow('gray', binary)

    c = cv2.waitKey(40)
    if c == 27:    # 按退出键esc关闭窗口
        break

cv2.destroyAllWindows()
反复调节 ret, binary = cv2.threshold(gray, 140, 200, 60)这一行里边的三个参数,直到线条紧紧包裹住你所拍摄视频的物体,然后调整相机焦距直到左上角距离和你拍摄视频时相机到物体的距离接近为止
然后将相机焦距写进测距代码distance.py文件里,这里行人用高度表示,根据公式 D = (F*W)/P,知道相机焦距F、行人的高度66.9(单位英寸→170cm/2.54)、像素点距离 h,即可求出相机到物体距离D。 这里用到h-2是因为框的上下边界像素点不接触物体
foc = 1990.0        # 镜头焦距
real_hight_person = 66.9   # 行人高度
real_hight_car = 57.08      # 轿车高度

# 自定义函数,单目测距
def person\_distance(h):
    dis_inch = (real_hight_person \* foc) / (h - 2)
    dis_cm = dis_inch \* 2.54
    dis_cm = int(dis_cm)
    dis_m = dis_cm/100
    return dis_m

def car\_distance(h):
    dis_inch = (real_hight_car \* foc) / (h - 2)
    dis_cm = dis_inch \* 2.54
    dis_cm = int(dis_cm)
    dis_m = dis_cm/100
    return dis_m
4. 相机测距
4.1 测距添加
主要是把测距部分加在了画框附近,首先提取边框的像素点坐标,然后计算边框像素点高度,在根据 公式 D = (F*W)/P 计算目标距离
 for \*xyxy, conf, cls in reversed(det):


     if save_txt:  # Write to file
         xywh = (xyxy2xywh(torch.tensor(xyxy).view(1, 4)) / gn).view(-1).tolist()  # normalized xywh
         line = (cls, \*xywh, conf) if save_conf else (cls, \*xywh)  # label format
         with open(txt_path + '.txt', 'a') as f:
             f.write(('%g ' \* len(line)).rstrip() % line + '\n')

     if save_img or save_crop or view_img:  # Add bbox to image
         x1 = int(xyxy[0])   #获取四个边框坐标
         y1 = int(xyxy[1])
         x2 = int(xyxy[2])
         y2 = int(xyxy[3])
         h = y2-y1
         if names[int(cls)] == "person":
             c = int(cls)  # integer class 整数类 1111111111
             label = None if hide_labels else (
                 names[c] if hide_conf else f'{names[c]} {conf:.2f}')  # 111
             dis_m = person_distance(h)   # 调用函数,计算行人实际高度
             label += f' {dis\_m}m'       # 将行人距离显示写在标签后
             txt = '{0}'.format(label)
             annotator.box_label(xyxy, txt, color=colors(c, True))
         if names[int(cls)] == "car":
             c = int(cls)  # integer class 整数类 1111111111
             label = None if hide_labels else (
                 names[c] if hide_conf else f'{names[c]} {conf:.2f}')  # 111
             dis_m = car_distance(h)      # 调用函数,计算汽车实际高度
             label += f' {dis\_m}m'       # 将汽车距离显示写在标签后
             txt = '{0}'.format(label)
             annotator.box_label(xyxy, txt, color=colors(c, True))

         if save_crop:
             save_one_box(xyxy, imc, file=save_dir / 'crops' / names[c] / f'{p.stem}.jpg', BGR=True)
4.2 细节修改(可忽略)
到上述步骤就已经实现了单目测距过程,下边是一些小细节修改,可以不看
为了实时显示画面,对运行的py文件点击编辑配置,在形参那里输入–view-img --save-txt

但实时显示画面太大,我们对显示部分做了修改,这部分也可以不要,具体是把代码
if view_img:
      cv2.imshow(str(p), im0)
      cv2.waitKey(1)  # 1 millisecond
替换成
if view_img:
     cv2.namedWindow("Webcam", cv2.WINDOW_NORMAL)
     cv2.resizeWindow("Webcam", 1280, 720)
     cv2.moveWindow("Webcam", 0, 100)
     cv2.imshow("Webcam", im0)
     cv2.waitKey(1)
4.3 主代码
# YOLOv5 🚀 by Ultralytics, GPL-3.0 license
"""
Run inference on images, videos, directories, streams, etc.
Usage - sources:
$ python path/to/detect.py --weights yolov5s.pt --source 0 # webcam
img.jpg # image
vid.mp4 # video
path/ # directory
path/\*.jpg # glob
'https://youtu.be/Zgi9g1ksQHc' # YouTube
'rtsp://example.com/media.mp4' # RTSP, RTMP, HTTP stream
Usage - formats:
$ python path/to/detect.py --weights yolov5s.pt # PyTorch
yolov5s.torchscript # TorchScript
yolov5s.onnx # ONNX Runtime or OpenCV DNN with --dnn
yolov5s.xml # OpenVINO
yolov5s.engine # TensorRT
yolov5s.mlmodel # CoreML (MacOS-only)
yolov5s\_saved\_model # TensorFlow SavedModel
yolov5s.pb # TensorFlow GraphDef
yolov5s.tflite # TensorFlow Lite
yolov5s\_edgetpu.tflite # TensorFlow Edge TPU
"""
import argparse
import os
import sys
from pathlib import Path
import cv2
import torch
import torch.backends.cudnn as cudnn
FILE = Path(__file__).resolve()
ROOT = FILE.parents[0] # YOLOv5 root directory
if str(ROOT) not in sys.path:
sys.path.append(str(ROOT)) # add ROOT to PATH
ROOT = Path(os.path.relpath(ROOT, Path.cwd())) # relative
from models.common import DetectMultiBackend
from utils.datasets import IMG_FORMATS, VID_FORMATS, LoadImages, LoadStreams
from utils.general import (LOGGER, check_file, check_img_size, check_imshow, check_requirements, colorstr,
increment_path, non_max_suppression, print_args, scale_coords, strip_optimizer, xyxy2xywh)
from utils.plots import Annotator, colors, save_one_box
from utils.torch_utils import select_device, time_sync
from distance import person_distance,car_distance
@torch.no\_grad()
def run(weights=ROOT / 'yolov5s.pt', # model.pt path(s)
source=ROOT / 'data/images', # file/dir/URL/glob, 0 for webcam
data=ROOT / 'data/coco128.yaml', # dataset.yaml path
imgsz=(640, 640), # inference size (height, width)
conf_thres=0.25, # confidence threshold
iou_thres=0.45, # NMS IOU threshold
max_det=1000, # maximum detections per image
device='', # cuda device, i.e. 0 or 0,1,2,3 or cpu
view_img=False, # show results
save_txt=False, # save results to \*.txt
save_conf=False, # save confidences in --save-txt labels
save_crop=False, # save cropped prediction boxes
nosave=False, # do not save images/videos
classes=None, # filter by class: --class 0, or --class 0 2 3
agnostic_nms=False, # class-agnostic NMS
augment=False, # augmented inference
visualize=False, # visualize features
update=False, # update all models
project=ROOT / 'runs/detect', # save results to project/name
name='exp', # save results to project/name
exist_ok=False, # existing project/name ok, do not increment
line_thickness=3, # bounding box thickness (pixels)
hide_labels=False, # hide labels
hide_conf=False, # hide confidences
half=False, # use FP16 half-precision inference
dnn=False, # use OpenCV DNN for ONNX inference
):
source = str(source)
save_img = not nosave and not source.endswith('.txt') # save inference images
is_file = Path(source).suffix[1:] in (IMG_FORMATS + VID_FORMATS)
is_url = source.lower().startswith(('rtsp://', 'rtmp://', 'http://', 'https://'))
webcam = source.isnumeric() or source.endswith('.txt') or (is_url and not is_file)
if is_url and is_file:
source = check_file(source) # download
# Directories
save_dir = increment_path(Path(project) / name, exist_ok=exist_ok) # increment run
(save_dir / 'labels' if save_txt else save_dir).mkdir(parents=True, exist_ok=True) # make dir
# Load model
device = select_device(device)
model = DetectMultiBackend(weights, device=device, dnn=dnn, data=data)
stride, names, pt, jit, onnx, engine = model.stride, model.names, model.pt, model.jit, model.onnx, model.engine
imgsz = check_img_size(imgsz, s=stride) # check image size
# Half
half &= (pt or jit or onnx or engine) and device.type != 'cpu' # FP16 supported on limited backends with CUDA
if pt or jit:
model.model.half() if half else model.model.float()
# Dataloader
if webcam:
view_img = check_imshow()
cudnn.benchmark = True # set True to speed up constant image size inference
dataset = LoadStreams(source, img_size=imgsz, stride=stride, auto=pt)
bs = len(dataset) # batch\_size
else:
dataset = LoadImages(source, img_size=imgsz, stride=stride, auto=pt)
bs = 1 # batch\_size
vid_path, vid_writer = [None] \* bs, [None] \* bs
# Run inference
model.warmup(imgsz=(1 if pt else bs, 3, \*imgsz), half=half) # warmup
dt, seen = [0.0, 0.0, 0.0], 0
for path, im, im0s, vid_cap, s in dataset:
t1 = time_sync()
im = torch.from_numpy(im).to(device)
im = im.half() if half else im.float() # uint8 to fp16/32
im /= 255 # 0 - 255 to 0.0 - 1.0
if len(im.shape) == 3:
im = im[None] # expand for batch dim
t2 = time_sync()
dt[0] += t2 - t1
# Inference
visualize = increment_path(save_dir / Path(path).stem, mkdir=True) if visualize else False
pred = model(im, augment=augment, visualize=visualize)
t3 = time_sync()
dt[1] += t3 - t2
# NMS
pred = non_max_suppression(pred, conf_thres, iou_thres, classes, agnostic_nms, max_det=max_det)
dt[2] += time_sync() - t3
# Second-stage classifier (optional)
# pred = utils.general.apply\_classifier(pred, classifier\_model, im, im0s)
# Process predictions
for i, det in enumerate(pred): # per image
seen += 1
if webcam: # batch\_size >= 1
p, im0, frame = path[i], im0s[i].copy(), dataset.count
s += f'{i}: '
else:
p, im0, frame = path, im0s.copy(), getattr(dataset, 'frame', 0)
p = Path(p) # to Path
save_path = str(save_dir / p.name) # im.jpg
txt_path = str(save_dir / 'labels' / p.stem) + ('' if dataset.mode == 'image' else f'\_{frame}') # im.txt
**自我介绍一下,小编13年上海交大毕业,曾经在小公司待过,也去过华为、OPPO等大厂,18年进入阿里一直到现在。**
**深知大多数Python工程师,想要提升技能,往往是自己摸索成长或者是报班学习,但对于培训机构动则几千的学费,着实压力不小。自己不成体系的自学效果低效又漫长,而且极易碰到天花板技术停滞不前!**
**因此收集整理了一份《2024年Python开发全套学习资料》,初衷也很简单,就是希望能够帮助到想自学提升又不知道该从何学起的朋友,同时减轻大家的负担。**

**既有适合小白学习的零基础资料,也有适合3年以上经验的小伙伴深入学习提升的进阶课程,基本涵盖了95%以上前端开发知识点,真正体系化!**
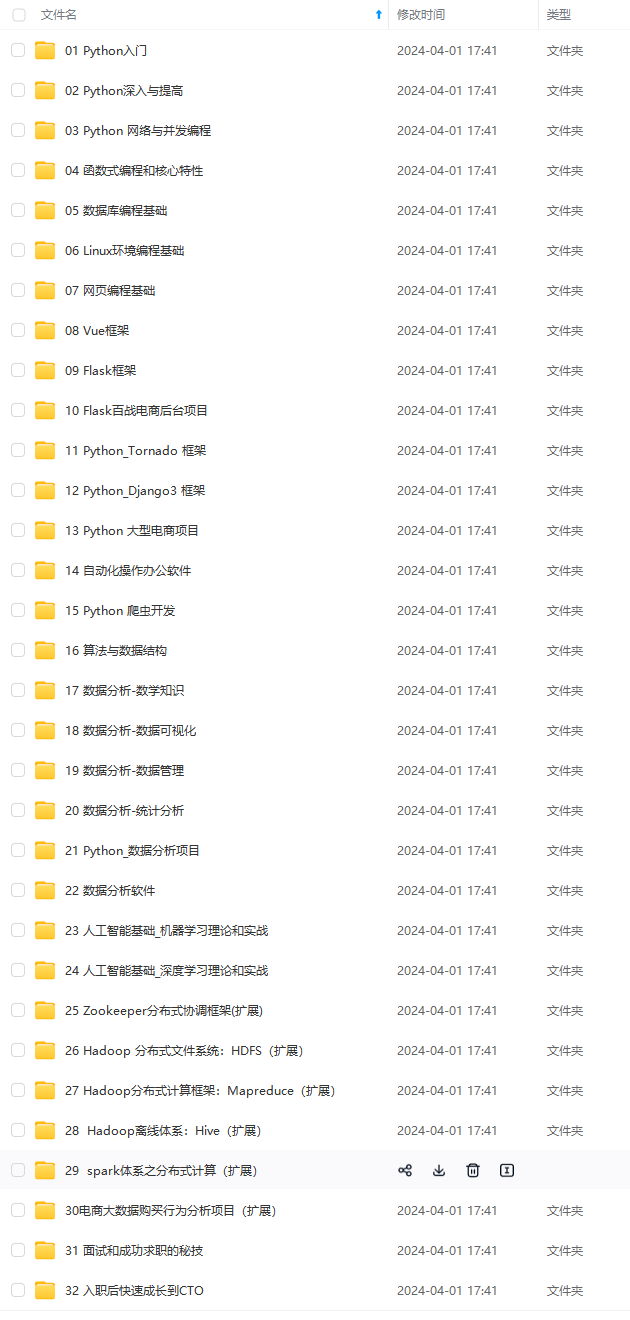
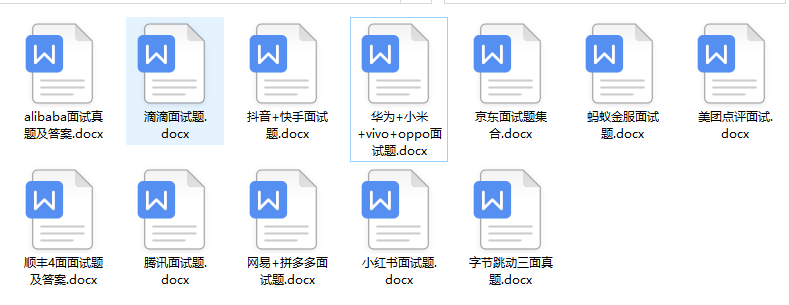
**由于文件比较大,这里只是将部分目录大纲截图出来,每个节点里面都包含大厂面经、学习笔记、源码讲义、实战项目、讲解视频,并且后续会持续更新**
**如果你觉得这些内容对你有帮助,可以扫码获取!!!(备注Python)**
.(img-yldNwVFL-1712956316452)]


**既有适合小白学习的零基础资料,也有适合3年以上经验的小伙伴深入学习提升的进阶课程,基本涵盖了95%以上前端开发知识点,真正体系化!**
**由于文件比较大,这里只是将部分目录大纲截图出来,每个节点里面都包含大厂面经、学习笔记、源码讲义、实战项目、讲解视频,并且后续会持续更新**
**如果你觉得这些内容对你有帮助,可以扫码获取!!!(备注Python)**
<img src="https://img-community.csdnimg.cn/images/fd6ebf0d450a4dbea7428752dc7ffd34.jpg" alt="img" style="zoom:50%;" />


 286
286


 被折叠的 条评论
为什么被折叠?
被折叠的 条评论
为什么被折叠?
 到【灌水乐园】发言


