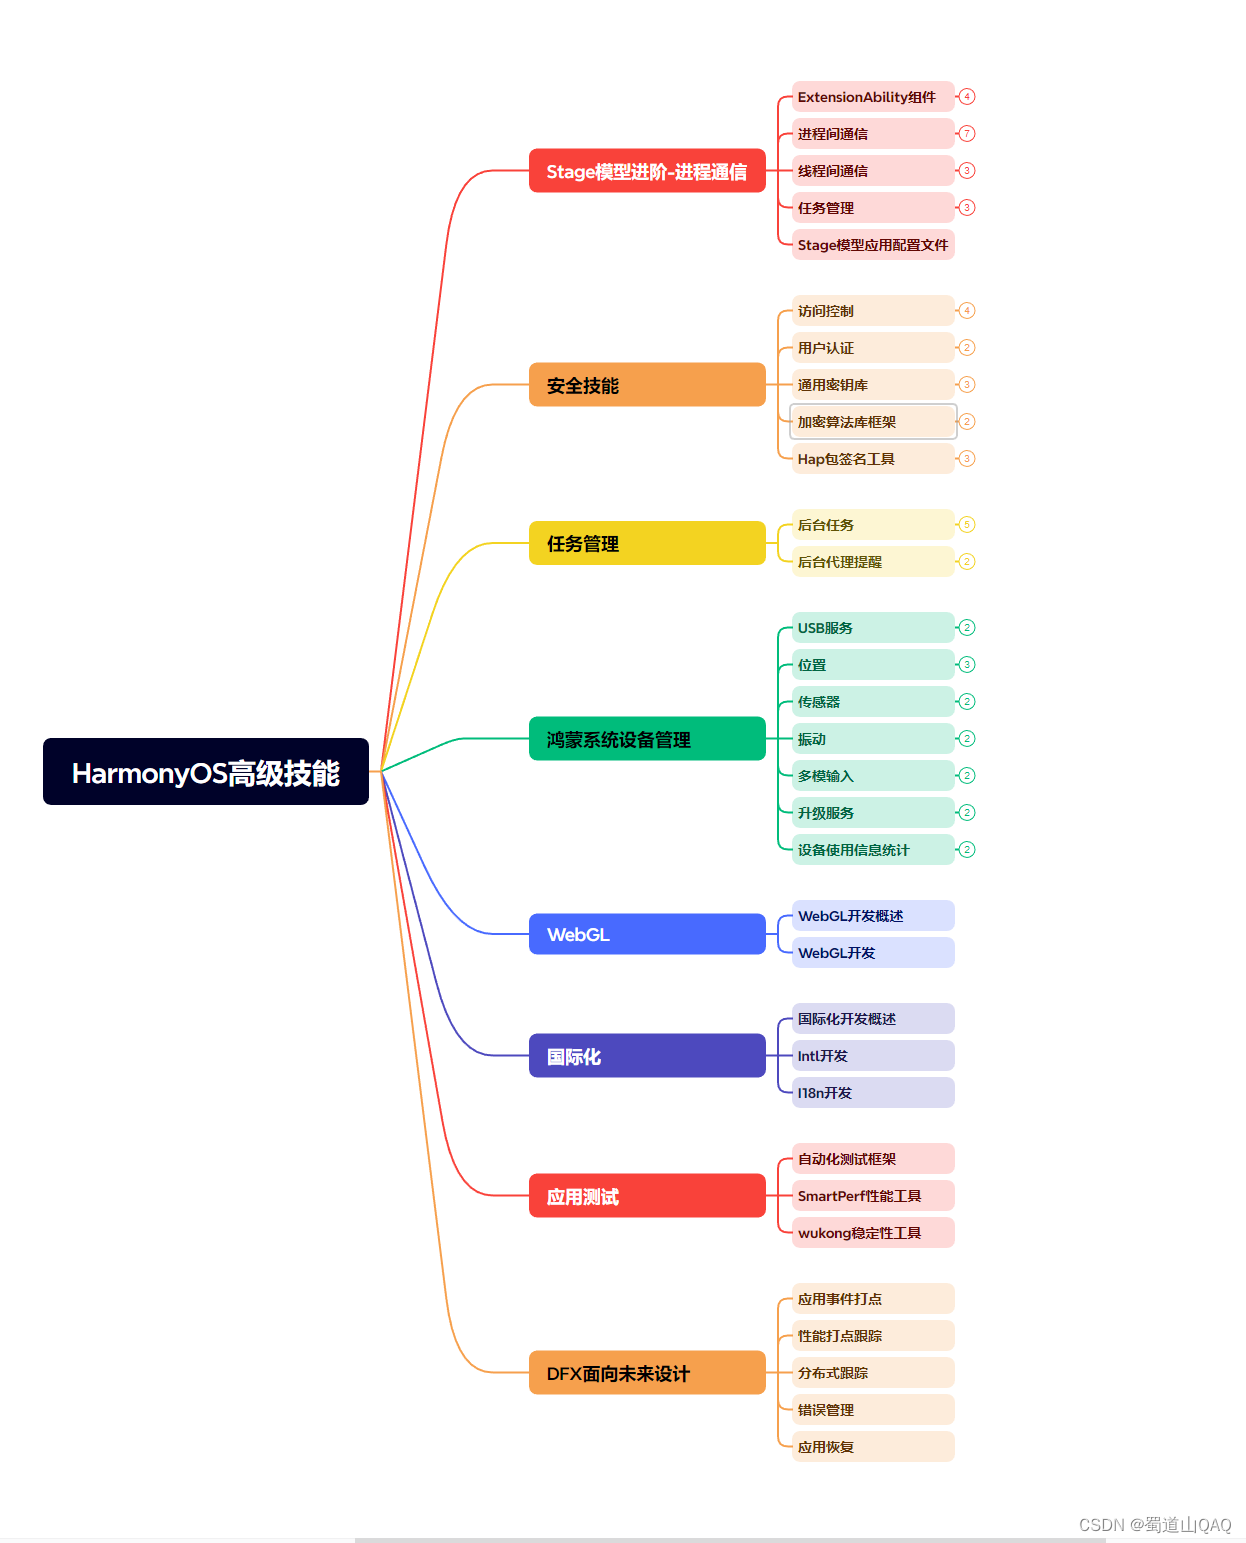
深知大多数程序员,想要提升技能,往往是自己摸索成长,但自己不成体系的自学效果低效又漫长,而且极易碰到天花板技术停滞不前!


既有适合小白学习的零基础资料,也有适合3年以上经验的小伙伴深入学习提升的进阶课程,涵盖了95%以上鸿蒙开发知识点,真正体系化!
由于文件比较多,这里只是将部分目录截图出来,全套包含大厂面经、学习笔记、源码讲义、实战项目、大纲路线、讲解视频,并且后续会持续更新
<ScrollView
xmlns:ohos=“http://schemas.huawei.com/res/ohos”
ohos:id=“$+id:scrollview”
ohos:height=“300vp”
ohos:width=“300vp”
ohos:background_element=“#FFDEAD”
ohos:bottom_padding=“16vp”
ohos:layout_alignment=“horizontal_center”
ohos:top_margin=“32vp”>
<DirectionalLayout
ohos:height=“match_content”
ohos:width=“match_content”>
<Image
ohos:id=“$+id:img_1”
ohos:height=“match_content”
ohos:width=“match_parent”
ohos:image_src=“$media:dog.jpg”
ohos:top_margin=“16vp”/>
<Image
ohos:id=“$+id:img_2”
ohos:height=“match_content”
ohos:width=“match_parent”
ohos:image_src=“$media:cat.jpg”
ohos:top_margin=“16vp”/>
<Image
ohos:id=“$+id:img_3”
ohos:height=“match_content”
ohos:width=“match_parent”
ohos:image_src=“$media:dog.jpg”
ohos:top_margin=“16vp”/>
<Image
ohos:id=“$+id:img_4”
ohos:height=“match_content”
ohos:width=“match_parent”
ohos:image_src=“$media:cat.jpg”
ohos:top_margin=“16vp”/>
<DirectionalLayout
xmlns:ohos=“http://schemas.huawei.com/res/ohos”
ohos:height=“match_content”
ohos:width=“match_parent”
ohos:orientation=“horizontal”>
<Button
ohos:id=“$+id:btnScroll”
ohos:height=“match_content”
ohos:width=“match_content”
ohos:background_element=“$graphic:background_button”
ohos:bottom_margin=“15vp”
ohos:left_margin=“15vp”
ohos:left_padding=“8vp”
ohos:right_padding=“8vp”
ohos:text=“Scroll By Y:300”
ohos:text_color=“#ffffff”
ohos:text_size=“27fp”
ohos:top_margin=“30vp”/>
<Button
ohos:id=“$+id:btnScrollTo”
ohos:height=“match_content”
ohos:width=“match_content”
ohos:background_element=“$graphic:background_button”
ohos:bottom_margin=“15vp”
ohos:left_margin=“15vp”
ohos:left_padding=“8vp”
ohos:right_padding=“8vp”
ohos:text=“Scroll To Y:500”
ohos:text_color=“#ffffff”
ohos:text_size=“27fp”
ohos:top_margin=“30vp”/>
2.2 ScrollView效果图

ScrollView的速度、滚动、回弹等常用接口如下
| 方法 | 作用 |
| :-: | :-: |
| doFling(int velocityX, int velocityY)
doFlingX(int velocityX)
doFlingY(int velocityY) | 设置X轴和Y轴滚动的初始速度,单位(px) |
| fluentScrollBy(int dx, int dy)
fluentScrollByX(int dx)
fluentScrollByY(int dy) | 根据像素数平滑滚动到指定位置,单位(px) |
| fluentScrollTo(int x, int y)
fluentScrollXTo(int x)
fluentScrollYTo(int y) | 根据指定坐标平滑滚动到指定位置,单位(px) |
| setReboundEffect(boolean enabled) | 设置是否启用回弹效果,默认false |
| setReboundEffectParams(int overscrollPercent, float overscrollRate, int remainVisiblePercent)
setReboundEffectParams(ReboundEffectParams reboundEffectParams)
setOverscrollPercent(int overscrollPercent)
setOverscrollRate(float overscrollRate)
setRemainVisiblePercent(int remainVisiblePercent) | 配置回弹效果
overscrollPercent:过度滚动百分比,默认值40
overscrollRate:过度滚动率,默认值0.6
remainVisiblePercent:应保持可见内容的最小百分比,默认值20 |
3.1 根据像素数平滑滚动
代码
Button btnScroll= (Button) findComponentById(ResourceTable.Id_btnScroll);
ScrollView scrollView= (ScrollView) findComponentById(ResourceTable.Id_scrollview);
btnScroll.setClickedListener(new Component.ClickedListener() {
@Override
public void onClick(Component component) {
scrollView.fluentScrollByY(300);
}
});
根据像素数平滑滚动效果

3.2 平滑滚动到指定位置
代码
Button btnScrollTo= (Button) findComponentById(ResourceTable.Id_btnScrollTo);
ScrollView scrollView= (ScrollView) findComponentById(ResourceTable.Id_scrollview);
btnScrollTo.setClickedListener(new Component.ClickedListener() {
@Override
public void onClick(Component component) {
scrollView.fluentScrollYTo(500);
}
深知大多数程序员,想要提升技能,往往是自己摸索成长,但自己不成体系的自学效果低效又漫长,而且极易碰到天花板技术停滞不前!


既有适合小白学习的零基础资料,也有适合3年以上经验的小伙伴深入学习提升的进阶课程,涵盖了95%以上鸿蒙开发知识点,真正体系化!
由于文件比较多,这里只是将部分目录截图出来,全套包含大厂面经、学习笔记、源码讲义、实战项目、大纲路线、讲解视频,并且后续会持续更新
e804fa6d0db.png)
[外链图片转存中…(img-wR2fYBqK-1715625169432)]
[外链图片转存中…(img-4Qinb6m4-1715625169433)]
既有适合小白学习的零基础资料,也有适合3年以上经验的小伙伴深入学习提升的进阶课程,涵盖了95%以上鸿蒙开发知识点,真正体系化!
由于文件比较多,这里只是将部分目录截图出来,全套包含大厂面经、学习笔记、源码讲义、实战项目、大纲路线、讲解视频,并且后续会持续更新


 1067
1067

 被折叠的 条评论
为什么被折叠?


