


网上学习资料一大堆,但如果学到的知识不成体系,遇到问题时只是浅尝辄止,不再深入研究,那么很难做到真正的技术提升。
一个人可以走的很快,但一群人才能走的更远!不论你是正从事IT行业的老鸟或是对IT行业感兴趣的新人,都欢迎加入我们的的圈子(技术交流、学习资源、职场吐槽、大厂内推、面试辅导),让我们一起学习成长!
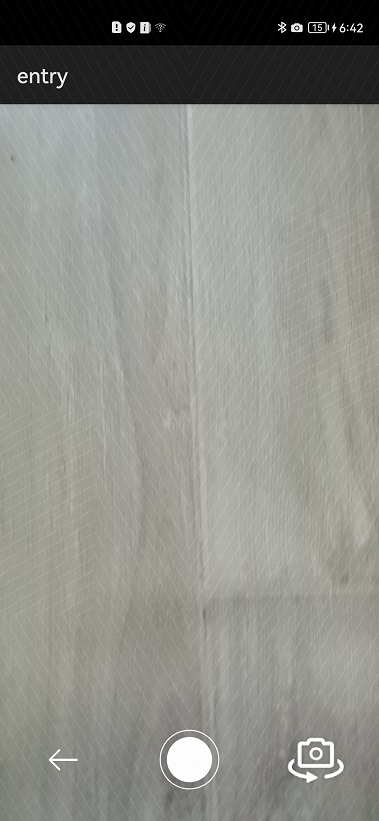
模拟相机页面
此页面主要由DirectionalLayout、DependentLayout布局和Image组件组成,其中三个Image组件作为图标,左右分别为返回、开始拍照和切换摄像头。在resources\layout\ability_open_camera.xml下有如下代码:
🕮 说明
布局文件中使用到的background_element样式,在entry\src\main\resources\base\graphic下有做定义,详情可以参考完整代码。
5. 相关权限
为了保证应用的成功运行,需要在config.json中声明需要如下权限:
“reqPermissions”: [
{
“name”: “ohos.permission.ACCESS_BIOMETRIC”
},
{
“name”: “ohos.permission.CAMERA”
},
{
“name”: “ohos.permission.WRITE_USER_STORAGE”
}
]
此外还需要在OpenCamera的onStart()方法中向用户申请权限,代码示例如下:
private void requestPermission() {
String[] permissions = {
// 存储权限
SystemPermission.WRITE_USER_STORAGE,
// 相机权限
SystemPermission.CAMERA
};
List permissionFiltereds = Arrays.stream(permissions)
.filter(permission -> verifySelfPermission(permission) != IBundleManager.PERMISSION_GRANTED)
.collect(Collectors.toList());
if (permissionFiltereds.isEmpty()) {
PermissionBridge.getHandler().sendEvent(EVENT_PERMISSION_GRANTED);
return;
}
requestPermissionsFromUser(permissionFiltereds.toArray(new String[permissionFiltereds.size()]),
PERMISSION_REQUEST_CODE);
}
6. 人脸识别业务逻辑
在人脸识别页面(ability_main.xml)中,我们添加了开始人脸识别和取消人脸识别的Button,通过监听不同Button的点击事件,从而实现不同的业务逻辑。下面我们将分别介绍开始人脸识别和取消人脸识别的业务逻辑。
开始人脸识别业务逻辑
在开始人脸识别之前,我们需要校验当前设备(手机)是否具备人脸识别能力,代码示例如下:
private void createStartListener() {
// 提示用户人脸识别时将人脸对准摄像头
getAndSetText(ResourceTable.Id_text_status, NO_FACE_RET, true);
try {
// 创建生物识别对象
mBiometricAuthentication =
BiometricAuthentication.getInstance(MainAbility.getMainAbility());
// 检验设备是否有人脸识别功能
int hasAuth = mBiometricAuthentication.checkAuthenticationAvailability(
BiometricAuthentication.AuthType.AUTH_TYPE_BIOMETRIC_FACE_ONLY,
BiometricAuthentication.SecureLevel.SECURE_LEVEL_S2, true);
if (hasAuth == BiometricAuthentication.BA_CHECK_SUPPORTED) {
// 如果支持人脸识别,则开启线程进行人脸识别
ThreadPoolExecutor pool = new ThreadPoolExecutor(
POOL_CORE_SIZE, POOL_MAX_SIZE, KEEP_ALIVE_TIME, TimeUnit.SECONDS,
new LinkedBlockingQueue<>(QUEUE_SIZE), new
ThreadPoolExecutor.DiscardOldestPolicy());
pool.submit(runnable);
} else {
// 人脸识别不支持或存在其他问题 ,直接在页面显示结果,
// 在主线程不需要通过EventHandler发送回显任务
int retExcAuth = getRetExcAuth(hasAuth);
getAndSetText(ResourceTable.Id_text_status, retExcAuth, true);
}
} catch (IllegalAccessException e) {
LogUtils.error(“createStartBtn”, “IllegalAccessException when start auth”);
}
}
🕮 说明
● checkAuthenticationAvailability方法参数说明:
1.BiometricAuthentication.AuthType中有三个类别,分别为
AUTH_TYPE_BIOMETRIC_FINGERPRINT_ONLY指纹识别,AUTH_TYPE_BIOMETRIC_FACE_ONLY脸部识别以及AUTH_TYPE_BIOMETRIC_ALL指纹和面部。
● BiometricAuthentication.SecureLevel验证级别,3D人脸识别支持S3及以下级别的验证;2D人脸识别支持S2及以下级别的验证
由于人脸识别是耗时操作,所以这里新起了线程去做认证,代码示例如下:
/**
- 新建线程进行认证,避免阻塞其他任务
*/
private Runnable runnable = new Runnable() {
private void initHandler() {
runner = EventRunner.getMainEventRunner();
if (runner == null) {
return;
}
myEventHandle = new MyEventHandle(runner);
}
@Override
public void run() {
// 初始化myEventHandle
initHandler();
// 开始认证
startAuth();
}
};
开始人脸识别,代码示例如下:
private void startAuth() {
// retExcAuth 0认证成功 1:比对失败 2:取消认证 3:认证超时 4:打开相机失败
// 5:busy,可能上一个认证没有结束 6:入参错误 7:人脸认证锁定(达到错误认证次数了)
// 8:没有录入人脸 100:其他错误。
int retExcAuth = mBiometricAuthentication.execAuthenticationAction(
BiometricAuthentication.AuthType.AUTH_TYPE_BIOMETRIC_FACE_ONLY,
BiometricAuthentication.SecureLevel.SECURE_LEVEL_S2,
true, false, null);
// 将认证结果发给主线程处理
myEventHandler.sendEvent(retExcAuth);
}
由于我们在线程中执行的人脸识别操作,需要通过EventHandler将识别结果发送到主线程中,并将识别结果显示在页面中,代码示例如下:
/**
- 事件分发器
*/
private class MyEventHandle extends EventHandler {
MyEventHandle(EventRunner runner) throws IllegalArgumentException {
super(runner);
}
@Override
protected void processEvent(InnerEvent event) {
super.processEvent(event);
int eventId = event.eventId;
getAndSetText(ResourceTable.Id_text_status, eventId, true);
}
}
取消人脸识别
点击取消人脸识别Button,触发取消人脸识别操作,代码示例如下:
private void createCancelBtn() {
// 创建点击事件
Component component = findComponentById(ResourceTable.Id_button_cancel);
// 创建按钮
Button cancelBtn = null;
if (component != null && component instanceof Button) {
cancelBtn = (Button) component;
cancelBtn.setClickedListener(view -> {
if (mBiometricAuthentication != null) {
// 调用取消接口
int result = mBiometricAuthentication.cancelAuthenticationAction();
LogUtils.info(“createCancelBtn:”, result + “”);
}
});
}
}
页面跳转
人脸识别成功后,跳转到模拟相机页面,代码示例如下:
private void toAuthAfterPage() {
Intent secondIntent = new Intent();
// 指定待启动FA的bundleName和abilityName
Operation operation = new Intent.OperationBuilder()
.withDeviceId(“”)
.withBundleName(getBundleName())
.withAbilityName(OpenCamera.class.getName())
.build();
secondIntent.setOperation(operation);
// startAbility接口实现启动另一个页面
startAbility(secondIntent);
}
7. 相机相关业务逻辑
在模拟相机页面(ability_open_camera.xml)中,包含打开相机和切换前后置摄像头的功能,我们下面将逐一介绍。
初始化SurfaceProvider
用户授权后,开始初始化SurfaceProvider,代码示例如下:
private void initSurface() {
surfaceProvider = new SurfaceProvider(this);
DirectionalLayout.LayoutConfig params = new DirectionalLayout.LayoutConfig(
ComponentContainer.LayoutConfig.MATCH_PARENT, ComponentContainer.LayoutConfig.MATCH_PARENT);
surfaceProvider.setLayoutConfig(params);
surfaceProvider.pinToZTop(false);
// 添加SurfaceCallBack回调
surfaceProvider.getSurfaceOps().get().addCallback(new SurfaceCallBack());
// 将SurfaceProvider加入到布局中
Component component = findComponentById(ResourceTable.Id_surface_container);
if (component instanceof ComponentContainer) {
((ComponentContainer) component).addComponent(surfaceProvider);
}
}
实现SurfaceOps.Callback回调,当Surface创建时,执行打开相机的操作,代码示例如下:
/**
- SurfaceCallBack,Surface回调
*/
class SurfaceCallBack implements SurfaceOps.Callback {
@Override
public void surfaceCreated(SurfaceOps callbackSurfaceOps) {
if (callbackSurfaceOps != null) {
callbackSurfaceOps.setFixedSize(SCREEN_HEIGHT, SCREEN_WIDTH);
}
openCamera();
}
@Override
public void surfaceChanged(SurfaceOps callbackSurfaceOps, int format, int width, int height) {
}
@Override
public void surfaceDestroyed(SurfaceOps callbackSurfaceOps) {
}
}
打开相机
创建surface后触发surfaceCreated回调,执行打开相机的操作。打开相机并添加相片接收的监听,代码示例如下:
private void openCamera() {
CameraKit cameraKit = CameraKit.getInstance(getApplicationContext());
String[] cameraLists = cameraKit.getCameraIds();
String cameraId = cameraLists.length > 1 && isCameraRear ? cameraLists[1] : cameraLists[0];
CameraStateCallbackImpl cameraStateCallback = new CameraStateCallbackImpl();
cameraKit.createCamera(cameraId, cameraStateCallback, creamEventHandler);
}
/**
- CameraStateCallbackImpl 相机状态回调
*/
class CameraStateCallbackImpl extends CameraStateCallback {
CameraStateCallbackImpl() {
}
@Override
public void onCreated(Camera camera) {
// 获取预览
previewSurface = surfaceProvider.getSurfaceOps().get().getSurface();
if (previewSurface == null) {
LogUtils.error(TAG, “create camera filed, preview surface is null”);
return;
}
// Wait until the preview surface is created.
try {
Thread.sleep(SLEEP_TIME);
} catch (InterruptedException exception) {
LogUtils.warn(TAG, “Waiting to be interrupted”);
}
CameraConfig.Builder cameraConfigBuilder = camera.getCameraConfigBuilder();
// 配置预览
cameraConfigBuilder.addSurface(previewSurface);
camera.configure(cameraConfigBuilder.build());
cameraDevice = camera;
enableImageGroup();
}
@Override
public void onConfigured(Camera camera) {
FrameConfig.Builder framePreviewConfigBuilder
= camera.getFrameConfigBuilder(Camera.FrameConfigType.FRAME_CONFIG_PREVIEW);
framePreviewConfigBuilder.addSurface(previewSurface);
// 开启循环捕捉
camera.triggerLoopingCapture(framePreviewConfigBuilder.build());
}
private void enableImageGroup() {
if (!exitImage.isEnabled()) {
exitImage.setEnabled(true);
switchCameraImage.setEnabled(true);
}
}
}
切换前后置摄像头
点击切换摄像头图标后,执行切换前后置摄像头操作,代码示例如下:
private void switchClicked() {
isCameraRear = !isCameraRear;
openCamera();
}
8. 效果展示
人脸识别FA(MainAbilitySlice)完成了检验设备是否支持人脸识别,人脸识别,人脸识别结果显示,成功后跳转到打开相机的FA(OpenCameraSlice);相机FA实现了相机的打开,拍照,相片存储,摄像头切换的功能。具体效果图如下:
人脸识别初始页面:

人脸识别结果显示:

相机页面:
9. 完整代码示例
编写布局与样式
1.base/graphic/background_ability_main.xml
2.base/graphic/button_element.xml
<?xml version="1.0" encoding="utf-8"?>
3.base/layout/ability_main.xml
<?xml version="1.0" encoding="utf-8"?>
4.base/layout/ability_open_camera.xml
<?xml version="1.0" encoding="utf-8"?>
功能逻辑代码
1.com/huawei/cookbook/slice/MainAbilitySlice.java
package com.huawei.cookbook.slice;
import com.huawei.cookbook.MainAbility;
import com.huawei.cookbook.OpenCamera;
import com.huawei.cookbook.ResourceTable;
import com.huawei.cookbook.util.FaceAuthResult;
import com.huawei.cookbook.util.LogUtils;
import ohos.aafwk.ability.AbilitySlice;
import ohos.aafwk.content.Intent;
import ohos.aafwk.content.Operation;
import ohos.agp.components.Button;
import ohos.agp.components.Component;
import ohos.agp.components.Text;
import ohos.agp.utils.Color;
import ohos.biometrics.authentication.BiometricAuthentication;
import ohos.eventhandler.EventHandler;
import ohos.eventhandler.EventRunner;
import ohos.eventhandler.InnerEvent;
import java.util.concurrent.LinkedBlockingQueue;
import java.util.concurrent.ThreadPoolExecutor;
import java.util.concurrent.TimeUnit;
/**
- MainAbilitySlice
- @since 2021-04-12
/
public class MainAbilitySlice extends AbilitySlice {
private static final int POOL_CORE_SIZE = 2;
private static final int POOL_MAX_SIZE = 5;
private static final int NO_FACE_RET = -1;
private static final int KEEP_ALIVE_TIME = 3;
private static final int QUEUE_SIZE = 6;
private static final int RET_NOT_SUPPORTED = 1;
private static final int RET_SAFE_LEVEL_NOT_SUPPORTED = 2;
private static final int RET_NOT_LOCAL = 3;
private EventRunner runner;
private MyEventHandle myEventHandle;
private BiometricAuthentication mBiometricAuthentication;
/* - 新建线程进行认证,避免阻塞其他任务
*/
private Runnable runnable = new Runnable() {
private void initHandler() {
runner = EventRunner.getMainEventRunner();
if (runner == null) {
return;
}
myEventHandle = new MyEventHandle(runner);
}
@Override
public void run() {
// 初始化myEventHandle
initHandler();
// 开始认证
startAuth();
}
};
/**
- onStart
- @param intent intent
*/
@Override
public void onStart(Intent intent) {
super.onStart(intent);
super.setUIContent(ResourceTable.Layout_ability_main);
// 创建开始认证按钮,并添加点击事件
createStartBtn();
// 创建取消认证按钮,并添加点击事件
createCancelBtn();
}
/**
- 创建取消按钮
*/
private void createCancelBtn() {
// 创建点击事件
Component component = findComponentById(ResourceTable.Id_button_cancel);
// 创建按钮
Button cancelBtn = null;
if (component != null && component instanceof Button) {
cancelBtn = (Button) component;
cancelBtn.setClickedListener(view -> {
if (mBiometricAuthentication != null) {
// 调用取消接口
int result = mBiometricAuthentication.cancelAuthenticationAction();
LogUtils.info(“createCancelBtn:”, result + “”);
}
});
}
}
/**
- 创建开始识别的按钮点击事件
*/
private void createStartBtn() {
// 创建点击事件
Component component = findComponentById(ResourceTable.Id_button_start);
// 创建按钮
Button featureBtn = null;
if (component != null && component instanceof Button) {
featureBtn = (Button) component;
featureBtn.setClickedListener(view -> {
createStartListener();
});
}
}
private void createStartListener() {
// 提示用户人脸识别时将人脸对准摄像头
getAndSetText(ResourceTable.Id_text_status, NO_FACE_RET, true);
try {
// 创建生物识别对象
mBiometricAuthentication = BiometricAuthentication.getInstance(MainAbility.getMainAbility());
// 检验设备是否有人脸识别功能
// BiometricAuthentication.AuthType中有三个类别
// 分别为AUTH_TYPE_BIOMETRIC_FINGERPRINT_ONLY指纹识别
// AUTH_TYPE_BIOMETRIC_FACE_ONLY脸部识别
// AUTH_TYPE_BIOMETRIC_ALL指纹和面部
// BiometricAuthentication.SecureLevel 2D人脸识别建议使用SECURE_LEVEL_S2,3D人脸识别建议使用SECURE_LEVEL_S3
int hasAuth = mBiometricAuthentication.checkAuthenticationAvailability(
BiometricAuthentication.AuthType.AUTH_TYPE_BIOMETRIC_FACE_ONLY,
BiometricAuthentication.SecureLevel.SECURE_LEVEL_S2, true);
// hasAuth 0是支持,1是不支持,2安全级别不支持 3不是本地认证 4无人脸录入
if (hasAuth == 0) {
ThreadPoolExecutor pool = new ThreadPoolExecutor(
POOL_CORE_SIZE, POOL_MAX_SIZE, KEEP_ALIVE_TIME, TimeUnit.SECONDS,
new LinkedBlockingQueue<>(QUEUE_SIZE), new ThreadPoolExecutor.DiscardOldestPolicy());
pool.submit(runnable);
} else {
// 人脸识别不支持或存在其他问题 ,直接回显页面,
// 在主线程不需要通过EventHandler发送回显任务
int retExcAuth = getRetExcAuth(hasAuth);
getAndSetText(ResourceTable.Id_text_status, retExcAuth, true);
}
} catch (IllegalAccessException e) {
LogUtils.error(“createStartBtn”, “IllegalAccessException when start auth”);
}
}
/**
- 开始认证
*/
private void startAuth() {
// retExcAuth 0认证成功 1:比对失败 2:取消认证 3认证超时 4:打开相机失败
// 5:busy,可能上一个认证没有结束 6:入参错误 7:人脸认证锁定(达到错误认证次数了)
// 8:没有录入人脸 100:其他错误。
int retExcAuth = mBiometricAuthentication.execAuthenticationAction(
BiometricAuthentication.AuthType.AUTH_TYPE_BIOMETRIC_FACE_ONLY,
BiometricAuthentication.SecureLevel.SECURE_LEVEL_S2,
true, false, null);
// 将修改页面发送到主线程执行
myEventHandle.sendEvent(retExcAuth);
}
/**
- 根据检验是否支持认证返回值获取提示code
- @param hasAuth 是否有认证能力
- @return 返回认证码
*/
private int getRetExcAuth(int hasAuth) {
int retExcAuth;
if (hasAuth == RET_NOT_SUPPORTED) {
// 1是不支持2D人脸识别
retExcAuth = FaceAuthResult.AUTH_2D_NOT_SUPPORTED;
} else if (hasAuth == RET_SAFE_LEVEL_NOT_SUPPORTED) {
// 安全级别不支持
retExcAuth = FaceAuthResult.AUTH_SAFE_LEVEL_NOT_SUPPORTED;
} else if (hasAuth == RET_NOT_LOCAL) {
// 是不是本地认证
retExcAuth = FaceAuthResult.AUTH_NOT_LOCAL;
} else {
// 无人脸录入
retExcAuth = FaceAuthResult.AUTH_NO_FACE;
}
return retExcAuth;
}
/**
- 获取并设置text
- @param textId 文本框id
- @param retExcAuth 认证返回码
- @param isVisible 是否显示
*/
private void getAndSetText(int textId, int retExcAuth, boolean isVisible) {
// 获取状态Text
Component componentText = findComponentById(textId);
if (componentText != null && componentText instanceof Text) {
Text text = (Text) componentText;
setTextValueAndColor(retExcAuth, text);
if (isVisible) {
text.setVisibility(Component.VISIBLE);
}
}
}
/**
- 设置文本提示信息
- @param text 文本对象
- @param textValue 文本值
- @param color 文本颜色
*/
private void setTextValueAndColor(Text text, String textValue, Color color) {
text.setText(textValue);
text.setTextColor(color);
}
/**
- 设置文本显示值和文本颜色
- @param retExcAuth 认证返回值
- @param text 文本对象
*/
private void setTextValueAndColor(int retExcAuth, Text text) {
switch (retExcAuth) {
case FaceAuthResult.AUTH_SUCCESS:
setTextValueAndColor(text, “认证成功”, Color.GREEN);
// 页面跳转
toAuthAfterPage();
break;
case FaceAuthResult.AUTH_FAIL:
setTextValueAndColor(text, “比对失败”, Color.RED);
break;
case FaceAuthResult.AUTH_CANCLE:
setTextValueAndColor(text, “取消认证”, Color.RED);
break;
case FaceAuthResult.AUTH_TIME_OUT:
setTextValueAndColor(text, “认证超时”, Color.RED);
break;
case FaceAuthResult.AUTH_OPEN_CAMERA_FAIL:
setTextValueAndColor(text, “打开相机失败”, Color.RED);
break;
case FaceAuthResult.AUTH_BUSY:
setTextValueAndColor(text, “busy,可能上一个认证没有结束”, Color.RED);
break;
case FaceAuthResult.AUTH_PARAM_ERROR:
setTextValueAndColor(text, “入参错误”, Color.RED);
break;
case FaceAuthResult.AUTH_FACE_LOCKED:
setTextValueAndColor(text, “人脸认证锁定(达到错误认证次数了)”, Color.RED);
break;
case FaceAuthResult.AUTH_NO_FACE:
setTextValueAndColor(text, “无人脸录入,请录入人脸。”, Color.BLUE);
break;
case FaceAuthResult.AUTH_OTHER_ERROR:
setTextValueAndColor(text, “其他错误。”, Color.RED);
break;
case FaceAuthResult.AUTH_2D_NOT_SUPPORTED:
setTextValueAndColor(text, “不支持2D人脸识别。”, Color.BLUE);
break;
case FaceAuthResult.AUTH_SAFE_LEVEL_NOT_SUPPORTED:
setTextValueAndColor(text, “安全级别不支持。”, Color.BLUE);
break;
case FaceAuthResult.AUTH_NOT_LOCAL:
setTextValueAndColor(text, “不是本地认证。”, Color.BLUE);
break;
default:
setTextValueAndColor(text, “开始认证,请将视线对准摄像头。。。。。。。”, Color.BLUE);
break;
}
}
private void toAuthAfterPage() {
Intent secondIntent = new Intent();
// 指定待启动FA的bundleName和abilityName
Operation operation = new Intent.OperationBuilder()
.withDeviceId(“”)
.withBundleName(getBundleName())
.withAbilityName(OpenCamera.class.getName())
.build();
secondIntent.setOperation(operation);
// 通过AbilitySlice的startAbility接口实现启动另一个页面
startAbility(secondIntent);
}
/**
- 事件分发器
- @since 2021-04-12
*/
private class MyEventHandle extends EventHandler {
MyEventHandle(EventRunner runner) throws IllegalArgumentException {
super(runner);
}
@Override
protected void processEvent(InnerEvent event) {
super.processEvent(event);
int eventId = event.eventId;
getAndSetText(ResourceTable.Id_text_status, eventId, true);
}
}
@Override
public void onStop() {
mBiometricAuthentication.cancelAuthenticationAction();
BiometricAuthentication.AuthenticationTips authenticationTips
= mBiometricAuthentication.getAuthenticationTips();
String tips = authenticationTips.tipInfo;
}
}
2.com/huawei/cookbook/slice/OpenCameraSlice.java
package com.huawei.cookbook.slice;
import com.huawei.cookbook.ResourceTable;
import com.huawei.cookbook.util.LogUtils;
import com.huawei.cookbook.util.PermissionBridge;
import ohos.aafwk.ability.AbilitySlice;
import ohos.aafwk.content.Intent;
import ohos.agp.components.Component;
import ohos.agp.components.ComponentContainer;
import ohos.agp.components.DirectionalLayout;
import ohos.agp.components.Image;
import ohos.agp.components.surfaceprovider.SurfaceProvider;
import ohos.agp.graphics.Surface;
import ohos.agp.graphics.SurfaceOps;
import ohos.agp.window.dialog.ToastDialog;
import ohos.app.Context;
import ohos.eventhandler.EventHandler;
import ohos.eventhandler.EventRunner;
import ohos.media.camera.CameraKit;
import ohos.media.camera.device.Camera;
import ohos.media.camera.device.CameraConfig;
import ohos.media.camera.device.CameraStateCallback;
import ohos.media.camera.device.FrameConfig;
/**
- 打开相机slice
*/
public class OpenCameraSlice extends AbilitySlice implements PermissionBridge.OnPermissionStateListener {
private static final String TAG = OpenCameraSlice.class.getName();
private static final int SCREEN_WIDTH = 1080;
private static final int SCREEN_HEIGHT = 1920;
private static final int SLEEP_TIME = 200;
private EventHandler creamEventHandler;
private Image exitImage;
private SurfaceProvider surfaceProvider;
private Image switchCameraImage;
private boolean isCameraRear;
private Camera cameraDevice;
private Surface previewSurface;
@Override
public void onStart(Intent intent) {
super.onStart(intent);
super.setUIContent(ResourceTable.Layout_ability_open_camera);
new PermissionBridge().setOnPermissionStateListener(this);


网上学习资料一大堆,但如果学到的知识不成体系,遇到问题时只是浅尝辄止,不再深入研究,那么很难做到真正的技术提升。
一个人可以走的很快,但一群人才能走的更远!不论你是正从事IT行业的老鸟或是对IT行业感兴趣的新人,都欢迎加入我们的的圈子(技术交流、学习资源、职场吐槽、大厂内推、面试辅导),让我们一起学习成长!
nPermissionStateListener {
private static final String TAG = OpenCameraSlice.class.getName();
private static final int SCREEN_WIDTH = 1080;
private static final int SCREEN_HEIGHT = 1920;
private static final int SLEEP_TIME = 200;
private EventHandler creamEventHandler;
private Image exitImage;
private SurfaceProvider surfaceProvider;
private Image switchCameraImage;
private boolean isCameraRear;
private Camera cameraDevice;
private Surface previewSurface;
@Override
public void onStart(Intent intent) {
super.onStart(intent);
super.setUIContent(ResourceTable.Layout_ability_open_camera);
new PermissionBridge().setOnPermissionStateListener(this);
[外链图片转存中…(img-bdvLvOKR-1715379165978)]
[外链图片转存中…(img-njc6QQf1-1715379165979)]
网上学习资料一大堆,但如果学到的知识不成体系,遇到问题时只是浅尝辄止,不再深入研究,那么很难做到真正的技术提升。
一个人可以走的很快,但一群人才能走的更远!不论你是正从事IT行业的老鸟或是对IT行业感兴趣的新人,都欢迎加入我们的的圈子(技术交流、学习资源、职场吐槽、大厂内推、面试辅导),让我们一起学习成长!


 322
322

 被折叠的 条评论
为什么被折叠?
被折叠的 条评论
为什么被折叠?
 到【灌水乐园】发言


