


网上学习资料一大堆,但如果学到的知识不成体系,遇到问题时只是浅尝辄止,不再深入研究,那么很难做到真正的技术提升。
一个人可以走的很快,但一群人才能走的更远!不论你是正从事IT行业的老鸟或是对IT行业感兴趣的新人,都欢迎加入我们的的圈子(技术交流、学习资源、职场吐槽、大厂内推、面试辅导),让我们一起学习成长!
.textAlign(TextAlign.Center)
.fontSize(30)
}
.loop(true)
.autoPlay(true)
.interval(2000)
}
}
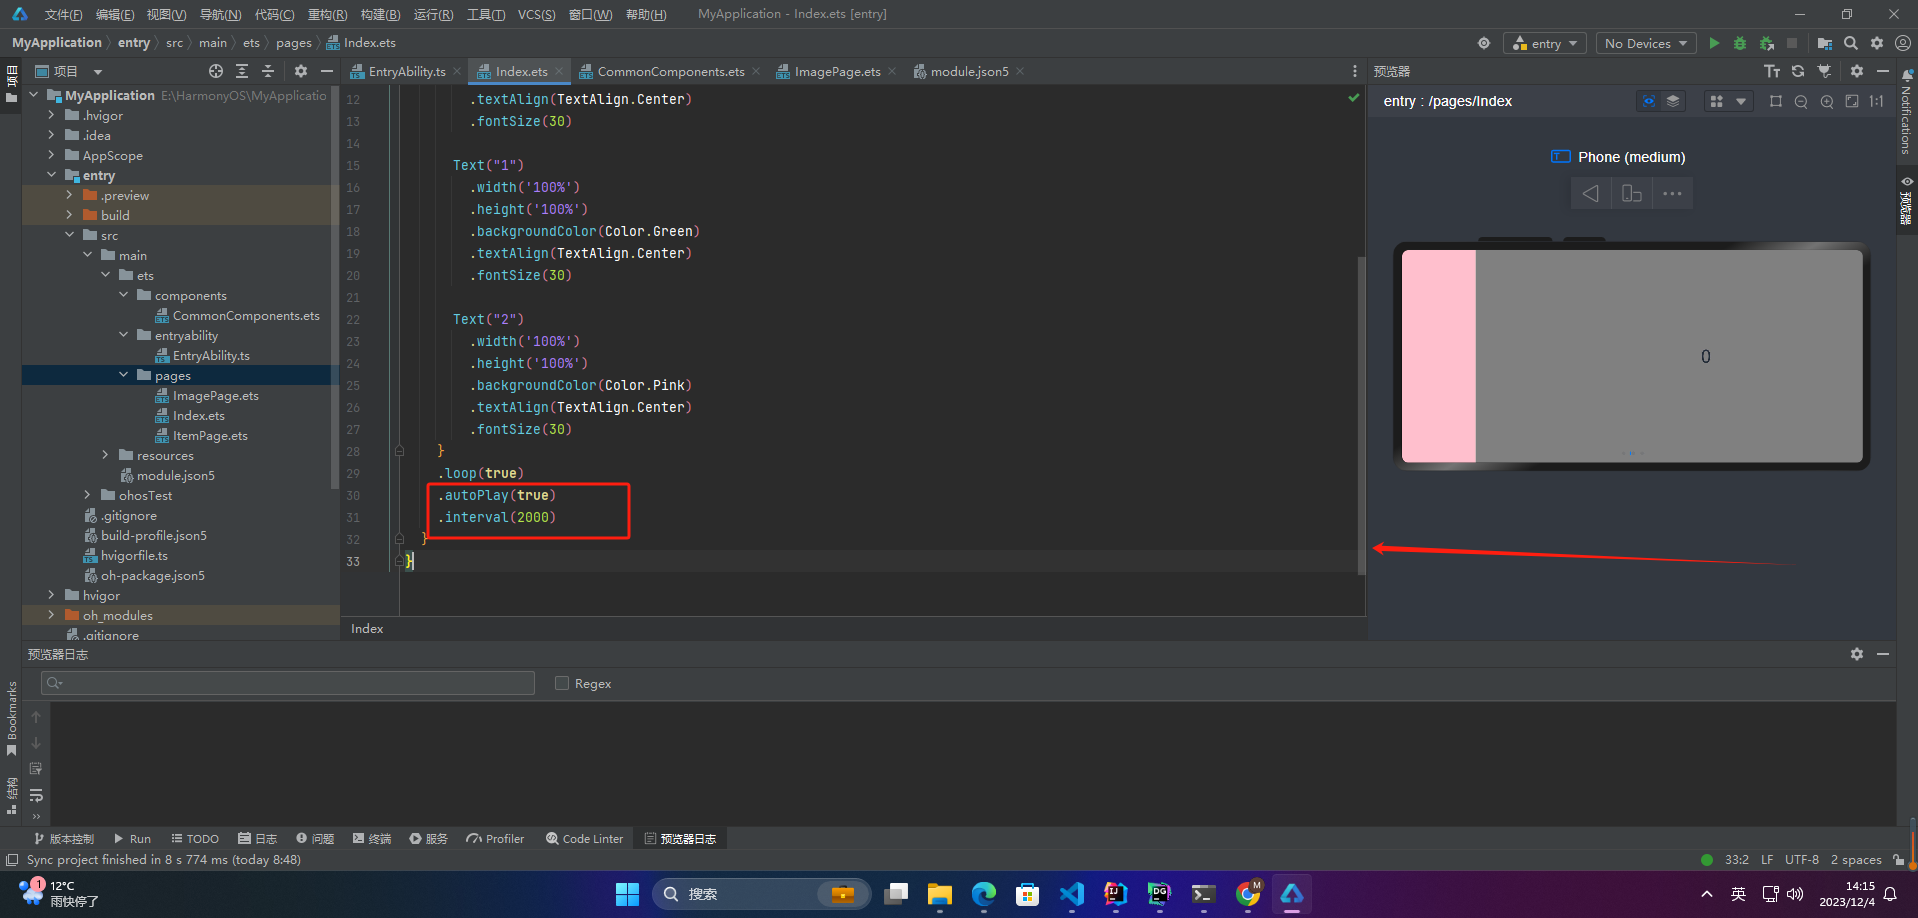
autoPlay为true时,会自动切换播放子组件,子组件与子组件之间的播放间隔通过interval属性设置。interval属性默认值为2000,单位毫秒。
5.导航点样式
@Entry
@Component
struct Index {
private swiperController: SwiperController = new SwiperController()
build() {
Swiper(this.swiperController) {
Text(“0”)
.width(‘100%’)
.height(‘100%’)
.backgroundColor(Color.Gray)
.textAlign(TextAlign.Center)
.fontSize(30)
Text(“1”)
.width(‘100%’)
.height(‘100%’)
.backgroundColor(Color.Green)
.textAlign(TextAlign.Center)
.fontSize(30)
Text(“2”)
.width(‘100%’)
.height(‘100%’)
.backgroundColor(Color.Pink)
.textAlign(TextAlign.Center)
.fontSize(30)
}
.indicatorStyle({
size: 30,
left: 0,
color: Color.Red
})
}
}

通过indicatorStyle属性,开发者可以设置导航点相对于Swiper组件上下左右四个方位的位置,同时也可以设置每个导航点的尺寸、颜色、蒙层和被选中导航点的颜色。
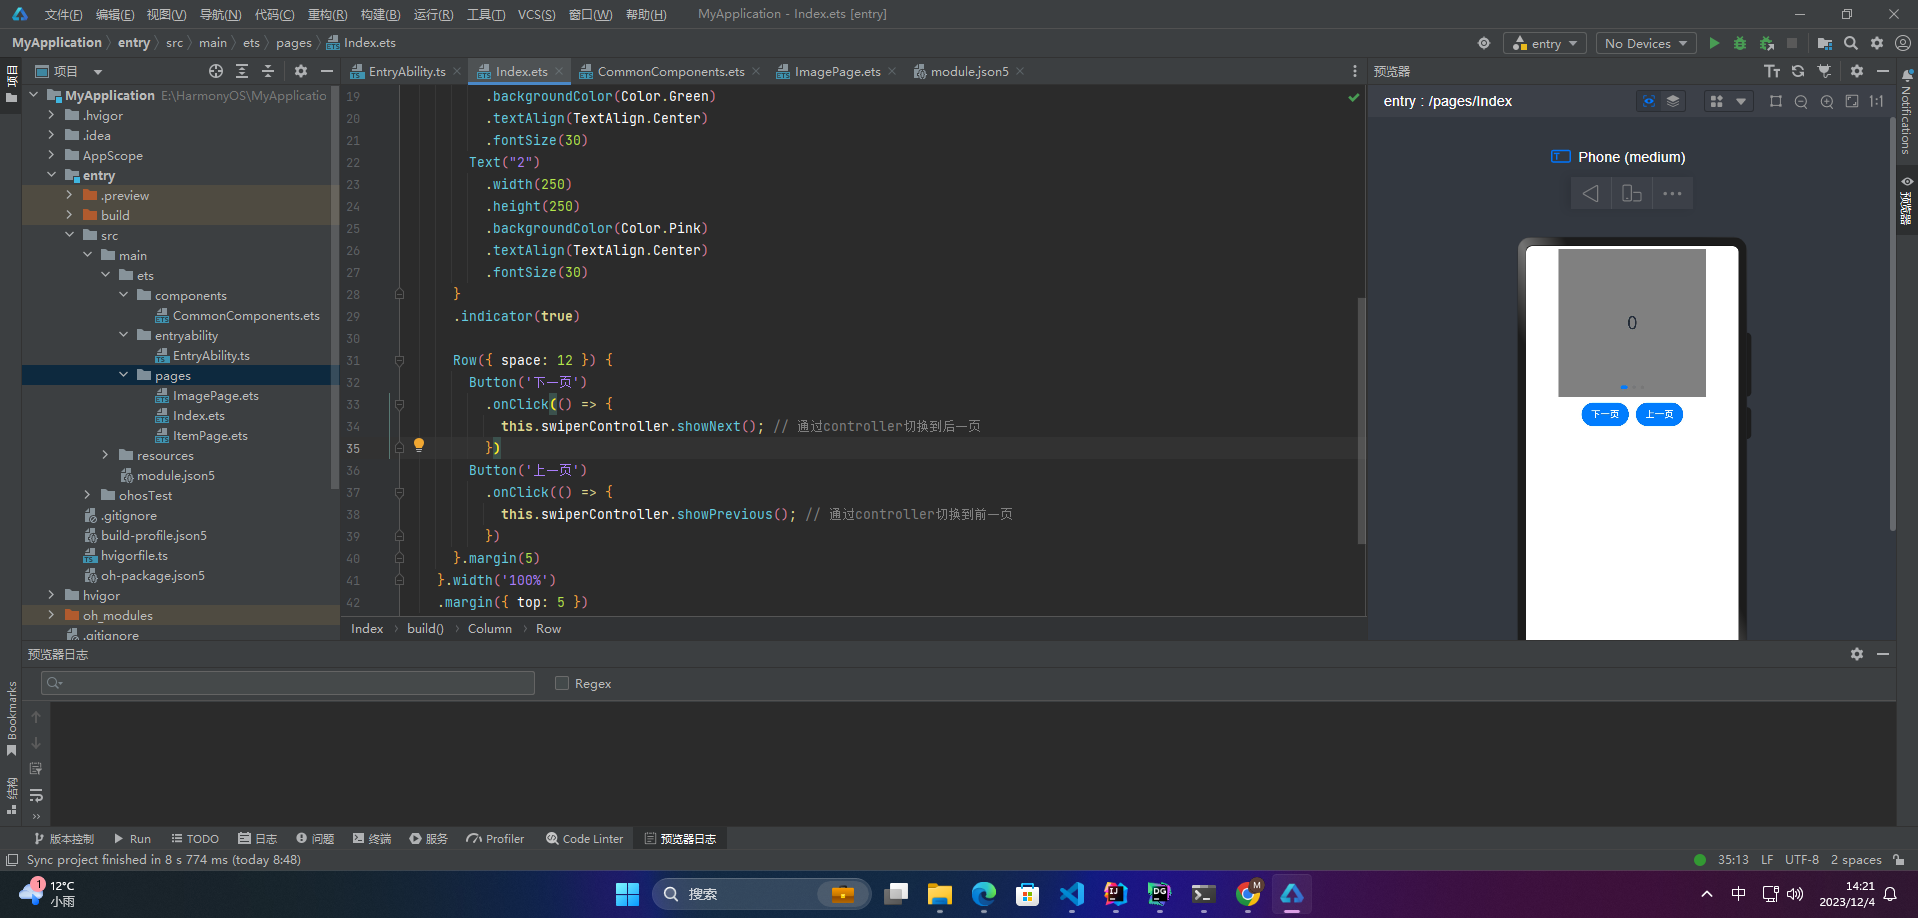
6.页面切换方式
Swiper支持三种页面切换方式:手指滑动、点击导航点和通过控制器
@Entry
@Component
struct Index {
private swiperController: SwiperController = new SwiperController();
build() {
Column({ space: 5 }) {
Swiper(this.swiperController) {
Text(“0”)
.width(250)
.height(250)
.backgroundColor(Color.Gray)
.textAlign(TextAlign.Center)
.fontSize(30)
Text(“1”)
.width(250)
.height(250)
.backgroundColor(Color.Green)
.textAlign(TextAlign.Center)
.fontSize(30)
Text(“2”)
.width(250)
.height(250)
.backgroundColor(Color.Pink)
.textAlign(TextAlign.Center)
.fontSize(30)
}
.indicator(true)
Row({ space: 12 }) {
Button(‘下一页’)
.onClick(() => {
this.swiperController.showNext(); // 通过controller切换到后一页
})
Button(‘上一页’)
.onClick(() => {
this.swiperController.showPrevious(); // 通过controller切换到前一页
})
}.margin(5)
}.width(‘100%’)
.margin({ top: 5 })
}
}
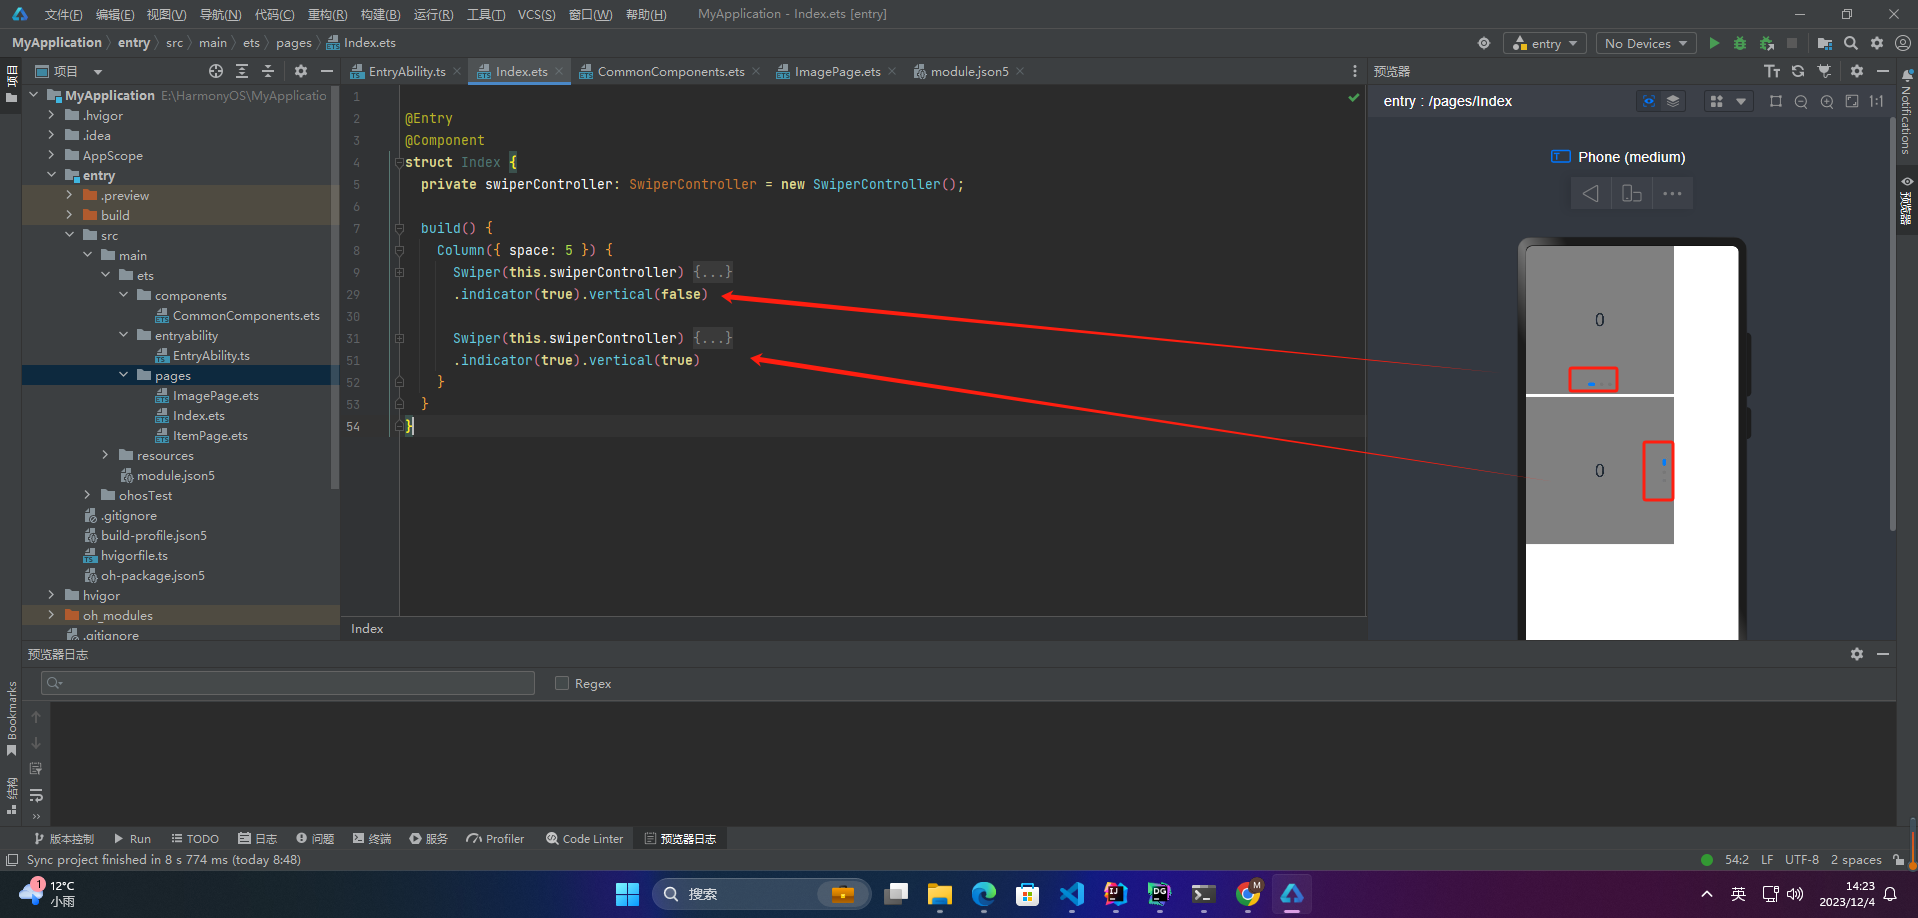
7.轮播方向
vertical为true时,表示在垂直方向上进行轮播;为false时,表示在水平方向上进行轮播。vertical默认值为false
@Entry
@Component
struct Index {
private swiperController: SwiperController = new SwiperController();
build() {
Column({ space: 5 }) {
Swiper(this.swiperController) {
Text(“0”)
.width(250)
.height(250)
.backgroundColor(Color.Gray)
.textAlign(TextAlign.Center)
.fontSize(30)
Text(“1”)
.width(250)
.height(250)
.backgroundColor(Color.Green)
.textAlign(TextAlign.Center)
.fontSize(30)
Text(“2”)
.width(250)
.height(250)
.backgroundColor(Color.Pink)
.textAlign(TextAlign.Center)
.fontSize(30)
}
.indicator(true).vertical(false)
Swiper(this.swiperController) {
Text(“0”)
.width(250)
.height(250)
.backgroundColor(Color.Gray)
.textAlign(TextAlign.Center)
.fontSize(30)
Text(“1”)
.width(250)
.height(250)
.backgroundColor(Color.Green)
.textAlign(TextAlign.Center)
.fontSize(30)
Text(“2”)
.width(250)
.height(250)
.backgroundColor(Color.Pink)
.textAlign(TextAlign.Center)
.fontSize(30)
}
.indicator(true).vertical(true)
}
}
}
8.每页显示多个子页面
Swiper支持在一个页面内同时显示多个子组件,通过displayCount属性设置
@Entry
@Component
struct Index {
private swiperController: SwiperController = new SwiperController();
build() {
Swiper(this.swiperController) {
Text(“0”)
.width(250)
网上学习资料一大堆,但如果学到的知识不成体系,遇到问题时只是浅尝辄止,不再深入研究,那么很难做到真正的技术提升。
一个人可以走的很快,但一群人才能走的更远!不论你是正从事IT行业的老鸟或是对IT行业感兴趣的新人,都欢迎加入我们的的圈子(技术交流、学习资源、职场吐槽、大厂内推、面试辅导),让我们一起学习成长!
一大堆,但如果学到的知识不成体系,遇到问题时只是浅尝辄止,不再深入研究,那么很难做到真正的技术提升。**
一个人可以走的很快,但一群人才能走的更远!不论你是正从事IT行业的老鸟或是对IT行业感兴趣的新人,都欢迎加入我们的的圈子(技术交流、学习资源、职场吐槽、大厂内推、面试辅导),让我们一起学习成长!


 1161
1161


 被折叠的 条评论
为什么被折叠?
被折叠的 条评论
为什么被折叠?
 到【灌水乐园】发言


