


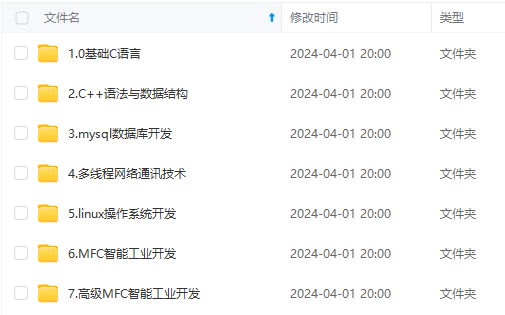
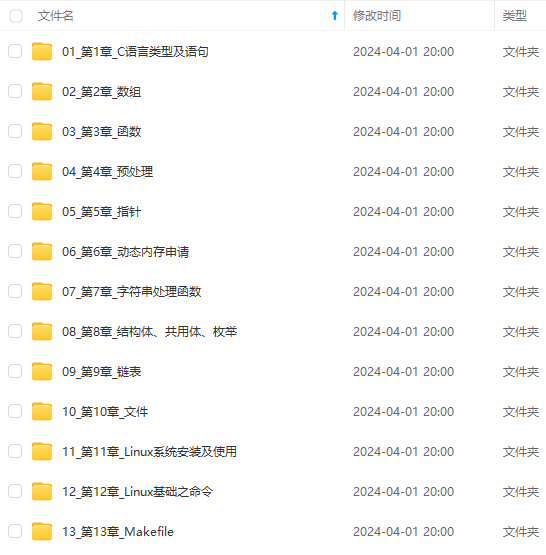
既有适合小白学习的零基础资料,也有适合3年以上经验的小伙伴深入学习提升的进阶课程,涵盖了95%以上C C++开发知识点,真正体系化!
由于文件比较多,这里只是将部分目录截图出来,全套包含大厂面经、学习笔记、源码讲义、实战项目、大纲路线、讲解视频,并且后续会持续更新
    if(points != null){
        this.cutRect(src, points, 12);
    }
    return points;
}

// 裁剪指定区域
public BufferedImage cutRect(Mat src,Point[] points, int offset){
    if(points == null || points.length < 3){
        System.out.println("-------没有点---------");
        return null;
    }
    int left_x = (int)Math.min(points[0].x, Math.min(points[1].x, points[2].x)) - offset;
    int right_x = (int)Math.max(points[0].x, Math.max(points[1].x, points[2].x)) + offset;
    int y = (int)Math.min(points[0].y, Math.min(points[1].y, points[2].y)) - offset;
    Rect roiArea = new Rect(left_x, y, right_x - left_x, right_x - left_x);
    Mat dstRoi = new Mat(src, roiArea);
    this.printImg("cutRect.jpg", dstRoi);
    return this.mat2BufImg(dstRoi, ".png");
}

// 通过角度筛选点, 只处理正常角度二维码
private List<MatOfPoint> filterByAngle(List<MatOfPoint> markContours) {
    // 二维码有三个角轮廓,少于三个的无法定位放弃,多余三个的循环裁剪出来
    if (markContours.size() < 3){
        return null;
    }else{
        for (int i=0; i<markContours.size()-2; i++){
            List<MatOfPoint> threePointList = new ArrayList<>();
            for (int j=i+1;j<markContours.size()-1; j++){
                for (int k=j+1;k<markContours.size();k++){
                    threePointList.add(markContours.get(i));
                    threePointList.add(markContours.get(j));
                    threePointList.add(markContours.get(k));
                    if(capture(threePointList)){
                        return threePointList;
                    }else{
                        threePointList.clear();
                    }
                }
            }
        }
    }
    return null;
}

// 计算三个点是否符合 90,45,45
private boolean capture(List<MatOfPoint> contours){
    Point[] pointthree = this.centerCals(contours);
    double angle1 = this.angle(pointthree[1],  pointthree[0],  pointthree[2]);
    double angle2 = this.angle(pointthree[0],  pointthree[1],  pointthree[2]);
    double angle3 = this.angle(pointthree[1],  pointthree[2],  pointthree[0]);

    System.out.println("angle1:"+angle1+",angle2:"+angle2+",angle3:"+angle3);
    if (Double.isNaN(angle1) || Double.isNaN(angle2) || Double.isNaN(angle3)){
        return false;
    }

    // 最大角度和最小角度
    double maxAngle = Math.max(angle3,Math.max(angle1,angle2));
    double minAngle = Math.min(angle3,Math.min(angle1,angle2));
    if (maxAngle<85 || maxAngle>95 || minAngle < 40 || minAngle > 50){ /\*\*二维码为直角,最大角过大或者过小都判断为不是二维码\*/
        return false;
    }
    return true;
}

// 计算夹角
private double angle(Point p1, Point p2, Point p3){
    double[] ca = new double[2];
    double[] cb = new double[2];

    ca[0] =  p1.x - p2.x;
    ca[1] =  p1.y - p2.y;
    cb[0] =  p3.x - p2.x;
    cb[1] =  p3.y - p2.y;
    return 180/3.1415\*Math.acos((ca[0]\*cb[0]+ca[1]\*cb[1])/(Math.sqrt(ca[0]\*ca[0]+ca[1]\*ca[1])\*Math.sqrt(cb[0]\*cb[0]+cb[1]\*cb[1])));
}
// 转换为点
private Point[] centerCals(List<MatOfPoint> matOfPoint){
    if(matOfPoint == null || matOfPoint.size() == 0){
        return null;
    }
    Point[] pointthree = new Point[matOfPoint.size()];
    for(int i=0; i<matOfPoint.size(); i++){
        pointthree[i] = centerCal(matOfPoint.get(i));
    }
    return pointthree;
}

// 转换为中心点
private Point centerCal(MatOfPoint matOfPoint){
    double centerx=0,centery=0;
    MatOfPoint2f mat2f = new MatOfPoint2f( matOfPoint.toArray() );
    RotatedRect rect = Imgproc.minAreaRect( mat2f );
    Point vertices[] = new Point[4];
    rect.points(vertices);
    centerx = ((vertices[0].x + vertices[1].x)/2 + (vertices[2].x + vertices[3].x)/2)/2;
    centery =  ((vertices[0].y + vertices[1].y)/2 + (vertices[2].y + vertices[3].y)/2)/2;
    Point point= new Point(centerx,centery);
    return point;
}


// 寻找二维码轮廓点
private List<MatOfPoint> markContour(Mat src_gray, List<MatOfPoint> contours, Mat hierarchy) {
    List<MatOfPoint> markContours = new ArrayList<>();
    for (int i = 0; i< contours.size(); i++ ) {
        MatOfPoint2f newMtx = new MatOfPoint2f(contours.get(i).toArray() );
        RotatedRect rotRect = Imgproc.minAreaRect( newMtx );
        double w = rotRect.size.width;
        double h = rotRect.size.height;
        double rate =  Math.max(w, h)/Math.min(w, h) ;
        //长短轴比小于1.3,总面积大于60
        if (rate < 1.3 && w < src_gray.cols()/4 && h< src_gray.rows()/4 && Imgproc.contourArea(contours.get(i))>60) {
            //计算层数,二维码角框有五层轮廓(有说六层),这里不计自己这一层,有4个以上子轮廓则标记这一点
            double[] ds = hierarchy.get(0, i);
            if (ds != null && ds.length>3){
                int count =0;
                if (ds[3] == -1){/\*\*最外层轮廓排除\*/
                    continue;
                }
                //计算所有子轮廓数量
                while ((int) ds[2] !=-1){
                    ++count;
                    ds = hierarchy.get(0 ,(int) ds[2]);
                }
                if (count >= 4){
                    markContours.add(contours.get(i));
                }
            }
        }
    }
    return markContours;
}

// 测试打印图片
private  void printImg(String name, Mat img){
    if(isDebug) {
        String path = String.format("%s/%s", System.getProperty("user.dir"), name);
        System.out.println("out:" + path);
        Imgcodecs.imwrite(path, img);
    }
}

/\*\*
* Mat转换成BufferedImage
*
* @param matrix 要转换的Mat
* @param fileExtension 格式为 “.jpg”, “.png”, etc
* @return
*/
public static BufferedImage mat2BufImg(Mat matrix, String fileExtension) {
// convert the matrix into a matrix of bytes appropriate for
// this file extension
MatOfByte mob = new MatOfByte();
Imgcodecs.imencode(fileExtension, matrix, mob);
// convert the “matrix of bytes” into a byte array
byte[] byteArray = mob.toArray();
BufferedImage bufImage = null;
try {
InputStream in = new ByteArrayInputStream(byteArray);
bufImage = ImageIO.read(in);
} catch (Exception e) {
e.printStackTrace();
}
return bufImage;
}
/\*\*
* BufferedImage转换成Mat
*
* @param original
* 要转换的BufferedImage
* @param imgType
* bufferedImage的类型 如 BufferedImage.TYPE_3BYTE_BGR
* @param matType
* 转换成mat的type 如 CvType.CV_8UC3
*/
public static Mat bufImg2Mat (BufferedImage original, int imgType, int matType) {
if (original == null) {
throw new IllegalArgumentException(“original == null”);
}
// Don’t convert if it already has correct type
if (original.getType() != imgType) {
// Create a buffered image
BufferedImage image = new BufferedImage(original.getWidth(), original.getHeight(), imgType);
// Draw the image onto the new buffer
Graphics2D g = image.createGraphics();
try {
g.setComposite(AlphaComposite.Src);
g.drawImage(original, 0, 0, null);
} finally {
g.dispose();
}
}
DataBufferByte dbi = (DataBufferByte) original.getRaster().getDataBuffer();
byte[] pixels = dbi.getData();
Mat mat = Mat.eye(original.getHeight(), original.getWidth(), matType);
mat.put(0, 0, pixels);
return mat;
}
/\*\*
* 解析读取二维码
* 先使用ZXING二维码识别,若失败,使用OPENCV自带的二维码识别
* 个人测试,两者的识别率差不多,都不尽人意,但一起使用还是可以略微提高一点识别率,毕竟实现算法不一样


既有适合小白学习的零基础资料,也有适合3年以上经验的小伙伴深入学习提升的进阶课程,涵盖了95%以上C C++开发知识点,真正体系化!
由于文件比较多,这里只是将部分目录截图出来,全套包含大厂面经、学习笔记、源码讲义、实战项目、大纲路线、讲解视频,并且后续会持续更新
15572068892)]
既有适合小白学习的零基础资料,也有适合3年以上经验的小伙伴深入学习提升的进阶课程,涵盖了95%以上C C++开发知识点,真正体系化!
由于文件比较多,这里只是将部分目录截图出来,全套包含大厂面经、学习笔记、源码讲义、实战项目、大纲路线、讲解视频,并且后续会持续更新


 1070
1070

 被折叠的 条评论
为什么被折叠?
被折叠的 条评论
为什么被折叠?
 到【灌水乐园】发言


