


基于深度学习卷积神经网络,利用Tensorflow和Keras等工具实现图像年龄和性别检测 建立基于深度学习的人脸性别年龄识别评估系统
以下文字及代码仅供参考。
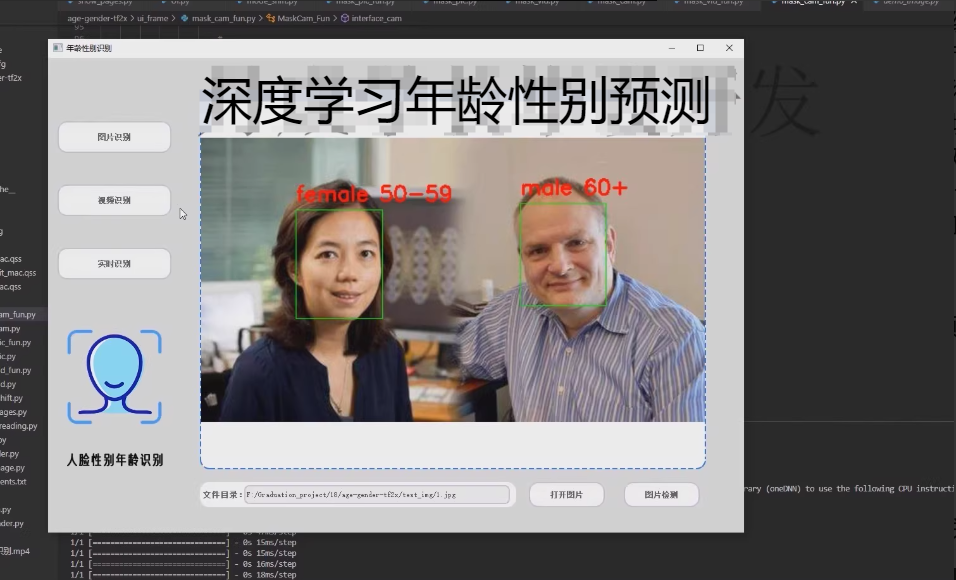
深度学习人脸性别年龄识别系统
实现功能
年龄和性别作为人重要的生物特征, 可以应用于多种场景, 如基于年龄的人机交互系统、电子商务中个性营销、刑事案件侦察中的年龄过滤等。然而基于图像的年龄分类和性别检测在真实场景下受很多因素影响, 如后天的生活工作环境等, 并且人脸图像中的复杂光线环境、姿态、表情以及图片本身的质量等因素都会给识别造成困难。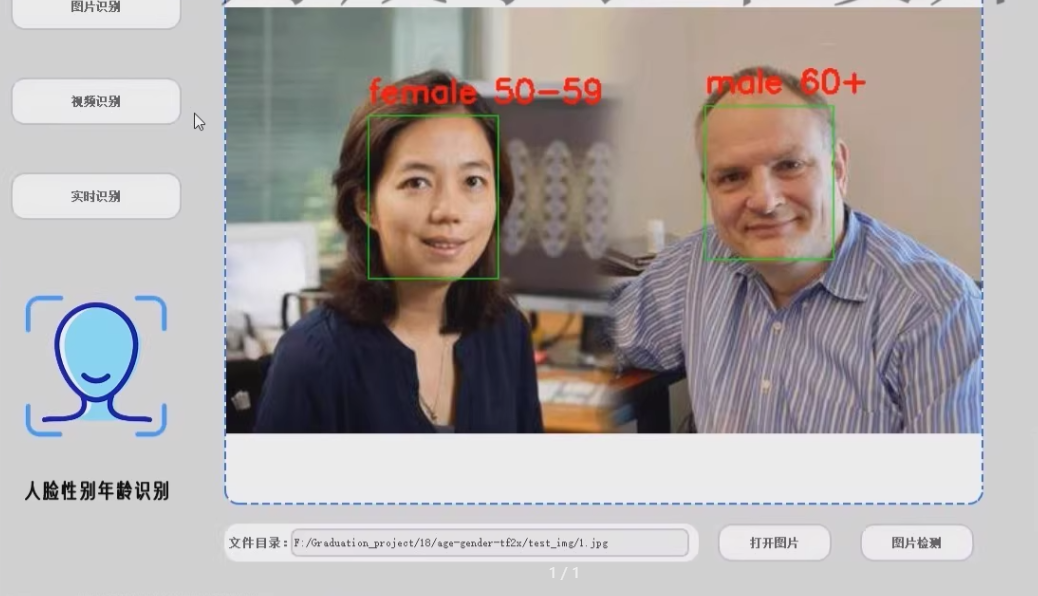
基于深度学习卷积神经网络,利用Tensorflow和Keras等工具实现图像年龄和性别检测。
基于深度学习的人脸性别年龄识别系统涉及数据准备、模型设计、训练和评估等多个步骤。
以下是关键代码仅供参考。仅供参考
1. 环境配置
首先确保安装了必要的库:
pip install tensorflow keras numpy pandas matplotlib opencv-python
2. 数据集准备
使用公开可用的数据集如Adience Benchmark或IMDB-WIKI来训练你的模型。这些数据集包含了人脸图像及其对应的年龄和性别标签。
数据预处理
假设我们已经有了一个包含人脸图像和对应年龄及性别的数据集。我们需要对数据进行预处理,包括图像尺寸调整、归一化等操作。
import cv2
import numpy as np
from sklearn.model_selection import train_test_split

def load_data(image_paths, age_labels, gender_labels, img_size=128):
    images = []
    for path in image_paths:
        img = cv2.imread(path)
        img = cv2.resize(img, (img_size, img_size))
        images.append(img)
    images = np.array(images, dtype="float") / 255.0
    age_labels = np.array(age_labels)
    gender_labels = np.array(gender_labels)
    return train_test_split(images, age_labels, gender_labels, test_size=0.2, random_state=42)
3. 模型设计
我们将设计一个同时预测年龄和性别的卷积神经网络(CNN)。
from tensorflow.keras.models import Model
from tensorflow.keras.layers import Input, Conv2D, MaxPooling2D, Flatten, Dense, Dropout

def create_model(input_shape=(128, 128, 3)):
    inputs = Input(shape=input_shape)

    x = Conv2D(32, kernel_size=(3, 3), activation='relu')(inputs)
    x = MaxPooling2D(pool_size=(2, 2))(x)

    x = Conv2D(64, kernel_size=(3, 3), activation='relu')(x)
    x = MaxPooling2D(pool_size=(2, 2))(x)

    x = Conv2D(128, kernel_size=(3, 3), activation='relu')(x)
    x = MaxPooling2D(pool_size=(2, 2))(x)

    x = Flatten()(x)
    x = Dense(128, activation='relu')(x)
    x = Dropout(0.5)(x)

    age_output = Dense(1, name='age_output')(x)
    gender_output = Dense(1, activation='sigmoid', name='gender_output')(x)

    model = Model(inputs=inputs, outputs=[age_output, gender_output])

    model.compile(optimizer='adam',
                  loss={'age_output': 'mse', 'gender_output': 'binary_crossentropy'},
                  metrics={'age_output': 'mae', 'gender_output': 'accuracy'})

    return model
4. 模型训练
将数据加载到内存中,并开始训练模型。
# 假设已经准备好image_paths, age_labels, gender_labels
X_train, X_test, y_train_age, y_test_age, y_train_gender, y_test_gender = load_data(image_paths, age_labels, gender_labels)

model = create_model()
history = model.fit(X_train, {'age_output': y_train_age, 'gender_output': y_train_gender},
                    validation_data=(X_test, {'age_output': y_test_age, 'gender_output': y_test_gender}),
                    epochs=50, batch_size=32)
5. 结果可视化
绘制损失函数和准确率曲线,以检查模型训练过程中的表现。
import matplotlib.pyplot as plt

def plot_training_history(history):
    # 绘制年龄输出的损失曲线
    plt.figure(figsize=(14, 5))
    plt.subplot(1, 2, 1)
    plt.plot(history.history['age_output_loss'], label='Train Age Loss')
    plt.plot(history.history['val_age_output_loss'], label='Validation Age Loss')
    plt.title('Age Loss')
    plt.xlabel('Epochs')
    plt.ylabel('Loss')
    plt.legend()

    # 绘制性别输出的准确率曲线
    plt.subplot(1, 2, 2)
    plt.plot(history.history['gender_output_accuracy'], label='Train Gender Accuracy')
    plt.plot(history.history['val_gender_output_accuracy'], label='Validation Gender Accuracy')
    plt.title('Gender Accuracy')
    plt.xlabel('Epochs')
    plt.ylabel('Accuracy')
    plt.legend()
    plt.show()

plot_training_history(history)
6. 模型评估
在测试集上评估模型性能。
loss, age_loss, gender_loss, age_mae, gender_acc = model.evaluate(X_test, {'age_output': y_test_age, 'gender_output': y_test_gender})
print(f"Test Age MAE: {age_mae}")
print(f"Test Gender Accuracy: {gender_acc}")
为了实现一个完整的人脸性别年龄识别系统,包括GUI界面和模型推理部分,我们可以基于之前提供的代码框架进行扩展。以下是详细的代码示例,包括数据预处理、模型设计、训练、以及使用PyQt5构建的GUI界面。
1. 数据预处理
import cv2
import numpy as np
from sklearn.model_selection import train_test_split

def load_data(image_paths, age_labels, gender_labels, img_size=128):
    images = []
    for path in image_paths:
        img = cv2.imread(path)
        img = cv2.resize(img, (img_size, img_size))
        images.append(img)
    images = np.array(images, dtype="float") / 255.0
    age_labels = np.array(age_labels)
    gender_labels = np.array(gender_labels)
    return train_test_split(images, age_labels, gender_labels, test_size=0.2, random_state=42)
2. 模型设计与训练
from tensorflow.keras.models import Model
from tensorflow.keras.layers import Input, Conv2D, MaxPooling2D, Flatten, Dense, Dropout

def create_model(input_shape=(128, 128, 3)):
    inputs = Input(shape=input_shape)

    x = Conv2D(32, kernel_size=(3, 3), activation='relu')(inputs)
    x = MaxPooling2D(pool_size=(2, 2))(x)

    x = Conv2D(64, kernel_size=(3, 3), activation='relu')(x)
    x = MaxPooling2D(pool_size=(2, 2))(x)

    x = Conv2D(128, kernel_size=(3, 3), activation='relu')(x)
    x = MaxPooling2D(pool_size=(2, 2))(x)

    x = Flatten()(x)
    x = Dense(128, activation='relu')(x)
    x = Dropout(0.5)(x)

    age_output = Dense(1, name='age_output')(x)
    gender_output = Dense(1, activation='sigmoid', name='gender_output')(x)

    model = Model(inputs=inputs, outputs=[age_output, gender_output])

    model.compile(optimizer='adam',
                  loss={'age_output': 'mse', 'gender_output': 'binary_crossentropy'},
                  metrics={'age_output': 'mae', 'gender_output': 'accuracy'})

    return model

# 假设已经准备好image_paths, age_labels, gender_labels
X_train, X_test, y_train_age, y_test_age, y_train_gender, y_test_gender = load_data(image_paths, age_labels, gender_labels)

model = create_model()
history = model.fit(X_train, {'age_output': y_train_age, 'gender_output': y_train_gender},
                    validation_data=(X_test, {'age_output': y_test_age, 'gender_output': y_test_gender}),
                    epochs=50, batch_size=32)
3. GUI界面开发(使用PyQt5)
首先安装PyQt5:
pip install PyQt5
然后编写GUI代码:
import sys
from PyQt5.QtWidgets import QApplication, QMainWindow, QPushButton, QLabel, QVBoxLayout, QWidget, QFileDialog, QLineEdit
from PyQt5.QtGui import QPixmap, QImage
import cv2
import numpy as np
class AgeGenderRecognitionApp(QMainWindow):
def __init__(self):
super().__init__()
self.initUI()
def initUI(self):
self.setWindowTitle('人脸性别年龄识别')
self.setGeometry(100, 100, 800, 600)
self.image_label = QLabel(self)
self.image_label.setGeometry(100, 100, 600, 400)
self.load_button = QPushButton('打开图片', self)
self.load_button.move(100, 550)
self.load_button.clicked.connect(self.load_image)
self.detect_button = QPushButton('图片检测', self)
self.detect_button.move(300, 550)
self.detect_button.clicked.connect(self.detect_image)
self.file_path_edit = QLineEdit(self)
self.file_path_edit.setGeometry(100, 510, 600, 30)
def load_image(self):
options = QFileDialog.Options()
file_name, _ = QFileDialog.getOpenFileName(self, "选择图片", "", "Images (*.png *.xpm *.jpg *.bmp);;All Files (*)", options=options)
if file_name:
self.file_path_edit.setText(file_name)
pixmap = QPixmap(file_name)
self.image_label.setPixmap(pixmap.scaled(600, 400))
def detect_image(self):
file_path = self.file_path_edit.text()
if file_path:
# 这里调用你的模型进行预测
result = self.predict_image(file_path)
self.display_result(result)
def predict_image(self, file_path):
# 加载并预处理图像
img = cv2.imread(file_path)
img = cv2.resize(img, (128, 128))
img = img.astype("float") / 255.0
img = np.expand_dims(img, axis=0)
# 使用模型进行预测
age_pred, gender_pred = model.predict(img)
age = int(age_pred[0][0])
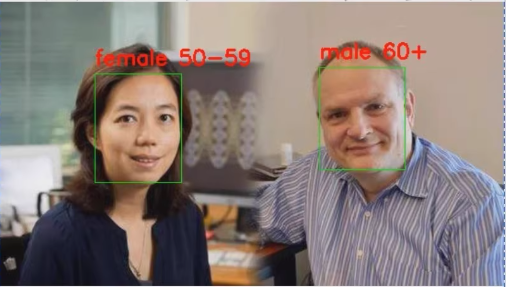
gender = 'male' if gender_pred[0][0] > 0.5 else 'female'
return {'age': age, 'gender': gender}
def display_result(self, result):
text = f"{result['gender']} {result['age']}"
self.image_label.setText(text)
if __name__ == '__main__':
app = QApplication(sys.argv)
ex = AgeGenderRecognitionApp()
ex.show()
sys.exit(app.exec_())
总结
以上代码展示了如何构建一个基于深度学习的人脸性别年龄识别系统,并附带了一个简单的GUI界面。你可以根据实际需求调整模型结构、优化超参数或改进GUI布局,以进一步提升系统的性能和用户体验。
仅供参考。


 被折叠的 条评论
为什么被折叠?
被折叠的 条评论
为什么被折叠?
 到【灌水乐园】发言


