


使用OpenCV和Dlib进行人脸特征提取 基于人工智能的课堂人脸考勤系统 使用深度学习模型进行活体检测和专注度检测 使用Qt Designer设计界面
基于人工智能的课堂人脸考勤系统
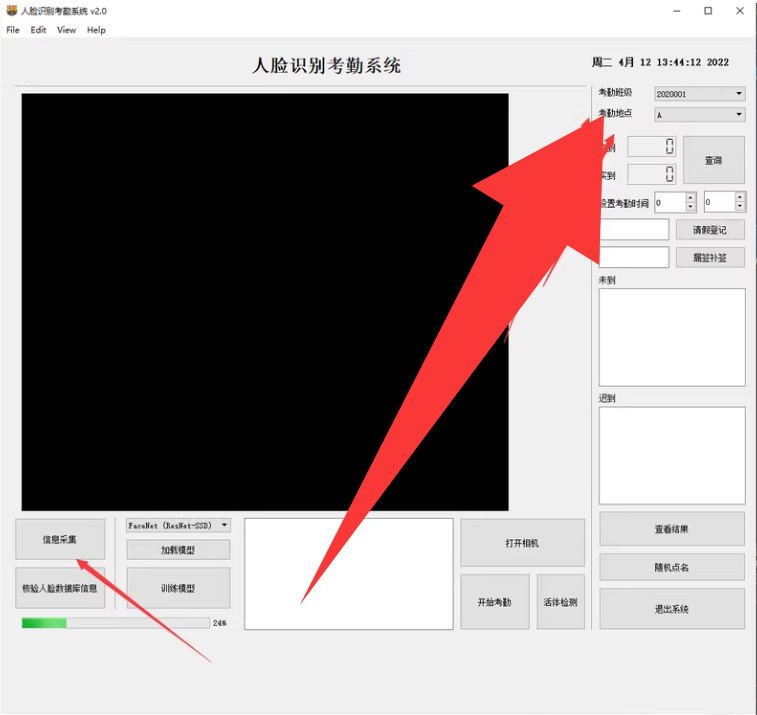
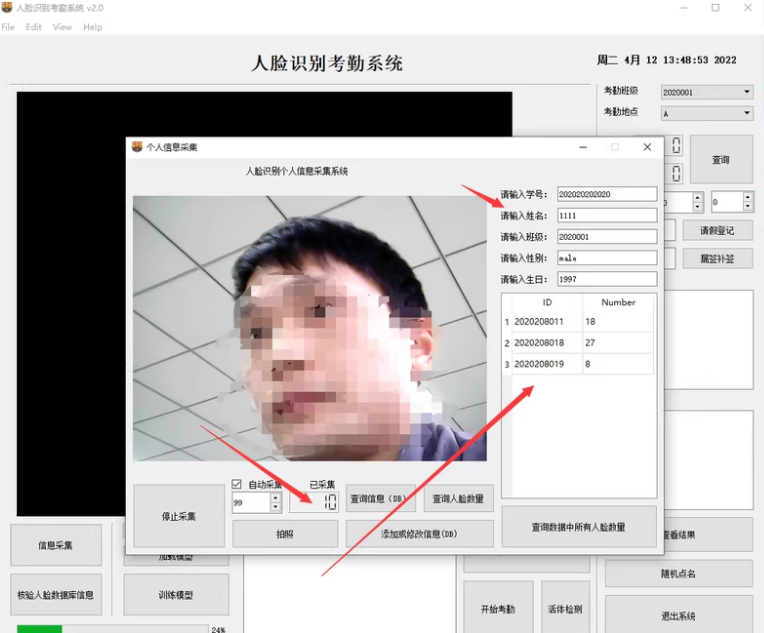
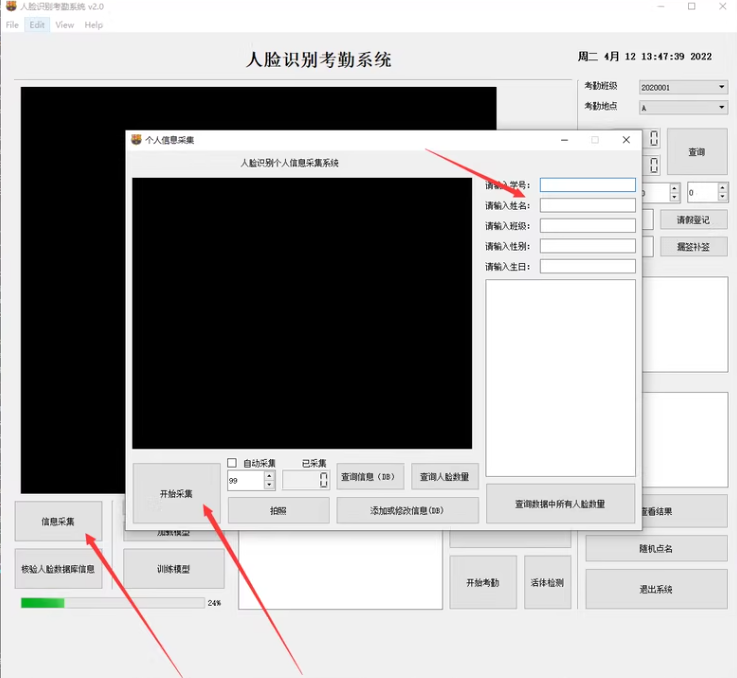
系统主要分为三个部分,第一个部分,人脸库的录入,通过录入人脸裤,记录学生信息。
第二部分,人脸识别,选择班级,考勤时间后,打开摄像头进行人脸考勤。
第三部分,活体检测,和专注度检测,判断学生是否在听课,以及听课的专注度。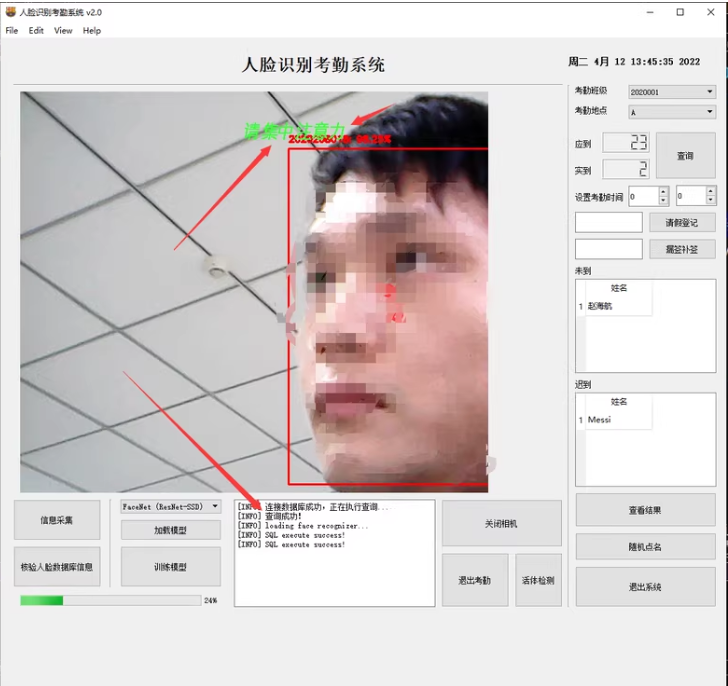
1
基于人工智能的课堂人脸考勤系统:人脸库录入、人脸识别、活体检测和专注度检测。关键代码示例
1. 环境搭建
确保你的开发环境已经安装了必要的库和工具。
安装依赖
# 创建并激活虚拟环境
conda create -n face_attendance python=3.8
conda activate face_attendance

# 安装相关库
pip install opencv-python numpy dlib imutils PyQt5 tensorflow keras scikit-learn
2. 人脸库录入
使用OpenCV和Dlib进行人脸特征提取,并将特征存储在数据库中。
录入人脸库代码
import cv2
import os
import numpy as np
import dlib
from imutils import face_utils
import sqlite3

# 初始化Dlib的人脸检测器和特征提取器
detector = dlib.get_frontal_face_detector()
predictor = dlib.shape_predictor("shape_predictor_68_face_landmarks.dat")
face_recog = dlib.face_recognition_model_v1("dlib_face_recognition_resnet_model_v1.dat")

def add_face_to_db(name, image_path):
    conn = sqlite3.connect('faces.db')
    c = conn.cursor()

    # 创建表(如果不存在)
    c.execute('''CREATE TABLE IF NOT EXISTS faces (name TEXT, encoding BLOB)''')

    # 加载图像并转换为灰度图
    image = cv2.imread(image_path)
    gray = cv2.cvtColor(image, cv2.COLOR_BGR2GRAY)

    # 检测人脸
    rects = detector(gray, 0)

    if len(rects) == 0:
        print("No face detected in the image.")
        return

    for rect in rects:
        shape = predictor(gray, rect)
        face_descriptor = face_recog.compute_face_descriptor(image, shape)

        # 将特征向量转换为二进制格式并存储到数据库中
        face_descriptor_bin = np.array(face_descriptor).tobytes()
        c.execute("INSERT INTO faces (name, encoding) VALUES (?, ?)", (name, face_descriptor_bin))

    conn.commit()
    conn.close()

# 示例:添加一张人脸到数据库
add_face_to_db('Student1', 'path/to/student1.jpg')
3. 人脸识别
使用摄像头实时捕捉图像,并与数据库中的人脸特征进行比对。
人脸识别代码
import cv2
import numpy as np
import dlib
import sqlite3
from imutils import face_utils

# 初始化Dlib的人脸检测器和特征提取器
detector = dlib.get_frontal_face_detector()
predictor = dlib.shape_predictor("shape_predictor_68_face_landmarks.dat")
face_recog = dlib.face_recognition_model_v1("dlib_face_recognition_resnet_model_v1.dat")

def load_faces_from_db():
    conn = sqlite3.connect('faces.db')
    c = conn.cursor()

    c.execute("SELECT name, encoding FROM faces")
    rows = c.fetchall()

    known_names = []
    known_encodings = []

    for row in rows:
        name = row[0]
        encoding = np.frombuffer(row[1], dtype=np.float64)
        known_names.append(name)
        known_encodings.append(encoding)

    conn.close()
    return known_names, known_encodings

def recognize_faces(frame, known_names, known_encodings):
    gray = cv2.cvtColor(frame, cv2.COLOR_BGR2GRAY)
    rects = detector(gray, 0)

    for rect in rects:
        shape = predictor(gray, rect)
        face_descriptor = face_recog.compute_face_descriptor(frame, shape)

        matches = dlib.compare_face_descriptors(known_encodings, face_descriptor, tolerance=0.6)

        if True in matches:
            match_index = matches.index(True)
            name = known_names[match_index]
            print(f"Recognized: {name}")
            return name
    return None

# 实时人脸识别
def real_time_face_recognition():
    known_names, known_encodings = load_faces_from_db()

    cap = cv2.VideoCapture(0)

    while True:
        ret, frame = cap.read()
        if not ret:
            break

        recognized_name = recognize_faces(frame, known_names, known_encodings)

        if recognized_name:
            cv2.putText(frame, recognized_name, (10, 30), cv2.FONT_HERSHEY_SIMPLEX, 1, (0, 255, 0), 2)

        cv2.imshow('Face Recognition', frame)

        if cv2.waitKey(1) & 0xFF == ord('q'):
            break

    cap.release()
    cv2.destroyAllWindows()

# 运行实时人脸识别
real_time_face_recognition()
4. 活体检测和专注度检测
使用深度学习模型进行活体检测和专注度检测。
活体检测代码
import cv2
import numpy as np
from keras.models import load_model

# 加载预训练的活体检测模型
model = load_model('liveness.model')

def is_living_face(frame):
    face_cascade = cv2.CascadeClassifier('haarcascade_frontalface_default.xml')
    gray = cv2.cvtColor(frame, cv2.COLOR_BGR2GRAY)
    faces = face_cascade.detectMultiScale(gray, scaleFactor=1.1, minNeighbors=5, minSize=(30, 30))

    if len(faces) > 0:
        (x, y, w, h) = faces[0]
        face_roi = frame[y:y+h, x:x+w]
        face_roi = cv2.resize(face_roi, (128, 128))
        face_roi = face_roi.astype("float") / 255.0
        face_roi = np.expand_dims(face_roi, axis=0)

        pred = model.predict(face_roi)[0]
        if pred[1] > pred[0]:
            return True
    return False

# 示例:检查当前帧是否为活体人脸
cap = cv2.VideoCapture(0)

while True:
    ret, frame = cap.read()
    if not ret:
        break

    if is_living_face(frame):
        print("Living face detected!")
    else:
        print("Not a living face.")

    cv2.imshow('Liveness Detection', frame)

    if cv2.waitKey(1) & 0xFF == ord('q'):
        break

cap.release()
cv2.destroyAllWindows()
专注度检测代码
import cv2
import numpy as np
from keras.models import load_model

# 加载预训练的专注度检测模型
model = load_model('attention.model')

def get_attention_level(frame):
    face_cascade = cv2.CascadeClassifier('haarcascade_frontalface_default.xml')
    gray = cv2.cvtColor(frame, cv2.COLOR_BGR2GRAY)
    faces = face_cascade.detectMultiScale(gray, scaleFactor=1.1, minNeighbors=5, minSize=(30, 30))

    if len(faces) > 0:
        (x, y, w, h) = faces[0]
        face_roi = frame[y:y+h, x:x+w]
        face_roi = cv2.resize(face_roi, (128, 128))
        face_roi = face_roi.astype("float") / 255.0
        face_roi = np.expand_dims(face_roi, axis=0)

        pred = model.predict(face_roi)[0]
        attention_level = np.argmax(pred)
        return attention_level
    return None

# 示例:获取当前帧的专注度水平
cap = cv2.VideoCapture(0)

while True:
    ret, frame = cap.read()
    if not ret:
        break

    attention_level = get_attention_level(frame)

    if attention_level is not None:
        print(f"Attention Level: {attention_level}")

    cv2.imshow('Attention Detection', frame)

    if cv2.waitKey(1) & 0xFF == ord('q'):
        break

cap.release()
cv2.destroyAllWindows()
5. UI设计与结果展示
使用PyQt5设计用户界面,并展示检测和跟踪结果。
设计界面
使用Qt Designer设计界面,并导出为.ui文件,然后使用pyuic5转换为Python代码。
pyuic5 -x your_design.ui -o ui_design.py
主程序代码
import sys
from PyQt5.QtWidgets import QApplication, QMainWindow, QFileDialog
from PyQt5.QtGui import QImage, QPixmap
from PyQt5.QtCore import QTimer
import cv2
from ui_design import Ui_MainWindow

class FaceAttendanceApp(QMainWindow, Ui_MainWindow):
    def __init__(self):
        super().__init__()
        self.setupUi(self)
        self.timer = QTimer()
        self.timer.timeout.connect(self.update_frame)
        self.cap = None
        self.known_names, self.known_encodings = load_faces_from_db()

    def start_camera(self):
        self.cap = cv2.VideoCapture(0)
        self.timer.start(30)

    def update_frame(self):
        ret, frame = self.cap.read()
        if ret:
            recognized_name = recognize_faces(frame, self.known_names, self.known_encodings)

            if recognized_name:
                cv2.putText(frame, recognized_name, (10, 30), cv2.FONT_HERSHEY_SIMPLEX, 1, (0, 255, 0), 2)

            height, width, channel = frame.shape
            bytes_per_line = 3 * width
            q_img = QImage(frame.data, width, height, bytes_per_line, QImage.Format_RGB888)
            self.imageLabel.setPixmap(QPixmap.fromImage(q_img))

    def stop_camera(self):
        if self.cap:
            self.cap.release()
            self.timer.stop()

    def closeEvent(self, event):
        self.stop_camera()
        event.accept()

if __name__ == '__main__':
    app = QApplication(sys.argv)
    window = FaceAttendanceApp()
    window.show()
    sys.exit(app.exec_())
以上就是构建一个基于人工智能的课堂人脸考勤系统的详细步骤和代码示例。你可以根据实际需求调整模型结构、优化超参数或改进界面设计,以进一步提升系统的性能和用户体验。


 5万+
5万+

 被折叠的 条评论
为什么被折叠?
被折叠的 条评论
为什么被折叠?
 到【灌水乐园】发言


