~~~~我的生活,我的点点滴滴!!
1、ScrollViewDemo
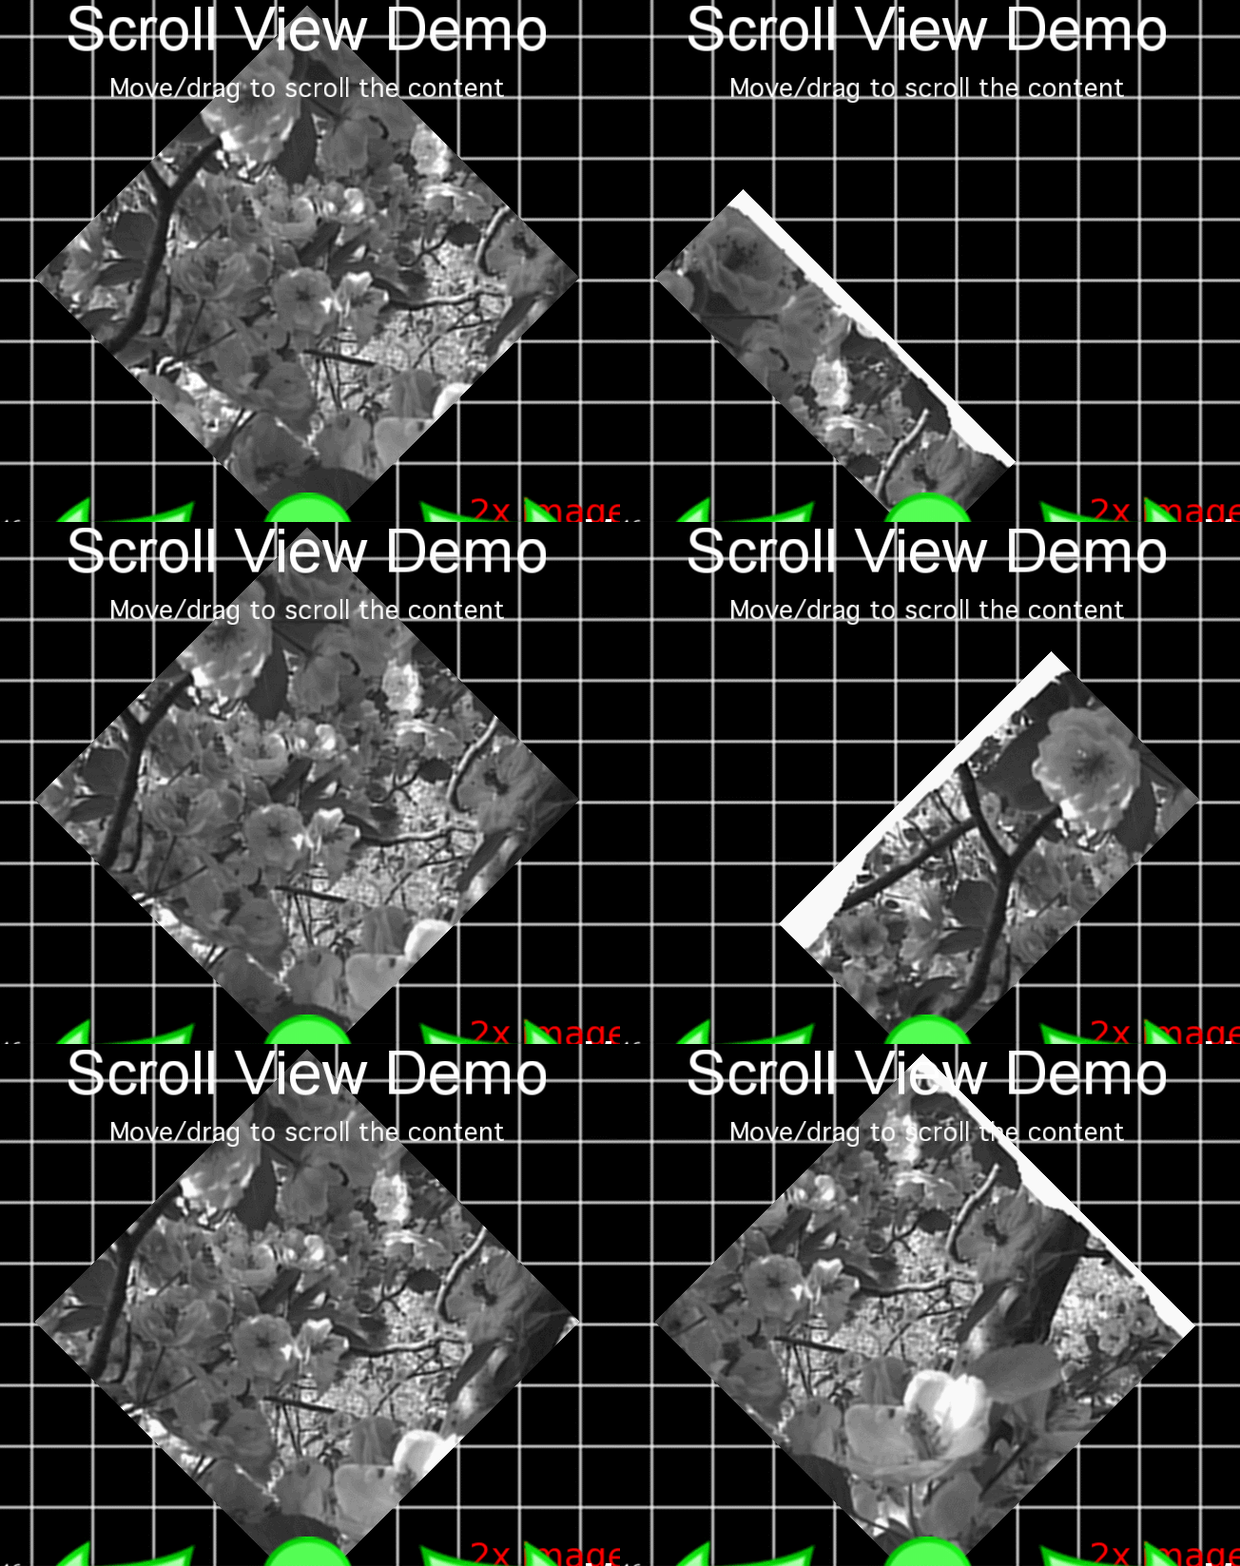
此例子效果是点击遮罩区域后鼠标拖动精灵,精灵会根着一起移动,移动效果是利用触摸事件和精灵的setPostion位置来达到效果,
遮罩是使用ClippingNode和DrawNode结合实现的,效果图:
代码比较简单,并且都是基本知识,如下:
void ScrollViewDemo::setup()
{
    auto clipper = ClippingNode::create();
    clipper->setTag( kTagClipperNode );
    clipper->setContentSize(  Size(200, 200) );
    clipper->setAnchorPoint(  Point(0.5, 0.5) );
    clipper->setPosition( Point(this->getContentSize().width / 2, this->getContentSize().height / 2) );
    clipper->runAction(RepeatForever::create(RotateBy::create(1, 45)));
    this->addChild(clipper);

    auto stencil = DrawNode::create();
    //四边形四个顶点
    Point rectangle[4];
    rectangle[0] = Point(0, 0);
    rectangle[1] = Point(clipper->getContentSize().width, 0);
    rectangle[2] = Point(clipper->getContentSize().width, clipper->getContentSize().height);
    rectangle[3] = Point(0, clipper->getContentSize().height);
    Color4F white(1, 1, 1, 1);
    stencil->drawPolygon(rectangle, 4, white, 1, white);
    //用四边形来当模板遮罩
    clipper->setStencil(stencil);

    //设置精灵来作为“裁剪结点”的content
    auto content = Sprite::create(s_back2);
    content->setTag( kTagContentNode );
    content->setAnchorPoint(  Point(0.5, 0.5) );
    content->setPosition( Point(clipper->getContentSize().width / 2, clipper->getContentSize().height / 2) );
    clipper->addChild(content);

    _scrolling = false;

    auto listener = EventListenerTouchAllAtOnce::create();
    listener->onTouchesBegan = CC_CALLBACK_2(ScrollViewDemo::onTouchesBegan, this);
    listener->onTouchesMoved = CC_CALLBACK_2(ScrollViewDemo::onTouchesMoved, this);
    listener->onTouchesEnded = CC_CALLBACK_2(ScrollViewDemo::onTouchesEnded, this);
    _eventDispatcher->addEventListenerWithSceneGraphPriority(listener, this);
}

void ScrollViewDemo::onTouchesBegan(const std::vector<Touch*>& touches, Event  *event)
{
	Touch *touch = touches[0];
    auto clipper = this->getChildByTag(kTagClipperNode);
	Point point = clipper->convertToNodeSpace(Director::getInstance()->convertToGL(touch->getLocationInView()));
    auto rect = Rect(0, 0, clipper->getContentSize().width, clipper->getContentSize().height);
    _scrolling = rect.containsPoint(point);
    _lastPoint = point;
}

void ScrollViewDemo::onTouchesMoved(const std::vector<Touch*>& touches, Event  *event)
{
    if (!_scrolling) return;
	Touch *touch = touches[0];
    auto clipper = this->getChildByTag(kTagClipperNode);
    auto point = clipper->convertToNodeSpace(Director::getInstance()->convertToGL(touch->getLocationInView()));
	Point diff = point - _lastPoint;
    auto content = clipper->getChildByTag(kTagContentNode);
    content->setPosition(content->getPosition() + diff);
    _lastPoint = point;
}
注意drag时为什么要把精灵的移动放到onTouchesMoved里面,而没有放到onTouchesEnded里面,如果想一步到位就放到onTouchesEnded里
面,如果想时时动态就应该放到onTouchesMoved里面。
2、ShapeTest、ShapeInvertedTest、SpriteTest、SpriteNoAlphaTest、SpriteInvertedTest
请先阅读此文章: 点击打开链接
这6个例子相互对应,分别讲解了以形状(DrawNode)为stencil模板和以精灵为stencil模板产生出来的效果,代码神马的特别简单,读完上
面的链接就OK了,这里不贴出来。
2.1、先看以shape为模板的产生的效果
左边是没有设置setInverted(true);右边是设置setInverted(true),也主是显示底板与不显示底板:
2.2 以sprite为模板产生的效果
左边:模板精灵只设置了alpha的值,setAlphaThreshold(0.05f);
中间:模板精灵只设置了alpha的值,但是是设置为1,setAlphaThreshold(1);那就是相当于没有设置alpha一样,因为stencil只会处理alpha
比他小的,例子中之所以要这样写,是因为他的父类里面把alpha的值设置了0.05了,所以这里他设置回来。
右边:模板精灵既设置了alpha的值,setAlphaThreshold(0.05f);也设置了底板显示,setInverted(true);
3、NestedTest
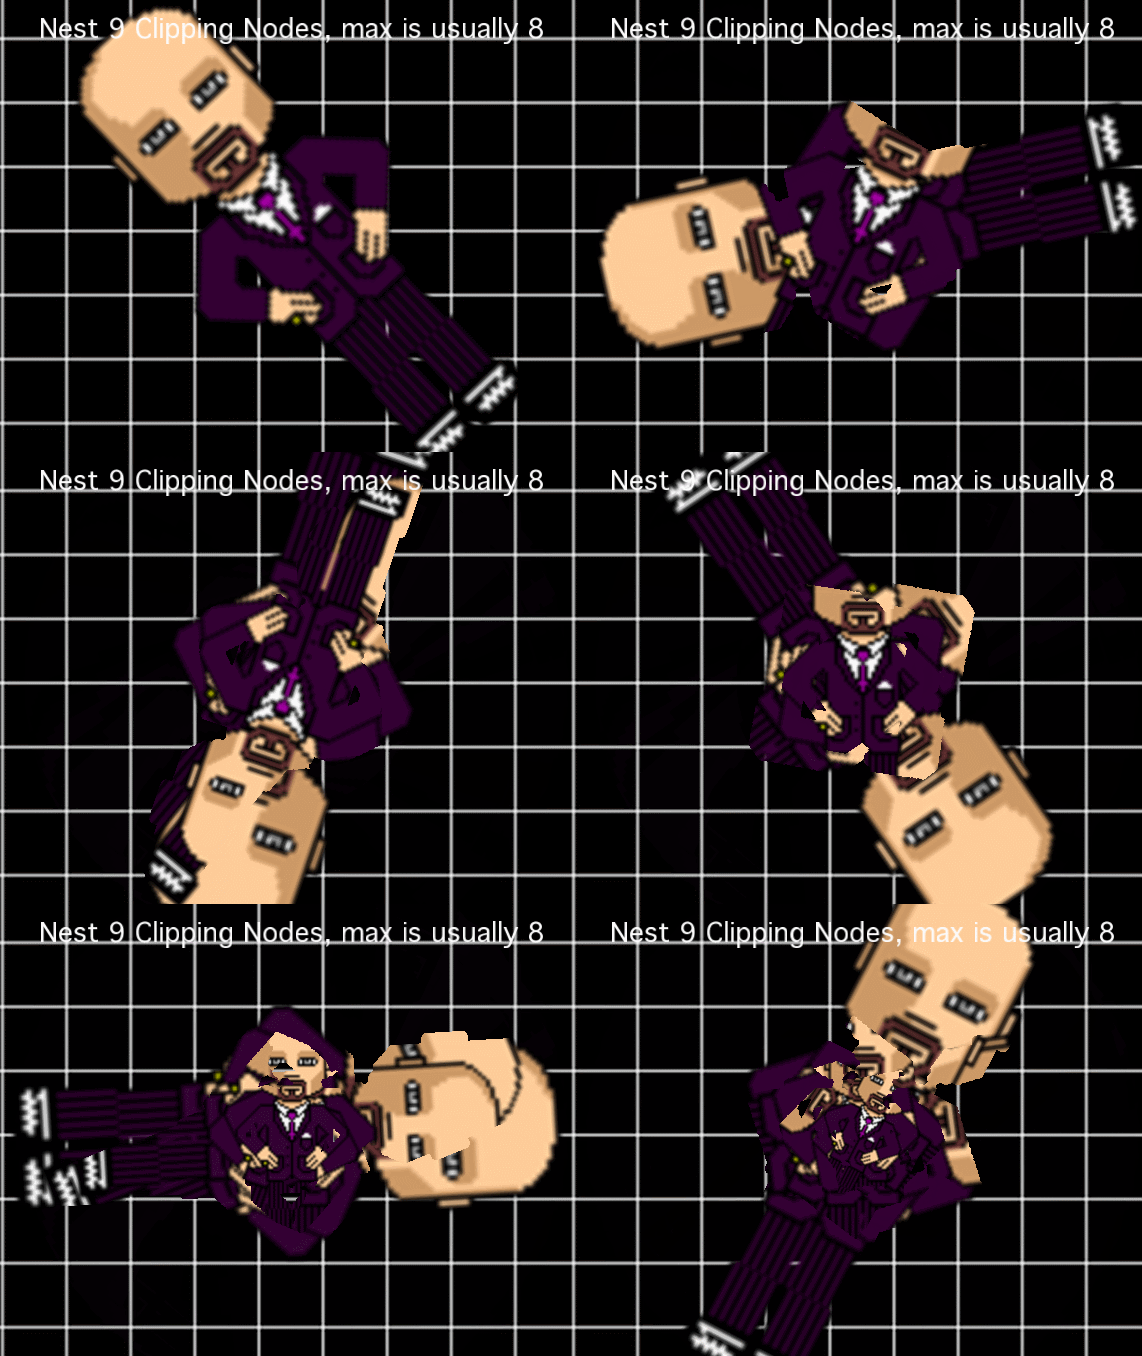
效果图:
猪角头上一行文字,已经指明这个例子的真正目的是为了告诉我们最多8个,第9个会失败的哦。
/**
功能:九个男猪脚进行重叠的模版遮罩的裁切。为什么是9?是为了说明
模版缓冲格式,告诉大家如果最多只有8位模版值,则第九个会失败的
**/

void NestedTest::setup()
{
    static int depth = 9;

    Node* parent = this;

    for (int i = 0; i < depth; i++) {

        int size = 225 - i * (225 / (depth * 2));

        auto clipper = ClippingNode::create();
        clipper->setContentSize(Size(size, size));
        clipper->setAnchorPoint(Point(0.5, 0.5));
        clipper->setPosition( Point(parent->getContentSize().width / 2, parent->getContentSize().height / 2) );
        clipper->setAlphaThreshold(0.05f);
        clipper->runAction(RepeatForever::create(RotateBy::create(i % 3 ? 1.33 : 1.66, i % 2 ? 90 : -90)));

        //这里和后面的 parent = clipper 构成了一个链式的关系,一层桥嵌套一层
        parent->addChild(clipper);

        auto stencil = Sprite::create(s_pathGrossini);
        stencil->setScale( 2.5 - (i * (2.5 / depth)) );
        stencil->setAnchorPoint( Point(0.5, 0.5) );
        stencil->setPosition( Point(clipper->getContentSize().width / 2, clipper->getContentSize().height / 2) );
        //最开始精灵"猪角"为隐藏的,随后才通过Show::create()显示出来
        stencil->setVisible(false);
        stencil->runAction(Sequence::createWithTwoActions(DelayTime::create(i), Show::create()));
        /**
          毁五观,我一直觉得stencil和content不能为同一个对象,这里彻底打醒了我,他们可以相同
          **/
        clipper->setStencil(stencil);

        clipper->addChild(stencil);

        //嵌套
        parent = clipper;
    }

}
看代码里面的注释!还算简单,但是让我开了眼了,还可以这样玩哦。。。。
上面的8个例子基本是基于ClippingNode来进行操作的。大家会疑问后面还有好几个例子像RawStencilBufferTest之类的,他们已经不属于ClippingNode的范围了。


 2万+
2万+

 被折叠的 条评论
为什么被折叠?


