


Manim文档及源码笔记-CE文档-示例库2动画
参考原文:
Manim Community Edition
Example Gallery
前言
笔记随想:
暂未发现官方中文版,自己实践代码的同时,顺便做翻译加深理解~
除了给出原文档中的展现效果及源码,我把实践代码过程的笔记也分享出来,另外最后设计出一些技能训练的内容,强化学校效果。行文格式:示例-标号及名称
展现效果
操作拆解
源码直击
代码实践
技能训练
本示例库包含一系列最佳实践代码片段及其相应的视频/图像输出,展示了整个库的不同功能。这些都是在麻省理工学院的许可下,所以请随意复制并粘贴到您的项目中。享受这Manim的味道!
更新【new】:
- 8月23日
-
- “笔记随想”前后标注了“前言”与“正文”;
-
- 本系列暂告段落,把“上一节”、“下一节”升级为系列目录,放到了文尾;
- 后续更新备忘:文中“【建设中】”的内容;欢迎朋友们催更~
正文
动画,Animations
示例1:PointMovingOnShapes
展现效果1
PointMovingOnShapes

操作拆解1
本节的主题是动画;
先从1、点画圆,2、点到圆上,3、圆上的动点开始,然后是4、点做圆弧轨迹(隐藏的圆);
本案例没有标注文字,旁边只默默放了一个直径长的线段~
- 画圆;画点和点2;画线段;
- 动画:
-
- 从中心生出;
-
- 点移动到点2;
-
- 沿轨迹移动;
-
- 旋转;
- 保持静止画面;
源码直击1
%%manim -v WARNING -qm PointMovingOnShapes
from manim import *

class PointMovingOnShapes(Scene):
    def construct(self):
        circle = Circle(radius=1, color=BLUE)
        dot = Dot()
        dot2 = dot.copy().shift(RIGHT)
        self.add(dot)

        line = Line([3, 0, 0], [5, 0, 0])
        self.add(line)

        self.play(GrowFromCenter(circle))
        self.play(Transform(dot, dot2))
        self.play(MoveAlongPath(dot, circle), run_time=2, rate_func=linear)
        self.play(Rotating(dot, about_point=[2, 0, 0]), run_time=1.5)
        self.wait()
参考:Circle,Dot,Line,GrowFromCenter
,Transform,MoveAlongPath,Rotating
代码实践1

技能训练1
单独整理到此【建设中】
示例2:MovingAround
展现效果2
MovingAround

操作拆解2
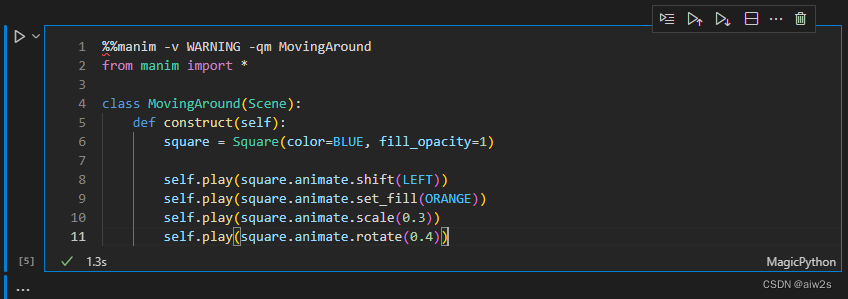
出现(忽然入镜感)正方形,移动、填充颜色(渐变淡入淡出)、缩小、“歪头”(旋转);
直接调用相应方法即可;
源码直击2
%%manim -v WARNING -qm MovingAround
from manim import *

class MovingAround(Scene):
    def construct(self):
        square = Square(color=BLUE, fill_opacity=1)

        self.play(square.animate.shift(LEFT))
        self.play(square.animate.set_fill(ORANGE))
        self.play(square.animate.scale(0.3))
        self.play(square.animate.rotate(0.4))
参考:shift(),set_fill(),scale(),rotate()
代码实践2
技能训练2
单独整理到此【建设中】
示例3:MovingAngle
展现效果3
MovingAngle

操作拆解3
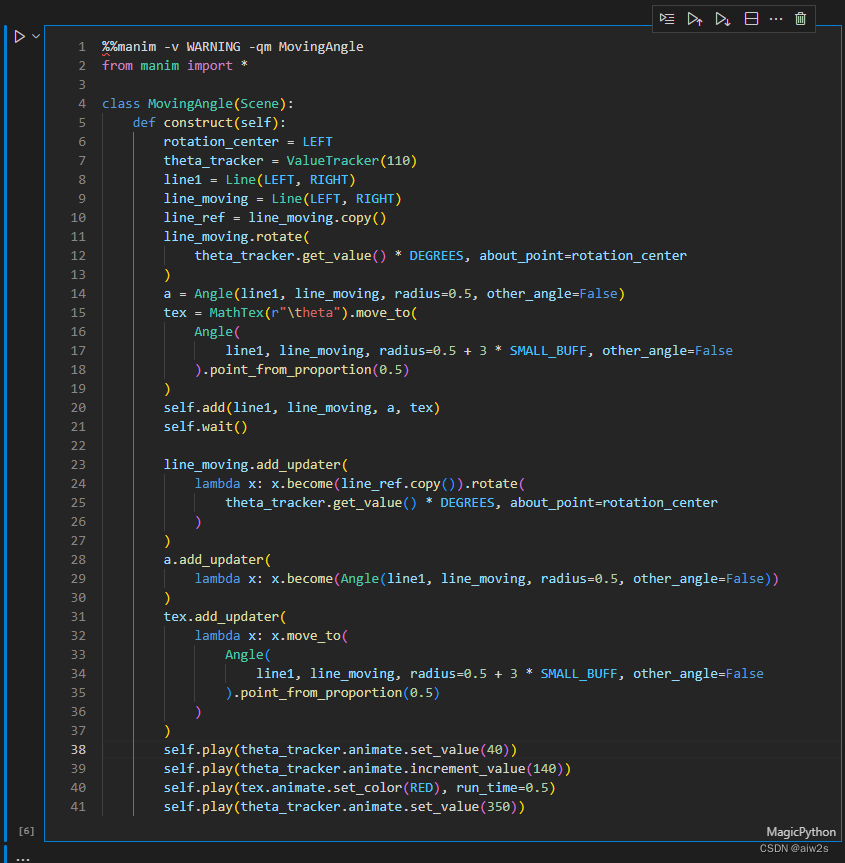
线条简单,但操作较多;
展示内容:钝角,锐角,平角,优角;
画线段;做标注;
移动方法的调用;
顺次播放;
细节:劣角变为优角后,停顿0.5秒、标注颜色由白变红;
源码直击3
%%manim -v WARNING -qm MovingAngle
from manim import *

class MovingAngle(Scene):
    def construct(self):
        rotation_center = LEFT

        theta_tracker = ValueTracker(110)
        line1 = Line(LEFT, RIGHT)
        line_moving = Line(LEFT, RIGHT)
        line_ref = line_moving.copy()
        line_moving.rotate(
            theta_tracker.get_value() * DEGREES, about_point=rotation_center
        )
        a = Angle(line1, line_moving, radius=0.5, other_angle=False)
        tex = MathTex(r"\theta").move_to(
            Angle(
                line1, line_moving, radius=0.5 + 3 * SMALL_BUFF, other_angle=False
            ).point_from_proportion(0.5)
        )

        self.add(line1, line_moving, a, tex)
        self.wait()

        line_moving.add_updater(
            lambda x: x.become(line_ref.copy()).rotate(
                theta_tracker.get_value() * DEGREES, about_point=rotation_center
            )
        )

        a.add_updater(
            lambda x: x.become(Angle(line1, line_moving, radius=0.5, other_angle=False))
        )
        tex.add_updater(
            lambda x: x.move_to(
                Angle(
                    line1, line_moving, radius=0.5 + 3 * SMALL_BUFF, other_angle=False
                ).point_from_proportion(0.5)
            )
        )

        self.play(theta_tracker.animate.set_value(40))
        self.play(theta_tracker.animate.increment_value(140))
        self.play(tex.animate.set_color(RED), run_time=0.5)
        self.play(theta_tracker.animate.set_value(350))
提示
您可以同时使用多个ValueTracker。
代码实践3
技能训练3
单独整理到此【建设中】
示例4:MovingDots
展现效果4
MovingDots

操作拆解4
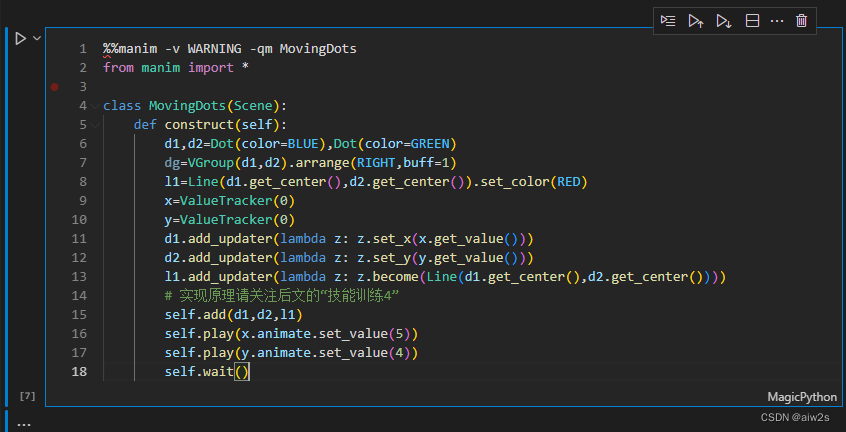
这次来做线段缩放、旋转(实际是第2点竖直上移);
加上箭头就可以做矢量动画了~
- 实现方法:
-
- 画2个点,蓝、绿各1,做线段;
-
- 比较巧妙的实现方法,实现原理请关注后文的“技能训练4”
-
- 播放动画的时候传入参数,便于拓展修改,或设为变量易于控制;
源码直击4
%%manim -v WARNING -qm MovingDots
from manim import *

class MovingDots(Scene):
    def construct(self):
        d1,d2=Dot(color=BLUE),Dot(color=GREEN)
        dg=VGroup(d1,d2).arrange(RIGHT,buff=1)
        l1=Line(d1.get_center(),d2.get_center()).set_color(RED)
        x=ValueTracker(0)
        y=ValueTracker(0)
        d1.add_updater(lambda z: z.set_x(x.get_value()))
        d2.add_updater(lambda z: z.set_y(y.get_value()))
        l1.add_updater(lambda z: z.become(Line(d1.get_center(),d2.get_center())))
        self.add(d1,d2,l1)
        self.play(x.animate.set_value(5))
        self.play(y.animate.set_value(4))
        self.wait()
参考:(无)
代码实践4
技能训练4
单独整理到此【建设中】
示例5:MovingGroupToDestination
展现效果5
MovingGroupToDestination

操作拆解5
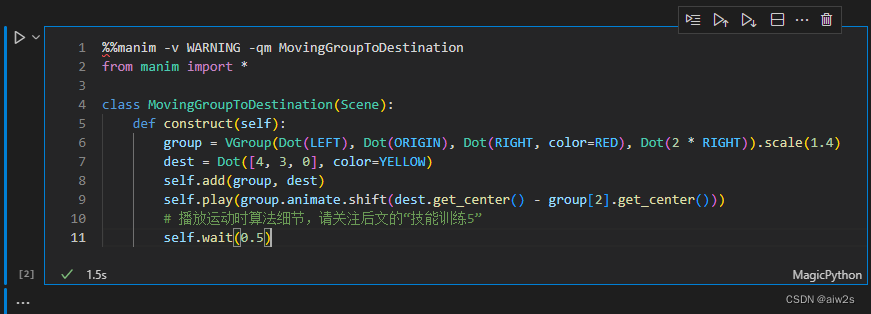
这次是多个物体(点)同步移动;
- 点之间间距不同,处理方法;
- 组成组的方法;
- 播放运动时算法细节,请关注后文的“技能训练5”
源码直击5
from manim import *

class MovingGroupToDestination(Scene):
    def construct(self):
        group = VGroup(Dot(LEFT), Dot(ORIGIN), Dot(RIGHT, color=RED), Dot(2 * RIGHT)).scale(1.4)
        dest = Dot([4, 3, 0], color=YELLOW)
        self.add(group, dest)
        self.play(group.animate.shift(dest.get_center() - group[2].get_center()))
        self.wait(0.5)
参考:(无)
代码实践5
技能训练5
单独整理到此【建设中】
示例6: MovingFrameBox
展现效果6
MovingFrameBox

操作拆解6
视频解说时,用框圈画出屏幕的对应位置,是常见而实用的方法之一。
- 所以这次公式淡出不是重点;
- 重点在圈框出现的姿势和位置;
-
- 全框出现类似用笔逆时针画出;
-
- 向右移动貌似有加速度的效果;
源码直击6
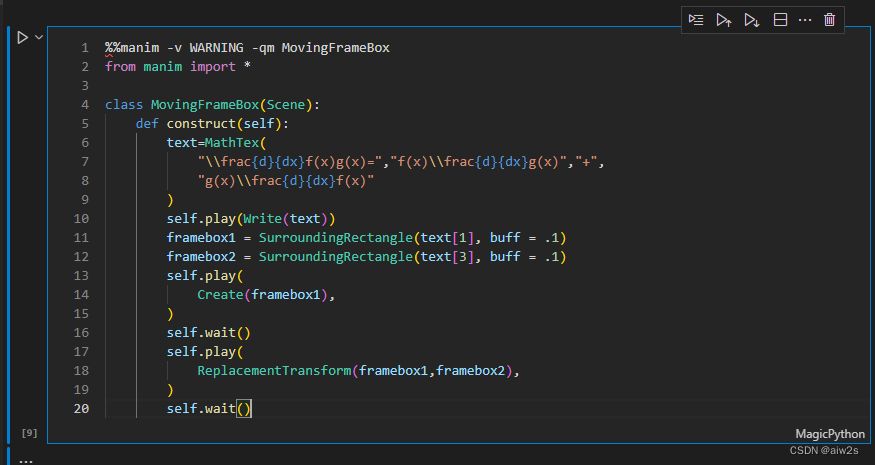
%%manim -v WARNING -qm MovingFrameBox
from manim import *

class MovingFrameBox(Scene):
    def construct(self):
        text=MathTex(
            "\\frac{d}{dx}f(x)g(x)=","f(x)\\frac{d}{dx}g(x)","+",
            "g(x)\\frac{d}{dx}f(x)"
        )
        self.play(Write(text))
        framebox1 = SurroundingRectangle(text[1], buff = .1)
        framebox2 = SurroundingRectangle(text[3], buff = .1)
        self.play(
            Create(framebox1),
        )
        self.wait()
        self.play(
            ReplacementTransform(framebox1,framebox2),
        )
        self.wait()
参考:tex_mobject,MathTex,SurroundingRectangle
代码实践6
技能训练6
单独整理到此【建设中】
示例7:RotationUpdater
展现效果7
RotationUpdater

操作拆解7
类似示例3,这次用了不同的方法实现;
同样,先实践代码,算法原理在后文“技能训练7”里一并汇总~
源码直击7
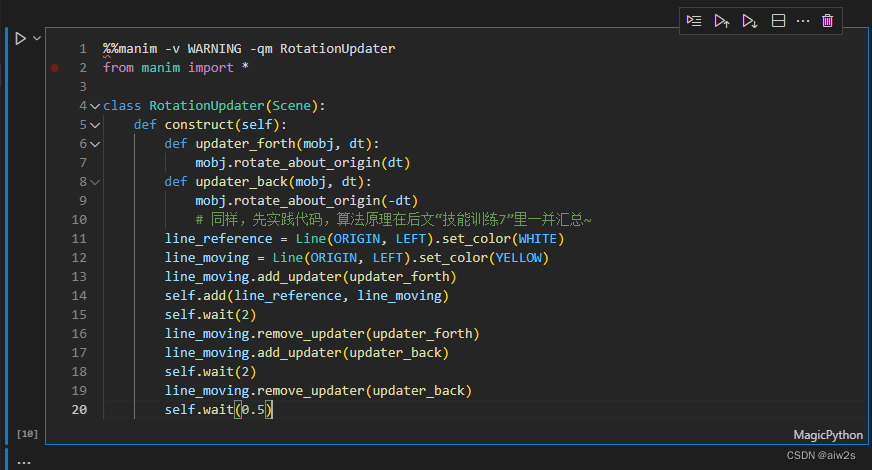
%%manim -v WARNING -qm RotationUpdater
from manim import *

class RotationUpdater(Scene):
    def construct(self):
        def updater_forth(mobj, dt):
            mobj.rotate_about_origin(dt)
        def updater_back(mobj, dt):
            mobj.rotate_about_origin(-dt)
        line_reference = Line(ORIGIN, LEFT).set_color(WHITE)
        line_moving = Line(ORIGIN, LEFT).set_color(YELLOW)
        line_moving.add_updater(updater_forth)
        self.add(line_reference, line_moving)
        self.wait(2)
        line_moving.remove_updater(updater_forth)
        line_moving.add_updater(updater_back)
        self.wait(2)
        line_moving.remove_updater(updater_back)
        self.wait(0.5)
参考:add_updater(),remove_updater()
代码实践7
技能训练7
单独整理到此【建设中】
示例8:PointWithTrace
展现效果8
PointWithTrace

操作拆解8
最后一个案例,模拟绘画类似作用痕迹的效果。
- 落笔,画半圆;
- 停顿,画线段;
联想到汉字笔顺,以后会作为拓展,先立旗~
源码直击8
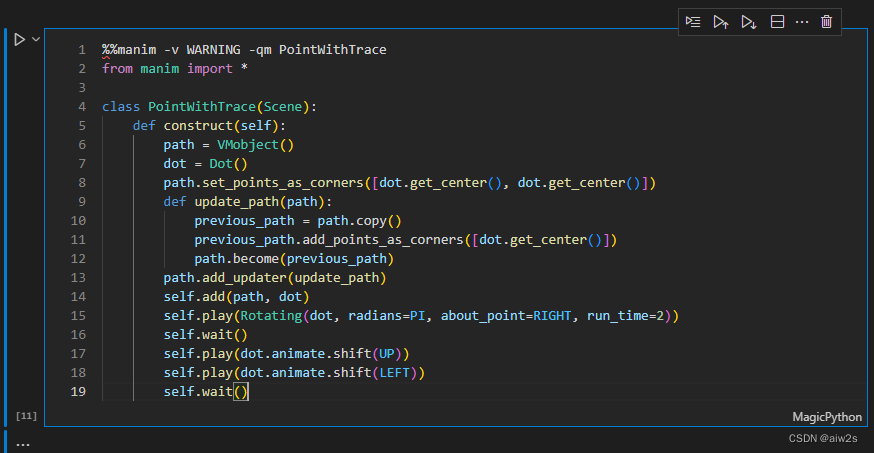
%%manim -v WARNING -qm PointWithTrace
from manim import *

class PointWithTrace(Scene):
    def construct(self):
        path = VMobject()
        dot = Dot()
        path.set_points_as_corners([dot.get_center(), dot.get_center()])
        def update_path(path):
            previous_path = path.copy()
            previous_path.add_points_as_corners([dot.get_center()])
            path.become(previous_path)
        path.add_updater(update_path)
        self.add(path, dot)
        self.play(Rotating(dot, radians=PI, about_point=RIGHT, run_time=2))
        self.wait()
        self.play(dot.animate.shift(UP))
        self.play(dot.animate.shift(LEFT))
        self.wait()
参考:Rotating,set_points_as_corners(),add_updater()
代码实践8
技能训练8
单独整理到此【建设中】
本系列目录【new】
Manim文档及源码笔记-CE文档-示例库1基本概念
Manim文档及源码笔记-CE文档-示例库2动画【本文】
Manim文档及源码笔记-CE文档-示例库3使用Manim绘图
Manim文档及源码笔记-CE文档-示例库4特殊摄像机设置
Manim文档及源码笔记-CE文档-示例库5进阶项目


 999
999

 被折叠的 条评论
为什么被折叠?
被折叠的 条评论
为什么被折叠?
 到【灌水乐园】发言


