


一、前言
本文主要使用opencv 的Python接口cv2,原理较为简单,单张先通过二值化找轮廓的方式找到轮廓的四个点,然后对点做排序,之后再计算轮廓的外接矩形的4个点,由这2组点做 warpPerspective 透射变换得到矫正的条码,最后使用zbar库做识别。
二、代码
import os,cv2,time
import numpy as np
import math
from math import *
from scipy import misc, ndimage
import matplotlib.pyplot as plt
import xml.etree.ElementTree as ET
def getBoxFromCnt(cnt):
x_coord = cnt[:, :, 0]
y_coord = cnt[:, :, 1]
xmin = int(np.min(x_coord))
xmax = int(np.max(x_coord))
ymin = int(np.min(y_coord))
ymax = int(np.max(y_coord))
return xmin,xmax,ymin,ymax
def getCnt(bar_img):
gray_roi = cv2.cvtColor(bar_img , cv2.COLOR_BGR2GRAY)
blurimg = cv2.GaussianBlur(gray_roi, (9, 9), 0) #这个数据有点固定死,条件要求高
ret, th = cv2.threshold(blurimg, 0, 255, cv2.THRESH_BINARY + cv2.THRESH_OTSU)
kernel = np.ones((9,9),np.uint8)
th_roi = cv2.dilate(th,kernel,iterations =1)
Cannyimg = cv2.Canny(th_roi, 35, 189) #这个数据有点固定死
#显示边沿线条的位置
lines = cv2.HoughLinesP(Cannyimg, 1, np.pi / 180, threshold=10, minLineLength=20, maxLineGap=10)
lines = np.squeeze(lines)
cnts = cv2.findContours(Cannyimg.copy(), cv2.RETR_EXTERNAL, cv2.CHAIN_APPROX_SIMPLE)
cnts = cnts[0]
pts,bar = [], []
"""
cv2.namedWindow("th_roi" ,2)
cv2.imshow("th_roi" , th_roi )
cv2.waitKey()
cv2.destroyAllWindows() """
max_area = 0
if len(cnts) > 0:
for cnt in cnts:
xmin,xmax,ymin,ymax = getBoxFromCnt(cnt)
area = (xmax-xmin)*(ymax-ymin)
if area > max_area:
max_area = area
max_cnt = cnt
rect = cv2.minAreaRect(max_cnt)
box = cv2.boxPoints(rect)
box = np.int0(box) # 获得矩形角点
area = cv2.contourArea(box)
width = rect[1][0]
height = rect[1][1]
"""
img2 = bar_img.copy()
cv2.polylines(img2, [box], True, (0, 255, 0), 3)
cv2.namedWindow("img2" ,2)
cv2.imshow("img2" , img2 )
cv2.waitKey( )
cv2.destroyAllWindows() """
#cv2.circle(bar_img,(pts[0][0],pts[0][1]),10,(255 ,0,0))
if len(box) != 0:
pts = box
minx = np.min(pts[:,0])
maxx = np.max(pts[:,0])
miny = np.min(pts[:,1])
maxy = np.max(pts[:,1])
bar = [minx,miny,maxx,maxy]
return pts,bar #失败则返回[]
def sortByX(elem):
return int(elem[0])
def sortByY(elem):
return int(elem[1])
def orderPts(pts_np):
dst_pts = []
pts_1 = []
pts_list = pts_np.tolist()
pt_0 = pts_list.pop()
pts_1.append(pt_0)
least_dist = 10e8
least_idx = 0
for idx, pt in enumerate(pts_list):
dist = np.sqrt( ((pt_0[0]-pt[0])**2) +( (pt_0[1]-pt[1])**2) )
if dist<least_dist:
least_idx = idx
least_dist = dist
pts_1.append(pts_list.pop(least_idx))
pts_1.sort(key=sortByX,reverse=False)
pts_list.sort(key=sortByX,reverse=False)
if pts_1[0][0] < pts_list[0][0]:
pts_1.sort(key=sortByY,reverse=False)
pts_list.sort(key=sortByY,reverse=False)
dst_pts = [pts_1[0], pts_list[0],pts_list[1] ,pts_1[1] ]
else:
pts_1.sort(key=sortByY,reverse=False)
pts_list.sort(key=sortByY,reverse=False)
dst_pts = [ pts_list[0], pts_1[0],pts_1[1] ,pts_list[1] ]
degree = np.arctan(((dst_pts[1][1]-dst_pts[0][1] ) /(dst_pts[1][0]-dst_pts[0][0] +1e-7)))*180/np.pi #原来只是180度
return np.array( dst_pts, dtype = "float32" )
def four_point_transform(image, pts):
# obtain a consistent order of the points and unpack them
# individually
(tl, tr, br, bl) = pts
# compute the width of the new image, which will be the
# maximum distance between bottom-right and bottom-left
# x-coordiates or the top-right and top-left x-coordinates
widthA = np.sqrt(((br[0] - bl[0]) ** 2) + ((br[1] - bl[1]) ** 2))
widthB = np.sqrt(((tr[0] - tl[0]) ** 2) + ((tr[1] - tl[1]) ** 2))
maxWidth = max(int(widthA), int(widthB))
# compute the height of the new image, which will be the
# maximum distance between the top-right and bottom-right
# y-coordinates or the top-left and bottom-left y-coordinates
heightA = np.sqrt(((tr[0] - br[0]) ** 2) + ((tr[1] - br[1]) ** 2))
heightB = np.sqrt(((tl[0] - bl[0]) ** 2) + ((tl[1] - bl[1]) ** 2))
maxHeight = max(int(heightA), int(heightB))
# now that we have the dimensions of the new image, construct
# the set of destination points to obtain a "birds eye view",
# (i.e. top-down view) of the image, again specifying points
# in the top-left, top-right, bottom-right, and bottom-left
# order
dst = np.array([
[0, 0],
[maxWidth - 1, 0],
[maxWidth - 1, maxHeight - 1],
[0, maxHeight - 1]], dtype = "float32")
# compute the perspective transform matrix and then apply it
M = cv2.getPerspectiveTransform(pts, dst)
warped = cv2.warpPerspective(image, M, (maxWidth, maxHeight))
# return the warped image
return warped
def recogBarcode(barcode_img):
#调用cmd命令,获取cmd的输出
bar_save_path = "temp.png"
cv2.imwrite(bar_save_path,barcode_img )
try:
d = os.popen("D:\\zbar\\bin\\zbarimg.exe -q "+bar_save_path)#这里要根据自己的zbar调用路径做修改
bar_info = d.readlines()[0]
bar_info = bar_info.strip('\n').split(":")[1] #读取命令行的输出
except:
bar_info = ""
return bar_info
def recogBar( img ):
pts,bar = getCnt(img)
if len(pts) == 0:
return ""
str_bar =""
try:
pst_order = orderPts(pts) #对4个点顺序排好序
res_img = four_point_transform( img , pst_order ) # 4点变换
str_bar = recogBarcode(res_img)
except:
return ""
return str_bar
if __name__=="__main__":
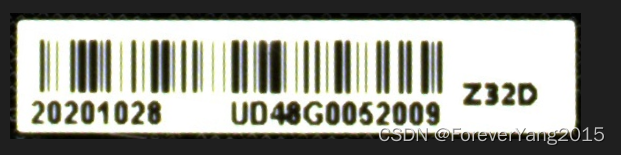
img = cv2.imread("imgs/41.png")
str_bar = recogBar( img )
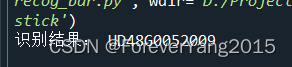
print( "识别结果:" , str_bar )
三、运行结果
代码将对一张倾斜了的条形码的输入图像,成功识别,将打印输出条码的内容,以及在代码根目录下生成矫正了的条码图像


 680
680


 被折叠的 条评论
为什么被折叠?
被折叠的 条评论
为什么被折叠?
 到【灌水乐园】发言


