


介绍
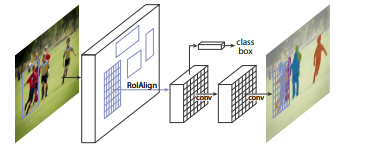
Mask-RCNN作为实例分割算法,在Faster RCNN网络框架的基础上进行了扩展,增加一个用于实例分割的掩码分支.
数据集准备
1、labelme 标注数据
labelme 的安装方法可以参考前面的博客: 数据标注工具 labelme 开始标注自己的数据集,如下:
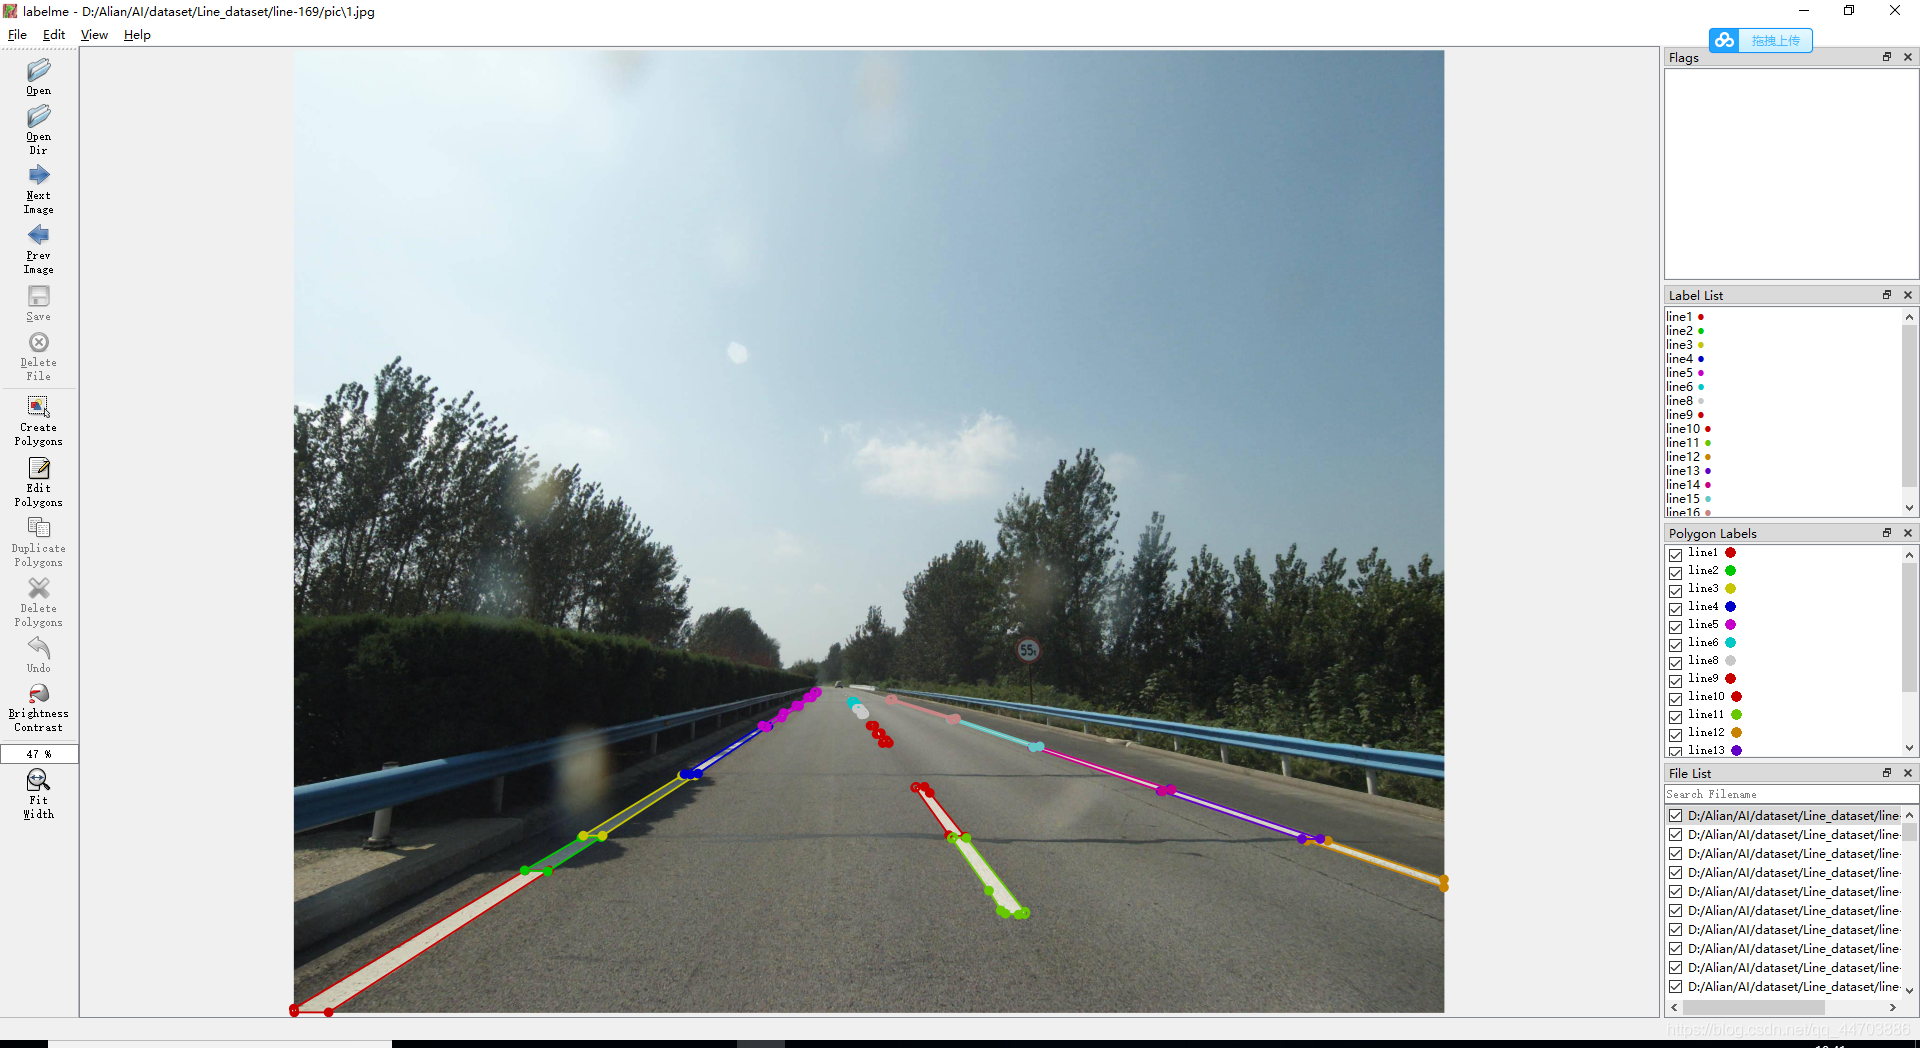
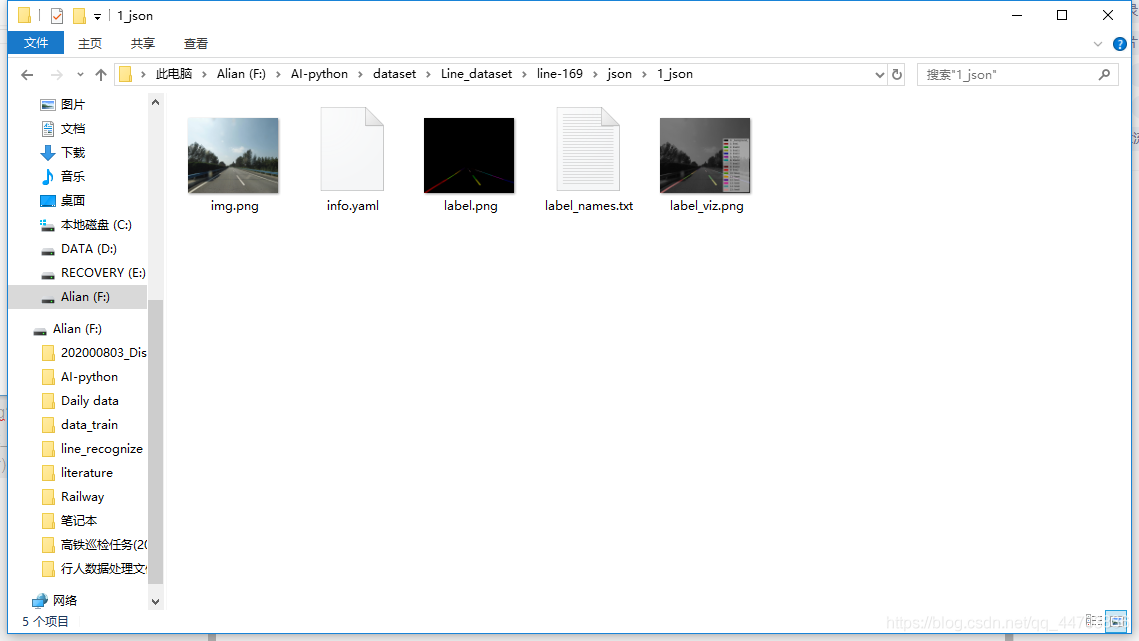
标注完成后生成如下的文件:
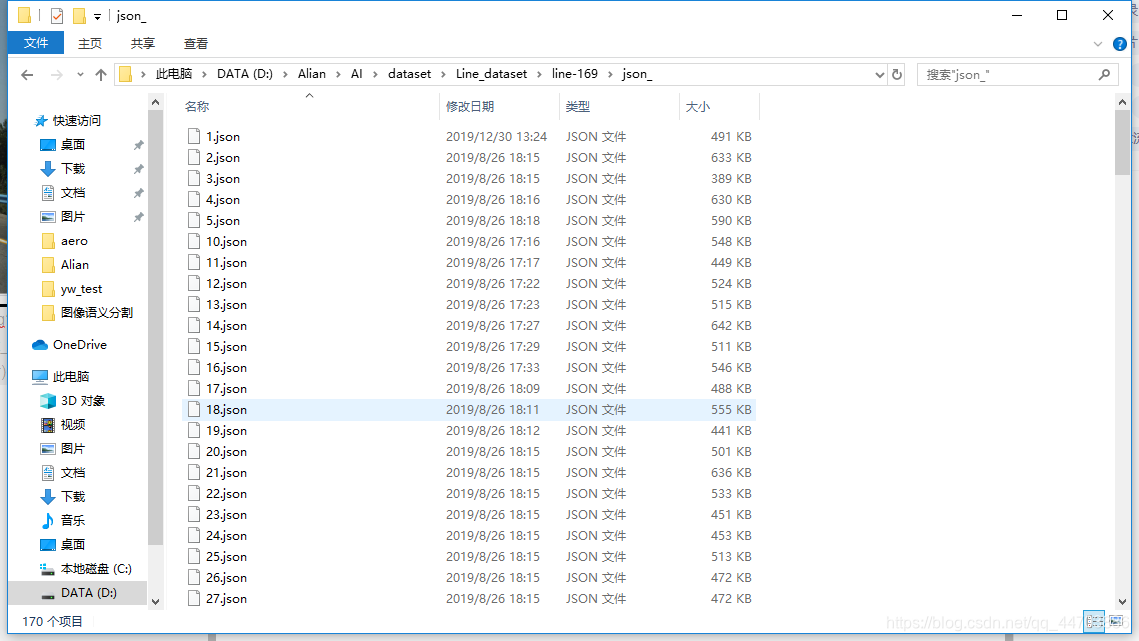
2、json文件转化数据集
下载转换工具如下
链接: https://pan.baidu.com/s/1ma-xWhadRQH4Zbuce41HkQ 提取码:r8bc
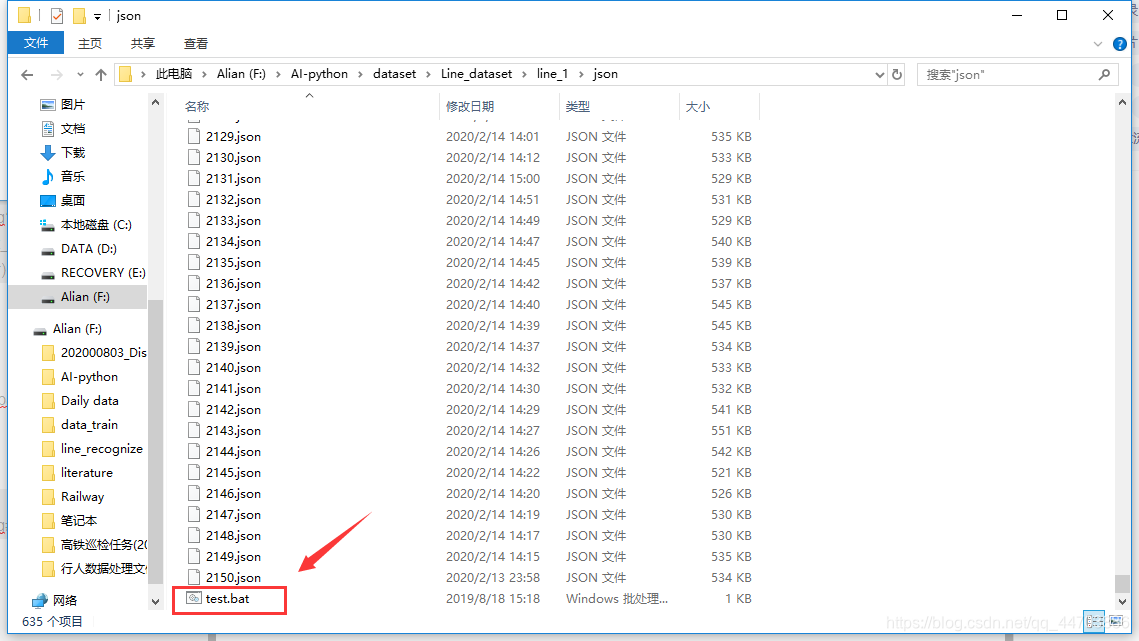
将该文件放在.json文件所在的目录下:
终端进入该目录:
激活labelme环境:( 数据标注工具 labelme中有详细说明。重要!重要!重要!)
conda activate labelme输入转换指令:
start "" "test.bat"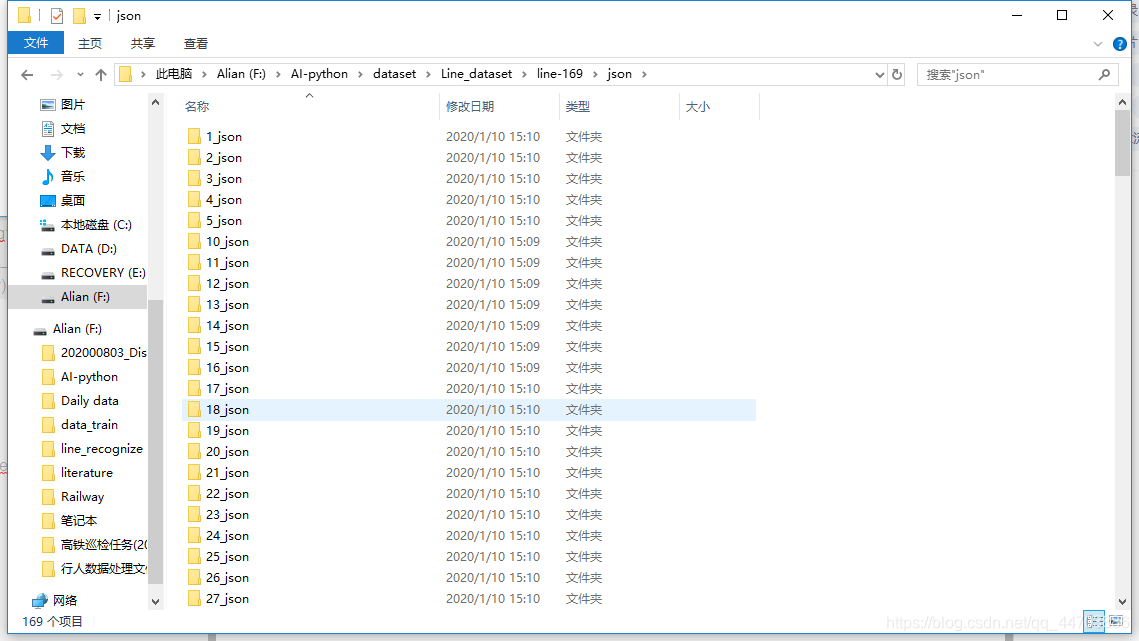
每个文件夹里面有五个文件,这些是后续训练需要读取的文件。
上述就把数据集准备好了
环境配置(基于Anaconda)
1、安装Anaconda
官网链接 Windows:直接双击.exe文件安装;
Ubuntu:打开终端,进入文件夹,输入
bash Anaconda3-5.1.0-Linux-x86_64.sh![]()
2、创建Mask-RCNN虚拟环境
conda create -n mask python=3.6
conda activate mask  # windows 激活环境
source activate mask  # ubuntu 激活环境
3、在虚拟环境中安装cuda+cudnn+tensorflow-gpu
# 三者的版本一定要匹配好,这里用conda下载可以更好的匹配版本。
conda install cudatoolkit=9.0
conda install cudnn=7.1.2
conda install tensorflow-gpu=1.6.0  # 版本不宜太高
conda install tensorflow-base=1.6.0
3、下载Mask-RCNN源码文件
Mask RCNN开源链接:https://github.com/matterport/Mask_RCNN
4、安装依赖项
pip install keras==2.1.6 # keras的版本不宜太高其他直接根据开源文件中的reguirements.txt下载需要的依赖项
pip install -r reguirements.txt5、编译Mask-RCNN
进入源码文件夹(即setup.py所在的目录)
python setup.py install6、下载预训练的coco.h5文件
7、下载pycocotools库,安装+编译
git clone https://github.com/cocodataset/cocoapi.git进入源码文件夹中的PythonAPI目录,执行如下命令
git clone https://github.com/cocodataset/cocoapi.git
cd cocoapi/PythonAPI
make
make install
python setup.py install
cp -r ./cocoapi/PythonAPI/pycocotools ./Mask_RCNN-master/  # 复制pycocotools到Mask_RCNN-master
验证是否安装成功
ipython
from pycocotools.coco import COCO
from pycocotools import mask
exit()
运行过程无任何错误则安装无误
训练
在Mask-RCNN-master目录下新建train_line.py
代码如下:
# -*- coding: utf-8 -*-
# 用于训练权重
"""
2020.09.25:alian
标志标线检测模型训练,类别:边线、路面标志
"""
import os
import sys
import random
import math
import re
import time
import numpy as np
import cv2
import matplotlib
import matplotlib.pyplot as plt
import tensorflow as tf
from mrcnn.config import Config
# import utils
# from mrcnn import utils
from mrcnn import model as modellib, utils  # 等价于from mrcnn import utils
from mrcnn import visualize
import yaml
from mrcnn.model import log
from PIL import Image

# os.environ['TF_CPP_MIN_LOG_LEVEL'] = '2'
os.environ["CUDA_VISIBLE_DEVICES"] = '0'   #指定第一块GPU可用
# config = tf.ConfigProto()
# config.gpu_options.per_process_gpu_memory_fraction = 0.5  # 程序最多只能占用指定gpu50%的显存
# config.gpu_options.allow_growth = True      #程序按需申请内存
# sess = tf.Session(config = config)

# 获得当前工作目录
ROOT_DIR = os.getcwd()

# ROOT_DIR = os.path.abspath("../") 获得绝对路径
# 保存logs和训练模型的文件
MODEL_DIR = os.path.join(ROOT_DIR, "logs")  #新建logs文件夹

iter_num = 0

# 权重文件路径
COCO_MODEL_PATH = os.path.join(ROOT_DIR, "mask_rcnn_coco.h5")  # 预训练权重文件
# 下载COCO预训练模型
if not os.path.exists(COCO_MODEL_PATH):
    utils.download_trained_weights(COCO_MODEL_PATH)


class ShapesConfig(Config):
    """Configuration for training on the toy shapes dataset.
    Derives from the base Config class and overrides values specific
    to the toy shapes dataset.
    """
    # 为配置制定一个可识别的名字
    NAME = "line"

    # 每个GPU训练的图片数,TBatch size=GPUs * images/GPU)如果gpu允许的话可以设置大些
    GPU_COUNT = 1
    IMAGES_PER_GPU = 1

    # 类别数量包括背景
    NUM_CLASSES = 1 + 1

    # 定义图像大小
    # 至少被2的6次方整除512,832
    IMAGE_MIN_DIM = 800
    IMAGE_MAX_DIM = 1024

    # 锚框
    RPN_ANCHOR_SCALES = (32, 64, 128, 256, 512)  # anchor side in pixels
    RPN_ANCHOR_RATIOS = [0.5, 1, 2]
    # 每个图像的ROI数量
    TRAIN_ROIS_PER_IMAGE = 200

    # epoch:每个时期的训练步数,不需要与训练集一致,每个人时期(epoch)未保存的Tensorboard以及计算验证统计信息
    STEPS_PER_EPOCH = 24

    # 每个训练时期结束时运行的验证数,较大的数字可以提高验证统计数据的准确性,但会降低训练速度
    VALIDATION_STEPS = 16


config = ShapesConfig()
config.display()

# 训练集
class DrugDataset(utils.Dataset):
    # 得到该图中有多少个实例(物体)
    def get_obj_index(self, image):
        n = np.max(image)
        return n

    # 解析labelme中得到的yaml文件,从而得到mask每一层对应的实例标签
    def from_yaml_get_class(self, image_id):
        info = self.image_info[image_id]
        with open(info['yaml_path']) as f:
            temp = yaml.load(f.read(),Loader=yaml.FullLoader)
            labels = temp['label_names']
            del labels[0]
        return labels

    # 重新写draw_mask
    def draw_mask(self, num_obj, mask, image, image_id):
        info = self.image_info[image_id]
        for index in range(num_obj):
            for i in range(info['width']):
                for j in range(info['height']):
                    # print("image_id-->",image_id,"-i--->",i,"-j--->",j)
                    # print("info[width]----->",info['width'],"-info[height]--->",info['height'])
                    at_pixel = image.getpixel((i, j))
                    if at_pixel == index + 1:
                        mask[j, i, index] = 1
        return mask

    # 重新写load_shapes,里面包含自己的类别,可以任意添加
    # 并在self.image_info信息中添加了path、mask_path 、yaml_path
    # yaml_pathdataset_root_path = "/tongue_dateset/"
    # img_floder = dataset_root_path + "rgb"
    # mask_floder = dataset_root_path + "mask"
    # dataset_root_path = "/tongue_dateset/"
    def load_shapes(self, count, img_floder, mask_floder, imglist, dataset_root_path):
        """Generate the requested number of synthetic images.
        count: number of images to generate.
        height, width: the size of the generated images.
        """
        # Add classes,可通过这种方式扩展多个物体
        self.add_class("shapes", 1, "line")  # 标线
        # self.add_class("shapes", 2, "sign") # 路面标志
        # self.add_class("shapes", 3, "Cement Barriers")
        for i in range(train):
            # 获取图片宽和高

            filestr = imglist[i].split(".")[0]
            # filestr = filestr.split("_")[1]
            mask_path = mask_floder + filestr + "_json/"+ "label.png"
            yaml_path = mask_floder + filestr + "_json/info.yaml"
            cv_img = cv2.imread( mask_floder + filestr + "_json/img.png")
            print(img_floder + "/" + imglist[i])

            self.add_image("shapes", image_id=i, path=img_floder + "/" + imglist[i],
                           width=cv_img.shape[1], height=cv_img.shape[0], mask_path=mask_path, yaml_path=yaml_path)

    # 重写load_mask
    def load_mask(self, image_id):
        """Generate instance masks for shapes of the given image ID.
        """
        global iter_num
        print("image_id", image_id)
        info = self.image_info[image_id]
        count = 1  # number of object
        img = Image.open(info['mask_path'])
        num_obj = self.get_obj_index(img)
        mask = np.zeros([info['height'], info['width'], num_obj], dtype=np.uint8)
        mask = self.draw_mask(num_obj, mask, img, image_id)
        occlusion = np.logical_not(mask[:, :, -1]).astype(np.uint8)
        for i in range(count - 2, -1, -1):
            mask[:, :, i] = mask[:, :, i] * occlusion

            occlusion = np.logical_and(occlusion, np.logical_not(mask[:, :, i]))

        labels = self.from_yaml_get_class(image_id)
        labels_form = []
        for i in range(len(labels)):
            if labels[i].find("line") != -1:
                labels_form.append("line")
            # elif labels[i].find("sign")!=-1:
            #     labels_form.append("sign")
            # elif labels[i].find("Cement Barriers")!=-1:
            #     labels_form.append("Cement Barriers")
        class_ids = np.array([self.class_names.index(s) for s in labels_form])
        return mask, class_ids.astype(np.int32)

# 验证集
class DrugDataset_val(utils.Dataset):
    # 得到该图中有多少个实例(物体)
    def get_obj_index(self, image):
        n = np.max(image)
        return n

    # 解析labelme中得到的yaml文件,从而得到mask每一层对应的实例标签
    def from_yaml_get_class(self, image_id):
        info = self.image_info[image_id]
        with open(info['yaml_path']) as f:
            temp = yaml.load(f.read(), Loader=yaml.FullLoader)
            labels = temp['label_names']
            del labels[0]
        return labels

    # 重新写draw_mask
    def draw_mask(self, num_obj, mask, image, image_id):
        info = self.image_info[image_id]
        for index in range(num_obj):
            for i in range(info['width']):
                for j in range(info['height']):
                    at_pixel = image.getpixel((i, j))
                    if at_pixel == index + 1:
                        mask[j, i, index] = 1
        return mask

    # 重新写load_shapes,里面包含自己的自己的类别
    # 并在self.image_info信息中添加了path、mask_path 、yaml_path
    # yaml_pathdataset_root_path = "/tongue_dateset/"
    # img_floder = dataset_root_path + "rgb"
    # mask_floder = dataset_root_path + "mask"
    # dataset_root_path = "/tongue_dateset/"
    def load_shapes(self, count, img_floder, mask_floder, imglist, dataset_root_path):
        """Generate the requested number of synthetic images.
        count: number of images to generate.
        height, width: the size of the generated images.
        """
        # Add classes
        self.add_class("shapes", 1, "line")  # 标线
        # self.add_class("shapes", 2, "sign")  # 路面标志
        # self.add_class("shapes", 3, "Cement Barriers")
        for i in range(val):
            i += train
            print(i)
            # 获取图片宽和高
            filestr = imglist[i].split(".")[0]
            # filestr = filestr.split("_")[1]
            mask_path = mask_floder + filestr + "_json/" + "label.png"
            yaml_path = mask_floder + filestr + "_json/info.yaml"
            cv_img = cv2.imread(mask_floder + filestr + "_json/img.png")
            print(img_floder + "/" + imglist[i])
            self.add_image("shapes", image_id=i, path=img_floder + "/" + imglist[i],
                           width=cv_img.shape[1], height=cv_img.shape[0], mask_path=mask_path, yaml_path=yaml_path)

    def load_mask(self, image_id):
        """Generate instance masks for shapes of the given image ID.
        """
        global iter_num
        info = self.image_info[image_id]
        count = 1  # number of object
        img = Image.open(info['mask_path'])
        num_obj = self.get_obj_index(img)
        mask = np.zeros([info['height'], info['width'], num_obj], dtype=np.uint8)
        mask = self.draw_mask(num_obj, mask, img, image_id)
        occlusion = np.logical_not(mask[:, :, -1]).astype(np.uint8)
        for i in range(count - 2, -1, -1):
            mask[:, :, i] = mask[:, :, i] * occlusion

            occlusion = np.logical_and(occlusion, np.logical_not(mask[:, :, i]))
        labels = self.from_yaml_get_class(image_id)
        labels_form = []
        for i in range(len(labels)):
            if labels[i].find("line") != -1:
                labels_form.append("line")
            # elif labels[i].find("sign") != -1:
            #     labels_form.append("sign")
            #
            # elif labels[i].find("Cement Barriers") != -1:
            #
            #     labels_form.append("Cement Barriers")

        class_ids = np.array([self.class_names.index(s) for s in labels_form])
        return mask, class_ids.astype(np.int32)
# 测试集
class DrugDataset_test(utils.Dataset):
    # 得到该图中有多少个实例(物体)
    def get_obj_index(self, image):
        n = np.max(image)
        return n

    # 解析labelme中得到的yaml文件,从而得到mask每一层对应的实例标签
    def from_yaml_get_class(self, image_id):
        info = self.image_info[image_id]
        with open(info['yaml_path']) as f:
            temp = yaml.load(f.read(), Loader=yaml.FullLoader)
            labels = temp['label_names']
            del labels[0]
        return labels

    # 重新写draw_mask
    def draw_mask(self, num_obj, mask, image, image_id):
        info = self.image_info[image_id]
        for index in range(num_obj):
            for i in range(info['width']):
                for j in range(info['height']):
                    at_pixel = image.getpixel((i, j))
                    if at_pixel == index + 1:
                        mask[j, i, index] = 1
        return mask

    # 重新写load_shapes,里面包含自己的自己的类别
    # 并在self.image_info信息中添加了path、mask_path 、yaml_path
    # yaml_pathdataset_root_path = "/tongue_dateset/"
    # img_floder = dataset_root_path + "rgb"
    # mask_floder = dataset_root_path + "mask"
    # dataset_root_path = "/tongue_dateset/"
    def load_shapes(self, count, img_floder, mask_floder, imglist, dataset_root_path):
        """Generate the requested number of synthetic images.
        count: number of images to generate.
        height, width: the size of the generated images.
        """
        # Add classes
        self.add_class("shapes", 1, "line")  # 标线
        # self.add_class("shapes", 2, "sign")  # 路面标志
        # self.add_class("shapes", 3, "Cement Barriers")
        for i in range(test):
            i += (train + val)
            print(i)
            # 获取图片宽和高
            filestr = imglist[i].split(".")[0]
            # filestr = filestr.split("_")[1]
            mask_path = mask_floder + filestr + "_json/" + "label.png"
            yaml_path = mask_floder + filestr + "_json/info.yaml"
            cv_img = cv2.imread(mask_floder + filestr + "_json/img.png")
            print(img_floder + "/" + imglist[i])
            self.add_image("shapes", image_id=i, path=img_floder + "/" + imglist[i],
                           width=cv_img.shape[1], height=cv_img.shape[0], mask_path=mask_path, yaml_path=yaml_path)

    def load_mask(self, image_id):
        """Generate instance masks for shapes of the given image ID.
        """
        global iter_num
        info = self.image_info[image_id]
        count = 1  # number of object
        img = Image.open(info['mask_path'])
        num_obj = self.get_obj_index(img)
        mask = np.zeros([info['height'], info['width'], num_obj], dtype=np.uint8)
        mask = self.draw_mask(num_obj, mask, img, image_id)
        occlusion = np.logical_not(mask[:, :, -1]).astype(np.uint8)
        for i in range(count - 2, -1, -1):
            mask[:, :, i] = mask[:, :, i] * occlusion

            occlusion = np.logical_and(occlusion, np.logical_not(mask[:, :, i]))
        labels = self.from_yaml_get_class(image_id)
        labels_form = []  # class_id 必须与class_names对应
        for i in range(len(labels)):
            if labels[i].find("line") != -1:
                labels_form.append("line")
            # elif labels[i].find("sign") != -1:
            #     labels_form.append("sign")
            # elif labels[i].find("Cement Barriers") != -1:
            #     labels_form.append("Cement Barriers")

        class_ids = np.array([self.class_names.index(s) for s in labels_form])

        return mask, class_ids.astype(np.int32)


def get_ax(rows=1, cols=1, size=8):
    """Return a Matplotlib Axes array to be used in
    all visualizations in the notebook. Provide a
    central point to control graph sizes.

    Change the default size attribute to control the size
    of rendered images
    """
    _, ax = plt.subplots(rows, cols, figsize=(size * cols, size * rows))
    return ax


# 基础设置
dataset_root_path = "/home/lianlirong/Mask_RCNN-master/line-169/"
img_floder = dataset_root_path + "pic"
mask_floder = dataset_root_path + "json/"
imglist = os.listdir(img_floder)
count = len(imglist)
train = int(count * 0.85)
val = int(count * 0.15)
test = count - train - val
# train与val数据集准备
dataset_train = DrugDataset()
dataset_train.load_shapes(train, img_floder, mask_floder, imglist, dataset_root_path)
dataset_train.prepare()
print('train_done')


dataset_val = DrugDataset_val()
dataset_val.load_shapes(val, img_floder, mask_floder, imglist, dataset_root_path)
dataset_val.prepare()
print('val_done')


# dataset_test = DrugDataset_test()
# dataset_test.load_shapes(test, img_floder, mask_floder, imglist, dataset_root_path)
# dataset_test.prepare()
# print('test_done')


# Create model in training mode
model = modellib.MaskRCNN(mode="training", config=config,
                          model_dir=MODEL_DIR)

# Which weights to start with?
init_with = "coco"  # imagenet, coco, or last

if init_with == "imagenet":
    model.load_weights(model.get_imagenet_weights(), by_name=True)
elif init_with == "coco":
    model.load_weights(COCO_MODEL_PATH, by_name=True,
                       exclude=["mrcnn_class_logits", "mrcnn_bbox_fc",
                                "mrcnn_bbox", "mrcnn_mask"])
elif init_with == "last":
    # Load the last model you trained and continue training
    model.load_weights(model.find_last(), by_name=True)

model.train(dataset_train, dataset_val,
            learning_rate=config.LEARNING_RATE / 20,
            epochs=100,
            layers="all")
修改以下部分:(以笔者的代码为参考)
28:多GPU可以指定GPU
39:新建logs文件夹储存模型文件
44:预训练权重文件的路径
56:指定配置的名字,可以根据识别的目标进行命名
60:batch size
63:识别目标数量,包括背景为其中一类
67,68:定义图象尺寸,以IMAGE_MAX_DIM为主
71:锚框的大小,若不明白其中的意义,则使用默认值即可
77:每个时期的训练步数,steps
80:每个训练时期结束时运行的验证数
127:增加类别,依据自己的识别类别(同理212,296)
164-166:类别标签(同理246-247,330-331)
355:数据集的路径
356:原图
357:转换后的标注文件
360-362:分配训练、验证和测试数据量
387:训练模式:“coco”:预训练权重从头训练;“last”:最后训练的权重继续训练
400:设置学习率
401:训练的周期
402:训练的模型网络层
(400-401:参数设置参考./mask-RCNN-master/mrcnn/config.py中的参数定义)
./mask-RCNN-master/mrcnn/config.py 55:选择网络类型:101和50两类可供选择
在激活环境下运行代码,训练完毕后
生成如下文件
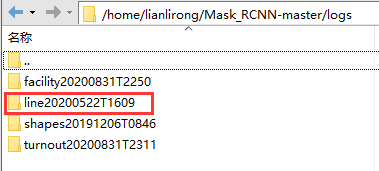
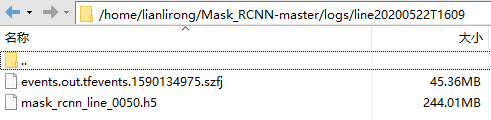
其中mask_rcnn_line_0050.h5就是我们需要的模型文件。
测试
在Mask-RCNN-master目录下新建test_line.py
测试代码如下:
# -*- coding: utf-8 -*-
"""
2020.3.22  基于Mask-RCNN的识别执行文件
"""
import os
import sys
import random
import math
import re  # 可视化
import time  #
import numpy as np
import cv2  #
import matplotlib
matplotlib.use('AGG')
import matplotlib.pyplot as plt
import tensorflow as tf
from mrcnn.config import Config
from mrcnn import model as modellib ,utils
from mrcnn.model import log
from mrcnn import visualize
import yaml #
from PIL import Image #
import skimage
# import skimage.io as io
import rt

# os.environ["CUDA_VISIBLE_DEVICES"] = "0"
# Root directory of the project
ROOT_DIR = os.getcwd()  # 返回当前工作目录==os.path.abspath("./")
# ROOT_DIR = os.path.abspath("../")  # 返回当前目录的父目录
# Directory to save logs and trained model
MODEL_DIR = os.path.join(ROOT_DIR, "logs")  # 当前工作目录下的logs文件夹
iter_num=0
# Local path to trained weights file
COCO_MODEL_PATH = os.path.join(ROOT_DIR, "mask_rcnn_coco.h5")  # 将与训练模型放在当前目录下
# Download COCO trained weights from Releases if needed
if not os.path.exists(COCO_MODEL_PATH):
    utils.download_trained_weights(COCO_MODEL_PATH)

# 检测图片路径
demopath =os.path.join(ROOT_DIR, "11")
demolist = os.listdir(demopath)
demolist.sort()

class ShapesConfig(Config):
    """Configuration for training on the toy shapes dataset.
    Derives from the base Config class and overrides values specific
    to the toy shapes dataset.
    """
    # Give the configuration a recognizable  为配置指定一个可识别的名称
    NAME = "line"

    # Train on 1 GPU and 8 images per GPU. We can put multiple images on each
    # GPU because the images are small. Batch size is 8 (GPUs * images/GPU).
    GPU_COUNT = 1
    IMAGES_PER_GPU = 1

    # Number of classes (including background)
    NUM_CLASSES = 1 + 1  # background + 3 shapes 检测的目标类别数,包括背景和检测目标

    # Use small images for faster training. Set the limits of the small side
    # the large side, and that determines the image shape.(512,832),(1088,1152)
    IMAGE_MIN_DIM = 512
    IMAGE_MAX_DIM = 832


    # Use smaller anchors because our image and objects are small
    RPN_ANCHOR_SCALES = (32, 64, 128, 256, 512)  # anchor side in pixels
    RPN_ANCHOR_RATIOS = [0.5, 1, 2]
    # Reduce training ROIs per image because the images are small and have
    # few objects. Aim to allow ROI sampling to pick 33% positive ROIs.
    TRAIN_ROIS_PER_IMAGE = 200

    # Use a small epoch since the data is simple
    STEPS_PER_EPOCH = 24

    # use small validation steps since the epoch is small
    VALIDATION_STEPS = 16


config = ShapesConfig()
config.display()

class InferenceConfig(ShapesConfig):
    GPU_COUNT = 1
    IMAGES_PER_GPU = 1
inference_config = InferenceConfig()
# Recreate the model in inference mode
model = modellib.MaskRCNN(mode="inference",
                              config=inference_config,
                              model_dir=MODEL_DIR)

# model_path = os.path.join(ROOT_DIR, ".h5 file name here")
model_path = model.find_last()  # 使用最新的权重文件
# Load trained weights
model.load_weights(model_path, by_name=True)
# class_names 要与训练时的class_id一一对应
# class_names = ["background","Railway Area", "Non Railway Area"]
# class_names = ["background","turnout", "x-turnout"]
# class_names = ["background","people"]
class_names = ["background","line"]
# class_names = ["background","line","Sign"]
# class_names = ["background","Guardrai", "Anti-glare Board", "Cement Barriers", "Sound Barrier"]
# class_names = ["background","D-block", "Sound Barrier", "Protective Fence", "Wind Wall", "Catenary Post"]
# class_names = ["BG","wall fitting", "distribution panel", "pipeline", "platform", "advertising board","guardrail","top pipeline"]

for image_id in demolist:
    demoimg = demopath+"/"+image_id
    image =skimage.io.imread(demoimg)  # 读取图像skimage.io.imread
    result = model.detect([image], verbose=1)
    rL = result[0]
    masked_imageL=visualize.display_instances(image_id,image, rL['rois'], rL['masks'], rL['class_ids'],
                                        class_names, rL['scores'])
    #  保存检测结果
    height, width = image.shape[:2]
    masked_imageL.set_size_inches(width/96.0,height/96.0)#输出width*height像素
    plt.subplots_adjust(top=1,bottom=0,left=0,right=1,hspace =0, wspace =0)#输出图像#边框设置
    plt.margins(0,0)
    plt.savefig(r"./out/%s" % (image_id), dpi=96.0, pad_inches=0.0)
# cv2.imwrite("./test_results/%s"%(image_id), masked_imageL)41:测试路径
45-78:尽量与训练的配置一致
101:目标类别,背景为第一类,其他目标顺序要与训练时的class_id一一对应
119:结果保存路径
检测结果如下:

文件夹树形结构如下
├──Mask-RCNN-master (tensorflow项目文件)
     ├── logs # 笔者存放训练模型的目录
         ├──line
             ├──events.out.tfevents.1590134975.szfj # 训练过程的可视化文件
             ├──mask_rcnn_line_0050.h5 # 模型权重
     ├── mrcnn
         ├──model.py # 生成tfrecord文件的代码
         ├──config.py
         ├──utils.py
         ├──visualize.py
     ├── line
         ├── pic # 原始图像数据
         ├── json
             ├──1_json # 转换后的json文件夹
             ├──…
     ├──test_line # 测试数据图像
     ├──mask_rcnn_coco.h5 # 预训练模型文件
     ├──train_line.py # 训练代码
     ├──test_line.py # 测试代码
最后特别注意:这个项目源码目前在github拥有最多start数可见框架影响力,但是原版只支持tensorflow1.x,对应RTX30及其以上显卡都无法正常使用,因为为了能够改成支持RTX30系列或者RTX40系列显卡,在tensorflow-gpu==2.10.0上进行完整训练和测试,最终成功改成支持RTX30及其以上显卡,当然其他显卡也是可以的,比如RTX1060、RTX2070等等。修改后源码下载地址:


 12万+
12万+

 被折叠的 条评论
为什么被折叠?
被折叠的 条评论
为什么被折叠?
 到【灌水乐园】发言


