


简介
记录一下最近入门OpenGL的学习成果,效果如下:
开发环境
Windows10、Qt5.13.2(编译器用的是MinGW64_bit)、OpenGL3.3
项目文件结构
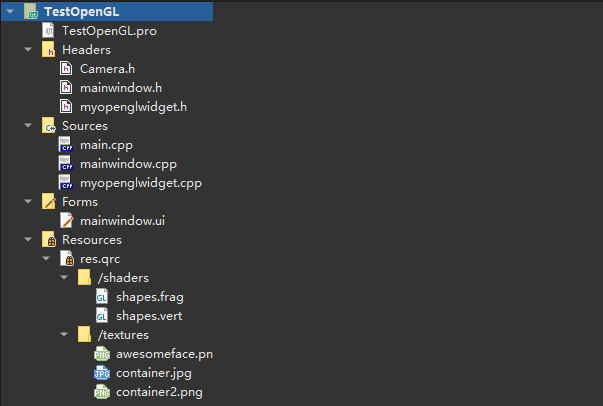
mainwindow:程序启动主窗口,用于响应菜单栏点击事件
myopenglwidget:自定义的openglwidget,用于显示场景
Camera.h:摄像机封装类,供其它文件调用,用于记录摄像机的坐标系及响应鼠标键盘事件
shapes.vert:用于顶点着色器,绘制物体
shapes.frag:用于片段着色器,为物体添加材质或颜色
textures文件夹存放用到的材质
源代码
Camera.h
#include <vector>
#include <QMatrix4x4>
#include <qopengl.h>
#include <math.h>

enum Camera_Movement{
    FORWARD,
    BACKWARD,
    LEFT,
    RIGHT
};

const float YAW = -90.0f;
const float PITCH = 0.0f;
const float SPEED = 2.5f;
const float SENSITIVITY = 0.1f;
const float ZOOM = 45.0f;

class Camera
{
public:
    QVector3D Position;
    QVector3D Front;
    QVector3D Up;
    QVector3D Right;
    QVector3D WorldUp;
    float Yaw;
    float Pitch;
    float MovementSpeed;
    float MouseSensitivity;
    float Zoom;

    Camera(QVector3D position = QVector3D(0.0f,0.0f,0.0f),QVector3D up = QVector3D(0.0f,1.0f,0.0f),float yaw=YAW,float pitch=PITCH):
        Front(QVector3D(0.0f,0.0f,-1.0f)),
        MovementSpeed(SPEED),
        MouseSensitivity(SENSITIVITY),
        Zoom(ZOOM)
    {
        Position=position;
        WorldUp=up;
        Yaw=yaw;
        Pitch=pitch;
        updateCameraVectors();
    }

    Camera(float posX, float posY, float posZ, float upX, float upY, float upZ, float yaw, float pitch):
        Front(QVector3D(0.0f, 0.0f, -1.0f)),
        MovementSpeed(SPEED),
        MouseSensitivity(SENSITIVITY),
        Zoom(ZOOM)
    {
        Position = QVector3D(posX, posY, posZ);
        WorldUp = QVector3D(upX, upY, upZ);
        Yaw = yaw;
        Pitch = pitch;
        updateCameraVectors();
    }

    QMatrix4x4 getViewMatrix()
    {
        QMatrix4x4 theMatrix;
        theMatrix.lookAt(Position,Position+Front,Up);
        return theMatrix;
    }

    void processKeybord(Camera_Movement direction,float deltaTime)
    {
        float velocity = MovementSpeed * deltaTime;
        if(direction==FORWARD)
            Position+=Front*velocity;
        if(direction==BACKWARD)
            Position-=Front*velocity;
        if(direction==LEFT)
            Position-=Right*velocity;
        if(direction==RIGHT)
            Position+=Right*velocity;
    }

    void processMouseMovement(float xoffset,float yoffset,GLboolean constrainPitch=true)
    {
        xoffset *= MouseSensitivity;
        yoffset *= MouseSensitivity;

        Yaw += xoffset;
        Pitch += yoffset;

        if(constrainPitch){
            if(Pitch > 89.0f)
                Pitch = 89.0f;
            if(Pitch < -89.0f)
                Pitch = -89.0f;
        }

        updateCameraVectors();
    }

    void processMouseScroll(float yoffset)
    {
        Zoom -= (float)yoffset;
        if(Zoom < 1.0f)
            Zoom = 1.0f;
        if(Zoom > 75.0f)
            Zoom = 75.0f;
    }

private:
    void updateCameraVectors()
    {
        float PI=3.1415926;
        QVector3D front;
        front.setX(cos(Yaw*PI/180.0)*cos(Pitch*PI/180.0));
        front.setY(sin(Pitch*PI/180.0));
        front.setZ(sin(Yaw*PI/180.0)*cos(Pitch*PI/180.0));
        front.normalize();
        Front=front;
        Right = QVector3D::crossProduct(Front, WorldUp);
        Right.normalize();
        Up = QVector3D::crossProduct(Right, Front);
        Up.normalize();
    }
};
myopenglwidget
代码太多只放关键部分,详细可看文末github链接
//创建窗口
MyOpenGLWidget::MyOpenGLWidget(QWidget *parent) : QOpenGLWidget(parent)
{
    //启动定时器,每隔TIME_OUT_INTERVAL会刷新一下OpenGLWidget
    connect(&m_timer,&QTimer::timeout,this,&MyOpenGLWidget::on_timeout);
    m_timer.start(TIME_OUT_INTERVAL);
    setFocusPolicy(Qt::StrongFocus);
    setMouseTracking(true);

    m_camera.Position=QVector3D(0.0,0.0,6.0);
}
//下面这两个函数为mainwindow的点击事件服务,当mainwindow捕捉到相应点击事件时,调用这些函数实现OpenGLWidget的重新绘制
void MyOpenGLWidget::drawShape(MyOpenGLWidget::Shape shape)
{
    m_shape=shape;
    update();
}
void MyOpenGLWidget::setWireFrame(bool mode)
{
    makeCurrent();
    if(mode){
        glPolygonMode(GL_FRONT_AND_BACK,GL_LINE);
    }
    else{
        glPolygonMode(GL_FRONT_AND_BACK,GL_FILL);
    }
    update();
    doneCurrent();
}
//自定义OpenGLWidget需要实现的三个函数initializeGL、resizeGL、paintGL
//用VAO[0]和VBO[0]画三角形,用VAO[0]和EBO画矩形,用VAO[1]和VBO[1]画立方体,顶点分别存放在vertices、indices、cube中
void MyOpenGLWidget::initializeGL()
{
    initializeOpenGLFunctions();

    glGenVertexArrays(2,VAO);
    glGenBuffers(2,VBO);
    glGenBuffers(1,&EBO);

    glBindVertexArray(VAO[0]);
    glBindBuffer(GL_ARRAY_BUFFER,VBO[0]);
    glBindBuffer(GL_ELEMENT_ARRAY_BUFFER,EBO);

    shaderProgram.addShaderFromSourceFile(QOpenGLShader::Vertex,":/shaders/shapes.vert");
    shaderProgram.addShaderFromSourceFile(QOpenGLShader::Fragment,":/shaders/shapes.frag");
    shaderProgram.link();

    m_block_texture=new QOpenGLTexture(QImage(":/textures/container.jpg").mirrored());
    m_block_texture2=new QOpenGLTexture(QImage(":/textures/container2.png").mirrored());
    m_smile_texture=new QOpenGLTexture(QImage(":/textures/awesomeface.png").mirrored());
    // 绑定,只有在绑定完后才可以对这个shader的变量进行设置
    shaderProgram.bind();
    shaderProgram.setUniformValue("texture0",0);
    shaderProgram.setUniformValue("texture1",1);
    shaderProgram.setUniformValue("texture2",2);
    shaderProgram.setUniformValue("ratio",ratio);

    glBufferData(GL_ARRAY_BUFFER,sizeof (vertices),vertices,GL_STATIC_DRAW);
    glBufferData(GL_ELEMENT_ARRAY_BUFFER,sizeof (indices),indices,GL_STATIC_DRAW);
    glVertexAttribPointer(0,3,GL_FLOAT,GL_FALSE,8*sizeof (float),(void*)0);
    glEnableVertexAttribArray(0);
    glVertexAttribPointer(1,3,GL_FLOAT,GL_FALSE,8*sizeof (float),(void*)(3*sizeof (float)));
    glEnableVertexAttribArray(1);
    glVertexAttribPointer(2,2,GL_FLOAT,GL_FALSE,8*sizeof (float),(void*)(6*sizeof (float)));
    glEnableVertexAttribArray(2);

    glBindBuffer(GL_ELEMENT_ARRAY_BUFFER,0);
    glBindBuffer(GL_ARRAY_BUFFER,0);
    glBindVertexArray(0);

    //cube
    glBindVertexArray(VAO[1]);
    glBindBuffer(GL_ARRAY_BUFFER,VBO[1]);

    glBufferData(GL_ARRAY_BUFFER,sizeof (cube),cube,GL_STATIC_DRAW);
    glVertexAttribPointer(0,3,GL_FLOAT,GL_FALSE,5*sizeof (float),(void*)0);
    glEnableVertexAttribArray(0);
    glVertexAttribPointer(2,2,GL_FLOAT,GL_FALSE,5*sizeof (float),(void*)(3*sizeof (float)));
    glEnableVertexAttribArray(2);

    glBindBuffer(GL_ARRAY_BUFFER,0);
    glBindVertexArray(0);
}
void MyOpenGLWidget::resizeGL(int w, int h)
{
    Q_UNUSED(w)
    Q_UNUSED(h)
}
void MyOpenGLWidget::paintGL()
{
    glClearColor(0.2f,0.3f,0.3f,1.0f);
    glEnable(GL_DEPTH_TEST);
    glClear(GL_COLOR_BUFFER_BIT | GL_DEPTH_BUFFER_BIT);

    QMatrix4x4 model,view,projection;
    shaderProgram.bind();
    m_block_texture->bind(2);
    m_block_texture2->bind(1);
    m_smile_texture->bind(0);

    switch (m_shape) {
    case Triangle:
        glBindVertexArray(VAO[0]);

        angle=(angle+5)%360;
        model.rotate(30,1.0f,0.0f,0.0f);
        model.rotate(angle,0.0f,1.0f,0.0f);
        view.translate(0.0,0.0,-6);
        projection.perspective(45,(float)width()/height(),0.1f,100);

        shaderProgram.setUniformValue("model",model);
        shaderProgram.setUniformValue("view",view);
        shaderProgram.setUniformValue("projection",projection);

        glDrawArrays(GL_TRIANGLES,0,3);//use VBO[0]
        break;
    case Rect:
        glBindVertexArray(VAO[0]);

        angle=(angle+5)%360;
        model.rotate(30,1.0f,0.0f,0.0f);
        model.rotate(angle,0.0f,1.0f,0.0f);
        view.translate(0.0,0.0,-6);
        projection.perspective(45,(float)width()/height(),0.1f,100);

        shaderProgram.setUniformValue("model",model);
        shaderProgram.setUniformValue("view",view);
        shaderProgram.setUniformValue("projection",projection);

        glDrawElements(GL_TRIANGLES,6,GL_UNSIGNED_INT,&indices);//use EBO
        break;
    case Cube:
        glBindVertexArray(VAO[1]);

        angle=(angle+5)%360;
        view=m_camera.getViewMatrix();
        projection.perspective(45,(float)width()/height(),0.1f,100);

        shaderProgram.setUniformValue("view",view);
        shaderProgram.setUniformValue("projection",projection);
        foreach (auto item, cubePositions) {
            model.setToIdentity();
            model.translate(item);
            model.rotate(30,1.0f,0.0f,0.0f);
            model.rotate(angle,0.0f,1.0f,0.0f);
            shaderProgram.setUniformValue("model",model);
            glDrawArrays(GL_TRIANGLES,0,36);//use VBO[1]
        }
        break;
    default:
        break;
    }
}
//后面还有一些鼠标键盘响应事件用于控制摄像机的移动,它们均调用Camera类的方法来处理
mainwindow
#include "mainwindow.h"
#include "ui_mainwindow.h"

MainWindow::MainWindow(QWidget *parent)
    : QMainWindow(parent)
    , ui(new Ui::MainWindow)
{
    ui->setupUi(this);
}

MainWindow::~MainWindow()
{
    delete ui;
}

//以下是菜单栏的点击响应函数
void MainWindow::on_actiontriangle_triggered()
{
    ui->openGLWidget->drawShape(MyOpenGLWidget::Triangle);
}

void MainWindow::on_actionWireFrame_triggered()
{
    ui->openGLWidget->setWireFrame(true);
}

void MainWindow::on_actionnonWireFrame_triggered()
{
    ui->openGLWidget->setWireFrame(false);
}

void MainWindow::on_actionclear_triggered()
{
    ui->openGLWidget->drawShape(MyOpenGLWidget::None);
}

void MainWindow::on_actionrect_triggered()
{
    ui->openGLWidget->drawShape(MyOpenGLWidget::Rect);
}

void MainWindow::on_actioncube_triggered()
{
    ui->openGLWidget->drawShape(MyOpenGLWidget::Cube);
}
顶点着色器(shapes.vert)
#version 330 core
layout(location=0)in vec3 aPos;
layout(location=1)in vec3 aColor;
layout(location=2)in vec2 aTexCord;
out vec3 ourColor;
out vec2 TexCord;
//uniform mat4 RotationMatrix;
uniform mat4 model;
uniform mat4 view;
uniform mat4 projection;

void main(){
    gl_Position=projection*view*model*vec4(aPos.x,aPos.y,aPos.z,1.0f);
    ourColor=aColor;
    TexCord=aTexCord;
}
片段着色器(shapes.frag)
#version 330 core
out vec4 FragColor;
in vec3 ourColor;
in vec2 TexCord;
uniform sampler2D texture0;
uniform sampler2D texture1;
uniform sampler2D texture2;
uniform float ratio;

void main(){
    FragColor=mix(texture(texture0,TexCord),texture(texture1,TexCord),ratio);
}
完整代码在:


 3026
3026


 被折叠的 条评论
为什么被折叠?
被折叠的 条评论
为什么被折叠?
 到【灌水乐园】发言


