


文章目录
HarmonyOS Next AtkTS语法
一、数组的操作

1. 数组 - 定义、查找、修改
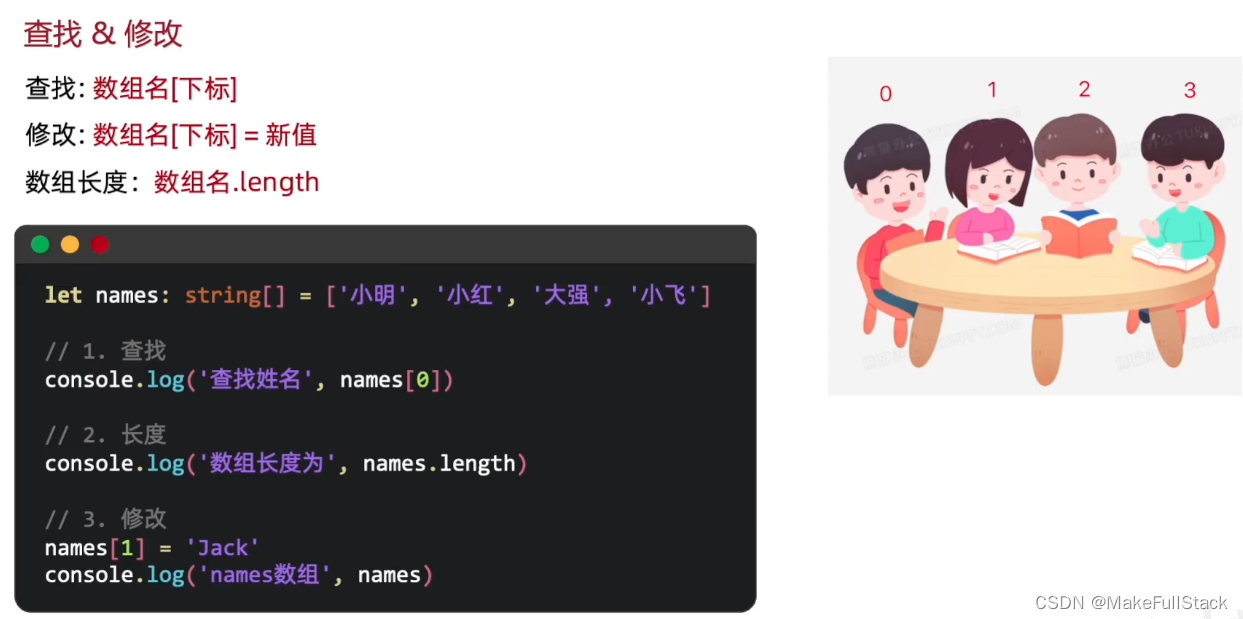
1.1 定义一个数组
// 定义一个数组
let arr : string[] = ['张三', '李四', '王五', '赵六']
console.log('整个数组内容为;', arr)
- 需要注意,类型可以根据自己的需求来定,你可以写成:number[]。
运行效果如下:

1.2 通过索引查找数组元素
// 2. 通过下标访问指定的数组元素
console.log(arr[1])  // 李四   (注意,索引 从 0  开始)
1.3 通过索引修改 数组元素
// 3. 修改数组下标指定的元素
arr[0] = '数组'
console.log('修改后的数组内容为:', arr)

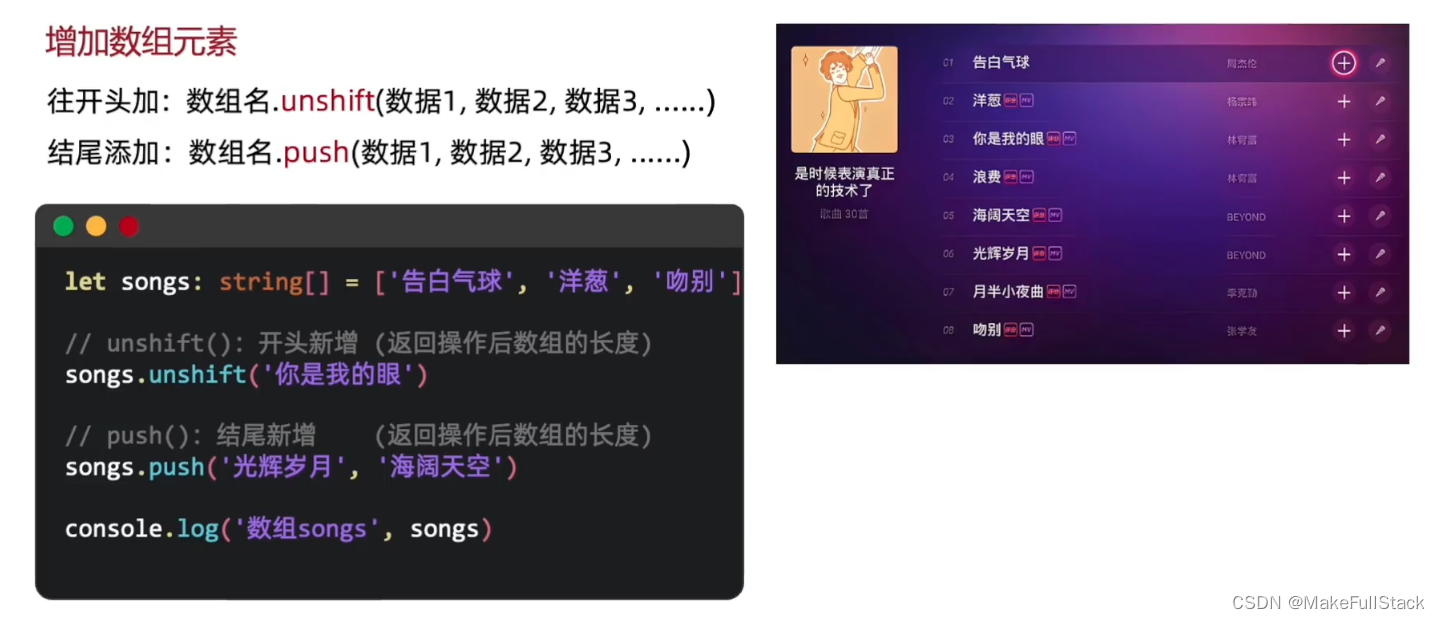
2. 数组 - 添加元素
3. 数组 - 删除元素
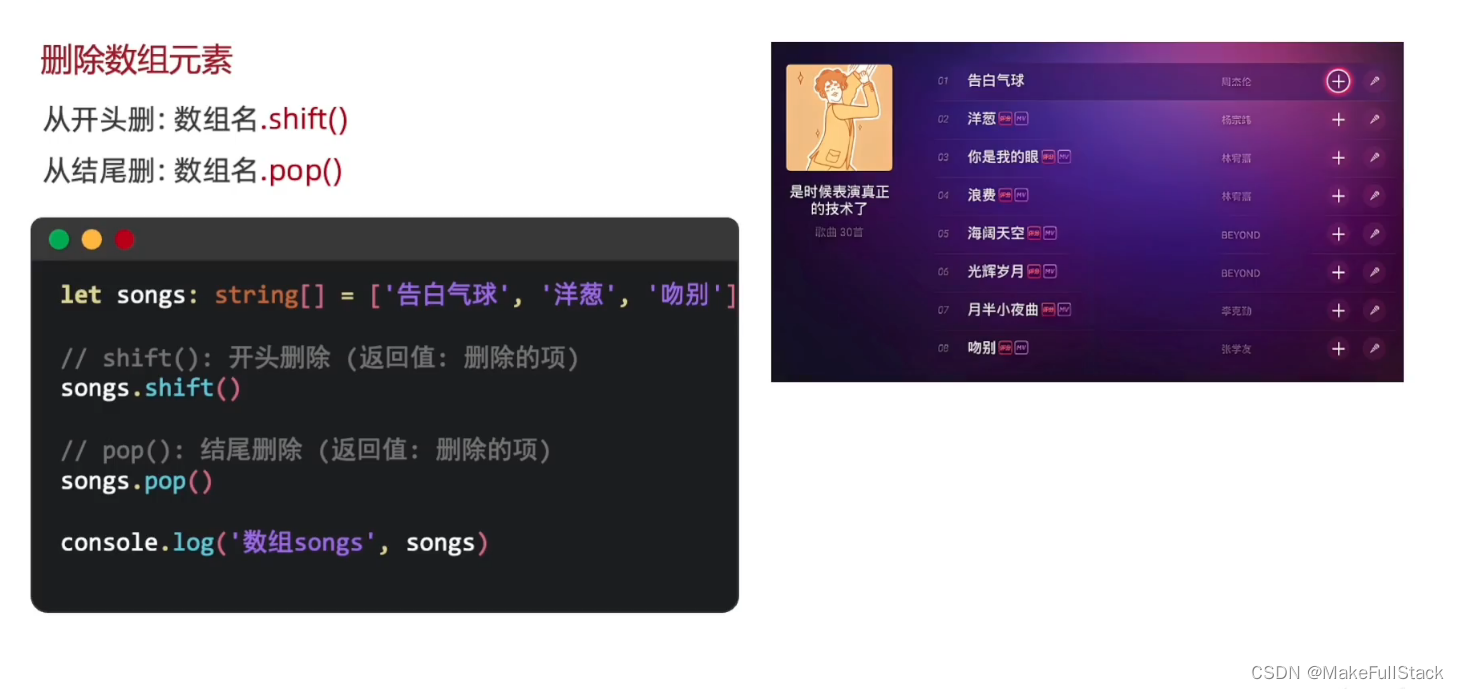
- 注意,删除后方法返回删除后的元素
4. 数组 - 任意位置添加、删除
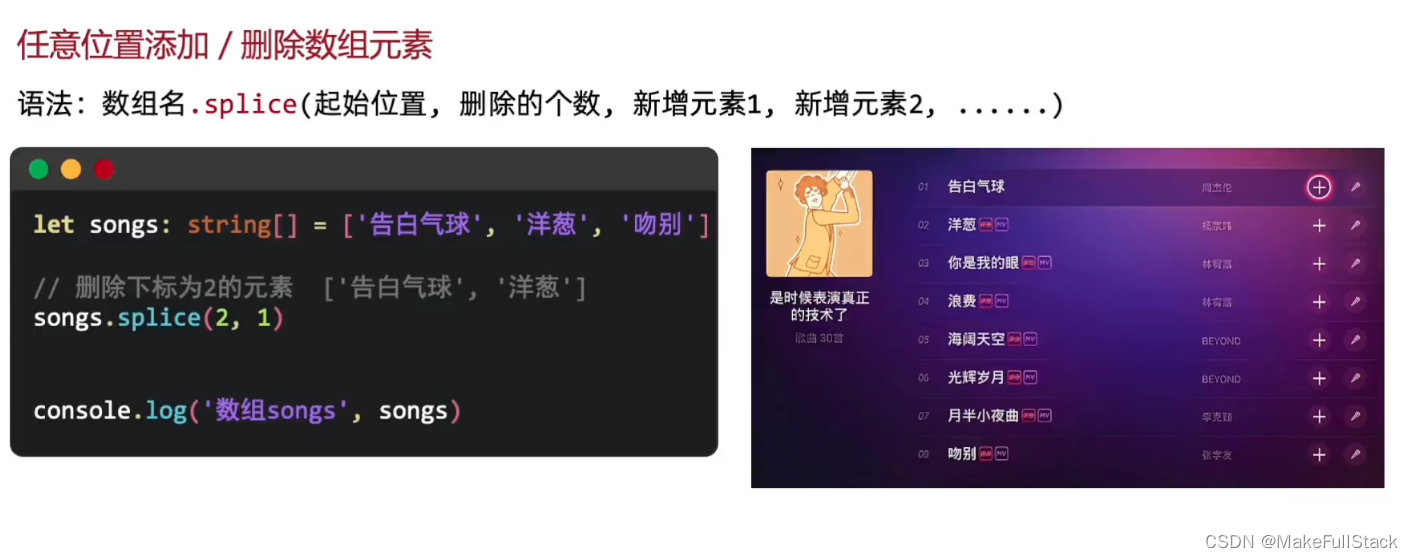
// splice方法,任意位置:删除
let arr1 : string[] = ['张三', '李四', '王五', '赵六']
arr1.splice(3, 1) // 从索引为 3 的元素处,开始删除,个数为 1
console.log('数组:',arr1)  //  张三,李四,王五


// splice方法,任意位置 :新增
arr1.splice(1, 0, '添加', '元素')  // 参数一: 起始索引   参数二: 操作的个   参数三: 添加的元素
console.log('arr1:', arr1)
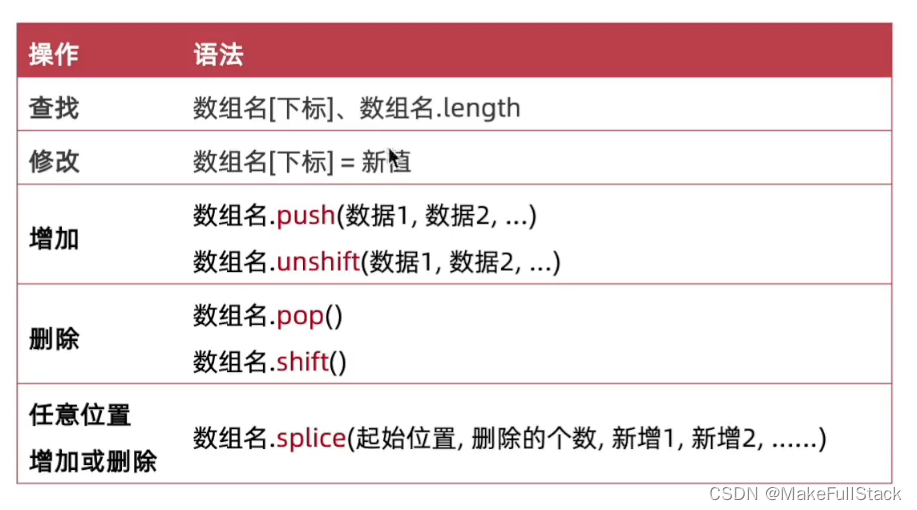
6. 数组操作 – 总结
二、ArkTS 中的 语句 - 判断

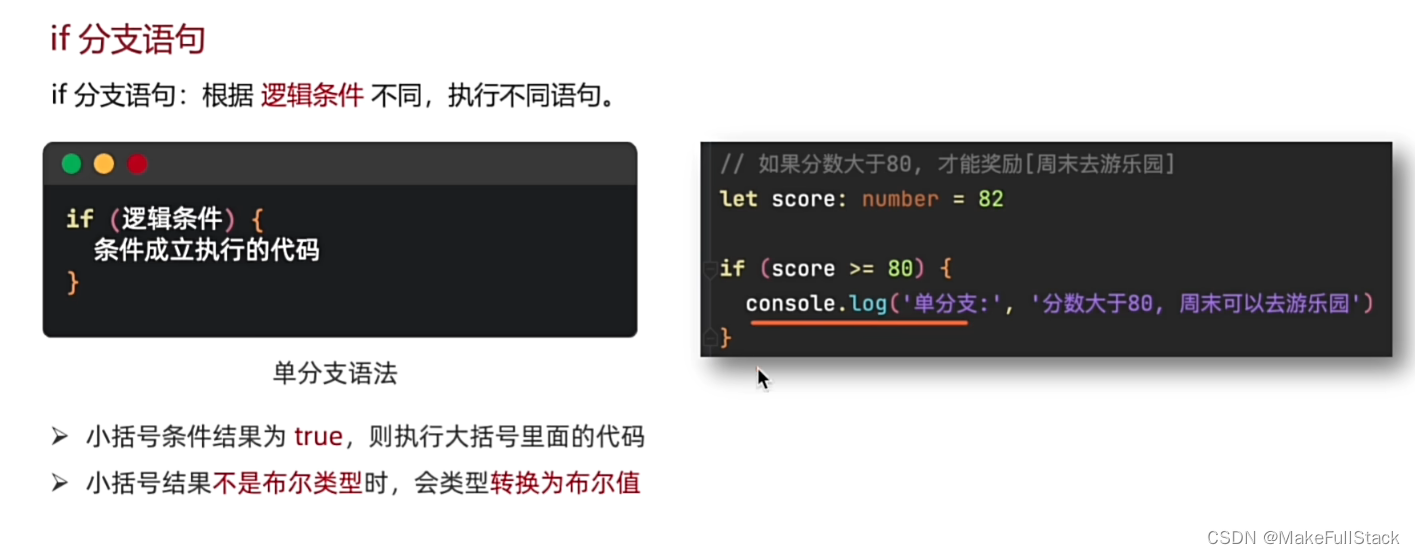
1. if - 判断语句
1.1 if 分支
单分支
双分支

代码演示:
// if 语句的基本使用  (大家不考试,不需要分清楚单分支双分支,知道怎么执行,怎么用就好了)
let age : number = 19   // 现在十九了,以前 18 天天 写 十八岁
if (age > 18) {
  console.log('年龄分段', `年龄为:${age} , 您已成年!`)
} else {
  console.log('年龄分段', `年龄为:${age} , 您未成年!`)
}
// 运行结果:年龄分段 年龄为:19 , 您已成年!
-
只要记住,if成立else就不执行,反之,else就一定执行。
-
大家学过 JavaScript、Typescript、Java、c其实都只需要知道有没有差异,可以无缝衔接。
1.2 判断语句 小结:

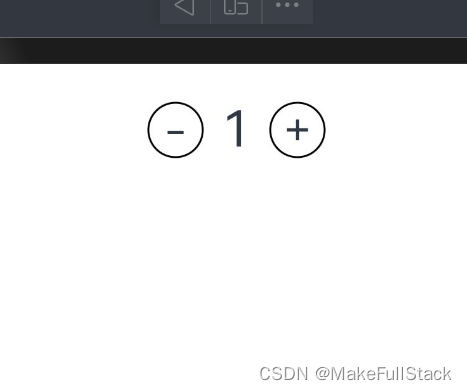
1.3 . 实际开发案例的使用
@Entry
@Component
struct ArrayDemoCode {
  // 状态变量
  @State number : number = 1
  build() {
    Column() {
      Row({ space: 10}) {
        Text('-').width(30).height(30).border({ width: 1, color: Color.Black}).fontSize(24).textAlign(TextAlign.Center).borderRadius(15)
          .onClick( () => {
            // 如果 this.number 小于 1 ,不允许操作数据,否则允许
            if (this.number > 1) {
              this.number--
            } else {
              console.log('this.number(-)', '操作已经达到上限!!!')
            }
          })
        Text(this.number.toString()).fontSize(26)
        Text('+').width(30).height(30).border({ width: 1, color: Color.Black}).fontSize(24).textAlign(TextAlign.Center).borderRadius(15)
          .onClick( () => {
            // 如果 this.number 小于 1000 ,允许操作数据,否则禁止
            if (this.number < 1000) {
              this.number++
            } else {
              console.log('this.number(+)', '操作已经达到上限!!!')
            }
          })
      }
    }
    .width('100%')
    .height('100%')
    .padding(20)
  }
}
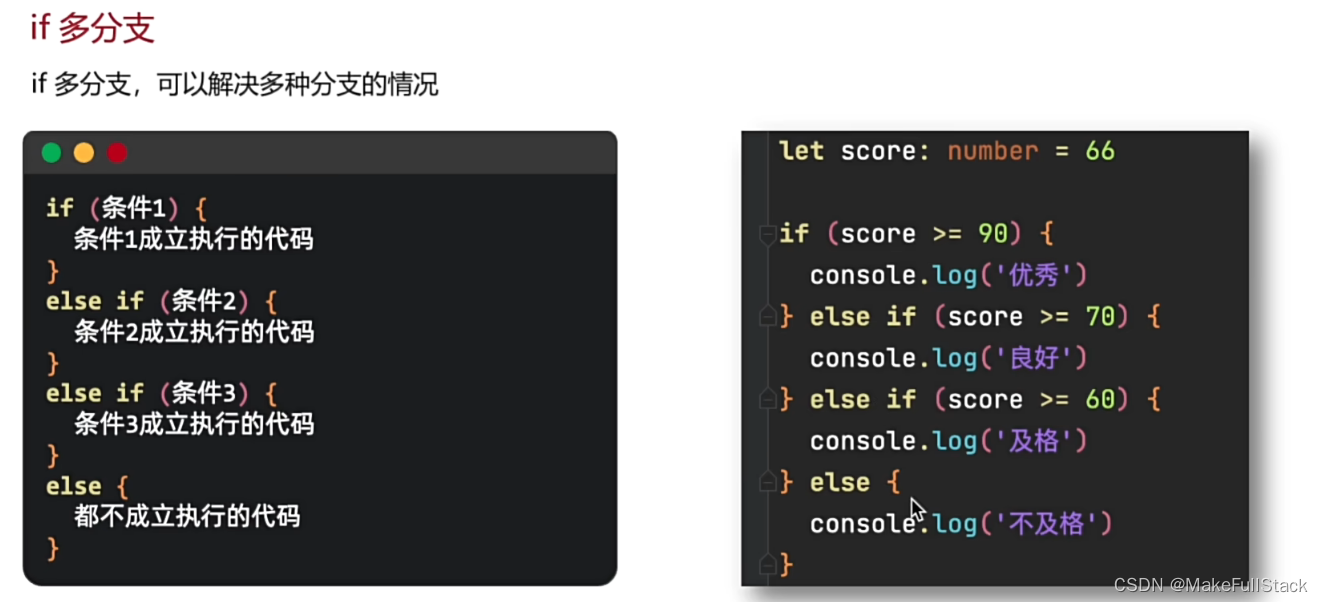
1. 4 if判断 多分支语句
-
其实这里学会了单分支和双分支,能看懂就可以。实际开发都是一样的。
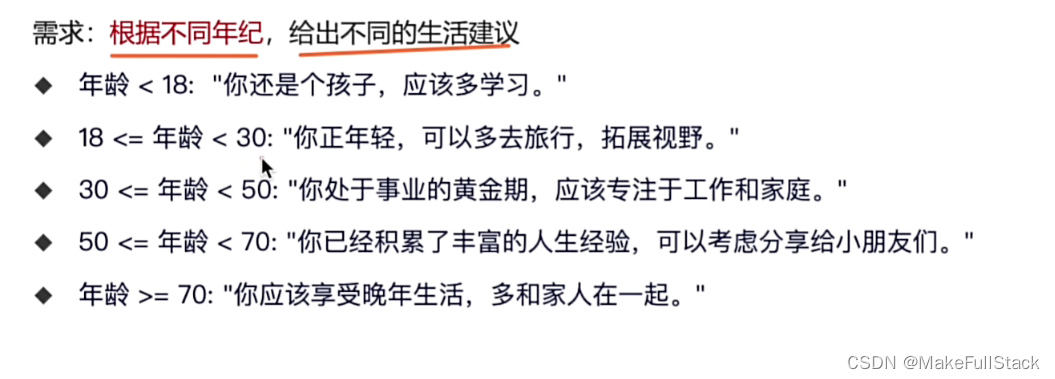
-
这个就是往上面替换文字和条件就可以了哦!
2. switch - 判断分支语句
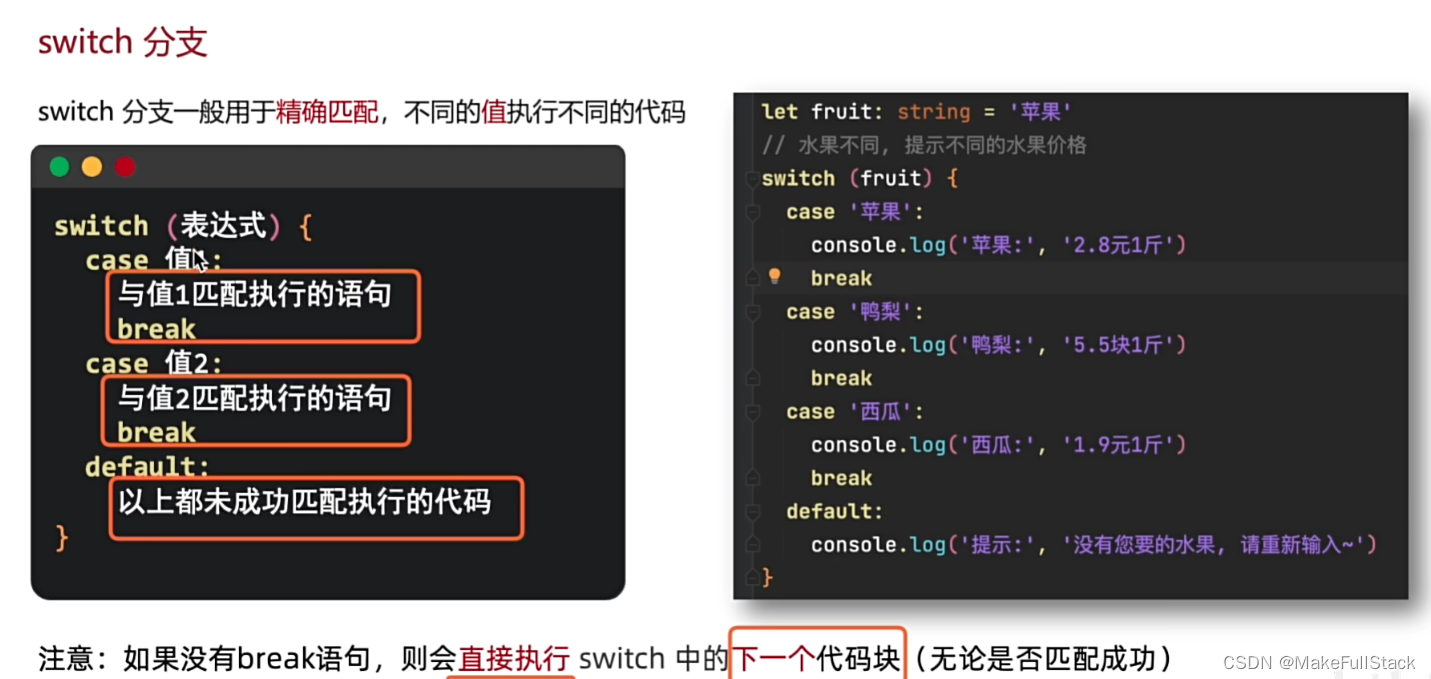
- 这里千万注意 break。执行完毕当前的case 分支,不跳出。后面的代码块就会执行。
3. 三元运算符

// 三目运算符
let number : number = 10
console.log('结果为:', number > 20 ? 'true' : 'false')  // 结果为: false
- 问号前面的成立, 执行 冒号 前面的, 不成立: 执行 冒号后面的
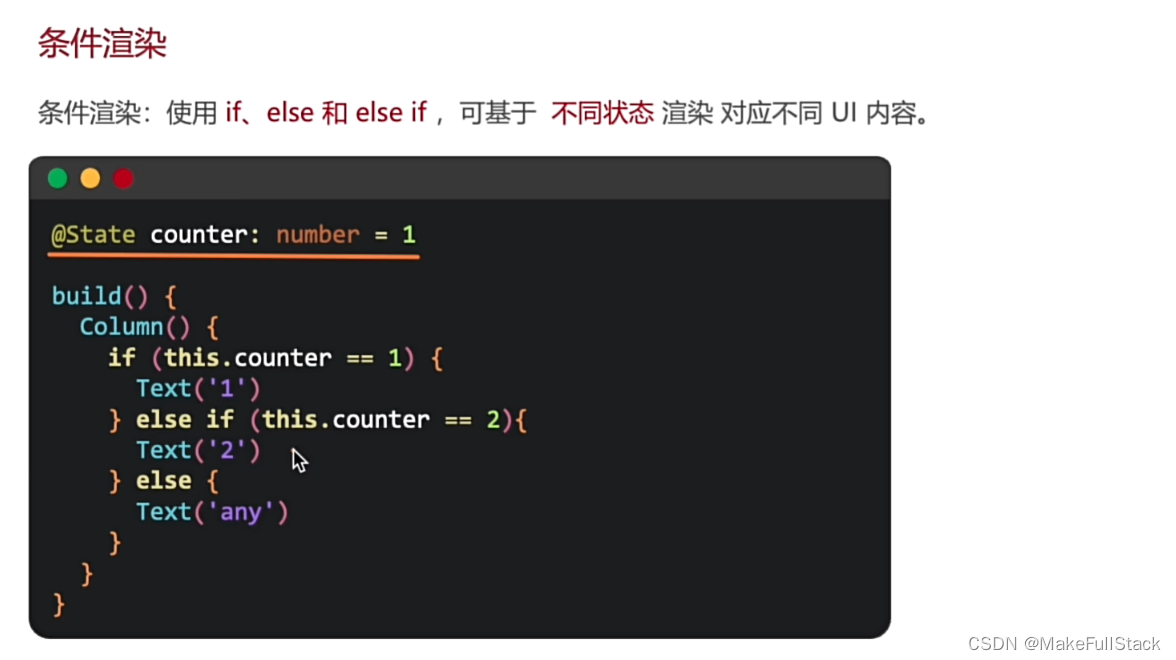
三 、条件渲染
1. 淘宝购物车案例
需求:商品购买完毕了,我们及时渲染对应的组件。

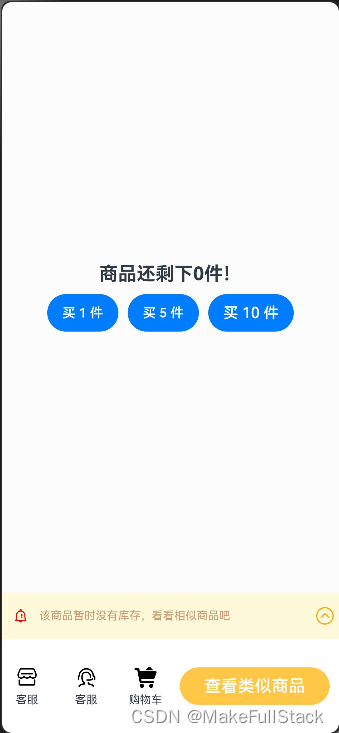
代码示例:
import { AlertDialog } from '@ohos.arkui.advanced.Dialog'

@Entry
@Component
struct TaoBaoShoppingCartTest {
  @State total : number = 100
  build() {
    Column() {
      Column () {
        Text(`商品还剩下${this.total}件!`).textAlign(TextAlign.Center).fontWeight(700).fontSize(20)
        Row({ space: 10}) {
          Button('买 1 件')
            .fontSize(14)
            .onClick( () => {
              if (this.total > 0) {
                this.total--
              }
            })
          Button('买 5 件')
            .fontSize(14)
            .onClick( () => {
               if (this.total >= 5) {
                   this.total -= 5
               }
            })
          Button('买 10 件').onClick(() => { if (this.total >= 10) {this.total -= 10} })
        }
        .margin({ top: 10})
      }
      .width('100%')
      .layoutWeight(1)
      .backgroundColor('#fcfcfc')
      .justifyContent(FlexAlign.Center)
        if (this.total > 0) {
          Row(){
            Row({space: 10}) {
              Column({space: 5}) {
                Image($r('app.media.dianpu')).width(24).height(24).fillColor(Color.Black)
                Text('客服').fontSize(12)
              }
              Column({space: 5}) {
                Image($r('app.media.kefu')).width(24).height(24).fillColor(Color.Black)
                Text('客服').fontSize(12)
              }
              Column({space: 5}) {
                Image($r('app.media.gouwucheman')).width(24).height(24).fillColor(Color.Black)
                Text('购物车').fontSize(12)
              }
            }
            Row() {
              Button('加入购物车').fontSize(14).fontColor(Color.White).backgroundColor('#ffc745')
                .width(110).margin({left: 5, right: 5})
              Button('立即购买').fontSize(16).fontColor(Color.White).backgroundColor('#fb0029').width(100)
            }.width(220)
        }
        .width('100%').height(100).padding(10).justifyContent(FlexAlign.SpaceEvenly)
        } else {
          Column() {
            Row() {
              Row() {
                Image($r('app.media.tongzhi')).width(20).height(20).fillColor(Color.Red).margin({left: 5, right: 10})
                Text('该商品暂时没有库存,看看相似商品吧').fontSize(12).fontColor('#cf9a6d')
              }
              Image($r('app.media.zhedie')).width(20).height(20).fillColor(Color.Orange)
            }
            .width('100%')
            .height(50)
            .justifyContent(FlexAlign.SpaceBetween)
            .backgroundColor('#fff9dc')
            .padding(5)
            Row() {
              Row({space: 10}) {
                Column({space: 5}) {
                  Image($r('app.media.dianpu')).width(24).height(24).fillColor(Color.Black)
                  Text('客服').fontSize(12)
                }.layoutWeight(1)
                Column({space: 5}) {
                  Image($r('app.media.kefu')).width(24).height(24).fillColor(Color.Black)
                  Text('客服').fontSize(12)
                }.layoutWeight(1)
                Column({space: 5}) {
                  Image($r('app.media.gouwucheman')).width(24).height(24).fillColor(Color.Black)
                  Text('购物车').fontSize(12)
                }.layoutWeight(1)
              }
              .layoutWeight(1)
              Button('查看类似商品')
                .width(160).margin(10).backgroundColor('#ffc745').fontSize(18)
            }
            .width('100%')
            .height(100)
          }.width('100%').height(150)
        }
    }
    .width('100%').height('100%')
    .justifyContent(FlexAlign.SpaceEvenly)
    }
}
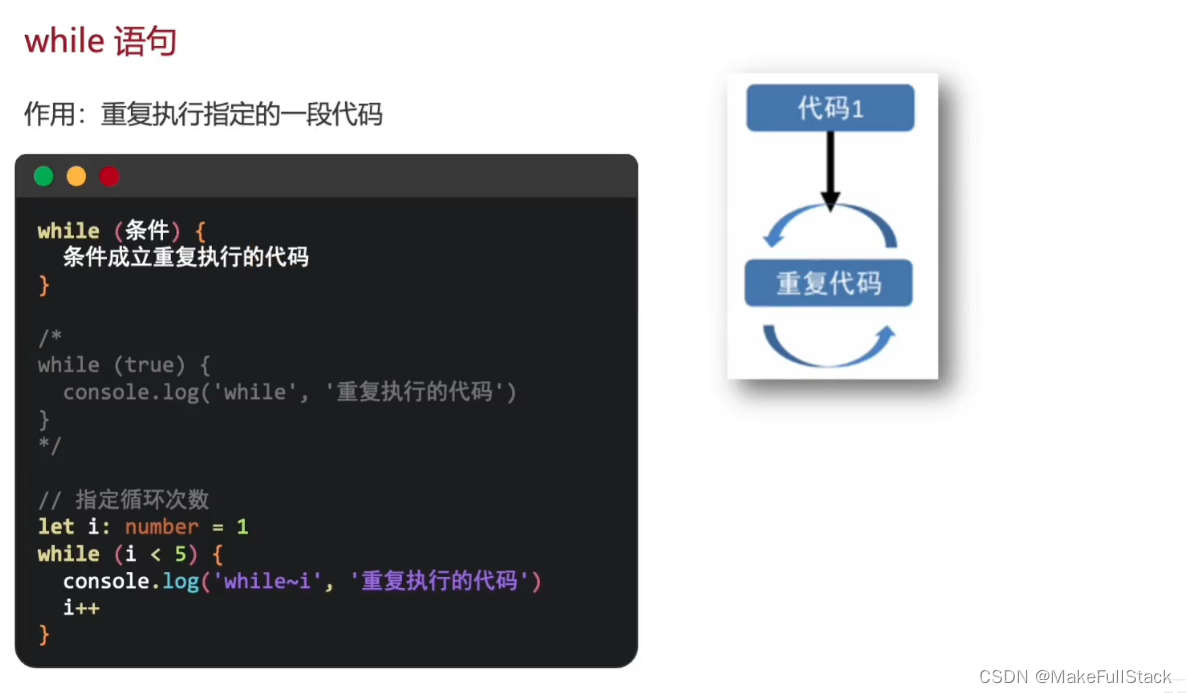
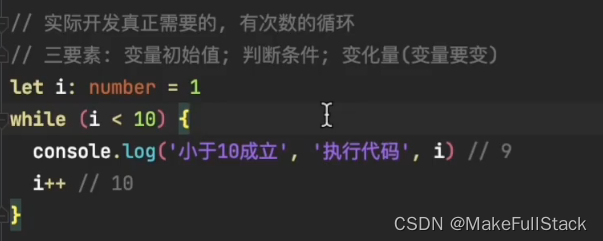
四、ArkTS - 循环语句
while循环

2. while - 练习题
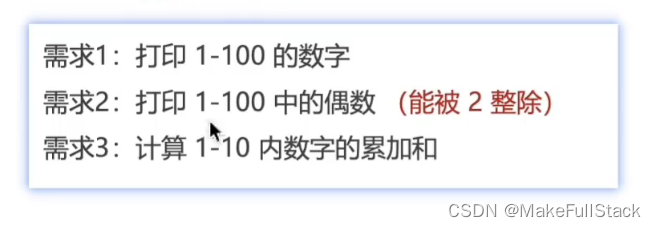
// 需求1: 打印 1 - 100 的数字
let i : number = 1;
while (i <= 100) {
  console.log("需求1:", i)
  i++
}

console.log("-------------------------------------------")

// 需求2:打印 1 - 100 之间的偶数
let z : number = 1;
while (z <= 100) {
  if (z % 2 == 0) {
    console.log("需求2:", z)
  }
  z++
}

console.log("-------------------------------------------")

// 需求3:计算 1 - 10 内数字的累加和
let k : number = 1
let sum : number = 0
while (k <= 10) {
  sum += k
  k++
}
console.log("需求三:", sum)
for 循环
- 作用和 while 循环作用一样。
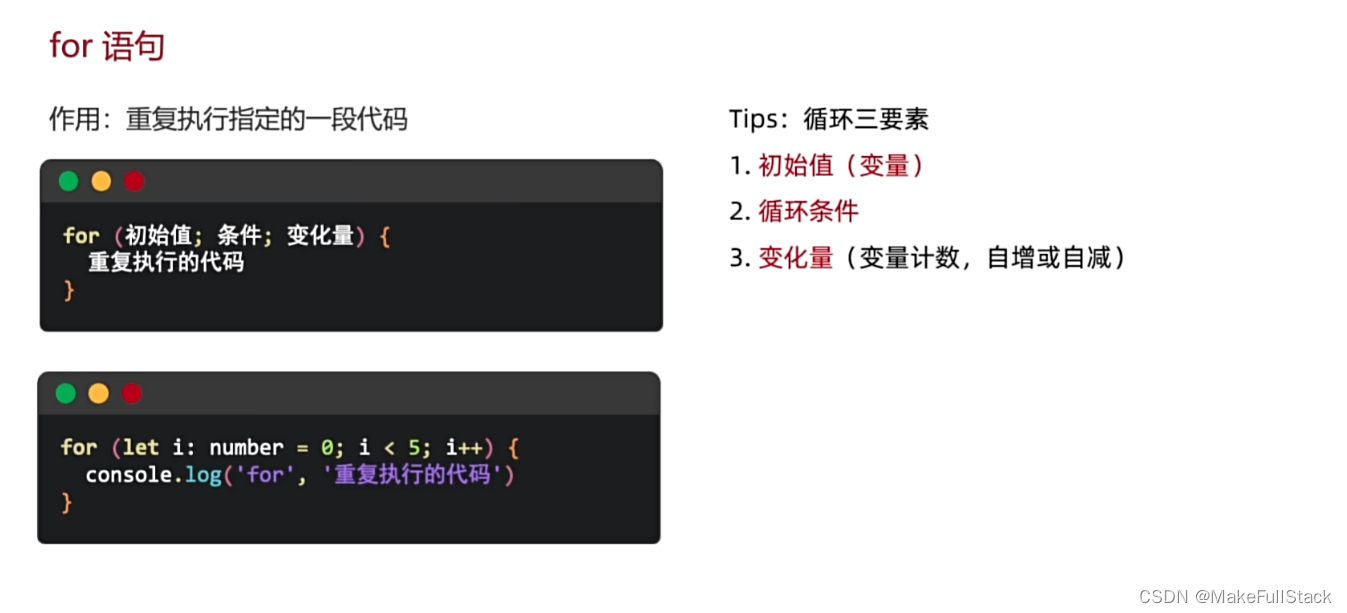
代码示例

for循环练习
// 使用 for 循环 求 1- 10 之间的值
let sum2 : number = 0
for (let i : number = 1; i <= 10; i++) {
  sum2 += i
}
console.log("sum2: ", sum2)
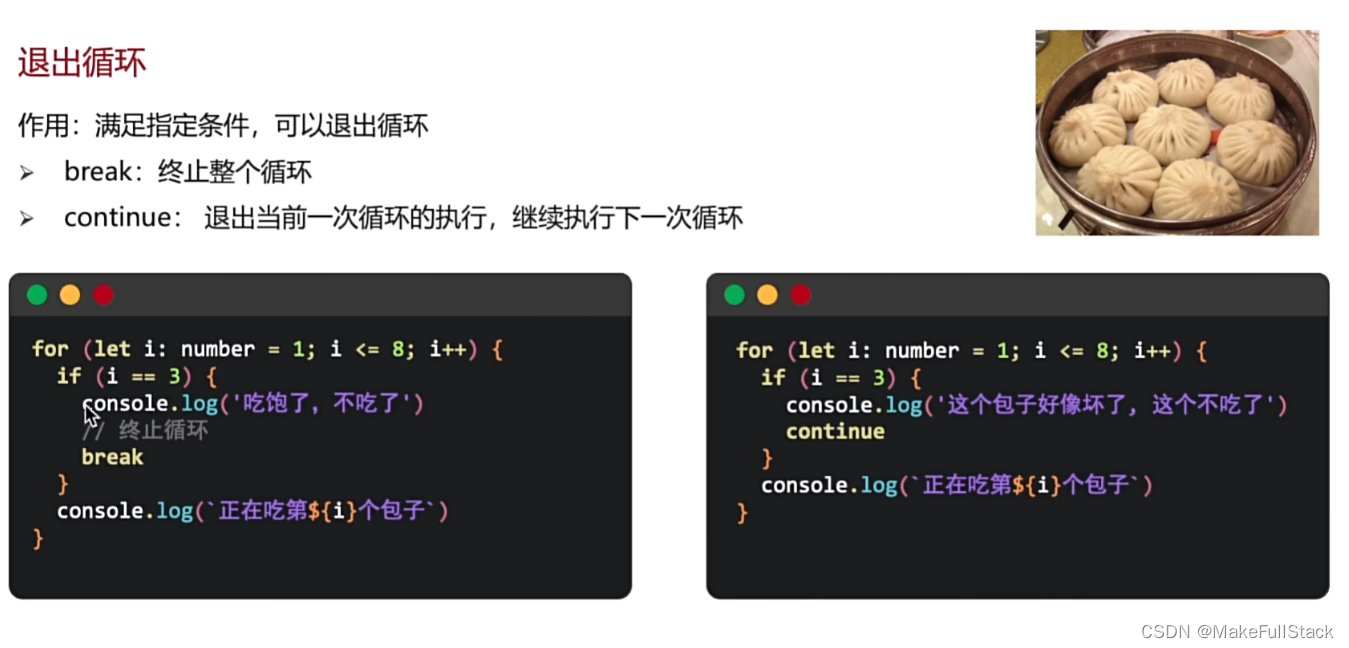
五、退出循环
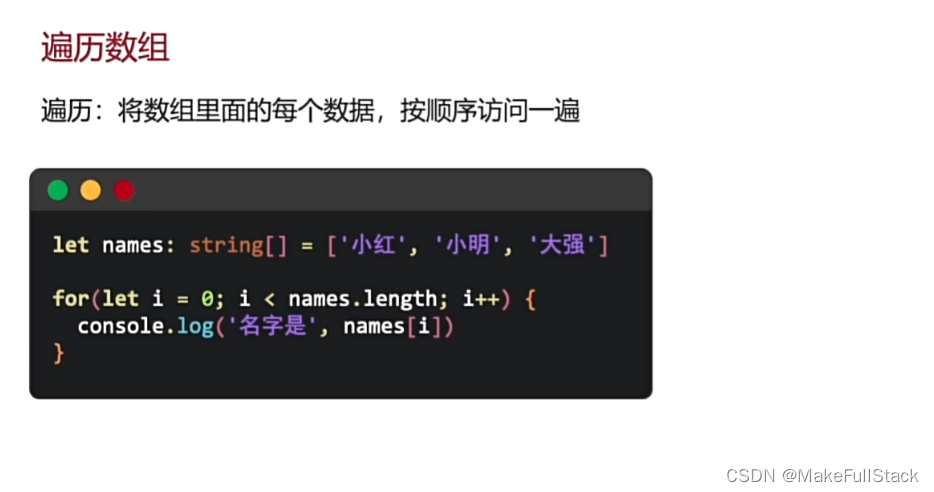
六、遍历数组
- 使用循环对数组一个一个访问一遍。
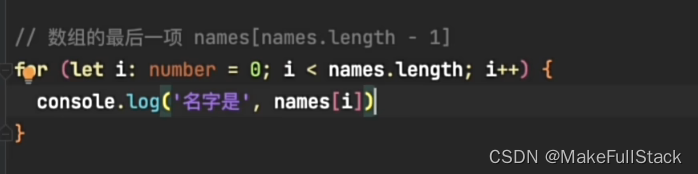
1. for 循环遍历
数组中的 - length方法
- 我不知道数组到底多长,此时就可以调用该方法,他返回的就是数组的元素个数。但是需要注意的是,我们数组从 0 开始,所以我们一般需要注意使用 等于号。
2. for of 遍历

- 主要是,我们 item 就是我们数组中的每一个元素
- of 后面写的是 需要遍历的数组
3. 遍历数组练习

/**
 * 遍历数组的练习
 */

// 需求1:求数组的累加和 [22, 3, 44, 55, 80]
let arr1 : number[] = [22, 3, 44, 55, 80]
let sum1 : number = 0
for (let item of arr1) {
  sum1 += item
}
console.log('需求1:', sum1)  // 204

console.log('------------------------------------------')

// 需求2:筛选数组中大于 10 的元素 ,将其收集到新的数组中并打印出来 [22, 3, 44, 55, 80]
let arr2 : number[] = [22, 3, 44, 55, 80]
let newArr : number[] = []
for (let item  of arr2) {
  if (item > 10 ) {
    newArr.push(item)
  }
}
console.log('newArr', newArr) // 22,44,55,80

console.log('------------------------------------------')

// 需求3:将数组中 不是 0 的元素 收集到新的数组中 [22, 3, 0, 55, 0, 0, 11, 5, 0]
let arr3 : number[] = [22, 3, 0, 55, 0, 0, 11, 5, 0]
let newArr2 : number[] = []
for (let item of arr3) {
  if (item != 0) {
    newArr2.push(item)
  }
}
console.log('newArr2', newArr2)    // 2 22,3,55,11,5
七、对象数组
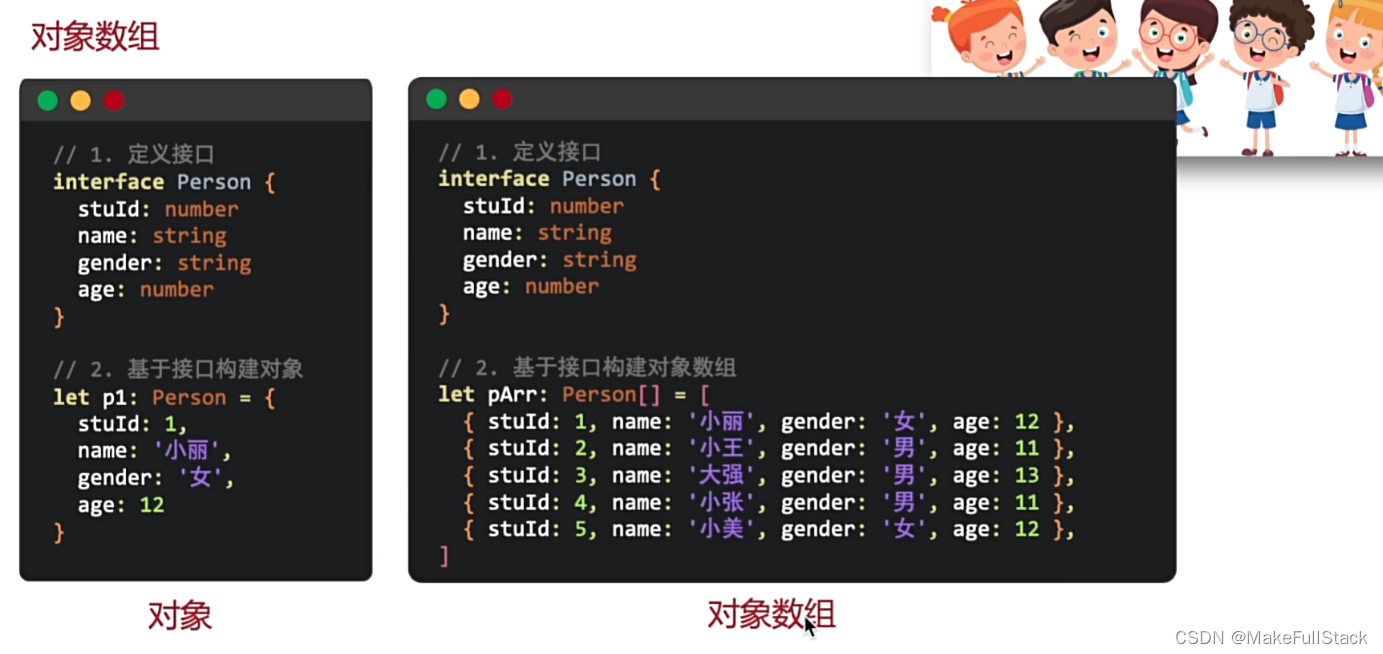
- 数组对象的基本使用代码示例:
/**
 * 对象数组
 */

// 1. 定义接口规范对象的创建
interface Student {
  id : string,
  name : string,
  gender : string
  age : number
}

// 2. 遵循接口类型规范,创建对象
let studentArray : Student[] = [
  {id: '001', name: '张三', gender: '男', age: 23},
  {id: '002', name: '李四', gender: '男', age: 24}
]

// 3. 使用数组对象,和 普通对象一样
// console.log('查看张三:', studentArray[0])  引用数据类型打印只能看到类型哦
console.log('查看张三', JSON.stringify(studentArray[0]))


// 4. 遍历数组对象,也是一样的,就是需要注意使用,需要调用方法转换数据处理哦
for (let item  of studentArray) {
  console.log('数据对象', JSON.stringify(item))
}
八、 ForEach - 遍历控制渲染

- 实现如下效果代码演示:
@Entry
@Component
struct ForEachItemDemo  {
  // 准备数据源,数据列表
  @State titles : string[] = ['电子产品','精品服饰','母婴产品','影音娱乐','海外旅游']
  build() {
    Column() {
      // 使用 ForEach 遍历数组渲染
      ForEach(this.titles, (item : string, index) => {
          Text(item).fontSize(18).fontColor('#FFCCAA').fontWeight(700).width('100%').padding(10).textAlign(TextAlign.Center)
      })
    } .width('100%').height('100%').padding(10)
  }
}
大家知道他的参数和使用即可!然后项目中多练习,加油!后面章节我们提供一个阶段性案例哦!


 1631
1631


 被折叠的 条评论
为什么被折叠?
被折叠的 条评论
为什么被折叠?
 到【灌水乐园】发言


