


玩转Jetson Nano(五):TensorRT加速YOLOv5目标检测
- 前言
- 实验环境
- YOLOv5目标检测
- TensorRT加速
- 常见问题
- 参考文献
前言
- 本文是个人使用Jetson Nano的电子笔记,由于水平有限,难免出现错漏,敬请批评改正。
- 更多精彩内容,可点击进入
玩转Jetson Nano专栏或我的个人主页查看
实验环境
- matplotlib>=3.2.2
- numpy>=1.18.5
- opencv-python>=4.1.1
- scipy>=1.4.1
- torch>=1.7.0
- torchvision>=0.8.1
- tqdm>=4.41.0
- tensorboard>=2.4.1
- seaborn>=0.11.0
YOLOv5目标检测
克隆下载yolov5项目
由于yolov5最新版本可能会出现了不兼容问题,所以这里克隆下载yolov5 5.0版本。
git clone -b v5.0 https://github.com/ultralytics/yolov5.git

安装所需的环境
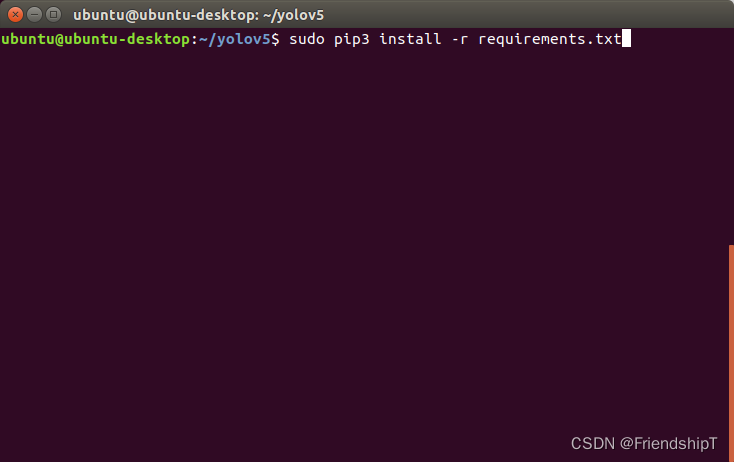
在yolov5项目下,打开终端输入:
sudo pip3 install -r requirements.txt
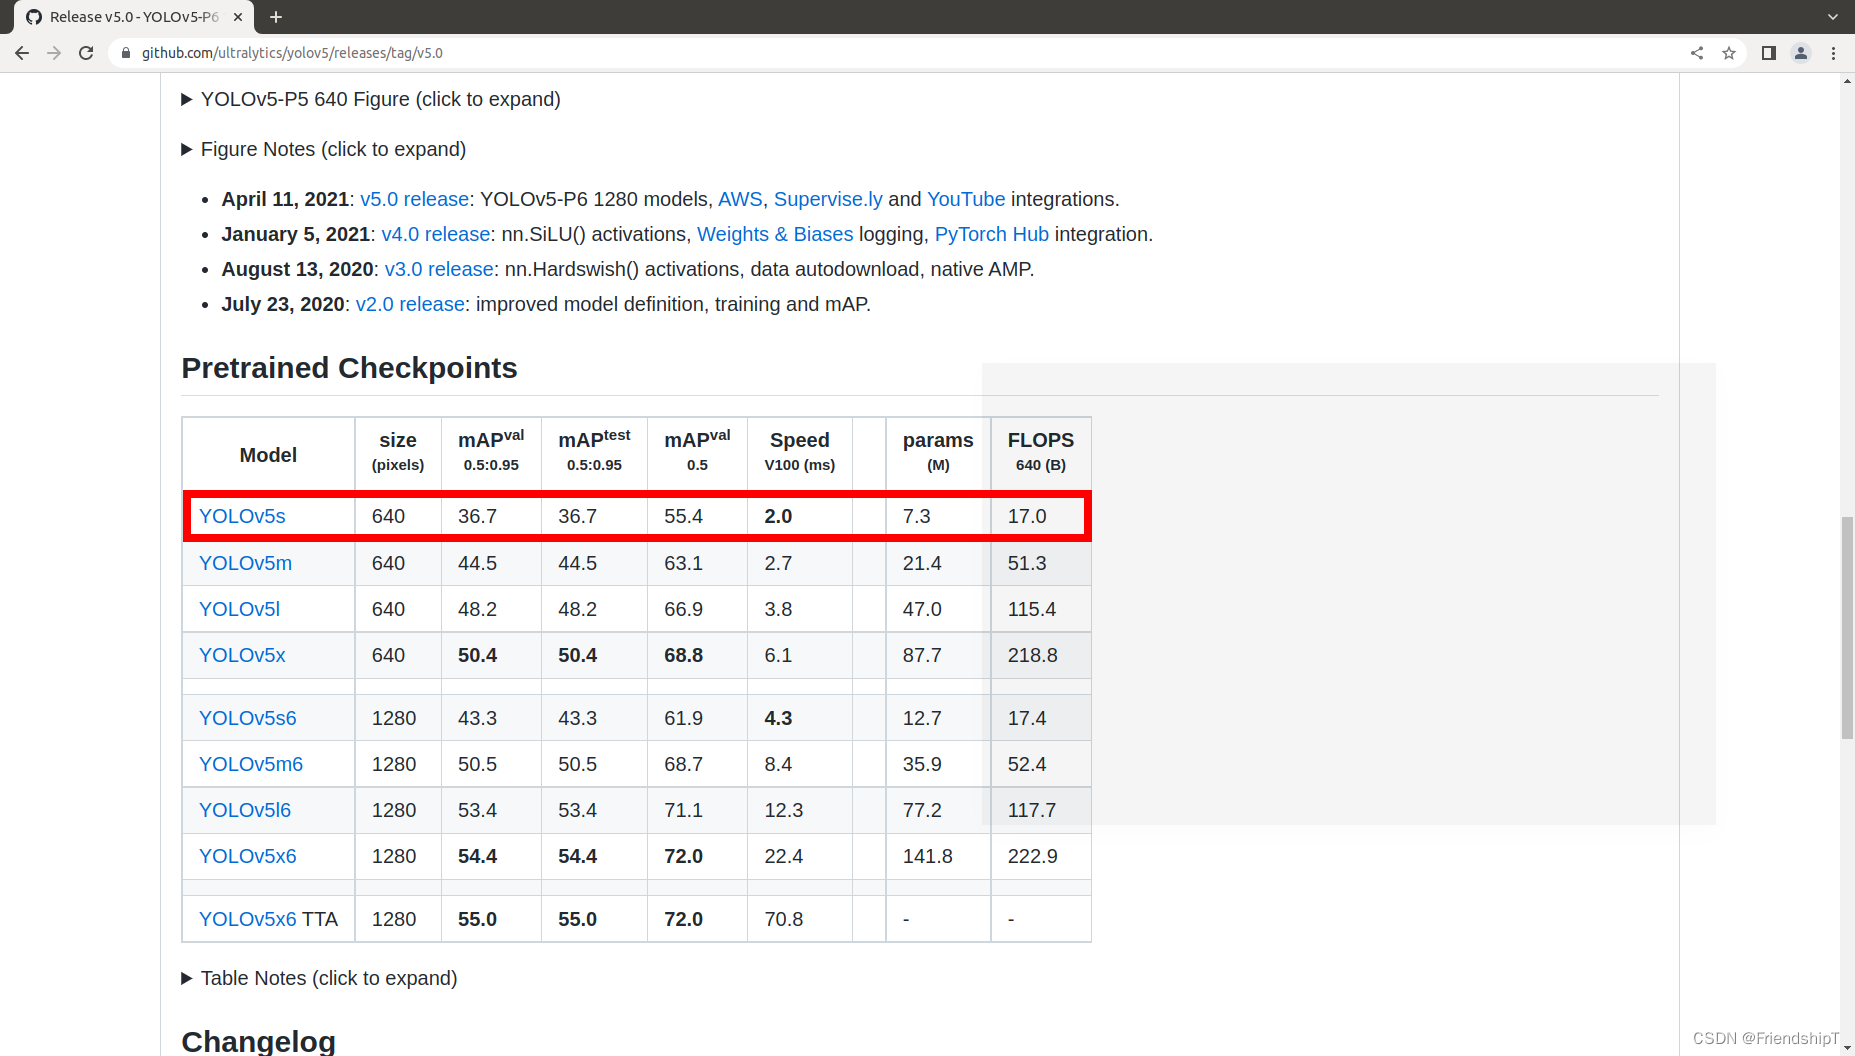
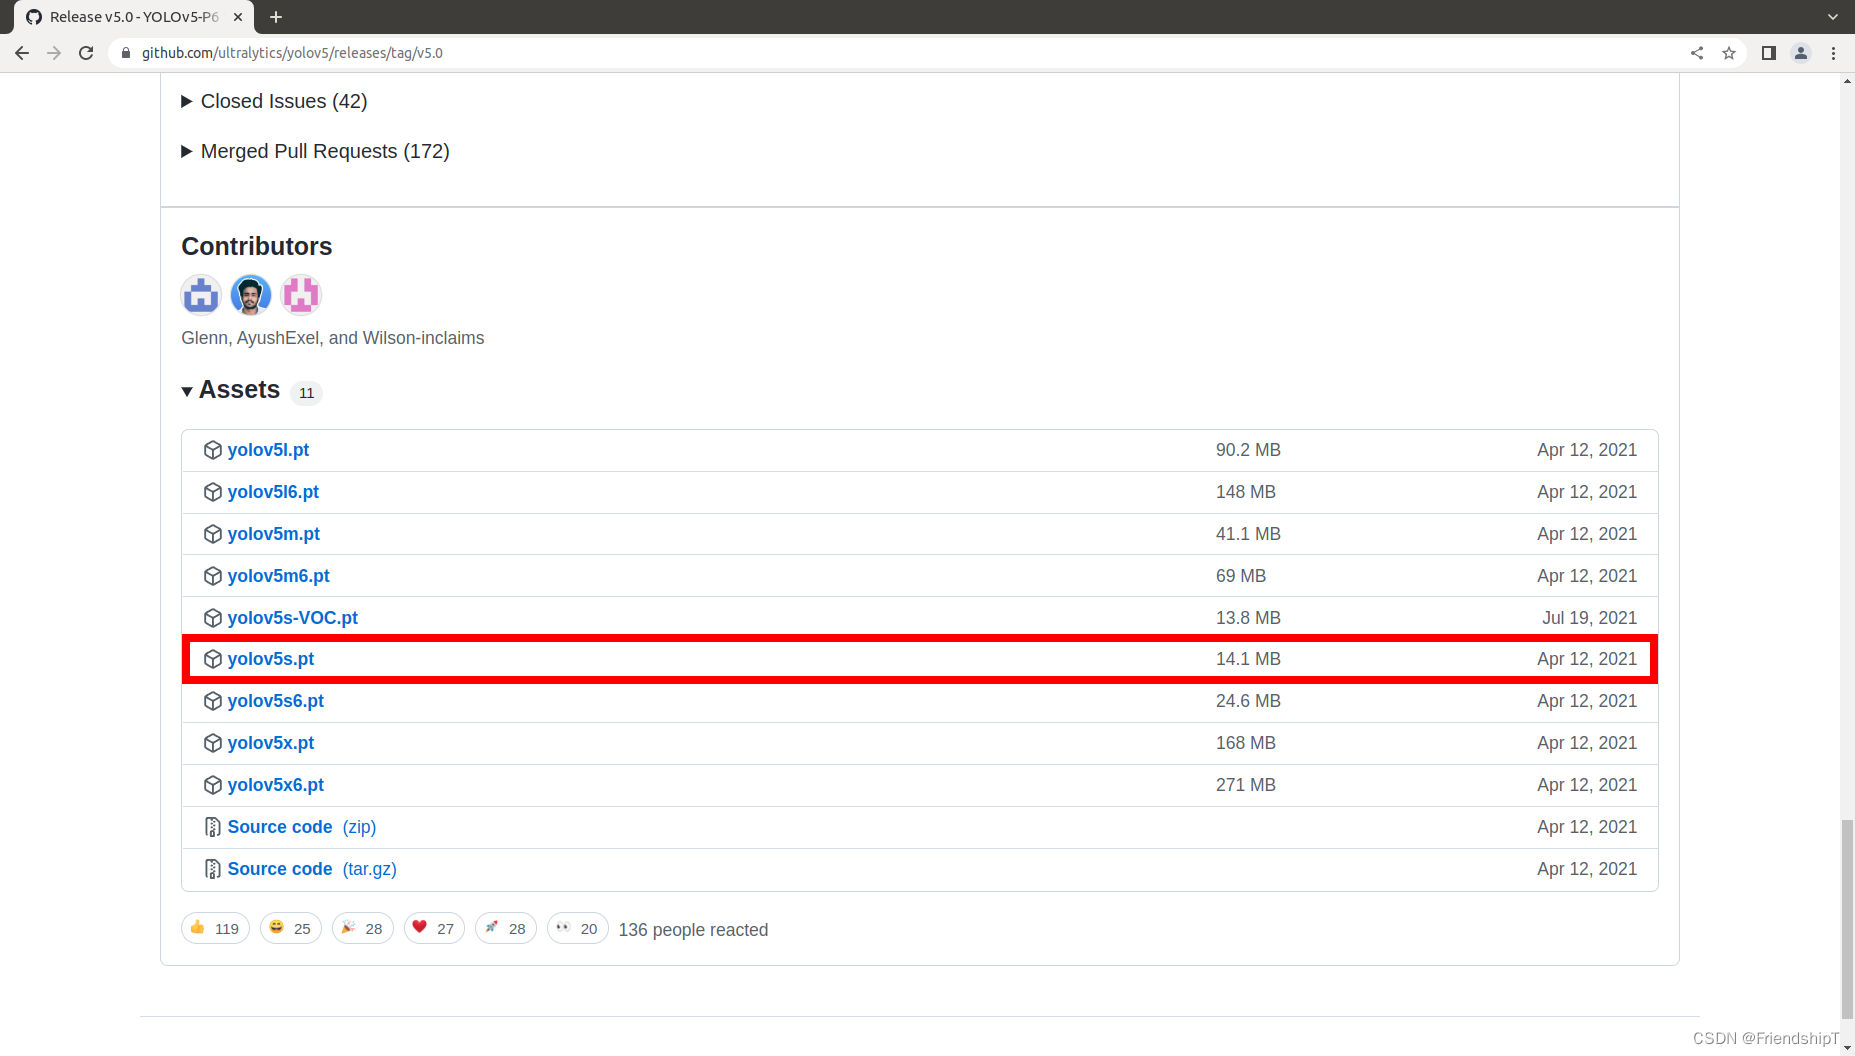
下载yolov5s.pt权重
https://github.com/ultralytics/yolov5/releases/tag/v5.0
如果没有下载yolov5s.pt权重,后续在测试图片,运行python3 detect.py时,会自动下载。
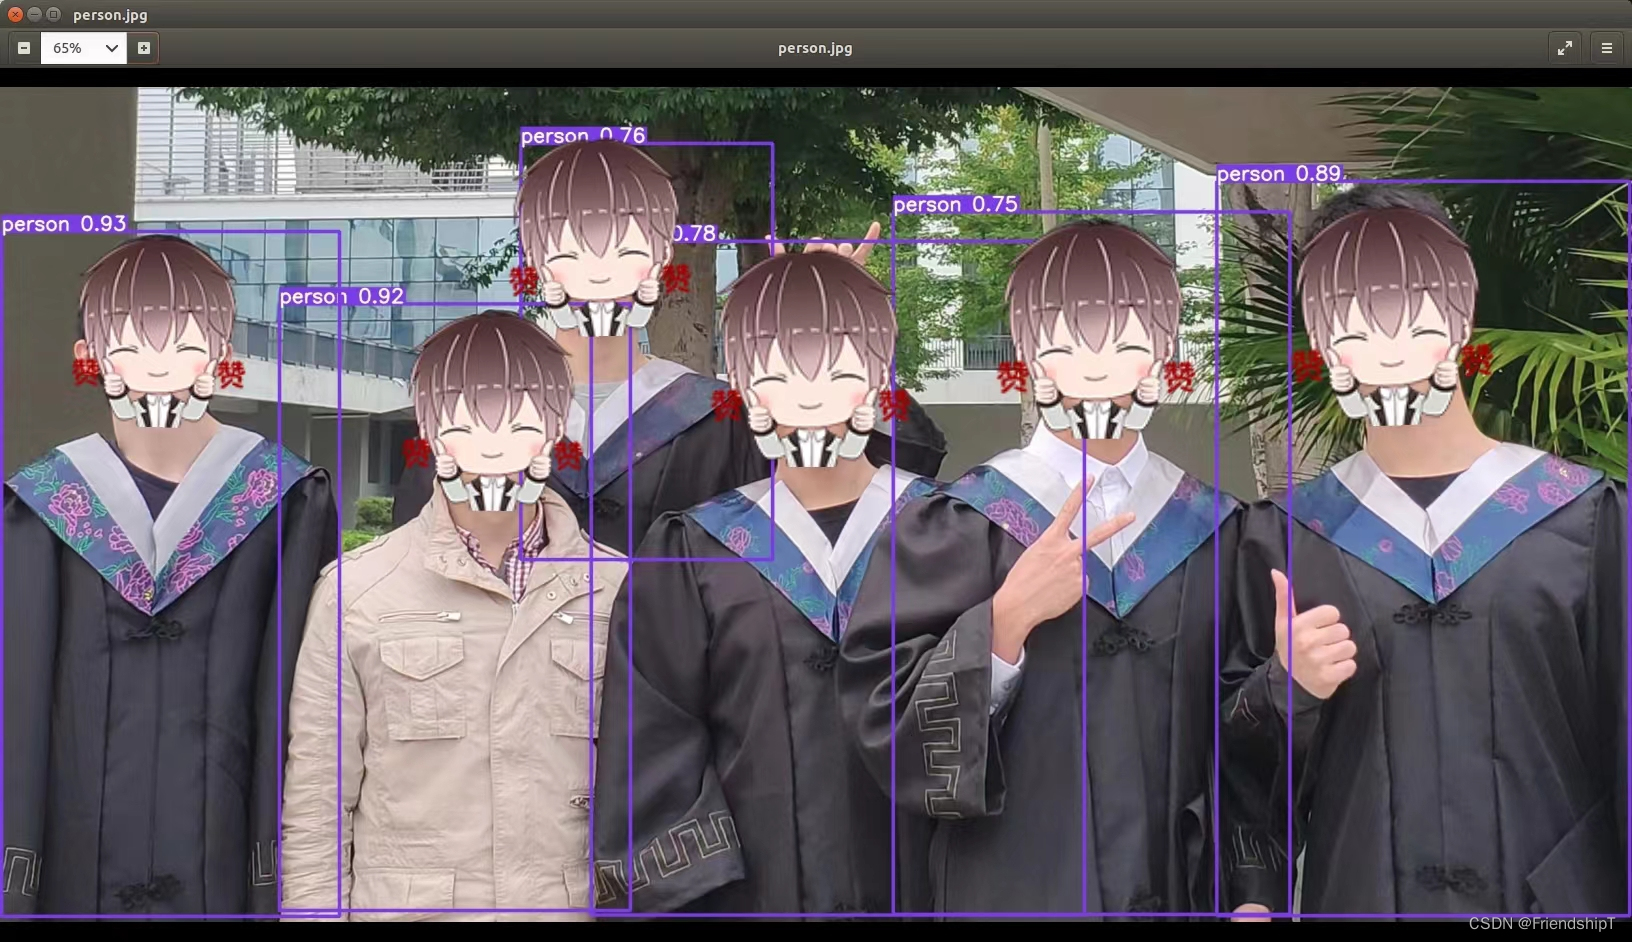
测试图片
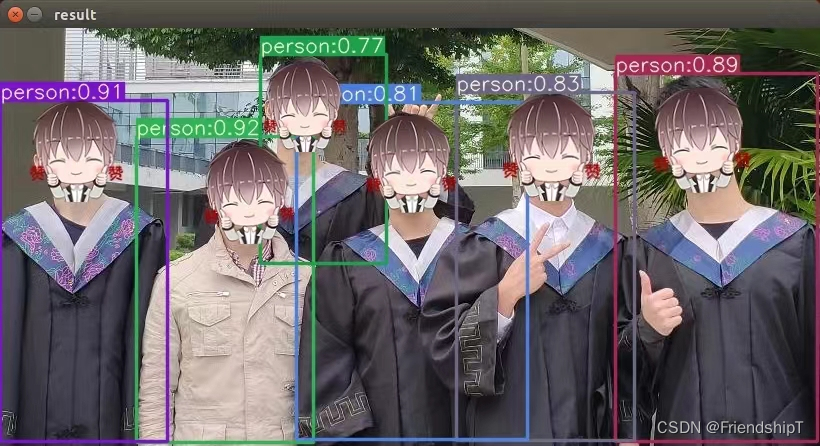
python3 detect.py --source data/images/person.jpg

TensorRT加速
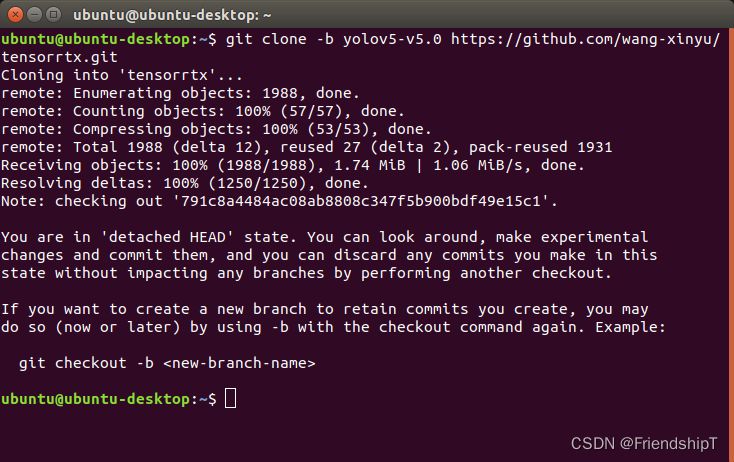
克隆下载tensorrtx项目
git clone -b yolov5-v5.0 https://github.com/wang-xinyu/tensorrtx.git
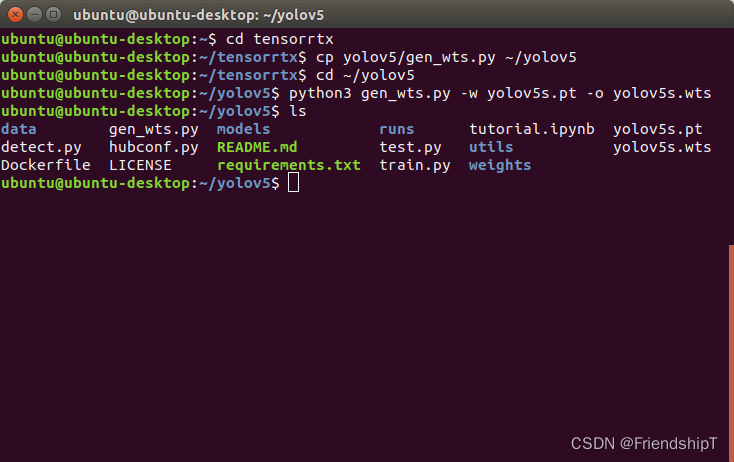
转换生成yolov5s.wts文件
cd tensorrtx
cp yolov5/gen_wts.py ~/yolov5
cd ~/yolov5
python3 gen_wts.py -w yolov5s.pt -o yolov5s.wts
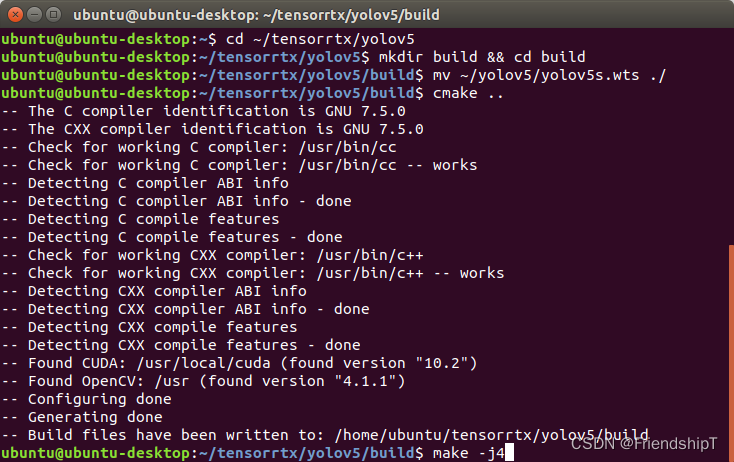
生成引擎文件
编译
cd ~/tensorrtx/yolov5
mkdir build && cd build
mv ~/yolov5/yolov5s.wts ./
cmake ..
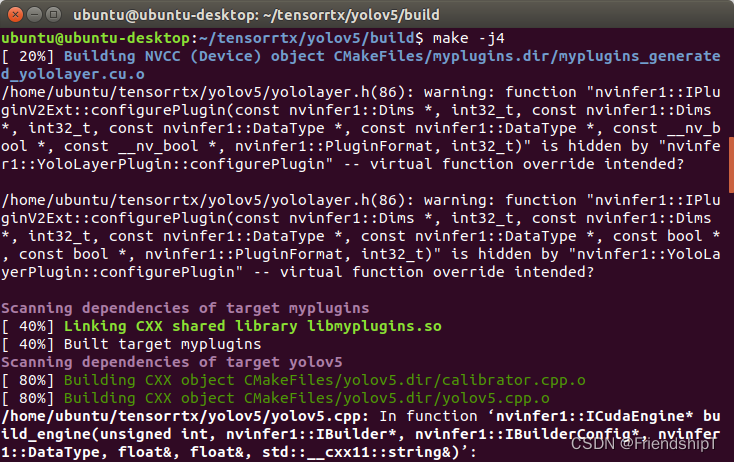
make -j4

生成yolov5s.engine文件
# ./yolov5 -s [.wts] [.engine] [s/m/l/x/s6/m6/l6/x6 or c/c6 gd gw]
./yolov5 -s yolov5s.wts yolov5s.engine s

测试图片
./yolov5 -d yolov5s.engine ../samples # 推理samples文件夹里的图片
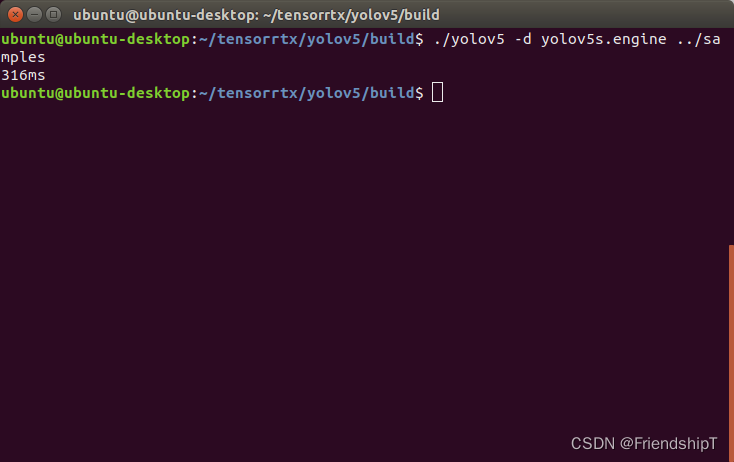
从结果上看,预测一张图片所需时间,从5.262s提升到了0.316s。

新建并编辑yolov5_trt_test.py
vi yolov5_trt_img_test.py
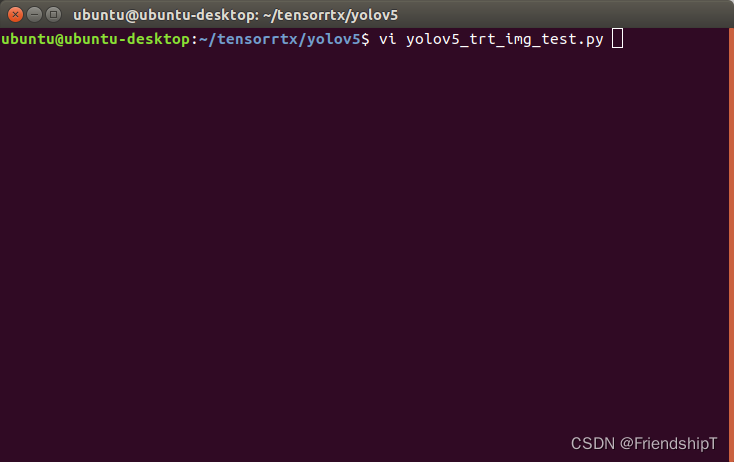
yolov5_trt_img_test.py内容如下:
"""
An example that uses TensorRT's Python api to make inferences.
"""
import ctypes
import os
import shutil
import random
import sys
import threading
import time
import cv2
import numpy as np
import pycuda.autoinit
import pycuda.driver as cuda
import tensorrt as trt
import torch
import torchvision
import argparse
CONF_THRESH = 0.5
IOU_THRESHOLD = 0.4
def get_img_path_batches(batch_size, img_dir):
ret = []
batch = []
for root, dirs, files in os.walk(img_dir):
for name in files:
if len(batch) == batch_size:
ret.append(batch)
batch = []
batch.append(os.path.join(root, name))
if len(batch) > 0:
ret.append(batch)
return ret
def plot_one_box(x, img, color=None, label=None, line_thickness=None):
"""
description: Plots one bounding box on image img,
this function comes from YoLov5 project.
param:
x: a box likes [x1,y1,x2,y2]
img: a opencv image object
color: color to draw rectangle, such as (0,255,0)
label: str
line_thickness: int
return:
no return
"""
tl = (
line_thickness or round(0.002 * (img.shape[0] + img.shape[1]) / 2) + 1
) # line/font thickness
color = color or [random.randint(0, 255) for _ in range(3)]
c1, c2 = (int(x[0]), int(x[1])), (int(x[2]), int(x[3]))
cv2.rectangle(img, c1, c2, color, thickness=tl, lineType=cv2.LINE_AA)
if label:
tf = max(tl - 1, 1) # font thickness
t_size = cv2.getTextSize(label, 0, fontScale=tl / 3, thickness=tf)[0]
c2 = c1[0] + t_size[0], c1[1] - t_size[1] - 3
cv2.rectangle(img, c1, c2, color, -1, cv2.LINE_AA) # filled
cv2.putText(
img,
label,
(c1[0], c1[1] - 2),
0,
tl / 3,
[225, 255, 255],
thickness=tf,
lineType=cv2.LINE_AA,
)
class YoLov5TRT(object):
"""
description: A YOLOv5 class that warps TensorRT ops, preprocess and postprocess ops.
"""
def __init__(self, engine_file_path):
# Create a Context on this device,
self.ctx = cuda.Device(0).make_context()
stream = cuda.Stream()
TRT_LOGGER = trt.Logger(trt.Logger.INFO)
runtime = trt.Runtime(TRT_LOGGER)
# Deserialize the engine from file
with open(engine_file_path, "rb") as f:
engine = runtime.deserialize_cuda_engine(f.read())
context = engine.create_execution_context()
host_inputs = []
cuda_inputs = []
host_outputs = []
cuda_outputs = []
bindings = []
for binding in engine:
print('bingding:', binding, engine.get_binding_shape(binding))
size = trt.volume(engine.get_binding_shape(binding)) * engine.max_batch_size
dtype = trt.nptype(engine.get_binding_dtype(binding))
# Allocate host and device buffers
host_mem = cuda.pagelocked_empty(size, dtype)
cuda_mem = cuda.mem_alloc(host_mem.nbytes)
# Append the device buffer to device bindings.
bindings.append(int(cuda_mem))
# Append to the appropriate list.
if engine.binding_is_input(binding):
self.input_w = engine.get_binding_shape(binding)[-1]
self.input_h = engine.get_binding_shape(binding)[-2]
host_inputs.append(host_mem)
cuda_inputs.append(cuda_mem)
else:
host_outputs.append(host_mem)
cuda_outputs.append(cuda_mem)
# Store
self.stream = stream
self.context = context
self.engine = engine
self.host_inputs = host_inputs
self.cuda_inputs = cuda_inputs
self.host_outputs = host_outputs
self.cuda_outputs = cuda_outputs
self.bindings = bindings
self.batch_size = engine.max_batch_size
def infer(self, input_image_path):
threading.Thread.__init__(self)
# Make self the active context, pushing it on top of the context stack.
self.ctx.push()
self.input_image_path = input_image_path
# Restore
stream = self.stream
context = self.context
engine = self.engine
host_inputs = self.host_inputs
cuda_inputs = self.cuda_inputs
host_outputs = self.host_outputs
cuda_outputs = self.cuda_outputs
bindings = self.bindings
# Do image preprocess
batch_image_raw = []
batch_origin_h = []
batch_origin_w = []
batch_input_image = np.empty(shape=[self.batch_size, 3, self.input_h, self.input_w])
input_image, image_raw, origin_h, origin_w = self.preprocess_image(input_image_path
)
batch_origin_h.append(origin_h)
batch_origin_w.append(origin_w)
np.copyto(batch_input_image, input_image)
batch_input_image = np.ascontiguousarray(batch_input_image)
# Copy input image to host buffer
np.copyto(host_inputs[0], batch_input_image.ravel())
start = time.time()
# Transfer input data to the GPU.
cuda.memcpy_htod_async(cuda_inputs[0], host_inputs[0], stream)
# Run inference.
context.execute_async(batch_size=self.batch_size, bindings=bindings, stream_handle=stream.handle)
# Transfer predictions back from the GPU.
cuda.memcpy_dtoh_async(host_outputs[0], cuda_outputs[0], stream)
# Synchronize the stream
stream.synchronize()
end = time.time()
# Remove any context from the top of the context stack, deactivating it.
self.ctx.pop()
# Here we use the first row of output in that batch_size = 1
output = host_outputs[0]
# Do postprocess
result_boxes, result_scores, result_classid = self.post_process(
output, origin_h, origin_w)
# Draw rectangles and labels on the original image
for j in range(len(result_boxes)):
box = result_boxes[j]
plot_one_box(
box,
image_raw,
label="{}:{:.2f}".format(
categories[int(result_classid[j])], result_scores[j]
),
)
return image_raw, end - start
def destroy(self):
# Remove any context from the top of the context stack, deactivating it.
self.ctx.pop()
def get_raw_image(self, image_path_batch):
"""
description: Read an image from image path
"""
for img_path in image_path_batch:
yield cv2.imread(img_path)
def get_raw_image_zeros(self, image_path_batch=None):
"""
description: Ready data for warmup
"""
for _ in range(self.batch_size):
yield np.zeros([self.input_h, self.input_w, 3], dtype=np.uint8)
def preprocess_image(self, input_image_path):
"""
description: Convert BGR image to RGB,
resize and pad it to target size, normalize to [0,1],
transform to NCHW format.
param:
input_image_path: str, image path
return:
image: the processed image
image_raw: the original image
h: original height
w: original width
"""
image_raw = input_image_path
h, w, c = image_raw.shape
image = cv2.cvtColor(image_raw, cv2.COLOR_BGR2RGB)
# Calculate widht and height and paddings
r_w = self.input_w / w
r_h = self.input_h / h
if r_h > r_w:
tw = self.input_w
th = int(r_w * h)
tx1 = tx2 = 0
ty1 = int((self.input_h - th) / 2)
ty2 = self.input_h - th - ty1
else:
tw = int(r_h * w)
th = self.input_h
tx1 = int((self.input_w - tw) / 2)
tx2 = self.input_w - tw - tx1
ty1 = ty2 = 0
# Resize the image with long side while maintaining ratio
image = cv2.resize(image, (tw, th))
# Pad the short side with (128,128,128)
image = cv2.copyMakeBorder(
image, ty1, ty2, tx1, tx2, cv2.BORDER_CONSTANT, (128, 128, 128)
)
image = image.astype(np.float32)
# Normalize to [0,1]
image /= 255.0
# HWC to CHW format:
image = np.transpose(image, [2, 0, 1])
# CHW to NCHW format
image = np.expand_dims(image, axis=0)
# Convert the image to row-major order, also known as "C order":
image = np.ascontiguousarray(image)
return image, image_raw, h, w
def xywh2xyxy(self, origin_h, origin_w, x):
"""
description: Convert nx4 boxes from [x, y, w, h] to [x1, y1, x2, y2] where xy1=top-left, xy2=bottom-right
param:
origin_h: height of original image
origin_w: width of original image
x: A boxes tensor, each row is a box [center_x, center_y, w, h]
return:
y: A boxes tensor, each row is a box [x1, y1, x2, y2]
"""
y = torch.zeros_like(x) if isinstance(x, torch.Tensor) else np.zeros_like(x)
r_w = self.input_w / origin_w
r_h = self.input_h / origin_h
if r_h > r_w:
y[:, 0] = x[:, 0] - x[:, 2] / 2
y[:, 2] = x[:, 0] + x[:, 2] / 2
y[:, 1] = x[:, 1] - x[:, 3] / 2 - (self.input_h - r_w * origin_h) / 2
y[:, 3] = x[:, 1] + x[:, 3] / 2 - (self.input_h - r_w * origin_h) / 2
y /= r_w
else:
y[:, 0] = x[:, 0] - x[:, 2] / 2 - (self.input_w - r_h * origin_w) / 2
y[:, 2] = x[:, 0] + x[:, 2] / 2 - (self.input_w - r_h * origin_w) / 2
y[:, 1] = x[:, 1] - x[:, 3] / 2
y[:, 3] = x[:, 1] + x[:, 3] / 2
y /= r_h
return y
def post_process(self, output, origin_h, origin_w):
"""
description: postprocess the prediction
param:
output: A tensor likes [num_boxes,cx,cy,w,h,conf,cls_id, cx,cy,w,h,conf,cls_id, ...]
origin_h: height of original image
origin_w: width of original image
return:
result_boxes: finally boxes, a boxes tensor, each row is a box [x1, y1, x2, y2]
result_scores: finally scores, a tensor, each element is the score correspoing to box
result_classid: finally classid, a tensor, each element is the classid correspoing to box
"""
# Get the num of boxes detected
num = int(output[0])
# Reshape to a two dimentional ndarray
pred = np.reshape(output[1:], (-1, 6))[:num, :]
# to a torch Tensor
pred = torch.Tensor(pred).cuda()
# Get the boxes
boxes = pred[:, :4]
# Get the scores
scores = pred[:, 4]
# Get the classid
classid = pred[:, 5]
# Choose those boxes that score > CONF_THRESH
si = scores > CONF_THRESH
boxes = boxes[si, :]
scores = scores[si]
classid = classid[si]
# Trandform bbox from [center_x, center_y, w, h] to [x1, y1, x2, y2]
boxes = self.xywh2xyxy(origin_h, origin_w, boxes)
# Do nms
indices = torchvision.ops.nms(boxes, scores, iou_threshold=IOU_THRESHOLD).cpu()
result_boxes = boxes[indices, :].cpu()
result_scores = scores[indices].cpu()
result_classid = classid[indices].cpu()
return result_boxes, result_scores, result_classid
class inferThread(threading.Thread):
def __init__(self, yolov5_wrapper):
threading.Thread.__init__(self)
self.yolov5_wrapper = yolov5_wrapper
def infer(self , frame):
batch_image_raw, use_time = self.yolov5_wrapper.infer(frame)
# for i, img_path in enumerate(self.image_path_batch):
# parent, filename = os.path.split(img_path)
# save_name = os.path.join('output', filename)
# # Save image
# cv2.imwrite(save_name, batch_image_raw[i])
# print('input->{}, time->{:.2f}ms, saving into output/'.format(self.image_path_batch, use_time * 1000))
return batch_image_raw,use_time
class warmUpThread(threading.Thread):
def __init__(self, yolov5_wrapper):
threading.Thread.__init__(self)
self.yolov5_wrapper = yolov5_wrapper
def run(self):
batch_image_raw, use_time = self.yolov5_wrapper.infer(self.yolov5_wrapper.get_raw_image_zeros())
print('warm_up->{}, time->{:.2f}ms'.format(batch_image_raw[0].shape, use_time * 1000))
if __name__ == "__main__":
# load custom plugins
parser = argparse.ArgumentParser()
parser.add_argument('--engine', nargs='+', type=str, default="build/yolov5s.engine", help='.engine path(s)')
parser.add_argument('--save', type=int, default=0, help='save?')
opt = parser.parse_args()
PLUGIN_LIBRARY = "build/libmyplugins.so"
engine_file_path = opt.engine
ctypes.CDLL(PLUGIN_LIBRARY)
# load coco labels
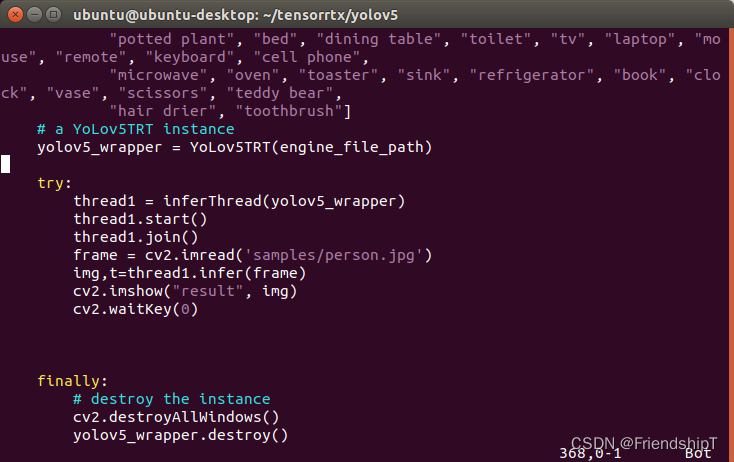
categories = ["person", "bicycle", "car", "motorcycle", "airplane", "bus", "train", "truck", "boat", "traffic light",
"fire hydrant", "stop sign", "parking meter", "bench", "bird", "cat", "dog", "horse", "sheep", "cow",
"elephant", "bear", "zebra", "giraffe", "backpack", "umbrella", "handbag", "tie", "suitcase", "frisbee",
"skis", "snowboard", "sports ball", "kite", "baseball bat", "baseball glove", "skateboard", "surfboard",
"tennis racket", "bottle", "wine glass", "cup", "fork", "knife", "spoon", "bowl", "banana", "apple",
"sandwich", "orange", "broccoli", "carrot", "hot dog", "pizza", "donut", "cake", "chair", "couch",
"potted plant", "bed", "dining table", "toilet", "tv", "laptop", "mouse", "remote", "keyboard", "cell phone",
"microwave", "oven", "toaster", "sink", "refrigerator", "book", "clock", "vase", "scissors", "teddy bear",
"hair drier", "toothbrush"]
# a YoLov5TRT instance
yolov5_wrapper = YoLov5TRT(engine_file_path)
try:
thread1 = inferThread(yolov5_wrapper)
thread1.start()
thread1.join()
frame = cv2.imread('samples/person.jpg')
img,t=thread1.infer(frame)
cv2.imshow("result", img)
cv2.waitKey(0)
finally:
# destroy the instance
cv2.destroyAllWindows()
yolov5_wrapper.destroy()
运行yolov5_trt_img_test.py文件
python3 yolov5_trt_img_test.py
常见问题
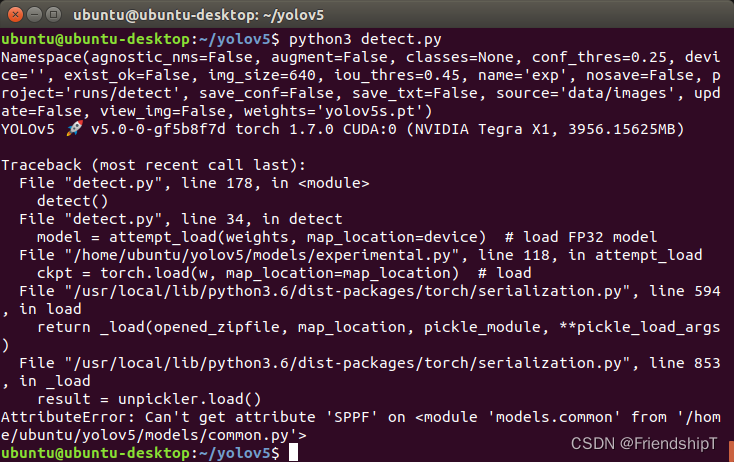
AttributeError: Can‘t get attribute ‘SPPF‘ on <module ‘models.common’ from ‘/home/yolov5/models/common.py’>
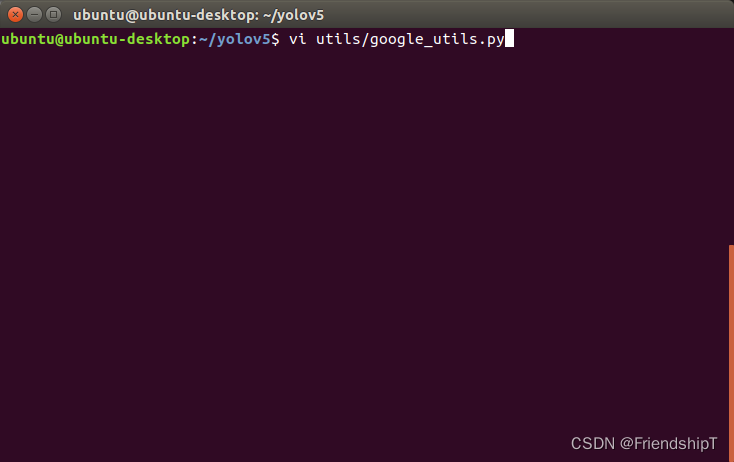
解决方法
vi utils/google_utils.py
将
response = requests.get(f'https://api.github.com/repos/{repo}/releases/latest').json() # github api
改为
response = requests.get(f'https://api.github.com/repos/{repo}/releases/tags/v5.0').json() # github api
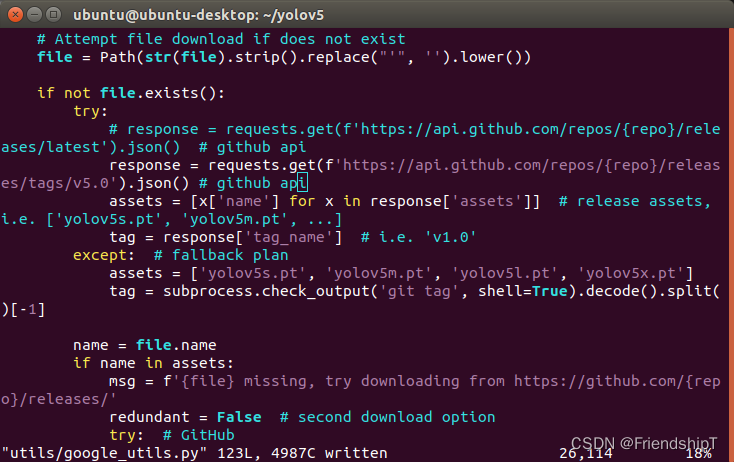
修改保存并退出,即可!
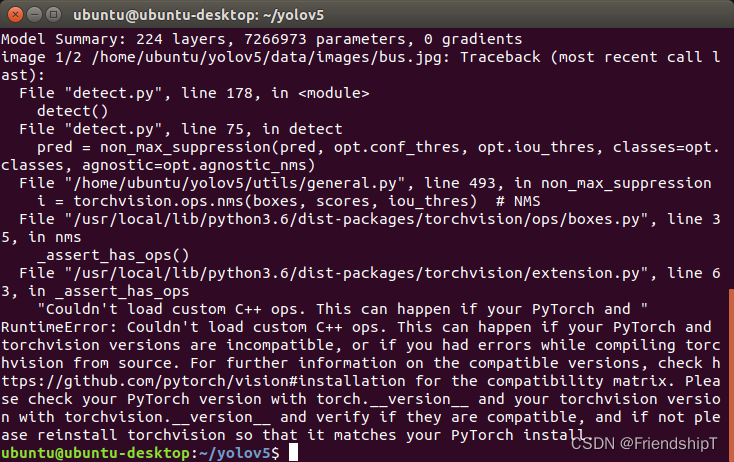
RuntimeError: Couldn’t load custom C++ ops.
RuntimeError: Couldn't load custom C++ ops. This can happen if your PyTorch and torchvision versions are incompatible, or if you had errors while compiling torchvision from source. For further information on the compatible versions, check https://github.com/pytorch/vision#installation for the compatibility matrix. Please check your PyTorch version with torch.__version__ and your torchvision version with torchvision.__version__ and verify if they are compatible, and if not please reinstall torchvision so that it matches your PyTorch install.
解决方法
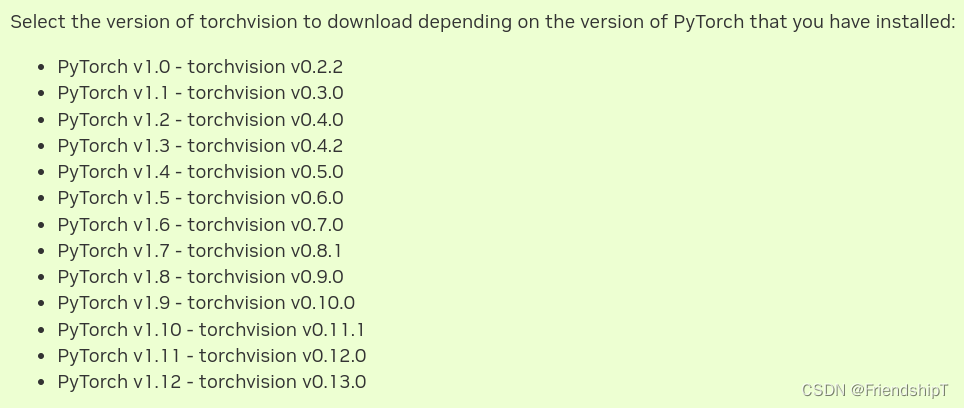
这可能是由于torch和torchvision版本不一致所引起的报错。torch所对应的torchvision版本,如下图所示。
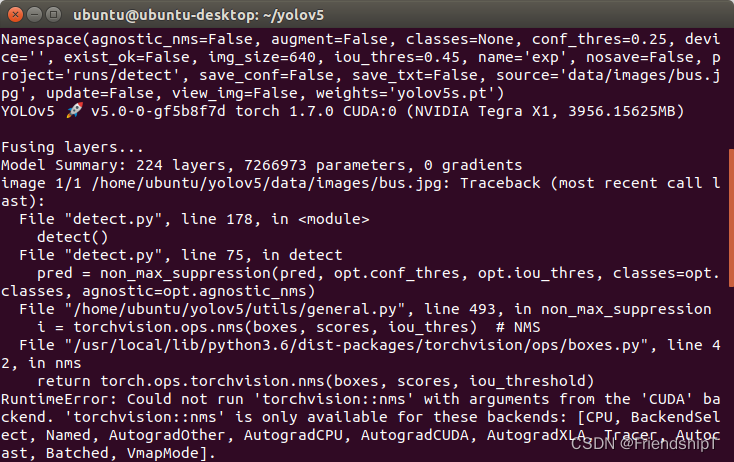
RuntimeError: Could not run ‘torchvision::nms’ with arguments from the ‘CUDA’ backend.
RuntimeError: Could not run 'torchvision::nms' with arguments from the 'CUDA' backend. 'torchvision::nms' is only available for these backends: [CPU, BackendSelect, Named, AutogradOther, AutogradCPU, AutogradCUDA, AutogradXLA, Tracer, Autocast, Batched, VmapMode].
解决方法
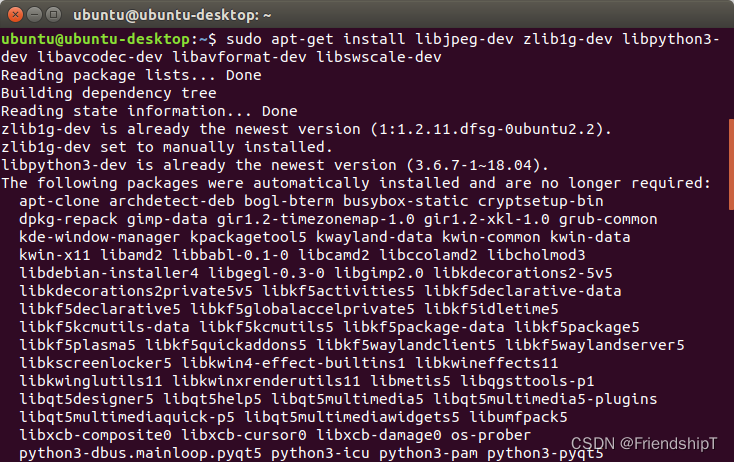
sudo apt-get install libjpeg-dev zlib1g-dev libpython3-dev libavcodec-dev libavformat-dev libswscale-dev
# 下载torchvision-0.8.1压缩包
wget https://github.com/pytorch/vision/archive/v0.8.1.zip
unzip vision-0.8.1.zip
mv vision-0.8.1 ~/torchvision
# 编译
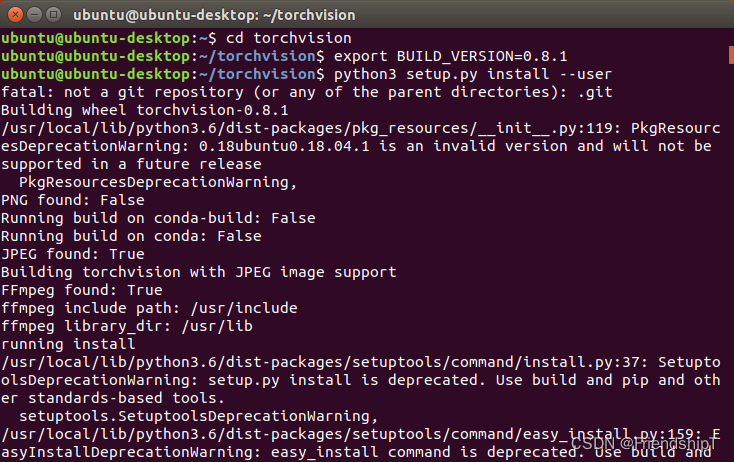
cd torchvision
export BUILD_VERSION=0.8.1 # torch-1.7.0 对应 torchvision-0.8.1
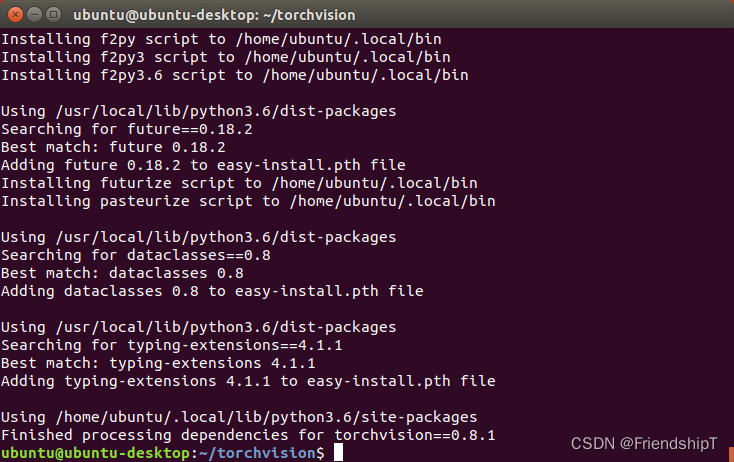
python3 setup.py install --user
ModuleNotFoundError: No module named ‘pycuda’
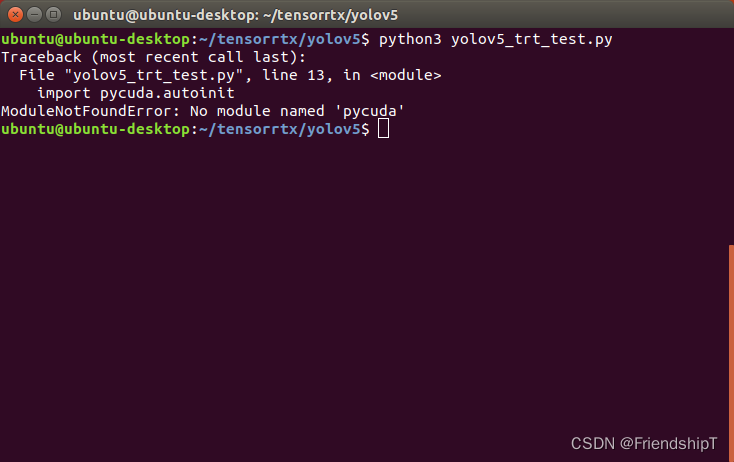
解决方法
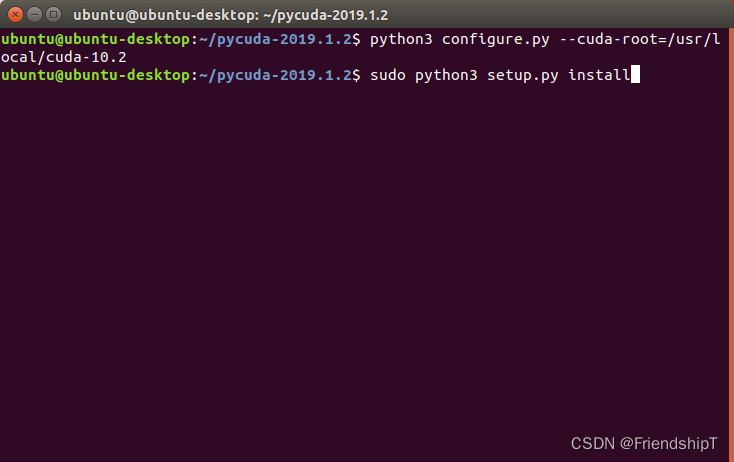
网上有教程,直接用sudo pip3 install pycuda下载,你们可以试试,我这里无法安装成功,只能使用编译安装的方法。
pycuda下载链接 提取码: cuda
下载完成后,解压文件,运行以下命令:
cd pycuda-2019.1.2
python3 configure.py --cuda-root=/usr/local/cuda-10.2
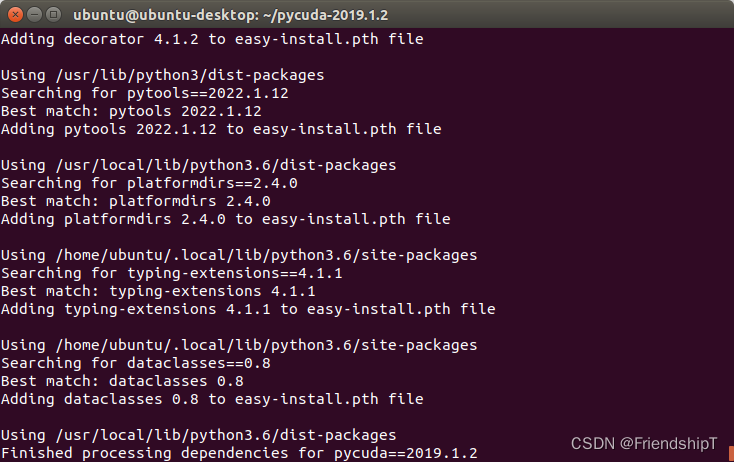
sudo python3 setup.py install
参考文献
[1] Jetson Nano Developer Kit User Guide
[2] https://docs.nvidia.com/deeplearning/frameworks/install-pytorch-jetson-platform-release-notes/index.html
[3] https://forums.developer.nvidia.com/t/pytorch-for-jetson-version-1-11-now-available/72048
[4] https://github.com/ultralytics/yolov5.git
[5] https://zhuanlan.zhihu.com/p/425891581
[6] https://blog.csdn.net/qq_40691868/article/details/117331162
- 更多精彩内容,可点击进入
玩转Jetson Nano专栏或我的个人主页查看


 1048
1048

 被折叠的 条评论
为什么被折叠?
被折叠的 条评论
为什么被折叠?
 到【灌水乐园】发言


