


 本文详细介绍了在Vue中如何实现父组件向子组件传递数据以及子组件触发事件将数据回传给父组件的过程。通过`v-show`和自定义事件`send-toy`展示了双向数据绑定和事件触发的实际应用。
父组件:Father.vue
<template>
  <div class="father">
    <h3>父组件</h3>
	<h4 v-show="toy">子给的玩具:{{ toy }}</h4>
	<!-- 给子组件Child绑定事件 -->
    <Child @send-toy="saveToy"/>
  </div>
</template>

<script setup lang="ts" name="Father">
  import Child from './Child.vue'
  import { ref } from 'vue'
  //数据
  let toy = ref('')
  //用于保存传递过来的玩具
  function saveToy (value:string){
	console.log('saveToy',value)
	toy.value = value
  }
</script>

<style scoped>
	.father{
		background-color:rgb(165, 164, 164);
		padding: 20px;
    border-radius: 10px;
	}
	.father button{
		margin-right: 5px;
	}
</style>
子组件:Child.vue
<template>
<div class="child">
<h3>子组件</h3>
<h4>玩具:{{ toy }}</h4>
<button @click="emit('send-toy',toy)">测试</button>
</div>
</template>
<script setup lang="ts" name="Child">
import { onMounted, ref } from 'vue'
//数据
let toy = ref('奥特曼')
//声明事件
const emit = defineEmits(['send-toy'])
</script>
<style scoped>
.child{
margin-top: 10px;
background-color: rgb(76, 209, 76);
padding: 10px;
box-shadow: 0 0 10px black;
border-radius: 10px;
}
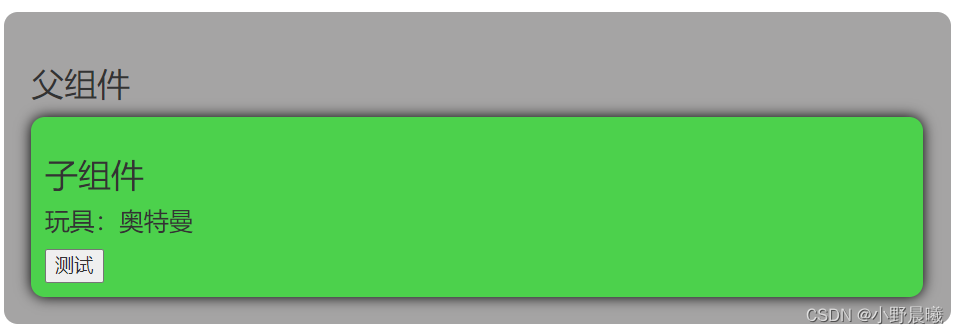
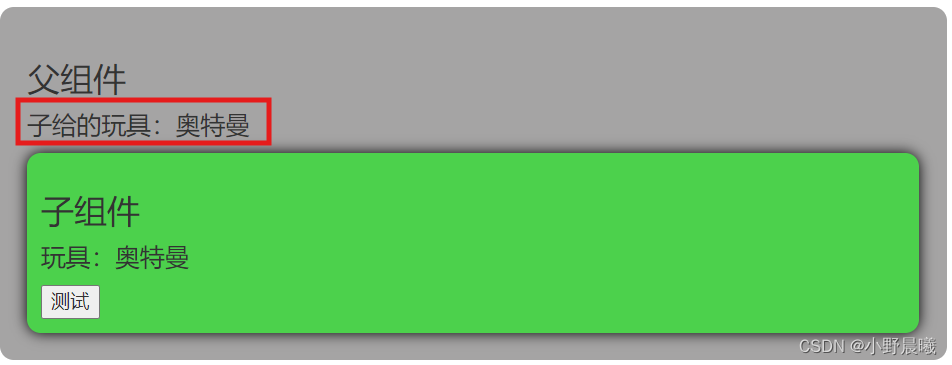
</style>效果展示:点击测试,子传给父玩具


 1万+
1万+

 被折叠的 条评论
为什么被折叠?
被折叠的 条评论
为什么被折叠?
 到【灌水乐园】发言


