


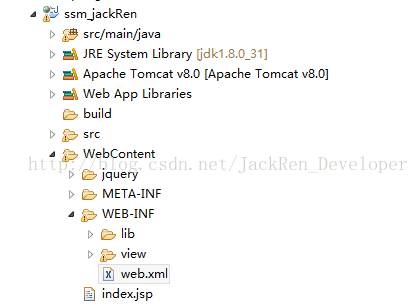
第一:创建一个web工程
第二:将所需要的jar包导入lib文件夹下
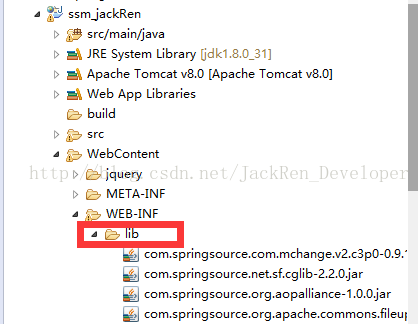
需要注意的是你的jdk版本是否符合要求,如果项目名称上面报莫名错误,说明jdk有问题,需要更改jdk
这仅仅是开发需要的工具放进去了,下面简单的实现页面上的增删改查
首先是建一个初始化的页面作为一个入口

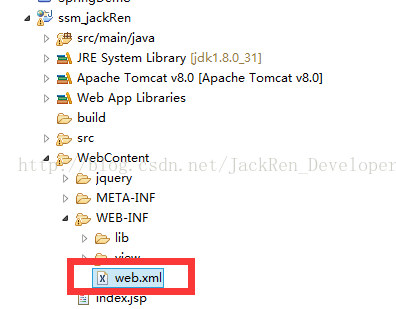
这个界面就是我们的入口,有了这个入口需要告诉tomcat我开始加载的时候就是要加载这个界面,这就需要创建一个web.xml进行配置文件信息。
<?xml version="1.0" encoding="UTF-8"?>
<web-app xmlns:xsi="http://www.w3.org/2001/XMLSchema-instance" xmlns="http://java.sun.com/xml/ns/javaee" xmlns:web="http://java.sun.com/xml/ns/javaee/web-app_2_5.xsd" xsi:schemaLocation="http://java.sun.com/xml/ns/javaee http://java.sun.com/xml/ns/javaee/web-app_2_5.xsd" id="WebApp_ID" version="2.5">
  <display-name>db</display-name>
  <welcome-file-list>
    <welcome-file>index.html</welcome-file>
    <welcome-file>default.html</welcome-file>
  </welcome-file-list>
</web-app>
上面的例子指定了2个欢迎页面,显示时按顺序从第一个找起,如果第一个存在,就显示第一个,后面的不起作用。如果第一个不存在,就找第二个,以此类推
初始化过程可知容器对于web.xml的加载过程是context-param >> listener >> fileter >> servlet 所以需要配置其他的参数信息。
<context-param>
	    <param-name>contextConfigLocation</param-name>
	    <param-value>classpath:applicationContext.xml</param-value>
	</context-param>

	<!-- 服务器启动时,通过监听器初始化Spring的配置环境
	    监听器,默认加载文件是:/WEB-INF/applicationContext.xml
	-->
	<listener>
	    <listener-class>org.springframework.web.context.ContextLoaderListener</listener-class>
	</listener>

	<!-- request作用域监听器 -->
	<listener>
		<listener-class>
		  	org.springframework.web.context.request.RequestContextListener
		</listener-class>
	</listener>


	  <!-- 配置字符集 -->
	<filter>
		<filter-name>encodingFilter</filter-name>
	    <filter-class>org.springframework.web.filter.CharacterEncodingFilter</filter-class>
	    <init-param>
	          <param-name>encoding</param-name>
	          <param-value>UTF-8</param-value>
	    </init-param>
	    <init-param>
	         <param-name>forceEncoding</param-name>
	         <param-value>true</param-value>
	     </init-param>
	</filter>

	<filter-mapping>
	     <filter-name>encodingFilter</filter-name>
	     <url-pattern>/*</url-pattern>
	</filter-mapping>

	 <servlet>
			<!--    spring 核心控制器   -->
			<servlet-name>dispatcherServlet</servlet-name>
			<servlet-class>org.springframework.web.servlet.DispatcherServlet</servlet-class>
			<init-param>
			 <!--   初始化参数  springmvc 配置文件 -->
				<param-name>contextConfigLocation</param-name>
				<param-value>classpath:applicationContext.xml</param-value>
			</init-param>

			  <load-on-startup>1</load-on-startup>
		</servlet>

		<servlet-mapping>
			<servlet-name>dispatcherServlet</servlet-name>
			<url-pattern>*.do</url-pattern>
		</servlet-mapping>
有上面配置可以看到启动servlet的时候回去加载applicationContext.xml这个文件,在这个文件中会配置链接数据库的相关配置。如果想从数据库中查询数据显示界面,需要在本地搭建一个mysql数据库。数据库暂不做论述
相关的代码如下:
<?xml version="1.0" encoding="UTF-8"?>
<beans xmlns="http://www.springframework.org/schema/beans"
    xmlns:xsi="http://www.w3.org/2001/XMLSchema-instance"
    xmlns:context="http://www.springframework.org/schema/context"
    xmlns:tx="http://www.springframework.org/schema/tx"
    xmlns:aop="http://www.springframework.org/schema/aop"
    xsi:schemaLocation="http://www.springframework.org/schema/beans
                        http://www.springframework.org/schema/beans/spring-beans.xsd
                        http://www.springframework.org/schema/context
                        http://www.springframework.org/schema/context/spring-context-3.0.xsd
                        http://www.springframework.org/schema/tx
                        http://www.springframework.org/schema/tx/spring-tx-3.0.xsd
                        http://www.springframework.org/schema/aop
                        http://www.springframework.org/schema/aop/spring-aop-3.0.xsd">

   <context:component-scan base-package="com..*"/>

	<bean id="dataSource"
		class="org.apache.commons.dbcp.BasicDataSource">
		<property name="driverClassName" value="com.mysql.jdbc.Driver"/>
		<property name="url" value="jdbc:mysql://localhost:3306/qq?useUnicode=true&characterEncoding=utf8"/>
		<property name="username" value="root"/>
		<property name="password" value="admin"/>

		<property name="maxActive" value="100" ></property>
			<property name="maxIdle" value="30" ></property>
			<property name="maxWait" value="10000" ></property>
	</bean>

	<bean id="sqlSessionFactory" class="org.mybatis.spring.SqlSessionFactoryBean">
		<property name="dataSource" ref="dataSource"/>
		<property name="configLocation" value="classpath:mybatis-config.xml"/>
	</bean>

	<bean id="txManager"  class="org.springframework.jdbc.datasource.DataSourceTransactionManager">
		<property name="dataSource" ref="dataSource"></property>
	</bean>

	<aop:config>
		<aop:pointcut id="bussinessService" expression="execution(public * com.zrrd.*.*(..))"/>
		<aop:advisor pointcut-ref="bussinessService" advice-ref="txAdvice"  />
	</aop:config>

	<tx:advice id="txAdvice" transaction-manager="txManager">
		<tx:attributes>
			<tx:method name="add*" propagation="REQUIRED"/>
			<tx:method name="update*" propagation="REQUIRED" />
			<tx:method name="del*" propagation="REQUIRED" />
			<tx:method name="*" propagation="REQUIRED" read-only="true"/>
		</tx:attributes>
	</tx:advice>


</beans>
一些数据的增删改查都是在my_mabatis.xml中,在这里面是一下sql语句,不做赘述。


 5万+
5万+


 被折叠的 条评论
为什么被折叠?
被折叠的 条评论
为什么被折叠?
 到【灌水乐园】发言


