


今天我们需要实现的功能是: 酷炫的Button动效, 大家不禁要问, 一个小小的Button, 能够搞出些什么花头呢? 想必大家都等不及了吧, 来, 不急我们step by step 一步步来~ (今天的内容过多, 示例代码不会很详尽, 具体请到github上下载)
有同学提出效果图放开头会比较好!! 大家可以先参考下, 先想想实现方法^ ^

导航栏遗漏细节处理
上周有些同学说, 渐变导航栏有几个细节不是尽善尽美, 今天我们就先来将其处理一下!!
1. 当push到下一界面时搜索栏的UI始终出现
这其实非常的正常, 我们是将searchBar加载到了navigationController.view上, 当push到下个见面自然会存在了, 好的, 为了处理这个问题, 我们新建一个viewcontroller, 然后作为栈顶控制器.
- (void)viewWillDisappear:(BOOL)animated {
    [super viewWillDisappear:animated];
    [self.searchBarView removeFromSuperview];
}

- (void)viewDidAppear:(BOOL)animated {
    [super viewDidAppear:animated];
    [self.navigationController.view addSubview:self.searchBarView];
    [self.searchBarView loomingAnimationWithDuration:kTimeInterval];
}
在生命周期方法中添加和删除, 当view完全出现的时候执行动画显现即可!
可是这样当我们使用交互转场的时候发现 搜索栏突然就消失了(这实在是太生硬了吧!!)
我们在SQLifestyleSearchCell中再添加一个searchBarView就可以完美解决啦~~
2. 当push到下一界面时会调用scorllDidScroll方法发生位移
好的, 我们来解决第二个问题, 当push到下一界面时会调用scorllDidScroll是系统自动会调用的, 我们为了解决这个问题首先要讲调用给屏蔽掉!
[self setAutomaticallyAdjustsScrollViewInsets:NO];在scorllDidScroll方法中添加上述方法就是屏蔽系统自动调用的问题! 但这样会将tableView上移64, 我们使用contentInset就能完美解决啦~~
_tableView.contentInset = UIEdgeInsetsMake(0, 0, 49, 0);这时我们碰到了一个问题, 当我们push进入到下个页面时, 导航栏的颜色会和栈底控制器保持同步!!
- (void)navigationBarGradualChangeWithScrollView:(UIScrollView *)scrollView titleView:(UIView *)titleView movableView:(UIView *)movableView offset:(CGFloat)offset color:(UIColor *)color {

    [self viewWillLayoutSubviews];
    [self setAutomaticallyAdjustsScrollViewInsets:NO];

    float alpha = 1 - ((offset - scrollView.contentOffset.y) / offset);
    [self setNavigationBarColor:color alpha:alpha];
    titleView  .hidden = scrollView.contentOffset.y > offset ? NO : YES;
    movableView.hidden = !titleView.hidden;
}

- (void)setNavigationBarColor:(UIColor *)color alpha:(CGFloat)alpha {
    [self.navigationController.navigationBar setBackgroundImage:[UIImage imageWithColor:[color colorWithAlphaComponent:alpha > 0.95f ? 0.95f : alpha]] forBarMetrics:UIBarMetricsDefault];
    if (self.navigationController.viewControllers.count > 1) {
        UIView * view = [[UIView alloc]initWithFrame:CGRectMake(0, 0, self.view.width, 64)];
        view.backgroundColor = color; [self.view addSubview:view];
    }
}
我们在下一个页面设置背景色, 并在导航栏的下面贴一层和导航栏相同颜色的view,即可解决!!
但是这样又有问题了, 我们把栈顶控制器导航栏的颜色给带回到栈底控制器了, 所以解决方法就是在view将要出现的时候, 计算颜色值!!
- (void)viewWillAppear:(BOOL)animated {
    [super viewWillAppear:animated];
    [self scrollViewDidScroll:self.tableView];
}
3. 轮播图被导航栏遮挡 部分区域不能交互
这个就要说到响应者链条的问题了, 但上层View可以接受响应的时候, 事件是不会向下传递的, 所以不能响应 很正常!! 我们禁止navigationBar的响应事件的能力即可!
我们在上面的方法中添加如下代码!!
[self.navigationController.navigationBar setUserInteractionEnabled:scrollView.contentOffset.y > offset ? YES : NO];看, 设置了取消用户交互,就能将事件传递到Cell身上了吧~~ (完美搞定!!)
4 显示效果

加载展示Cell
向诸如此类的Cell 图片,文字等元素都是相同的, 就单布局不同的情况下, 我们可以将其封装一下, 这里共享给大家一个写法~~ (抽象类)
.h
@property (nonatomic,strong) UIImageView * displayImageView;
@property (nonatomic,strong) UILabel     * displayTitleLabel;
@property (nonatomic,strong) UILabel     * displayContentLabel;
@property (nonatomic,strong) UILabel     * displayTimeLabel;
@property (nonatomic,strong) UIView      * dividingLineView;

+ (instancetype)cellWithTableView:(UITableView *)tableView;

+ (CGFloat)cellHeight;

- (void)setupSubviews;
.m
- (UIImageView *)displayImageView {

    if (!_displayImageView) {
        _displayImageView = [UIImageView new];
        _displayImageView.contentMode = UIViewContentModeScaleAspectFill;
        _displayImageView.clipsToBounds = YES;
        _displayImageView.layer.borderColor = KC05_dddddd.CGColor;
        _displayImageView.layer.borderWidth = 0.5f;
        _displayImageView.image = [UIImage imageNamed:@"image 2"];
    }
    return _displayImageView;
}

- (UILabel *)displayTitleLabel {

    if (!_displayTitleLabel) {
        _displayTitleLabel = [UILabel new];
        _displayTitleLabel.textColor = KC02_2c2c2c;
        _displayTitleLabel.text = @"Ride Bicycle";
    }
    return _displayTitleLabel;
}

- (UILabel *)displayContentLabel {

    if (!_displayContentLabel) {
        _displayContentLabel = [UILabel new];
        _displayContentLabel.textColor = KC03_666666;
        _displayContentLabel.text = @"I’m riding on highway with my friend John That’s fantastic Awesome!!";
        _displayContentLabel.numberOfLines = 0;
    }
    return _displayContentLabel;
}

- (UILabel *)displayTimeLabel {

    if (!_displayTimeLabel) {
        _displayTimeLabel = [UILabel new];
        _displayTimeLabel.textColor = KC03_666666;
        _displayTimeLabel.text = @"06-29-2016";
    }
    return _displayTimeLabel;
}

- (UIView *)dividingLineView {

    if (!_dividingLineView) {
        _dividingLineView = [UIView new];
        _dividingLineView.backgroundColor = [UIColor lightGrayColor];
        _dividingLineView.alpha = 0.3f;
    }
    return _dividingLineView;
}

- (void)setupSubviews {
    [self.contentView addSubview:self.displayImageView];
    [self.contentView addSubview:self.displayTitleLabel];
    [self.contentView addSubview:self.displayContentLabel];
    [self.contentView addSubview:self.displayTimeLabel];
    [self.contentView addSubview:self.dividingLineView];
}

+ (CGFloat)cellHeight {
    return 0;
}
上面我们完成了Cell的内容部分, 接下来我们可以创建任意Cell来继承上面的Cell, 共享内容!! 并且仅需实现布局即可!!
- (void)setupSubviews {
    [super setupSubviews];
    self.displayTitleLabel.font = KF04_15px;
    self.displayContentLabel.numberOfLines = 2;
    self.displayContentLabel.font = KF05_14px;
    self.displayTimeLabel.textAlignment = NSTextAlignmentRight;
    self.displayTimeLabel.font = KF05_14px;
    self.backgroundColor = GLOBAL_BGC;
}

- (void)layoutSubviews {
    [super layoutSubviews];

    CGFloat padding = kSpace;

    CGFloat displayImageViewX = padding;
    CGFloat displayImageViewW = 60;
    CGFloat displayImageViewH = displayImageViewW;
    CGFloat displayImageViewY = (self.height - displayImageViewH) * 0.5f;
    self.displayImageView.frame = CGRectMake(displayImageViewX, displayImageViewY, displayImageViewW, displayImageViewH);

    CGFloat displayTitleLabelX = displayImageViewX + displayImageViewW + padding;
    CGFloat displayTitleLabelY = displayImageViewY;
    CGFloat displayTitleLabelW = (self.width - displayTitleLabelX - padding) * 0.5f;
    CGFloat displayTitleLabelH = displayImageViewH * 0.4f;
    self.displayTitleLabel.frame = CGRectMake(displayTitleLabelX, displayTitleLabelY, displayTitleLabelW, displayTitleLabelH);

    CGFloat displayContentLabelX = displayTitleLabelX;
    CGFloat displayContentLabelY = displayTitleLabelY + displayTitleLabelH;
    CGFloat displayContentLabelW = displayTitleLabelW * 2;
    CGFloat displayContentLabelH = displayImageViewH - displayTitleLabelH;
    self.displayContentLabel.frame = CGRectMake(displayContentLabelX, displayContentLabelY, displayContentLabelW, displayContentLabelH);

    CGFloat displayTimeLabelY = displayTitleLabelY;
    CGFloat displayTimeLabelW = displayTitleLabelW;
    CGFloat displayTimeLabelH = displayTitleLabelH;
    CGFloat displayTimeLabelX = self.width - displayTimeLabelW - padding;
    self.displayTimeLabel.frame = CGRectMake(displayTimeLabelX, displayTimeLabelY, displayTimeLabelW, displayTimeLabelH);

    CGFloat dividingLineViewX = padding;
    CGFloat dividingLineViewW = self.width - 2 * padding;
    CGFloat dividingLineViewH = 0.5f;
    CGFloat dividingLineViewY = self.height - dividingLineViewH;
    self.dividingLineView.frame = CGRectMake(dividingLineViewX, dividingLineViewY, dividingLineViewW, dividingLineViewH);
}

+ (CGFloat)cellHeight {
    return 80;
}
狂霸酷炫拽之Button动效
终于进入今天的正题, 我们先来吧Button给画出来吧~~
1. 自定义Button
这里我们使用CAShapeLayer + UIBezierPath将Button给画了出来, 其实完全可以让设计做图, 我这里只是因为抛砖引玉后面的内容!!
- (CAShapeLayer *)roundShapeLayer {

    if (!_roundShapeLayer) {
        _roundShapeLayer = [CAShapeLayer layer];
        _roundShapeLayer.backgroundColor = KC01_57c2de.CGColor;
        _roundShapeLayer.borderColor = KC05_dddddd.CGColor;
        _roundShapeLayer.borderWidth = 0.5f;
        _roundShapeLayer.masksToBounds = YES;
    }
    return _roundShapeLayer;
}

- (CAShapeLayer *)horizontalShapeLayer {

    if (!_horizontalShapeLayer) {
        _horizontalShapeLayer = [CAShapeLayer layer];
        _horizontalShapeLayer.fillColor = [UIColor whiteColor].CGColor;
    }
    return _horizontalShapeLayer;
}

- (CAShapeLayer *)verticalShapeLayer {

    if (!_verticalShapeLayer) {
        _verticalShapeLayer = [CAShapeLayer layer];
        _verticalShapeLayer.fillColor = _horizontalShapeLayer.fillColor;
    }
    return _verticalShapeLayer;
}

- (void)setupSubviews {
    [self setAlpha:0.7f];
    [self.layer addSublayer:self.roundShapeLayer];
    [self.layer addSublayer:self.horizontalShapeLayer];
    [self.layer addSublayer:self.verticalShapeLayer];
}

- (void)layoutSubviews {
    [super layoutSubviews];

    CGFloat roundShapeLayerX = 0;
    CGFloat roundShapeLayerY = 0;
    CGFloat roundShapeLayerW = self.width;
    CGFloat roundShapeLayerH = roundShapeLayerW;
    self.roundShapeLayer.cornerRadius = roundShapeLayerW * 0.5f;
    self.roundShapeLayer.frame = CGRectMake(roundShapeLayerX, roundShapeLayerY, roundShapeLayerW, roundShapeLayerH);

    CGFloat horizontalPathW = self.width - 12;
    CGFloat horizontalPathH = self.height / 6;
    CGFloat horizontalPathX = (self.width - horizontalPathW) * 0.5f;
    CGFloat horizontalPathY = (self.height - horizontalPathH) * 0.5f;
    self.horizontalShapeLayer.path = [UIBezierPath bezierPathWithRoundedRect:CGRectMake(horizontalPathX, horizontalPathY, horizontalPathW, horizontalPathH) cornerRadius:10].CGPath;

    CGFloat verticalPathW = horizontalPathH;
    CGFloat verticalPathH = horizontalPathW;
    CGFloat verticalPathX = (self.width - verticalPathW) * 0.5f;;
    CGFloat verticalPathY = (self.height - horizontalPathW) * 0.5f;;
    self.verticalShapeLayer.path = [UIBezierPath bezierPathWithRoundedRect:CGRectMake(verticalPathX, verticalPathY, verticalPathW, verticalPathH) cornerRadius:10].CGPath;
}
2. 可移动Button
将上面创建好的Button 继承与SQExtension中的SQRemovableButton 即可实现移动属性!! 这里我来看下可移动属性的实现原理!!(其实完全可以使用Pan手势实现!!)
@interface SQRemovableButton ()

@property (nonatomic,assign,getter = isMoved) BOOL moved;

@end

@implementation SQRemovableButton

- (void)touchesMoved:(NSSet *)touches withEvent:(UIEvent *)event {

    [super touchesMoved:touches withEvent:event];

    self.moved = YES;

    UITouch * touch = [touches anyObject];
    CGPoint current = [touch locationInView:self];
    CGPoint previous = [touch previousLocationInView:self];

    CGPoint center = self.center;

    center.x += current.x - previous.x; center.y += current.y - previous.y;

    CGFloat screenWidth  = [UIScreen mainScreen].bounds.size.width;
    CGFloat screenHeight = [UIScreen mainScreen].bounds.size.height;

    CGFloat xMin = self.frame.size.width  * 0.5f; CGFloat xMax = screenWidth  - xMin;
    CGFloat yMin = self.frame.size.height * 0.5f; CGFloat yMax = screenHeight - yMin - 49;

    if (center.x > xMax) center.x = xMax; if (center.y > yMax) center.y = yMax;
    if (center.x < xMin) center.x = xMin; if (center.y < yMin) center.y = yMin;

    self.center = center;
}

- (void)touchesEnded:(NSSet *)touches withEvent:(UIEvent *)event {

    if (!self.moved) {
        [super touchesEnded:touches withEvent:event];
    }
        self.moved = NO; if (!self.dockable) return;

    CGFloat screenWidth = [UIScreen mainScreen].bounds.size.width;
    CGFloat           x = self.frame.size.width * 0.5f;

    [UIView animateWithDuration:0.25f animations:^{
        CGPoint center = self.center;
        center.x = self.center.x > screenWidth * 0.5f ? screenWidth - x : x;
        self.center = center;
    }];
}
这里有个难点在于当滑动的时候会和Touch Events/Tap Gesture 发生冲突, 解决方法在于当其移动的时候不调用其父类的方法即可!!
3. Button的Pop动画
使用SQExtension中的CAAnimation+Extension即可实现pop动画, 这个我不多说, 关键帧动画的基本实现!
+ (CAAnimation *)animationPopWithLayer:(CALayer *)layer {

    CAKeyframeAnimation * pop = [CAKeyframeAnimation animation];
    pop.keyPath     = @"transform.scale";
    pop.values      = @[@0.1, @0.2, @0.3, @0.2, @0.1];
    pop.additive    = YES;

    CAAnimationGroup * group = [CAAnimationGroup new];
    group.animations = @[pop];
    group.duration = kTimeInterval;
    group.removedOnCompletion = NO;
    [layer addAnimation:group forKey:nil];
    return group;
}
我们同样将其加在navigationController.view 上并设定初始布局
- (SQLifestylePostButton *)postButton {

    CGFloat postButtonW = 40;
    CGFloat postButtonH = postButtonW;
    CGFloat postButtonX = self.view.width - kSpace - postButtonW;
    CGFloat postButtonY = self.view.height - 49 - kSpace - postButtonH;

    if (!_postButton) {
        _postButton = [SQLifestylePostButton new];
        _postButton.frame = CGRectMake(postButtonX, postButtonY, postButtonW, postButtonH);
    }
    [CAAnimation animationPopWithLayer:_postButton.layer];
    return _postButton;
}
并将点击事件在Button内部实现, 那我们怎么在view的内部拿到当前控制器呢?
之前我的老大在项目中是用单例设计模式实现的可以参考SQExtension中的SQViewControllerManager.h, 今天我分享一个更加投机的方式, 全局变量!!
我们先将所有的控制器都继承与SQViewController, 并实现如下方法;
.h
extern UIViewController * kCurrentViewController;.m
UIViewController * kCurrentViewController = nil;SQViewController.m
- (void)viewWillAppear:(BOOL)animated {
    [super viewWillAppear:animated];
    kCurrentViewController = self;
}
这样我们就能够拿到当前的控制器了 whenTap方法我不多讲,底层是用runtime实现的, 就是为了让代码高内聚,低耦合,(关键是runtime真的要讲很久...)
    __weak typeof(self) _self = self;
    [self whenTapped:^{
        SQNavigationController * navigationController = [[SQNavigationController alloc]initWithRootViewController:[SQPostViewController new]];
        [kCurrentViewController presentViewController:navigationController animated:YES completion:nil];
    }];
到此为止, 我们的Button已经具有不错的动画效果了~~
Button的自定义转场动画
自定义转场, 我之前就有提及到我就快速的讲, 今天我们来在Modal的自定义转场, 自定义转场两步走~
1 设置代理
   @interface SQLifestylePostButton () UIViewControllerTransitioningDelegate>

  [navigationController setTransitioningDelegate:_self];

  - (id <UIViewControllerAnimatedTransitioning>)animationControllerForDismissedController:(UIViewController *)dismissed {
    SQHoleAnimatedTransitioning * animatedTransitioning = [SQHoleAnimatedTransitioning new];
    animatedTransitioning.frame = self.frame;
    return animatedTransitioning;
}
2 实现自定义转场
@interface SQHoleAnimatedTransitioning ()

@property (nonatomic, strong) id<UIViewControllerContextTransitioning> transitionContext;

@end

static const CGFloat kRatio = 1.5f;

@implementation SQHoleAnimatedTransitioning

- (NSTimeInterval)transitionDuration:(id <UIViewControllerContextTransitioning>)transitionContext {
    return 0.25f;
}

- (void)animateTransition:(id <UIViewControllerContextTransitioning>)transitionContext {
    self.transitionContext = transitionContext;

    UIViewController * toViewController = [transitionContext viewControllerForKey:UITransitionContextToViewControllerKey];
    UIViewController * fromViewController = [transitionContext viewControllerForKey:UITransitionContextFromViewControllerKey];
    UIView * containView = transitionContext.containerView;
    [containView addSubview:toViewController.view];
    [containView addSubview:fromViewController.view];

    UIView * endView = [UIView new];
    endView.frame = self.frame;
    UIBezierPath * endPath = [UIBezierPath bezierPathWithOvalInRect:endView.frame];

    UIView * startView = [UIView new];
    startView.center = endView.center;
    startView.bounds = CGRectMake(0, 0, [UIScreen mainScreen].bounds.size.height * kRatio, [UIScreen mainScreen].bounds.size.height * kRatio);
    UIBezierPath * startpath = [UIBezierPath bezierPathWithOvalInRect:startView.frame];

    CAShapeLayer * maskLayer = [CAShapeLayer layer];

    maskLayer.path = endPath.CGPath;
    fromViewController.view.layer.mask = maskLayer;

    CABasicAnimation * animation = [CABasicAnimation animationWithKeyPath:@"path"];
    animation.fromValue = (__bridge id )(startpath.CGPath);
    animation.toValue = (__bridge id )(endPath.CGPath);
    animation.duration = [self transitionDuration:self.transitionContext];
    animation.delegate = self;
    animation.timingFunction = [CAMediaTimingFunction functionWithName:kCAMediaTimingFunctionEaseInEaseOut];
    [maskLayer addAnimation:animation forKey:nil];
}

- (void)animationDidStop:(CAAnimation *)anim finished:(BOOL)flag {

    [self.transitionContext completeTransition:![self.transitionContext transitionWasCancelled]];
    [self.transitionContext viewControllerForKey:UITransitionContextFromViewControllerKey].view.layer.mask = nil;
}
之前我有看过用象限算法实现的, 擦, 好复杂… 本宝宝最不喜欢的就是计算这种费脑子的事情了, 能够投机的, 就不要那么麻烦嘛, 这里我借用了两个view来实现相同功能, 我感觉这里需要细讲一下,不然有些同学不是很好理解…
self.frame 就是可移动Button最终的frame, 然后借助一个View来确定第二个Rect的Center, 其实就是同心圆, 有没有很好理解?? 然后使用mask属性进行路径动画就可以了, mask其实就Ps中的蒙版, 遮罩, 对mask属性不是很熟悉的同学可以Google一下alpha通道, 简单来说就是, mask不透明, 就能够穿透, 好像就是这个意思~
到这里我们今天的内容就全部结束了…
Q/A
但是我发现一个问题, 只要进行转场动画, 自动轮播图就会有几率被卡住, 为了解决这个问题,我们可以在控制器加载完成后进行对TableView的刷新 就可以了~~
还有同学提出, 打开Demo时模拟器上下会有两条黑边, 这是由于我是用Xcode5创建的项目 新版Xcode没有加载LaunchScreen.xib 可以在项目配置页,General下面有一栏App Icons and Launch Images,其中有一项Launch Images Source,如果你遇到了问题,那么旁边显示的可能是一个按钮,Use Asset Catalog,点一下然后确定就可以了.
显示效果
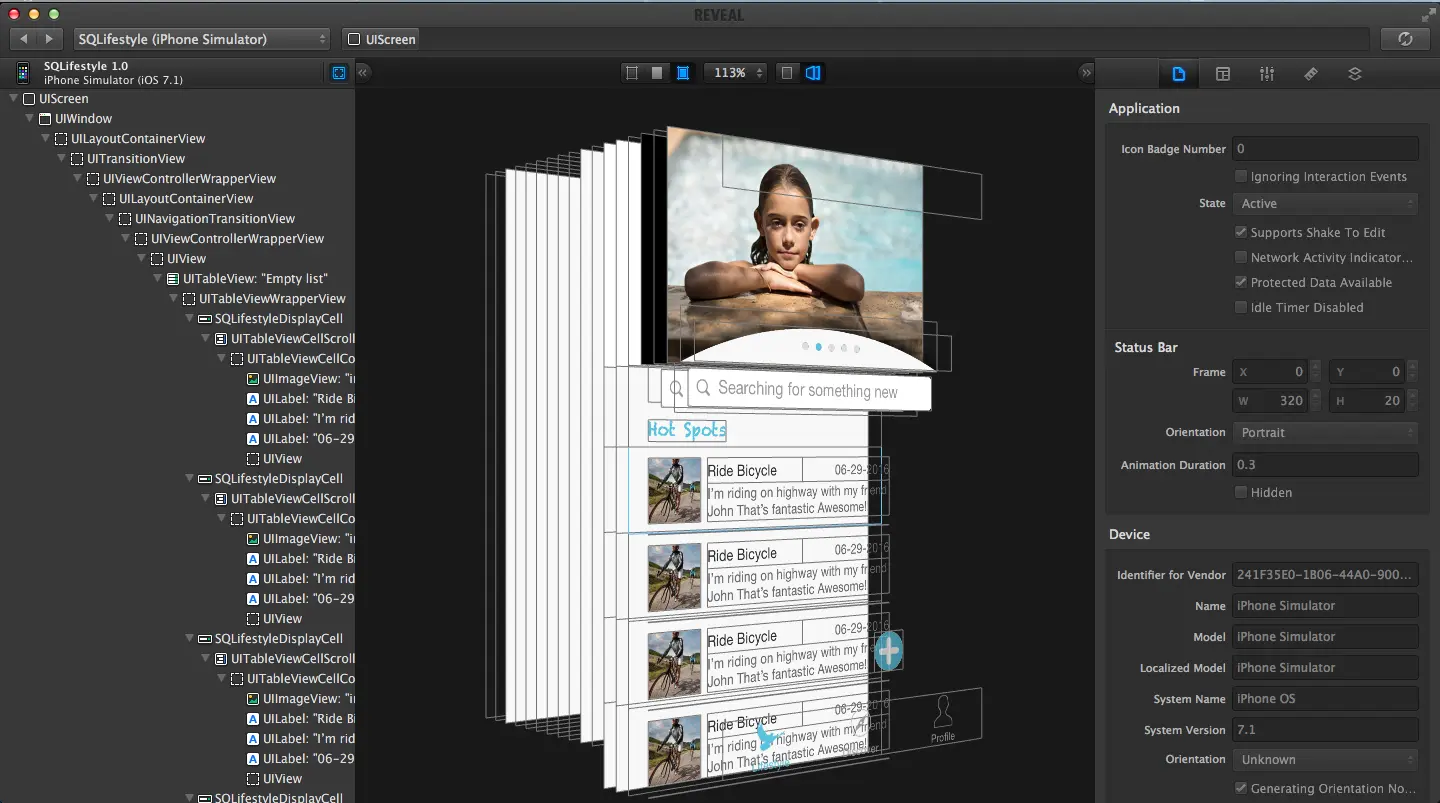
在Reveal中显示
最终显示

github 下载地址!!!

点击下方链接跳转!!
具体源码及SQExtension方法信息 请到github上进行下载! 喜欢的朋友送下小星星哟!!
原文链接:http://www.jianshu.com/p/6106f5a08ec3
著作权归作者所有,转载请联系作者获得授权,并标注“简书作者”。


 3781
3781

 被折叠的 条评论
为什么被折叠?
被折叠的 条评论
为什么被折叠?
 到【灌水乐园】发言


