


Getting Started
You have everything set up now and it is time to finally do some coding and get your hands dirty. In this chapter you will just create a simple project with the help of the XNA Studio templates. Then you will change the code a little and add a little functionality to the
Update
and
Draw
methods. In the next chapter you will create your first game after you learn about the
SpriteBatch
class.
你已经安装好了一切所需,是时候动手开始写代码了。在这一章里,你仅仅只是在
XNA Studio
模板的帮助下创建一个简单的项目。你只需修改少量代码,添加一些功能到
Update
和
Draw
方法中。下一章,你将在学习
SpriteBatch
类后创建你的第一个游戏。
Your First Project
Create a new XNA project in XNA Studio by clicking File  New Project. Now select Windows Game and enter a name for your first project - for example, “Hello World” - or just leave it as “WindowsGame1” (see
Figure 1-10
). As you can see you can also create games based on the starter kits quite easily from here too.
New Project. Now select Windows Game and enter a name for your first project - for example, “Hello World” - or just leave it as “WindowsGame1” (see
Figure 1-10
). As you can see you can also create games based on the starter kits quite easily from here too.
New Project. Now select Windows Game and enter a name for your first project - for example, “Hello World” - or just leave it as “WindowsGame1” (see
Figure 1-10
). As you can see you can also create games based on the starter kits quite easily from here too.
点击
File->New Project
建立一个
XNA
项目。选择
Windows Game
,并为你的第一个项目输入名字——例如“
Hello World
”——或者就使用默认的名称“
WindowsGame1
”。正如你所见,你也可以从这里很容易的创建基于
starter kits
(初学者开发包)的游戏。
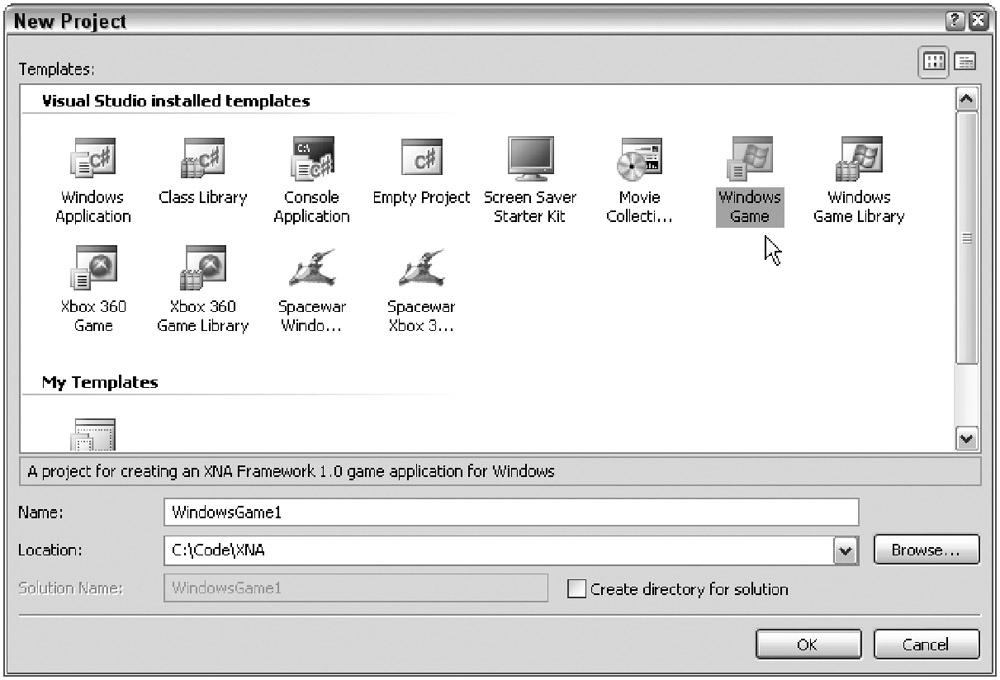
Figure 1-10
You can see now that a new project was created and it contains two source files:
Game1.cs
and
Program.cs
. The
Program
file basically just contains the following three lines of code:
你现在所看见的就是新项目创建后所包含的两个源文件:
Game1.cs
和
Program.cs
。
Progam
文件基本上仅仅只有下面三行代码:
using (Game1 game = new Game1())
{
..game.Run();
} // using
The
Game1
class contains the
Initialize
,
Update
, and
Draw
methods mentioned a little bit earlier.
Initialize
does nothing for now and
Update
just checks if the back button on the first connected gamepad was pressed.
Game1
类包括了早些时候提到的
Initialize
、
Update
和
Draw
方法。
Initialize
现在什么都不做,
Update
仅仅是检查第一个链接的游戏手柄的
back
键是否被按下。
For now you are just interested in the
Draw
method, which basically just executes the following line to clear the background to a specific color:
现在你只需关心
Draw
方法,它只执行下面一行来用某一特定颜色清空背景:
graphics.GraphicsDevice.Clear(Color.CornflowerBlue);
F5 and Go
If you press F5, the project starts (same as Debug  Start Debugging) and you see the screen shown in
Figure 1-11
, which shows the blue color that is specified in the
Draw
method.
Start Debugging) and you see the screen shown in
Figure 1-11
, which shows the blue color that is specified in the
Draw
method.
Start Debugging) and you see the screen shown in
Figure 1-11
, which shows the blue color that is specified in the
Draw
method.
如果你按下
F5
,项目就会运行(或者从
Debug->Start Debugging
来运行),你将看到屏幕上显示如图
1-11
的画面,这个窗口被
Draw
绘制成为蓝颜色背景。
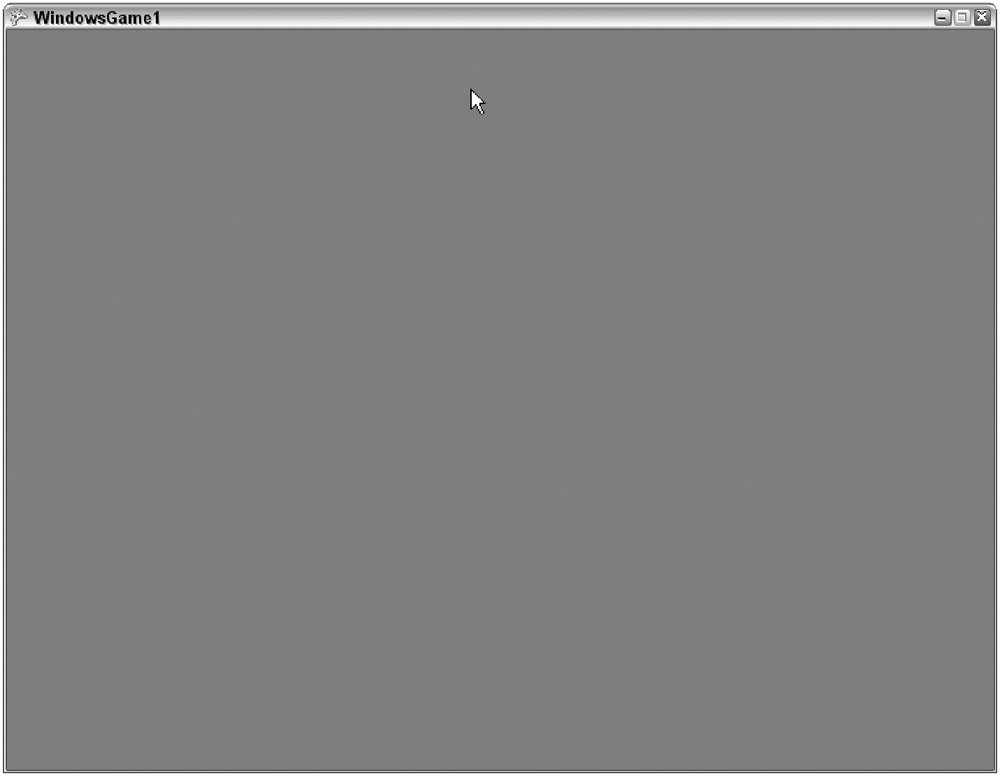
Figure 1-11
To feel like you are actually doing something, change the
Color
to
Color.Green
and press F5 again. The window now has a green background. The
Clear
method of the graphics device has other overloads that can be used to clear the depth and stencil buffers, which will be done automatically if you just set the color. For example, later in this book you will just need to clear the depth buffer, but not the color of the background. To do that you just write the following line:
想感受一下自己可以做些什么,可以把
Color
改为
Color.Green
然后再按
F5.
现在窗口的背景就变成了绿色。图形设备的
Clear
方法还有其他的重载版本,可以用于清空深度缓冲和模板缓冲,如果你仅仅只设置了颜色,这些将被自动完成。例如,在本书的后面部分,你仅仅需要清空深度缓冲,而不是背景的颜色。你只需要这么做:
graphics.GraphicsDevice.Clear(ClearOptions.DepthBuffer,
Color.Green, 1, 0);
By default the
ClearOptions
are set to
ClearOptions.Target | ClearOptions.DepthBuffer
, which means both the background color and the depth buffer are cleared. By the way, if you don’t know it already the | operator between the
ClearOptions
flags will combine both settings.
默认情况下
ClearOptions
是
ClearOptions.Target | ClearOptions.DepthBuffer
,这意味着背景颜色和深度缓冲都要被清空。顺便提一句,
ClearOptions
标记间的
”|”
操作符是用于将两个标记合并使用。
Changing the Code
修改代码
Ok, instead of giving up here, think about some ways you can modify the code in a useful manner. First of all you should be able to quit your program by pressing Escape. By default XNA just adds the following lines to the
Update
method, which quits the program when the Xbox 360 controller’s back button is being pressed:
好了
,
不能在这儿停止
,
想想你能用什么有用的方法来修改代码
.
首先你应该能通过
Esc
来退出程序。
XNA
的
Update
方法在默认情况下只有下面几行,当
Xbox360
的控制器的
back
键被按下是退出程序:
// Allows the default game to exit on Xbox 360 and Windows
if (GamePad.GetState(PlayerIndex.One).Buttons.Back ==
ButtonState.Pressed)
this.Exit();
To learn more about the
Input
classes go to
Chapter 3
, “
Helper Classes
.” For now you will just use a quick and dirty way to access the keyboard. If you modify the code in the following way you can also press Escape now to quit the application:
在第三章的
”Helper Classes
(辅助类)
”
中你会学到更多关于输入操作方面的类。现在你只需要知道怎么样快速的使用键盘操作。如果你像下面那样修改代码,那么你就可以通过按下
Esc
键来退出程序:
// Get current gamepad and keyboard states
//
获得当前手柄和键盘的状态
GamePadState gamePad = GamePad.GetState(PlayerIndex.One);
KeyboardState keyboard = Keyboard.GetState();
// Back or Escape exits our game on Xbox 360 and Windows
//
在
Xbox360
或
Windows
上返回或退出游戏
if (gamePad.Buttons.Back == ButtonState.Pressed ||
keyboard.IsKeyDown(Keys.Escape))
this.Exit();
As you can see you put the gamepad and keyboard states in extra variables to have easier access. If you press F5 again, you can quit the game with Escape now.
正如你所见,将手柄和键盘状态放入一个变量里可以更容易地接入。再按下
F5
,这时你就可以用
Esc
来退出游戏了。
Next you are going to jump a little bit ahead and load a graphic into your game. More details about sprites are discussed in
Chapter 2
. The idea is to display a small background texture and tile it over the whole screen. Then you implement some simple keyboard and gamepad controls to move the background like in a top-down racing game or a tile engine, which is often used in 2D role playing games. For a more complex tile engine you would need more textures like stones, grass, water, mud, and so on, and then even transition textures you can put between grass and water, for example. This would require a little bit more textures and custom code, but overall this is not a very hard topic. You can also find a lot of information about this topic on the Internet if you are really interested in tile engines.
接下来我们要在前进一点了,在你的游戏中加载图像。关于精灵(
sprite
)更详细的内容将在第二章中讨论。现在要做的就是显示一个小的背景图,并将它铺满整个画面。然后补充一些简单的键盘和手柄控制用以移动背景,就想是从上倒下的竞速游戏或【
tile
引擎】那样,这在
2D
的角色扮演游戏中经常用到。对于更复杂的【
tile
引擎】来说你需要更多的纹理,像石头、草、水、泥还有其他等等,【而且还要处理纹理的转换,像放东西到草和水之间】。这要求更多的纹理和代码,但是这些都不是非常困难高深的主题。如果你真的对【
tile
引擎】感兴趣,你可以在网络上找到关于这个主题的很多信息。
For your simple first project you just add the texture shown in
Figure 1-12
.
在一开始你只要添加图
1-12
里的纹理
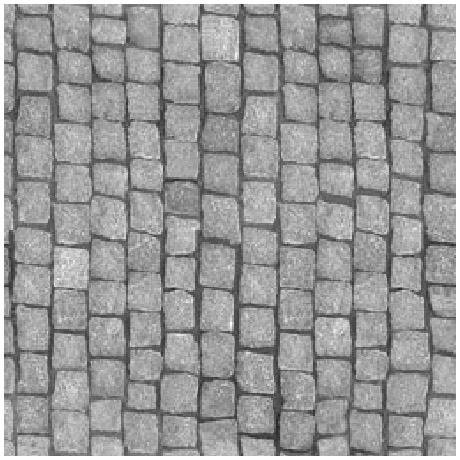
Figure 1-12
To load this texture (
CityGroundSmall.jpg
) into your game, just drag it into your project on the Solution Explorer. Then click the file in the project and select Properties. You should now see the screen shown in
Figure 1-13
.
将纹理加入到你的游戏中,只需将它拖入到你项目的
Solution Explorer
(解决方案资源管理器)中。然后点击项目中的文件并选择
Properties
(属性)。你现在应该可以在屏幕上看到像图
1-13
中显示的那样。

Figure 1-13
Normally you would just see the build action and some options for copying the content file to the output directory (e.g. if you want to include a .dll or .xml file). But if XNA Studio detects one of the supported content file formats, you will see the advanced XNA properties. There are three important new settings: Asset Name, Content Importer, and Content Processor. The Asset Name is used to load the content later; each content file must have a unique Asset Name. For the Content Importer you can select a Texture as in this case or a Model Importer for .x files or an Effect Importer for .fx files.
一般情况下你应该只能看到
build action
和一些选项,用来将素材文件拷贝到输出目录(例如你想包含一个
.dll
或
.xml
文件)。但是如果
XNA Studio
侦测到一个支持的素材文件格式,你就可以看到更多的
XNA
属性。有三个重要的新设置:
Asset Name
(资源名称)
, Content Importer
(蔬菜导入器)
,
和
Content Processor
(素材处理器)。
Asset Name
用于加载素材;每一个素材文件必须有一个唯一的
Asset Name
。在本例中
Content Importer
选择为
Texture
,对于
.x
文件选择
Model Importer
,对于
.fx
文件选择
Effect Importer
。
The Content Processor contains more options; for example, you could select DXT, DXT mip-mapped, or Sprite 32bpp for your texture here. DXT is a compression format, which is also used in dds files and it is very good for textures in games because they get compressed down in a 1:6 ratio (or 1:4 if they contain transparent pixels). This means you can have up to six times as many textures for the same space on the hard disk and graphic memory. For 2D sprites it is usually better not to compress them because you see them in their full size, and using 32bpp (bits per pixel) guarantees the best possible sprite quality. For more information about the content pipeline read the next part of this chapter.
Content Processor
包含了更多的选项;例如,你为你的纹理可以选择
DXT
,
DXT mip-mapped
,或者
Sprite 32bpp
。
DXT
是一种压缩格式,这同样用在
dds
文件中,并且用于游戏中是非常好的,因为它能将图像要说到原来的
1/6
(若包含有透明像素这一压缩比例为
1/4
)。这意味着在同样的硬盘空间里你可以存储比原来多
6
倍的纹理。对于
2D
精灵,更常用到的是未经压缩的图像,因为看到的是它们的完全尺寸,并且使用
32bpp
(比特每像素)可以保证最好的图像质量。关于素材管线的更多内容可以在本章的后续部分了解到。
If you press F5 or build the project (F6) the content is processed and a new file,
CityGroundSmall.xnb
, will be created in your output directory. The build output window also shows the following new line:
按下
F5
或建立项目(
F6
),素材将被处理并在输出目录生成一个新文件
CityGroundSmall.xnb
。建立输出窗口将显示下面一行信息:
Building CityGroundSmall.jpg -> bin/x86/Debug/CityGroundSmall.xnb
The final thing you have to do now is to load the imported texture. You will do that in the
Initialize
method and use a new variable
backgroundTexture
in your class. To load the texture you use the asset name you specified earlier (it was actually generated automatically from the filename of the file you dragged into your project). To render the texture on the screen you need a
SpriteBatch
, which is discussed in the next chapter. Basically it sets up the alpha blending, then draws textures into the sprite and finally draws everything on the screen:
现在你要做的最后一件事是加载导入的纹理文件。接下来你要在
Initialize
方法中完成一些事,还有,在你的类中使用一个新的变量
backgroundTexture
。使用你早先指定的
asset name
来加载纹理(当你将文件拖入项目后他会使用文件名来自动生成一个
asset name
)。你需要
SpriteBatch
来在屏幕上渲染出纹理,这个
SpriteBatch
将会在下一章里讨论。基本上它会建立
alpha
混合,然后将纹理会知道精灵中,最后在屏幕上绘制出所有图像。
Texture2D backgroundTexture;
SpriteBatch sprites;
protected override void Initialize()
{
backgroundTexture = content.Load<Texture2D>("CityGroundSmall");
sprites = new SpriteBatch(graphics.GraphicsDevice);
base.Initialize();
} // Initialize()
To display the background texture you have to start the sprite batch and render the texture to your sprites in the
Draw
method:
要显示背景纹理你需要在
Draw
方法中开始
sprite batch
并且向
sprite
渲染纹理:
protected override void Draw(GameTime gameTime)
{
graphics.GraphicsDevice.Clear(Color.Green);
sprites.Begin();
sprites.Draw(backgroundTexture, Vector2.Zero, Color.White);
sprites.End();
base.Draw(gameTime);
} // Draw(gameTime)
This renders the background texture at the location (0, 0) on top of your green background. With the color parameter you can also recolor a sprite, but for now this is not important.
这段代码在绿色背景的顶部即位置(
0
,
0
)处渲染了一个背景纹理。你可以使用颜色参数来给精灵重新上色,但是对现在来说这并不重要。
If you press F5 you will now see the result shown in
Figure 1-14
.
如果按下
F5
你将会得到像图
1-14
的结果。

Figure 1-14
One final thing you are going to add for this first project is the ability to scroll the background with the cursor keys or a gamepad and then you render the scrollable tiles to the whole background. To capture the gamepad and keyboard input you modify the
Update
method a little:
最后一件事,你要想你第一个项目添加滚动背景的功能,通过方向键或手柄来操作,让背景图在满屏幕上滚动。要捕获手柄或键盘的输入需要修改一下
update
方法:
float scrollPosition = 0;
protected override void Update(GameTime gameTime)
{
// Get current gamepad and keyboard states
//
获取当前手柄或键盘状态
GamePadState gamePad = GamePad.GetState(PlayerIndex.One);
KeyboardState keyboard = Keyboard.GetState();
// Back or Escape exits our game on Xbox 360 and Windows
//
返回或退出游戏
if (gamePad.Buttons.Back == ButtonState.Pressed ||
keyboard.IsKeyDown(Keys.Escape))
this.Exit();
// Move 400 pixels each second
//
每秒移动
400
像素
float moveFactorPerSecond = 400 *
(float)gameTime.ElapsedRealTime.TotalMilliseconds / 1000.0f;
// Move up and down if we press the cursor or gamepad keys.
//
如果按动方向键或手柄按键,就向上或向下移动
if (gamePad.DPad.Up == ButtonState.Pressed ||
keyboard.IsKeyDown(Keys.Up))
scrollPosition += moveFactorPerSecond;
if (gamePad.DPad.Down == ButtonState.Pressed ||
keyboard.IsKeyDown(Keys.Down))
scrollPosition -= moveFactorPerSecond;
base.Update(gameTime);
} // Update(gameTime)
The first few lines are the same as before. Then you calculate how many pixels you would move this frame. If a frame would take 1 second,
moveFactorPerSecond
would be 400; for 60 frames it would be 400/60. Because you use floats here instead of just integers you can have a couple of thousand frames and the movement is still 400 pixels per frame if you press up or down.
开始几行和之前的代码是一样的。接着你要计算这一帧需要移动多少像素。如果一帧需要
1
秒,
moveFactorPerSecond
将是
400
;如果是
60
帧每秒,
moveFactorPerSecond
的值将是
400/60
。【因为这里使用了浮点数来代替整数,所以你可以有几千帧,而当你按动上或下键时移动仍保持
400
像素每帧。】
The variable
scrollPosition
is changed if the user presses up or down. In your draw method you can now render each tile and add the
scrollPosition
to the y position to move the background up and down:
如果用户按了上或下键,变量
scrollPosition
将会改变。现在你可以在
draw
方法中渲染每一块砖并在
y
方向加上
scrollPosition
来获得向上或向下移动背景的效果:
protected override void Draw(GameTime gameTime)
{
graphics.GraphicsDevice.Clear(Color.Green);
sprites.Begin();
int resolutionWidth = graphics.GraphicsDevice.Viewport.Width;
int resolutionHeight = graphics.GraphicsDevice.Viewport.Height;
for (int x = 0; x <= resolutionWidth / backgroundTexture.Width;
x++)
for (int y = -1; y <= resolutionHeight / backgroundTexture.Height;
y++)
{
Vector2 position = new Vector2(
x * backgroundTexture.Width,
y * backgroundTexture.Height +
((int)scrollPosition) % backgroundTexture.Height);
sprites.Draw(backgroundTexture, position, Color.White);
} // for for
sprites.End();
base.Draw(gameTime);
} // Draw(gameTime)
Now you can start your project and move around with up and down. This is pretty good for your first little application, isn’t it?
运行你的项目,用上下来操作。你的第一个程序非常不错,不是吗?^_^


 100
100

 被折叠的 条评论
为什么被折叠?
被折叠的 条评论
为什么被折叠?
 到【灌水乐园】发言


