


介绍
本方案做的是采用Swiper组件实现容器视图居中完全展示,两边等长露出,并且跟手滑动效果。
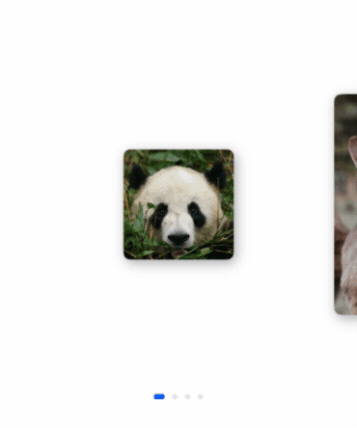
效果图预览
实现思路
本解决方案通过维护所有卡片偏移的数组,实时更新卡片的偏移量,以实现swiper子组件内图片居中展示,两边等长露出。
- 左右露出效果静态实现。
Swiper组件基础视图效果如下。

如果所有子组件卡片大小一样,子组件内卡片居中展示即可实现效果。但是当子组件的卡片大小不一样时,无法通过简单的设置居中布局实现左右的等长露出。
此时需要计算当前状态下的卡片的偏移量。

  /**
   * 计算指定卡片的最大偏移量。
   * @param index {number} target card's index.
   * @returns offset value.
   */
  getMaxOffset(index: number): number {
    /*
     * 这里的偏移量指相对容器左侧的值。
     * 计算公式为:屏幕宽度 - Swiper两侧突出的偏移量 - 卡片自身的宽度。
     * 此值即为卡片可偏移的最大值,也就是卡片右对齐的状态值。
     * 如果居中,则将最大偏移量 / 2。
     */
    return this.displayWidth - this.cardsList[index].width - 2 * this.swiperMargin;
  }

  /**
   * 计算卡片偏移量,并维护偏移量列表。
   * @param targetIndex { number } swiper target card's index.
   */
  calculateOffset(target: number) {
    let left = target - 1;
    let right = target + 1;

    // 计算上一张卡片的偏移值
    if (this.isIndexValid(left)) {
      this.cardsOffset[left] = this.getMaxOffset(left);
    }
    // 计算当前卡片的偏移值
    if (this.isIndexValid(target)) {
      this.cardsOffset[target] = this.getMaxOffset(target) / 2;
    }
    // 下一张片的偏移值
    if (this.isIndexValid(right)) {
      this.cardsOffset[right] = 0;
    }
  }
- 滑动跟手实现
滑动swiper组件动态位置更新原理和上一步静态位置获取原理一样,只不过在滑动过程通过相应的回调函数实时位置更新。
在以下这三个swiper回调接口中,分别实现卡片跟手、离手、导航点切换时的卡片偏移量更新。
| 接口名 | 基本功能 |
|---|---|
| onGestureSwipe | 在页面跟手滑动过程中,逐帧触发该回调。 |
| onAnimationStart | 切换动画开始时触发该回调。 |
| onChange | 子组件索引变化时触发该事件。 |
具体api接口信息查看:Swiper事件。
- 在onGestureSwiper回调中,根据手指滑动的距离实时维护卡片的偏移量。
.onGestureSwipe((index, event) => {
  let currentOffset = event.currentOffset;
  // 获取当前卡片(居中)的原始偏移量
  let maxOffset = this.getMaxOffset(index) / 2;
  // 实时维护卡片的偏移量列表,做到跟手效果
  if (currentOffset < 0) {
    // 向左偏移
    /*
     * 此处计算原理为:按照比例设置卡片的偏移量。
     * 当前卡片居中,向左滑动后将在左边,此时卡片偏移量即为 maxOffset * 2(因为向右对齐)。
     * 所以手指能够滑动的最大距离(this.displayWidth)所带来的偏移量即为 maxOffset。
     * 易得公式:卡片实时偏移量 = (手指滑动长度 / 屏幕宽度) * 卡片最大可偏移量 + 当前偏移量。
     * 之后的计算原理相同,将不再赘述。
     */
    this.cardsOffset[index] = (-currentOffset / this.displayWidth) * maxOffset + maxOffset;
    if (this.isIndexValid(index + 1)) {
      // 下一个卡片的偏移量
      let maxOffset = this.getMaxOffset(index + 1) / 2;
      this.cardsOffset[index + 1] = (-currentOffset / this.displayWidth) * maxOffset;
    }
    if (this.isIndexValid(index - 1)) {
      // 上一个卡片的偏移量
      let maxOffset = this.getMaxOffset(index - 1) / 2;
      this.cardsOffset[index - 1] = (currentOffset / this.displayWidth) * maxOffset + 2 * maxOffset;
    }
  } else if (currentOffset > 0) {
    // 向右滑动
    this.cardsOffset[index] = maxOffset - (currentOffset / this.displayWidth) * maxOffset;
    if (this.isIndexValid(index + 1)) {
      let maxOffset = this.getMaxOffset(index + 1) / 2;
      this.cardsOffset[index + 1] = (currentOffset / this.displayWidth) * maxOffset;
    }
    if (this.isIndexValid(index - 1)) {
      let maxOffset = this.getMaxOffset(index -1) / 2;
      this.cardsOffset[index - 1] = 2 * maxOffset - (currentOffset / this.displayWidth) * maxOffset;
    }
  }
})
- 在onAnimationStart回调中,计算手指离开屏幕时卡片的偏移量,避免产生突变的偏移量。
.onAnimationStart((_, targetIndex) => {
  this.calculateOffset(targetIndex);
})
这里的 calculateOffset 函数即步骤1中维护卡片偏移量的函数。
- 在onChange回调中提前计算Swiper滑动后卡片的位置。
.onChange((index) => {
  logger.info(TAG, `Target index: ${index}`);
  this.calculateOffset(index);
})
计算方式同上一步。
- 图片预览效果实现
图片预览动效是通过共享元素转场结合全屏模态实现的。
通过geometryTransition属性绑定两个需要“一镜到底”的组件(本案例中的图片),结合模态窗口转场即可。
// 以下代码仅展示关键部分,详请查看源码
Row() {
  Image(this.cardInfo.src)
    .objectFit(ImageFit.Cover)
    .borderRadius($r('app.integer.photo_radius'))
      // TODO 知识点:geometryTransition通过id参数绑定两个组件转场关系,实现一镜到底动画
    .geometryTransition(this.cardIndex.toString(), { follow: true })
    .transition(TransitionEffect.OPACITY.animation({ duration: Constants.DURATION, curve: Curve.Friction }))
}
...
.bindContentCover(
  this.isPhotoShow,
  this.photoShowBuilder(this.cardInfo.src, this.cardIndex.toString()),
  { backgroundColor: $r('app.color.photo_preview_build_background'), modalTransition: ModalTransition.ALPHA }
)
...
// 全屏模态组件
@Builder photoShowBuilder(img: Resource, id: string) {
  Column() {
    Image(img)
      .borderRadius($r('app.integer.photo_radius'))
      .geometryTransition(id, { follow: true })
      .width($r('app.string.photo_preview_width'))
      .transition(TransitionEffect.opacity(Constants.OPACITY))
  }
  ...
  .onClick(() => {
    animateTo({
      duration: Constants.DURATION,
      curve: Curve.Friction
    }, () => {
      this.isPhotoShow = !this.isPhotoShow;
    })
  })
}
高性能知识点
- 本示例使用了LazyForEach进行数据懒加载以降低内存占用。
- Swiper组件的onGestureSwipe事件是个高频回调,注意在里面不要调用冗余操作和耗时操作。
工程结构&模块类型
cardswiperanimation            // har包
 ├─components
 │  ├─mainpage
 │  │  └─ CardSwiper.ets       // 卡片滑动组件入口
 │  ├─model
 │  │  └─ CardModel.ets        // 定义卡片类型
 │  ├─viewmodel
 │     └─ CardViewModel.ets    // 定义卡片组件
 ├─utils
 │  ├─ Constants.ets           // 常量数据
鸿蒙全栈开发全新学习指南
之前总有很多小伙伴向我反馈说,不知道学习哪些鸿蒙开发技术?不知道需要重点掌握哪些鸿蒙应用开发知识点?而且学习时频繁踩坑,最终浪费大量时间。所以这里为大家准备了一份实用的鸿蒙(HarmonyOS NEXT)学习路线与学习文档用来跟着学习是非常有必要的。
针对一些列因素,整理了一套纯血版鸿蒙(HarmonyOS Next)全栈开发技术的学习路线,包含了鸿蒙开发必掌握的核心知识要点,内容有(ArkTS、ArkUI开发组件、Stage模型、多端部署、分布式应用开发、WebGL、元服务、OpenHarmony多媒体技术、Napi组件、OpenHarmony内核、OpenHarmony驱动开发、系统定制移植等等)鸿蒙(HarmonyOS NEXT)技术知识点。
本路线共分为四个阶段:
第一阶段:鸿蒙初中级开发必备技能

第二阶段:鸿蒙南北双向高工技能基础:gitee.com/MNxiaona/733GH

第三阶段:应用开发中高级就业技术

第四阶段:全网首发-工业级南向设备开发就业技术:gitee.com/MNxiaona/733GH

《鸿蒙 (Harmony OS)开发学习手册》(共计892页)
如何快速入门?
1.基本概念
2.构建第一个ArkTS应用
3.……

开发基础知识:gitee.com/MNxiaona/733GH
1.应用基础知识
2.配置文件
3.应用数据管理
4.应用安全管理
5.应用隐私保护
6.三方应用调用管控机制
7.资源分类与访问
8.学习ArkTS语言
9.……

基于ArkTS 开发
1.Ability开发
2.UI开发
3.公共事件与通知
4.窗口管理
5.媒体
6.安全
7.网络与链接
8.电话服务
9.数据管理
10.后台任务(Background Task)管理
11.设备管理
12.设备使用信息统计
13.DFX
14.国际化开发
15.折叠屏系列
16.……

鸿蒙开发面试真题(含参考答案):gitee.com/MNxiaona/733GH

鸿蒙入门教学视频:

美团APP实战开发教学:gitee.com/MNxiaona/733GH

写在最后
- 如果你觉得这篇内容对你还蛮有帮助,我想邀请你帮我三个小忙:
- 点赞,转发,有你们的 『点赞和评论』,才是我创造的动力。
- 关注小编,同时可以期待后续文章ing🚀,不定期分享原创知识。
- 想要获取更多完整鸿蒙最新学习资源,请移步前往小编:
gitee.com/MNxiaona/733GH


 770
770

 被折叠的 条评论
为什么被折叠?
被折叠的 条评论
为什么被折叠?
 到【灌水乐园】发言


