


https://github.com/richzhang/PerceptualSimilarity#1-learned-perceptual-image-patch-similarity-lpips-metric
作用评估图像斑块之间的距离。越高意味着越不同。越低意味着越相似。
真正用到的/home/zhj/PerceptualSimilarity/models/
- 示例脚本,取两个特定图像之间的距离,所有对应的图像在2个目录,或所有对图像在一个目录:
python compute_dists.py -p0 imgs/ex_ref.png -p1 imgs/ex_p0.png --use_gpu
Distance: 0.722

python compute_dists_dirs.py -d0 imgs/ex_dir0 -d1 imgs/ex_dir1 -o
imgs/example_dists.txt --use_gpu

1.png: 0.138
0.png: 0.722

python compute_dists_pair.py -d imgs/ex_dir_pair -o imgs/example_dists_pair.txt --use_gpu

(ex_p0.png,ex_ref.png): 0.722
(ex_ref.png,ex_p1.png): 0.138
Avg: 0.42972 +/- 0.20659
- Python代码
文件test_network.py显示了示例的用法。这段代码片段就是您真正需要的。
import torch
from util import util
import models
from models import dist_model as dm
from IPython import embed
use_gpu = False # Whether to use GPU
spatial = True # Return a spatial map of perceptual distance.
# Linearly calibrated models (LPIPS)
model = models.PerceptualLoss(model='net-lin', net='alex', use_gpu=use_gpu, spatial=spatial)
# Can also set net = 'squeeze' or 'vgg'
# Off-the-shelf uncalibrated networks
# model = models.PerceptualLoss(model='net', net='alex', use_gpu=use_gpu, spatial=spatial)
# Can also set net = 'squeeze' or 'vgg'
# Low-level metrics
# model = models.PerceptualLoss(model='L2', colorspace='Lab', use_gpu=use_gpu)
# model = models.PerceptualLoss(model='ssim', colorspace='RGB', use_gpu=use_gpu)
## Example usage with dummy tensors
dummy_im0 = torch.zeros(1,3,64,64) # image should be RGB, normalized to [-1,1]
dummy_im1 = torch.zeros(1,3,64,64)
if(use_gpu):
dummy_im0 = dummy_im0.cuda()
dummy_im1 = dummy_im1.cuda()
dist = model.forward(dummy_im0,dummy_im1)
## Example usage with images
ex_ref = util.im2tensor(util.load_image('./imgs/ex_ref.png'))
ex_p0 = util.im2tensor(util.load_image('./imgs/ex_p0.png'))
ex_p1 = util.im2tensor(util.load_image('./imgs/ex_p1.png'))
if(use_gpu):
ex_ref = ex_ref.cuda()
ex_p0 = ex_p0.cuda()
ex_p1 = ex_p1.cuda()
ex_d0 = model.forward(ex_ref,ex_p0)
ex_d1 = model.forward(ex_ref,ex_p1)
if not spatial:
print('Distances: (%.3f, %.3f)'%(ex_d0, ex_d1))
else:
print('Distances: (%.3f, %.3f)'%(ex_d0.mean(), ex_d1.mean())) # The mean distance is approximately the same as the non-spatial distance
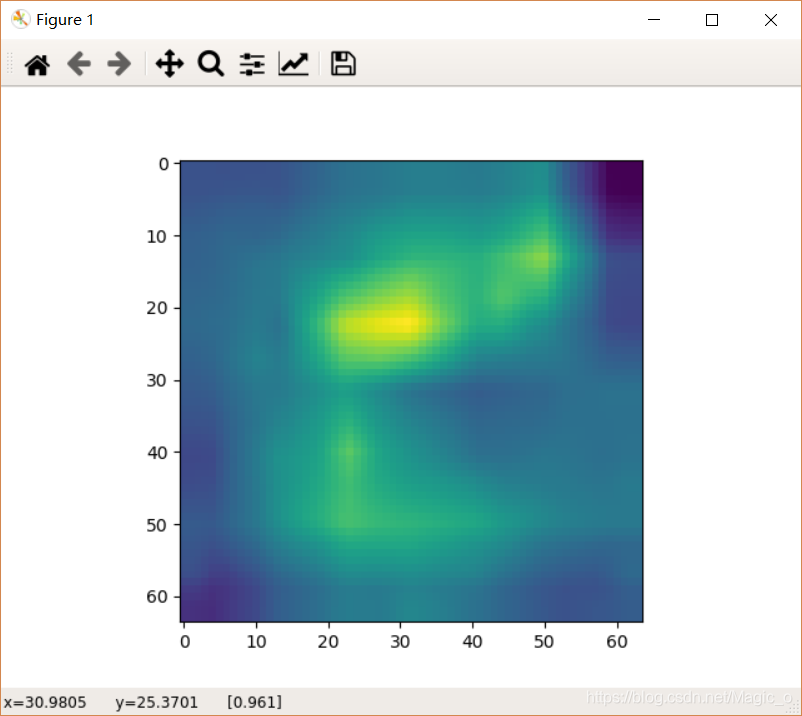
# Visualize a spatially-varying distance map between ex_p0 and ex_ref
import pylab
pylab.imshow(ex_d0[0,0,...].data.cpu().numpy())
pylab.show()
里面最重要的
import models
model = models.PerceptualLoss(model='net-lin', net='alex', use_gpu=use_gpu, gpu_ids=[0])
d = model.forward(im0,im1)
变量im0, im1a PyTorch Tensor/Variable with shape
Nx3xHxW (N patches of size HxW, RGB images scaled in [-1,+1]). This returns d, a length N Tensor/Variable.
一些选项默认在model.initialize:
net='alex':网络alex是最快的,性能最好的,并且是默认的。你可以用squeeze或vgg来代替。
model='net-lin':这在网络的中间特征上增加了一个线性校准。将其设置为model=net,以便对所有的特性赋予同等的权重。
Distances: (0.722, 0.138)
那么怎么比较GT和HR的感知距离呢?


 814
814

 被折叠的 条评论
为什么被折叠?
被折叠的 条评论
为什么被折叠?
 到【灌水乐园】发言


