


Android studio 3.0 已经集成了kotlin相关插件和配置,可以直接创建kotlin项目,3.0之前的项目需要我们手动搭建,下面就是搭建过程~
环境搭建
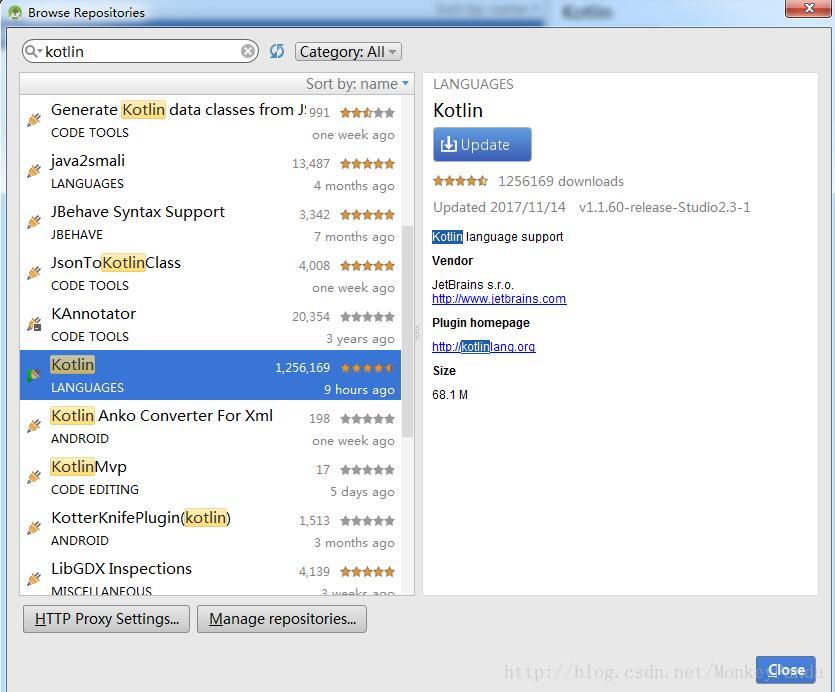
1.安装kotlin插件
2.在project的build.gradle中配置kotlin的版本
ext.kotlin_version = "1.0.3"
3.在module的build.gradle文件中配置kotlin插件和kotlin库
buildscript {
    repositories {
        jcenter()
    }
    dependencies {
        //1. 添加插件到classpath
        classpath "org.jetbrains.kotlin:kotlin-gradle-plugin:$kotlin_version"
    }
}

apply plugin: 'com.android.application'
//2. 应用kotlin插件
apply plugin: 'kotlin-android'
apply plugin: 'kotlin-android-extensions'
android {
    compileSdkVersion 25
    buildToolsVersion "25.0.3"
    defaultConfig {
        applicationId "com.kotlin.demo"
        minSdkVersion 19
        targetSdkVersion 25
        versionCode 1
        versionName "1.0"
        testInstrumentationRunner "android.support.test.runner.AndroidJUnitRunner"
    }
    buildTypes {
        release {
            minifyEnabled false
            proguardFiles getDefaultProguardFile('proguard-android.txt'), 'proguard-rules.pro'
        }
    }

    sourceSets {
        //3. 将kotlin源文件添加到编译路径下
        main.java.srcDirs += 'src/main/kotlin'
    }

}


dependencies {
    compile fileTree(dir: 'libs', include: ['*.jar'])
    androidTestCompile('com.android.support.test.espresso:espresso-core:2.2.2', {
        exclude group: 'com.android.support', module: 'support-annotations'
    })
    compile 'com.android.support:appcompat-v7:25.3.1'
    compile 'com.android.support.constraint:constraint-layout:1.0.2'
    testCompile 'junit:junit:4.12'

    //    apply plugin: 'kotlin-android-extensions'
    //4. 使用kotlin库
    compile "org.jetbrains.kotlin:kotlin-stdlib:$kotlin_version"
}
代码测试
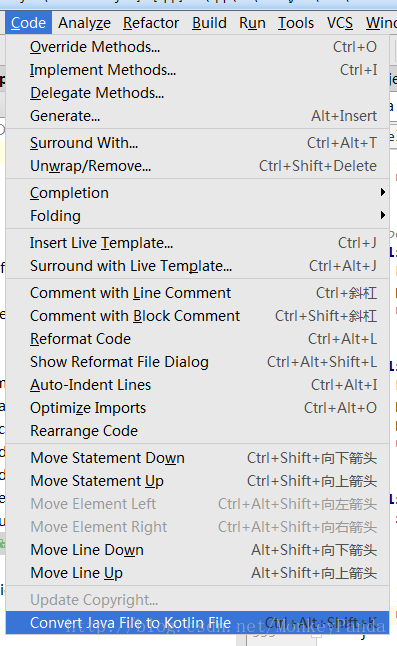
把MainActivity.java转换成MainActivity.kt.
activity_main.xml
<?xml version="1.0" encoding="utf-8"?>
<RelativeLayout xmlns:android="http://schemas.android.com/apk/res/android"
                xmlns:tools="http://schemas.android.com/tools"
                android:layout_width="match_parent"
                android:layout_height="match_parent">

    <TextView
        android:layout_width="wrap_content"
        android:layout_height="wrap_content"
        android:id="@+id/tv_message"
        android:text="Hello World!" />
</RelativeLayout>
MainActivity.kt
package com.kotlin.demo

import android.support.v7.app.AppCompatActivity
import android.os.Bundle
import kotlinx.android.synthetic.main.activity_main.*

class MainActivity : AppCompatActivity() {

    override fun onCreate(savedInstanceState: Bundle?) {
        super.onCreate(savedInstanceState)
        setContentView(R.layout.activity_main)
        tv_message.text = "hello kotlin!"
    }
}
不需要findViewById就可以直接使用textView
使用kotlin确实可以简化代码,使用起来很方便。


 7598
7598

 被折叠的 条评论
为什么被折叠?
被折叠的 条评论
为什么被折叠?
 到【灌水乐园】发言


