


前言
此篇仅为熟悉UEC++而做的小游戏demo。
做点程序员该做的东西-_-|| 通过小demo学习官方API文档、宏等一些基本信息(在笔记六中详细记录)
项目创建与基本设置
VS安装包:
.NET桌面开发(非必须):.NET Framework 4.6.2-4.7.1
使用C++的桌面开发(必须):Win10 SDK(默认是√的),Win11SDK(非必须)
使用C++的游戏开发(必须):UnrealEngine安装程序
单个组件(必须):
Windows 通用 CRT SDK
Visual Studio SDK
.NET Core3.1 运行时(LTS)
VS2022对应的版本 UE5/UE4.27
有问题可以去社区搜搜
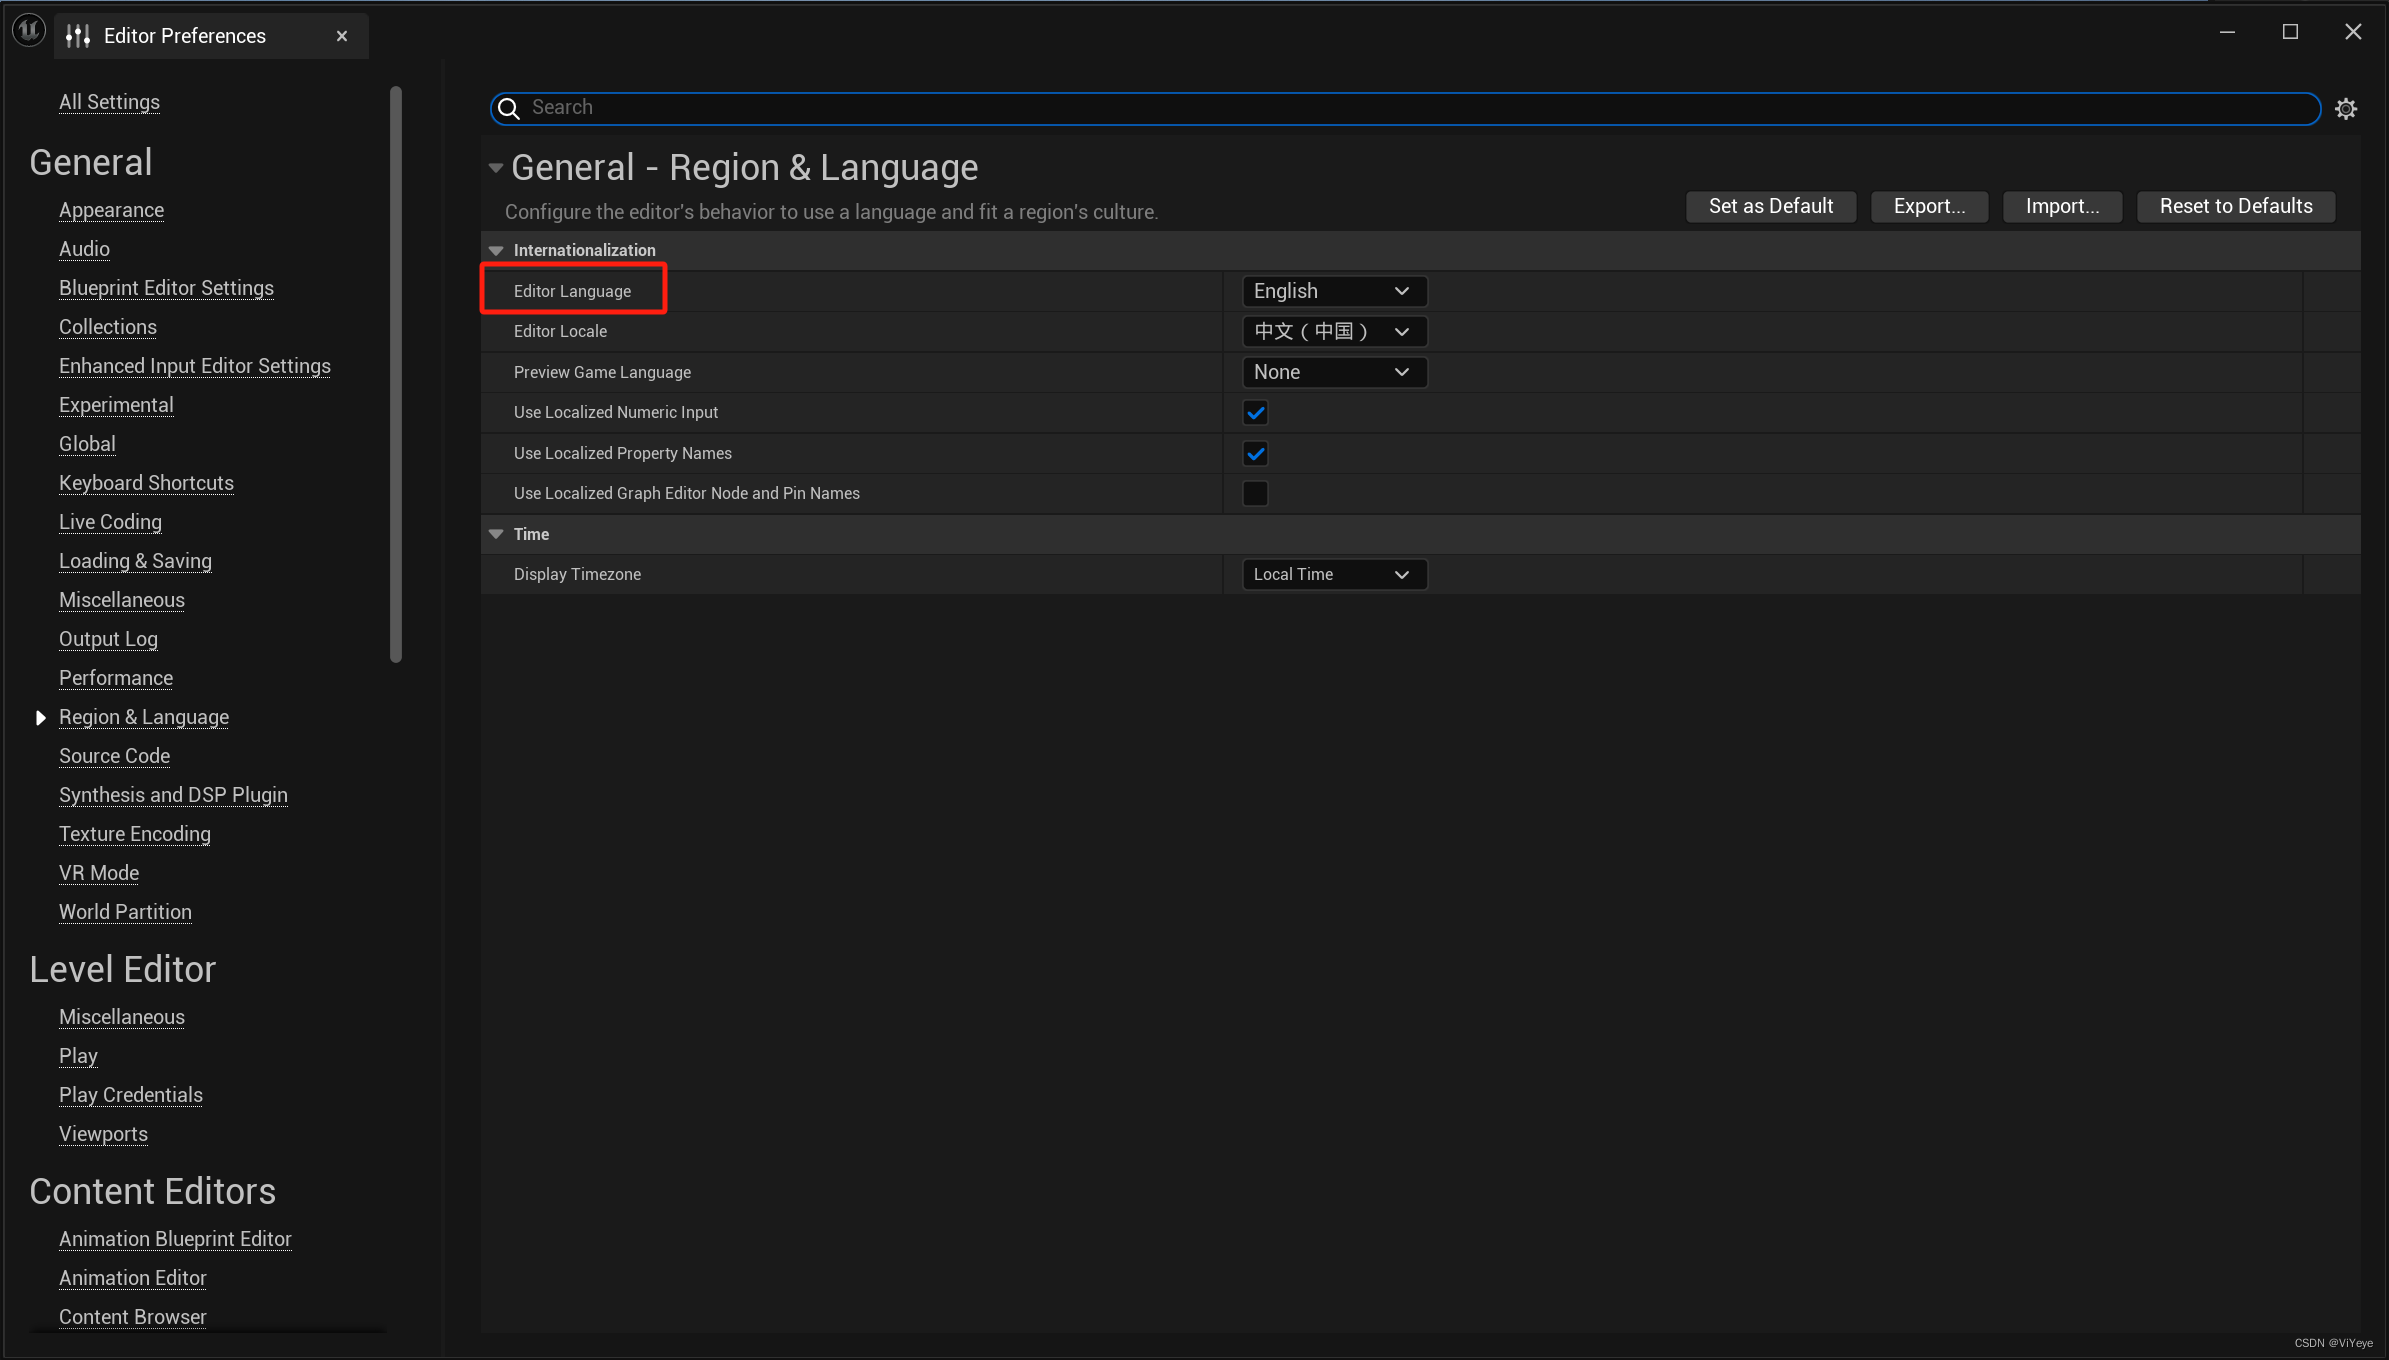
编辑器
- 修改编辑器语言
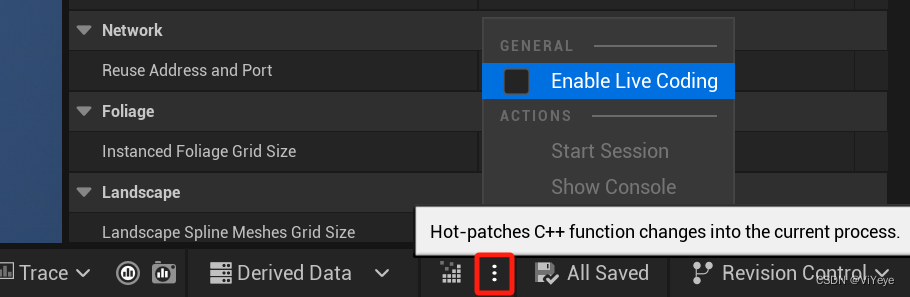
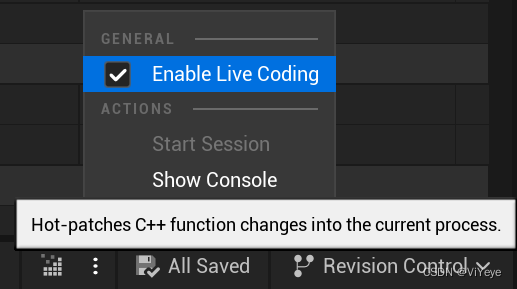
- 以IDE为主,关闭下方三个点→Enable Live Coding
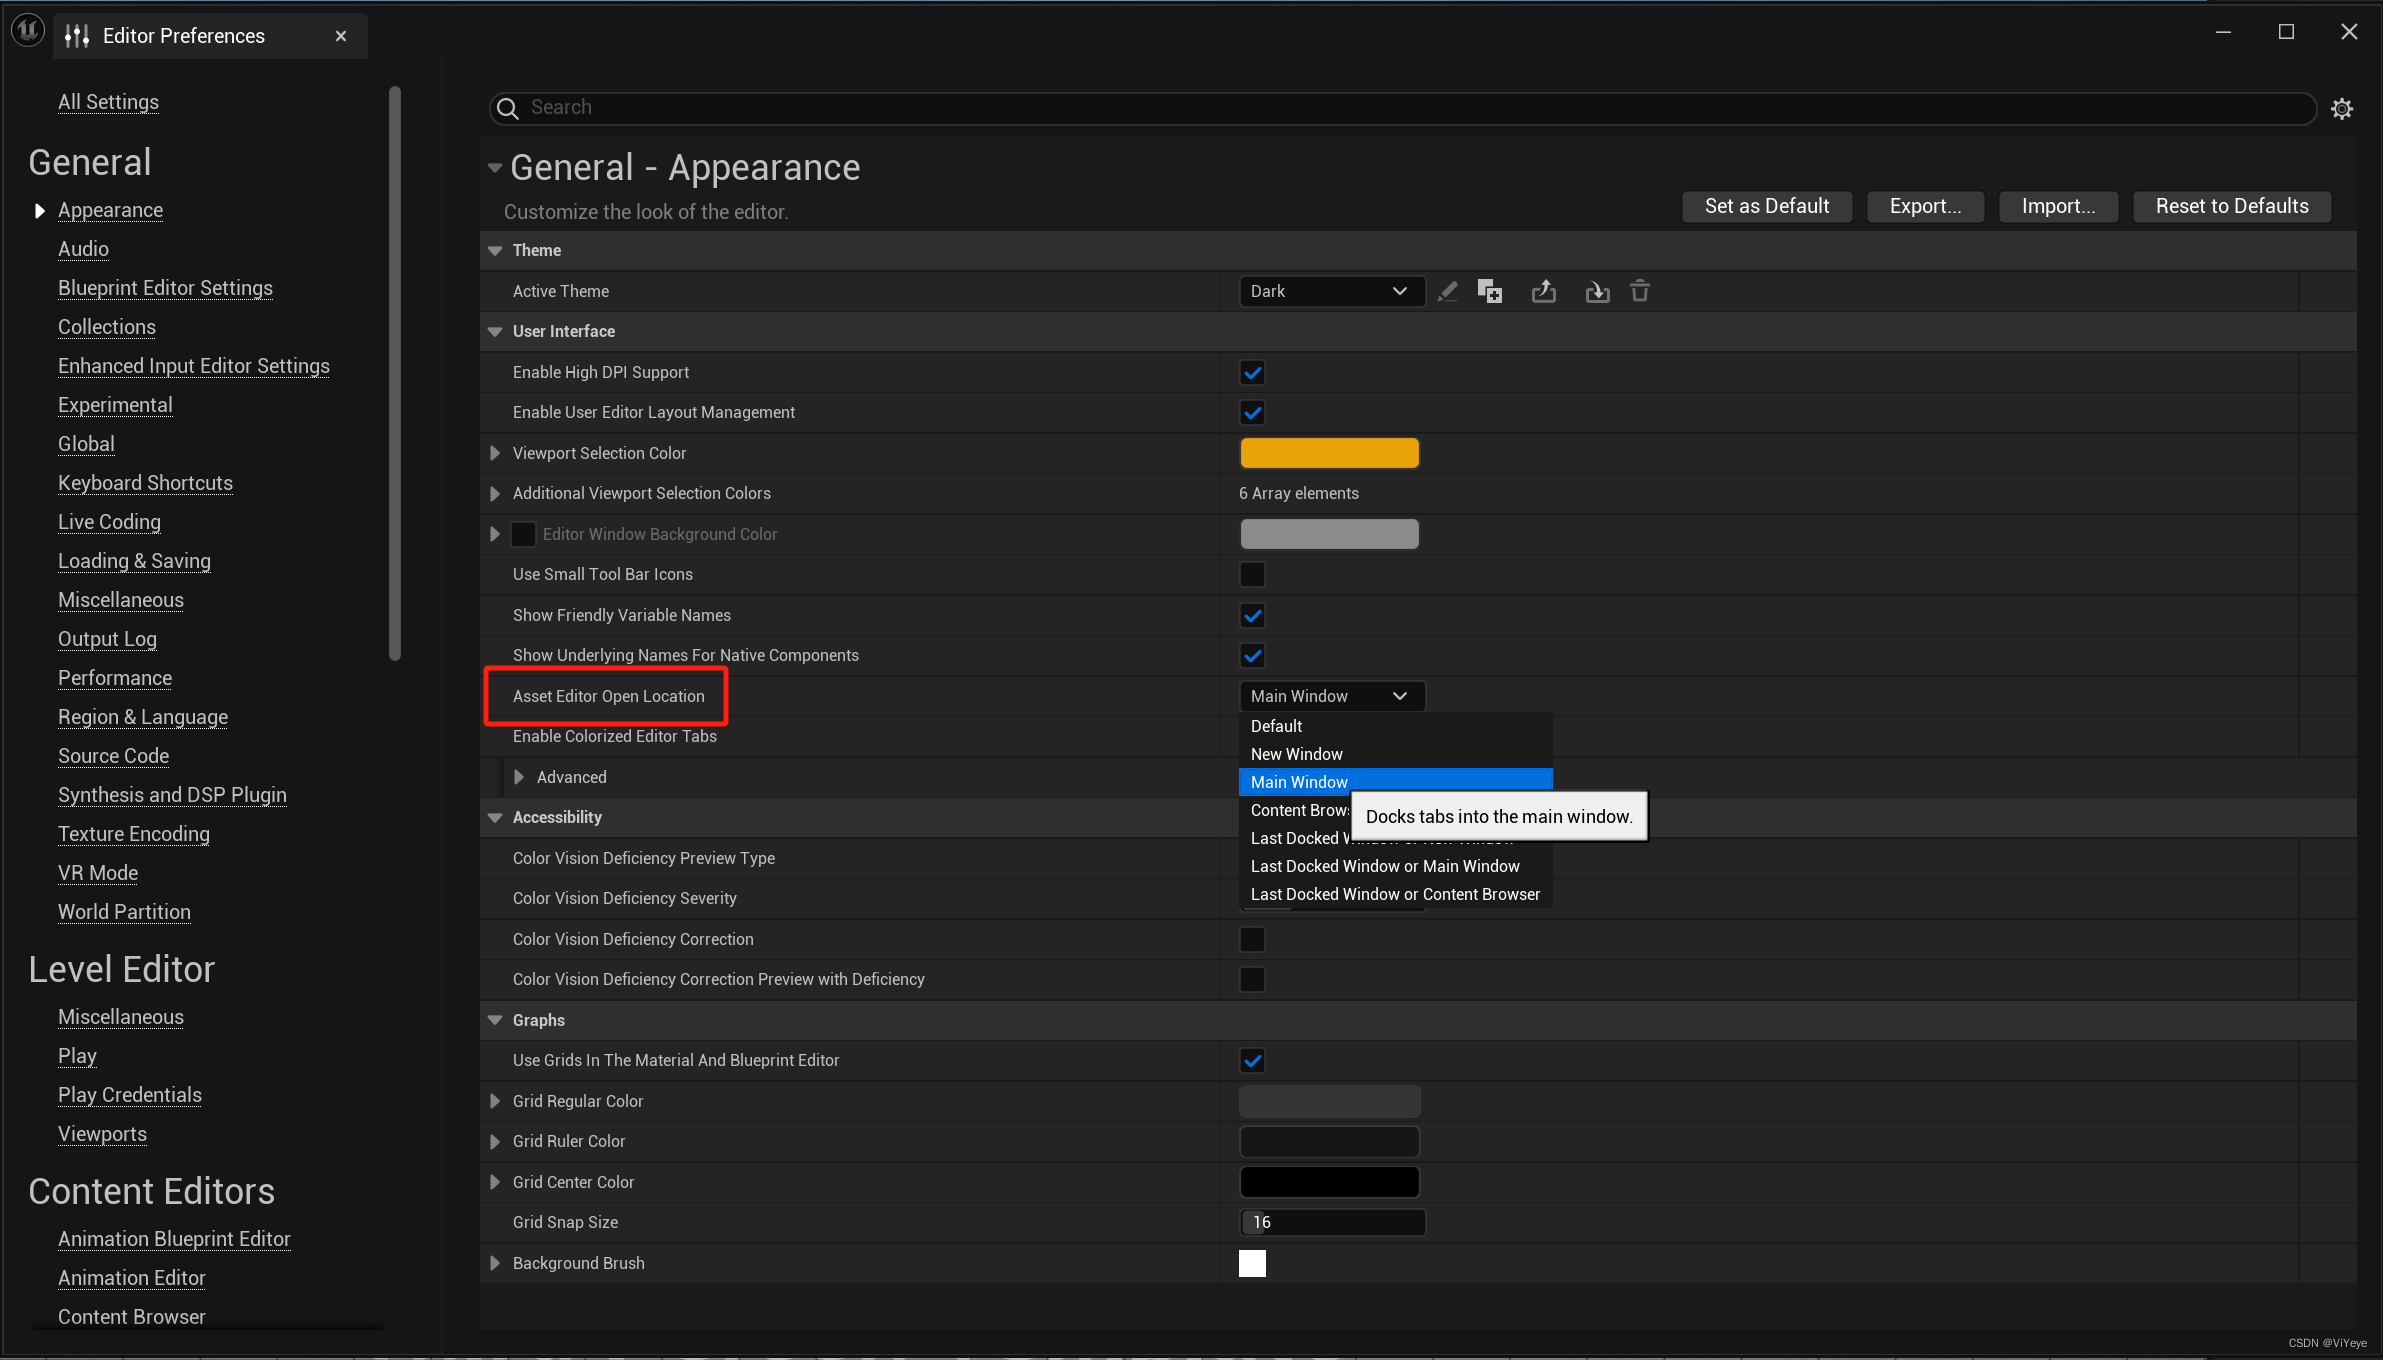
- Editor→Editor Preferences...→Appearance→Asset Editor Open Location(Main Window)
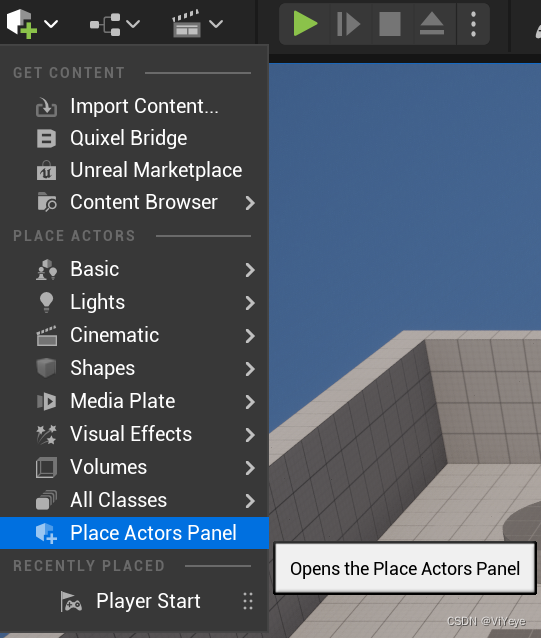
- 显示Place Actors Panel
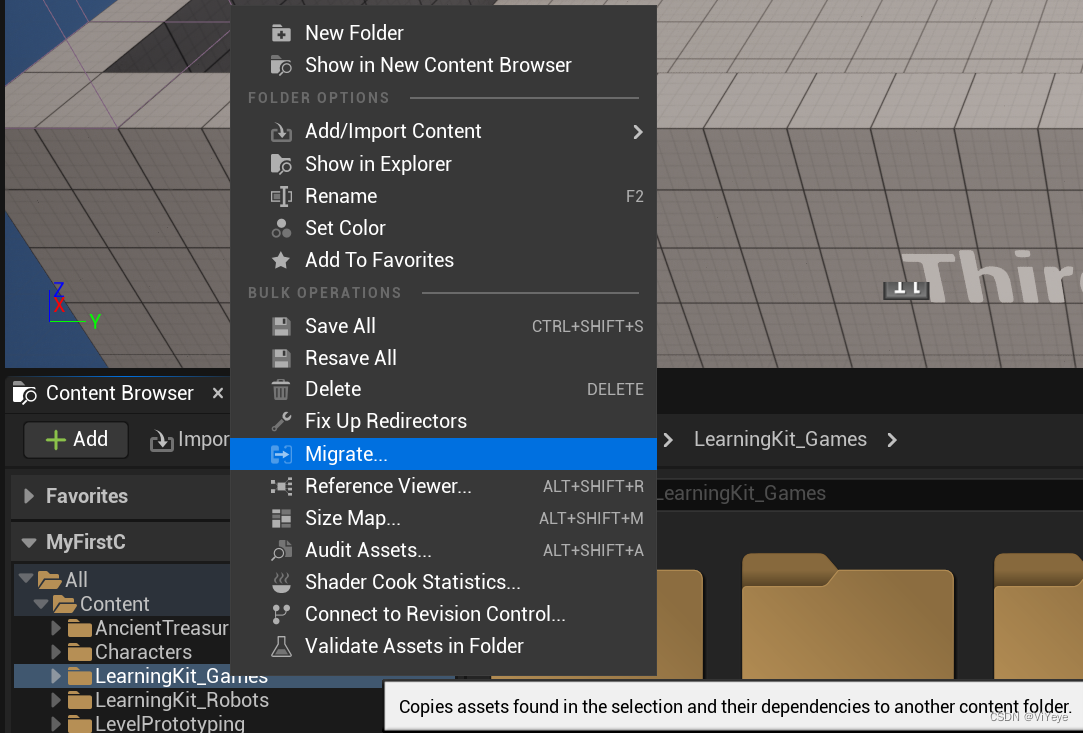
- 不同引擎版本间的资产迁移:右键需要迁移的文件夹→Migrate→迁移到指定项目中的Content目录(Games目录)下
- 创建名为“_GameProgrammer”的文件夹用于文件整理
相机
创建角色:
创建角色C++类继承自Character(MyCharacter)→通过该类创建蓝图类放到 _GameProgrammer/BP文件夹下 (MyCharacter_BP)
创建相应的GameMode(选择AllClasses后选择GameMode , 命名为MyCharacter_GameMode)→通过该类创建蓝图类放到_GameProgrammer/BP文件夹下 (MyCharacter_GameMode_BP)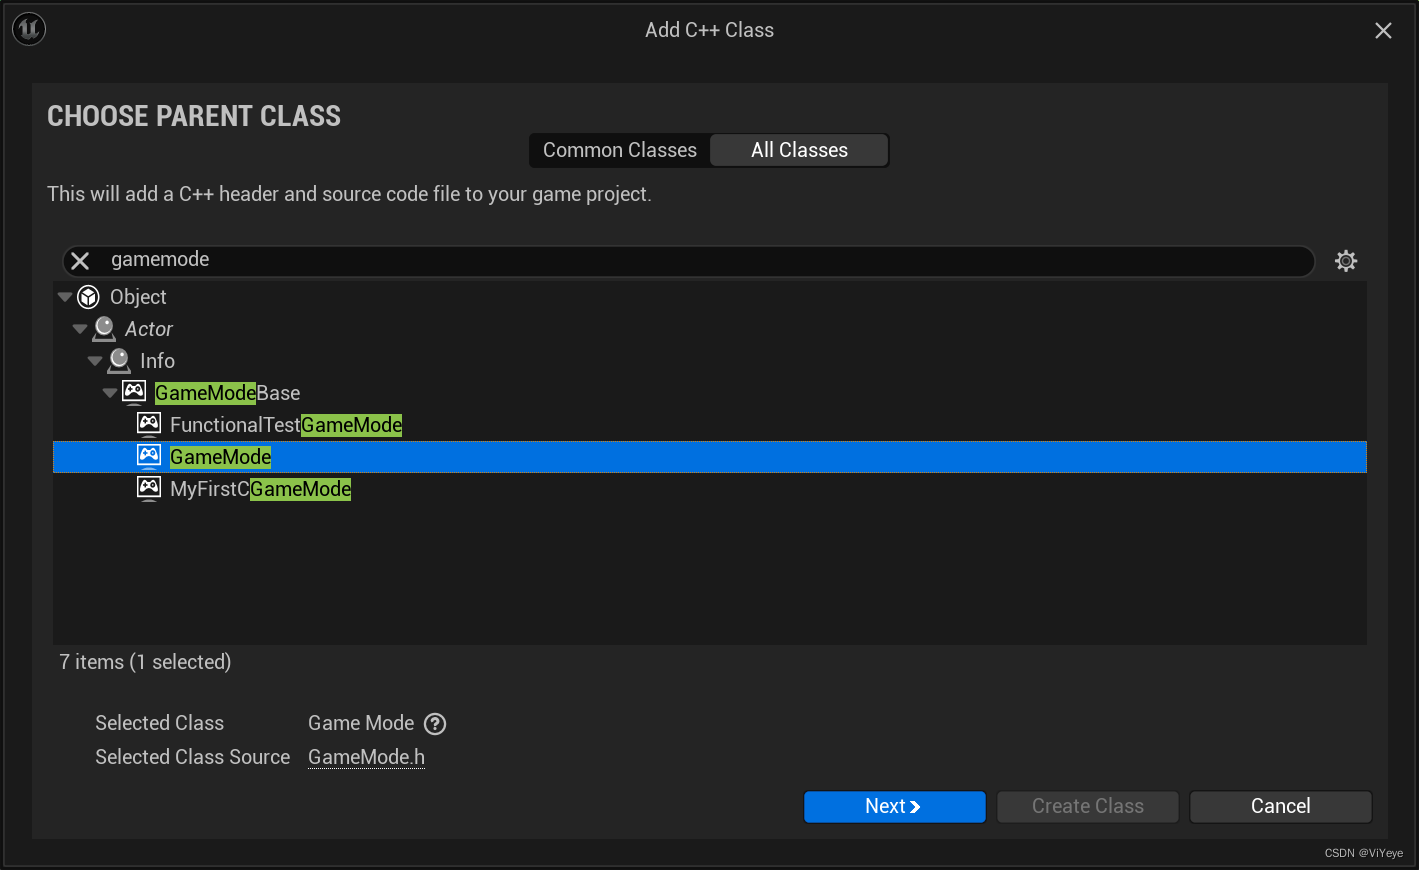
选择MyCharacter_GameMode_BP进行默认配置
- 在Classes/Default Pawn Class→MyCharacter_BP
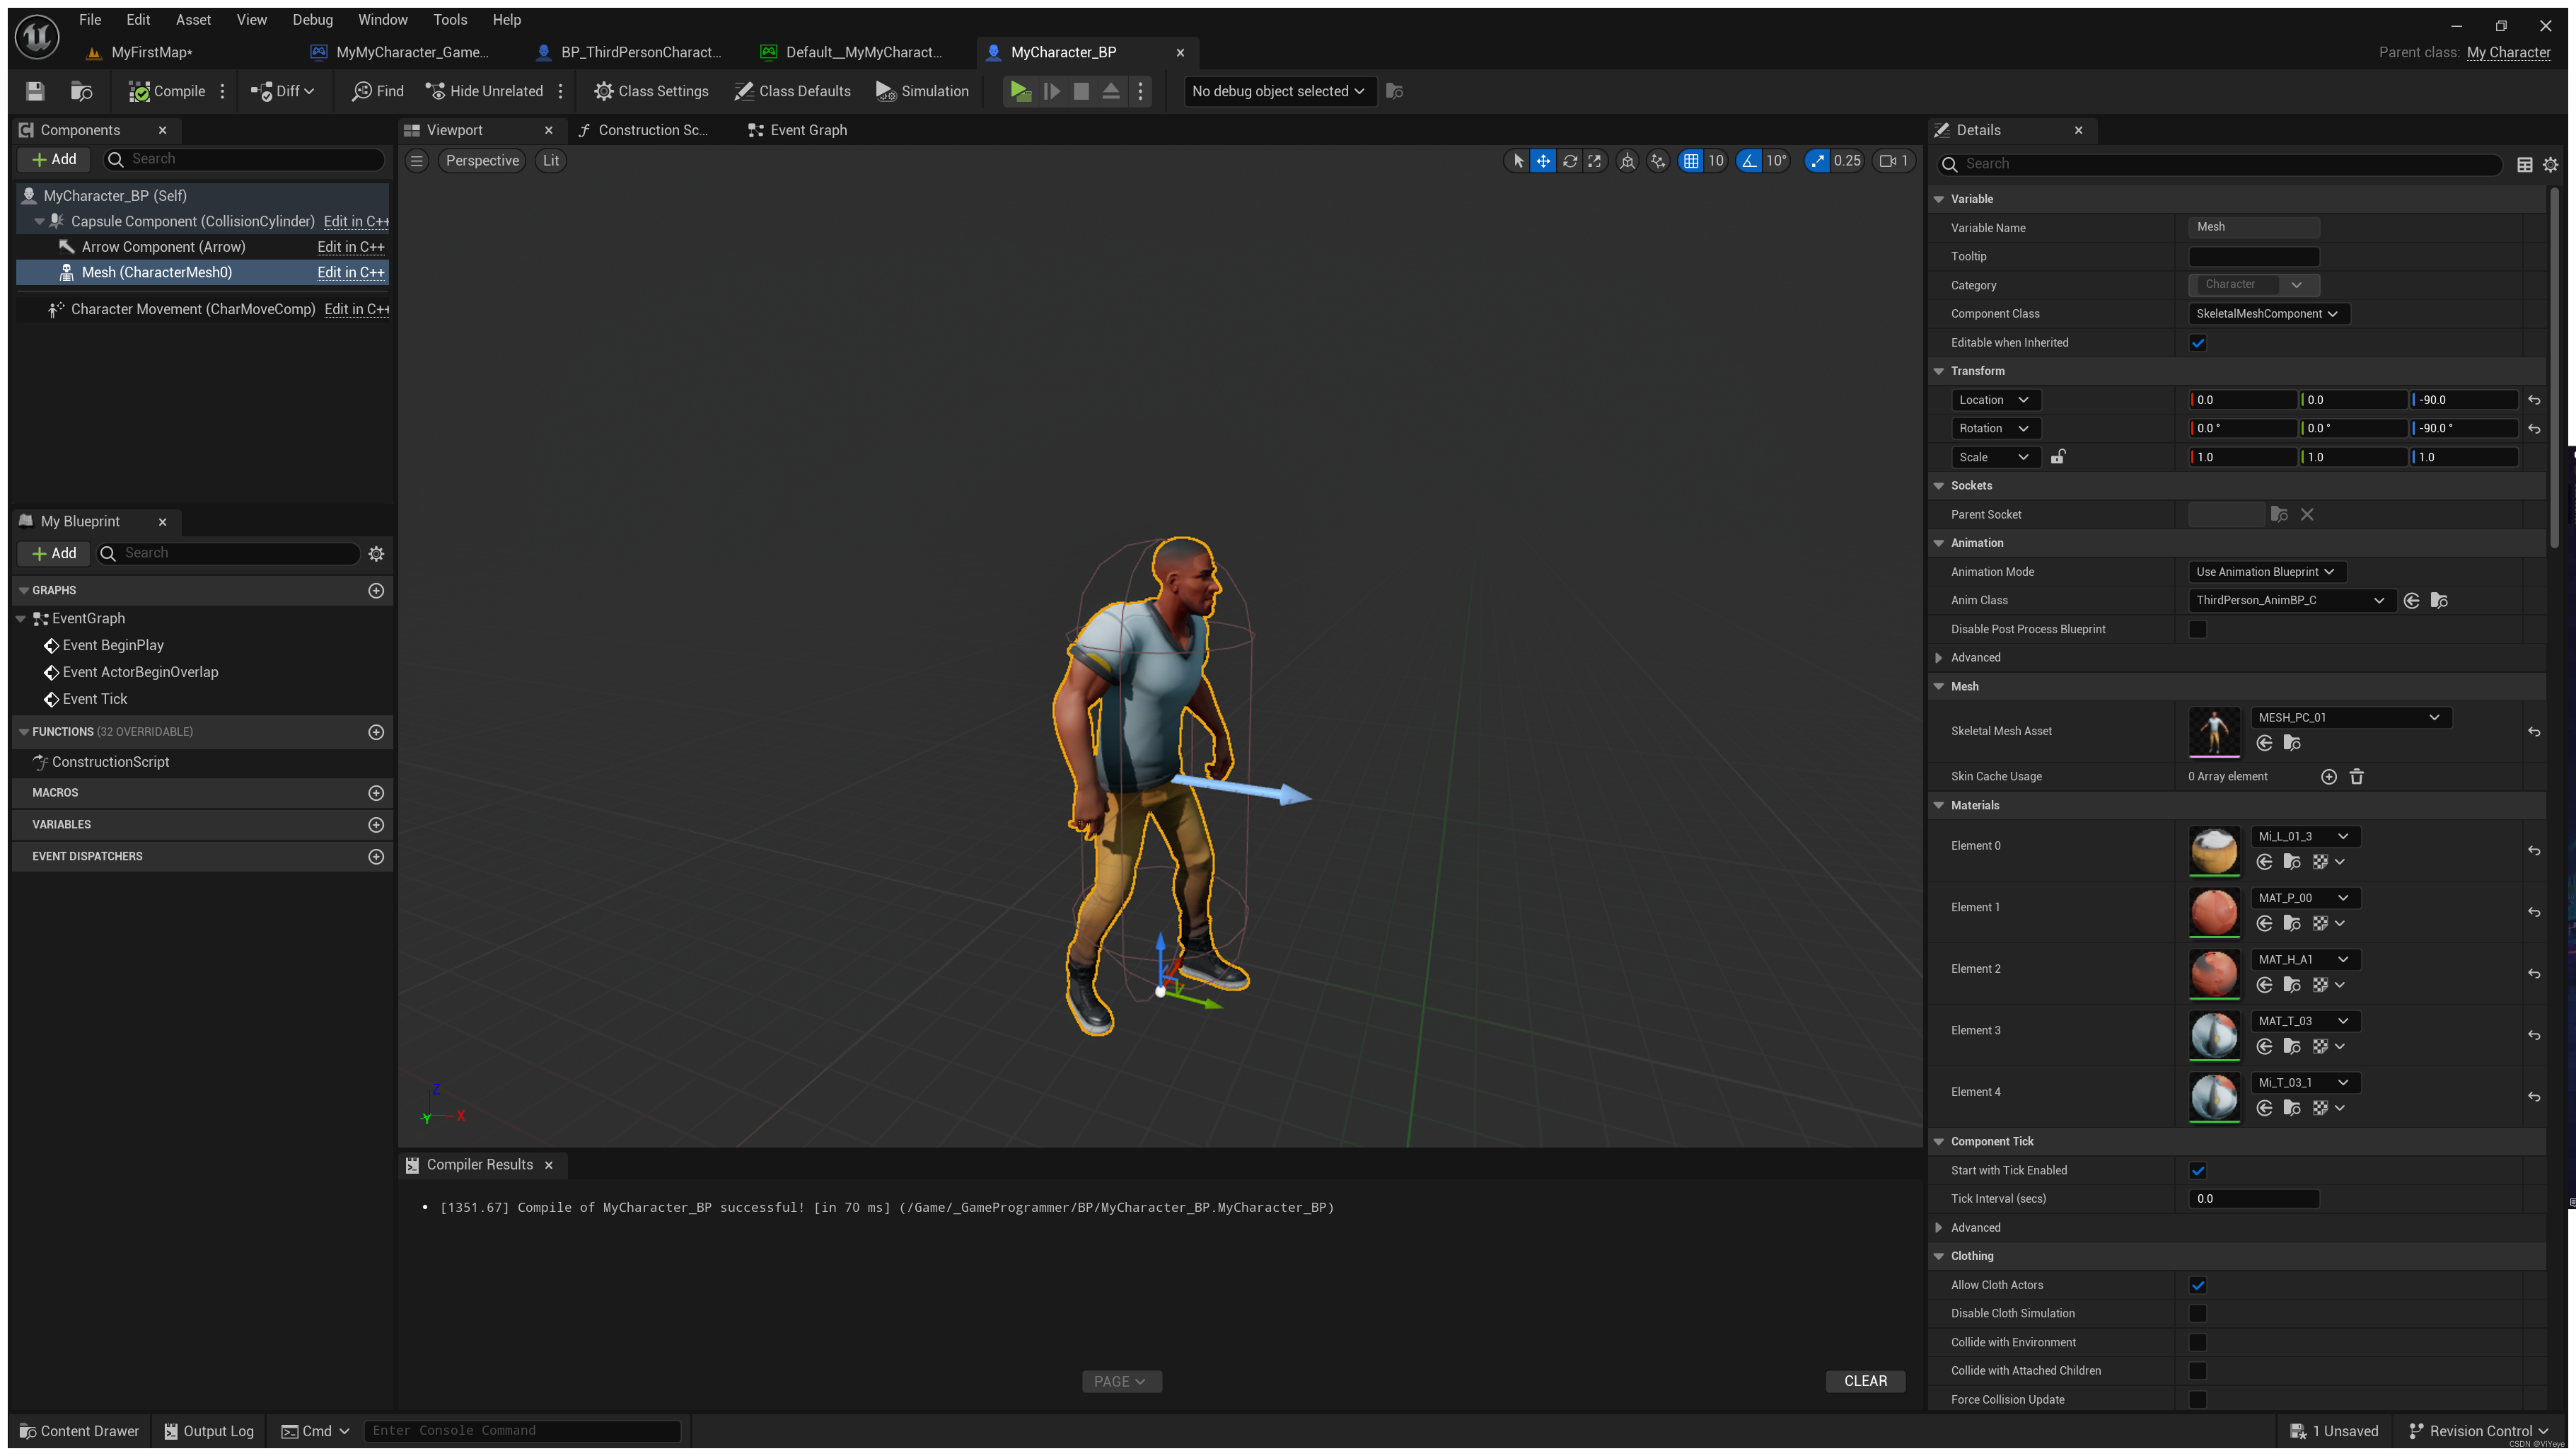
- 选择MyCharacter_BP配置Mesh、坐标以及旋转
在MyCharacter.h中声明摄像机 需要添加头文件
class UCameraComponent;
class USpringArmComponent;
UPROPERTY(VisibleAnywhere, BlueprintReadOnly, Category = Camera, meta = (AllowPrivateAccess = "true"))
UCameraComponent* FollowCamera;
UPROPERTY(VisibleAnywhere, BlueprintReadOnly, Category = Camera, meta = (AllowPrivateAccess = "true"))
USpringArmComponent* CameraBoom;并在MyCharacter.cpp文件中添加头文件
#include "Camera/CameraComponent.h"
#include "GameFramework/SpringArmComponent.h"
并配置相机
AMyCharacter::AMyCharacter()
{
 	// Set this character to call Tick() every frame.  You can turn this off to improve performance if you don't need it.
	PrimaryActorTick.bCanEverTick = true;

	CameraBoom = CreateDefaultSubobject<USpringArmComponent>(TEXT("CameraBoom"));
	CameraBoom->SetupAttachment(RootComponent);

	FollowCamera = CreateDefaultSubobject<UCameraComponent>(TEXT("FollowCamera"));
	FollowCamera->SetupAttachment(CameraBoom, USpringArmComponent::SocketName);
	FollowCamera->bUsePawnControlRotation = false;
}
增强输入系统InputMappingContext(简称IMC)
先学代码,再学Input中的配置
在MyCharacter.h文件中添加增强输入API (需要添加头文件)
class UInputMappingContext;
struct FInputActionValue;
在 MyCharacter.cpp 文件中添加头文件
#include "EnhancedInputComponent.h"
#include "EnhancedInputSubsystems.h"
#include "InputActionValue.h"
#include "GameFramework/CharacterMovementComponent.h"
声明属性
	/** MappingContext */
	UPROPERTY(EditAnywhere, BlueprintReadOnly, Category = Input, meta = (AllowPrivateAccess = "true"))
	UInputMappingContext* DefaultMappingContext;

	/** Jump Input Action */
	UPROPERTY(EditAnywhere, BlueprintReadOnly, Category = Input, meta = (AllowPrivateAccess = "true"))
	UInputAction* JumpAction;

	/** Move Input Action */
	UPROPERTY(EditAnywhere, BlueprintReadOnly, Category = Input, meta = (AllowPrivateAccess = "true"))
	UInputAction* MoveAction;

	/** Look Input Action */
	UPROPERTY(EditAnywhere, BlueprintReadOnly, Category = Input, meta = (AllowPrivateAccess = "true"))
	UInputAction* LookAction;
(这里边的UInputMappingContext其实就是在编辑器中右键创建的 Input Mapping Context(IMC) 与 Input Action(IA))
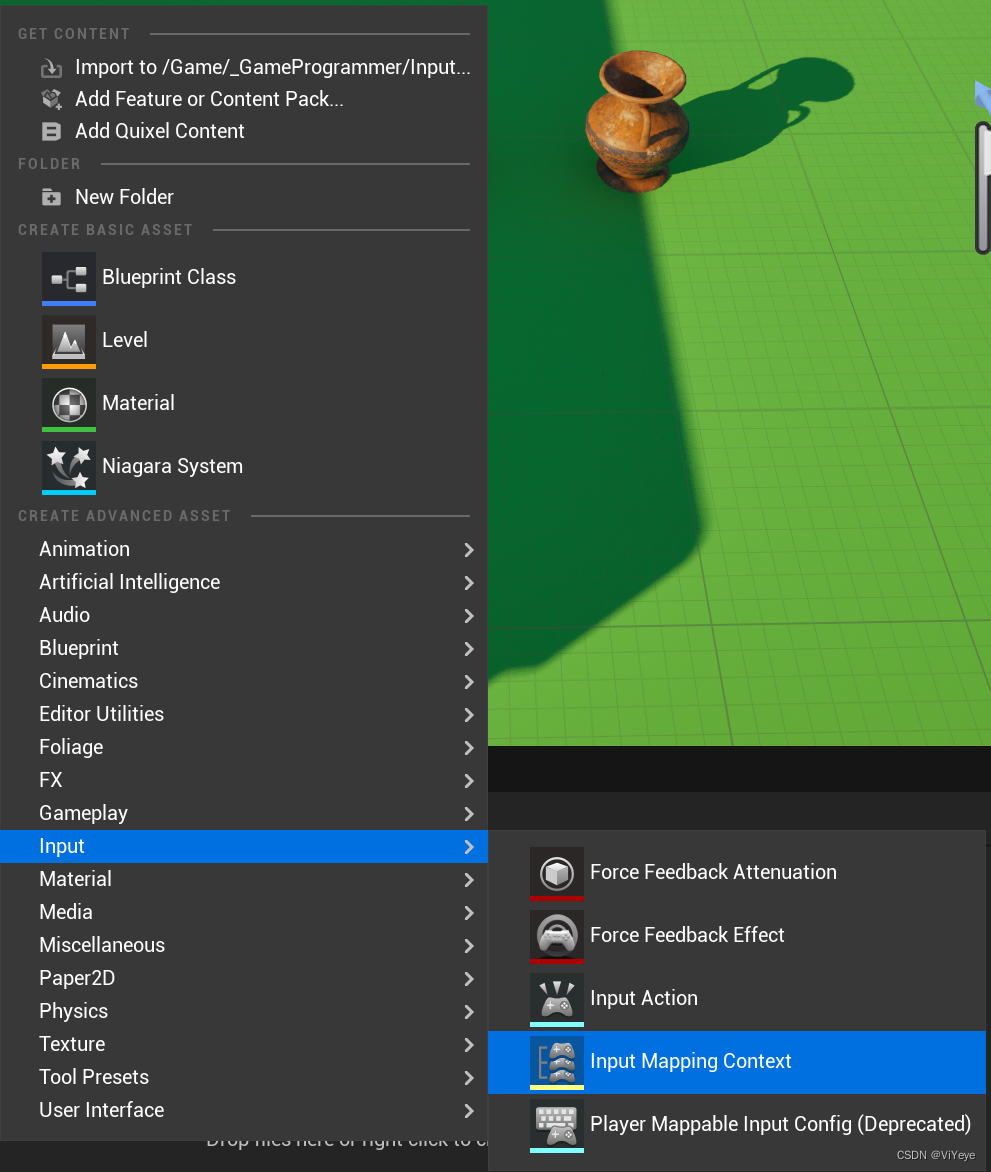
创建相关的 IMC 与 IA(我这边直接使用了初学者包里边的)
编译后查看角色蓝图会在编辑器多出 Input 组其中包含上面的 IA 以及IMC ,对其进行配置
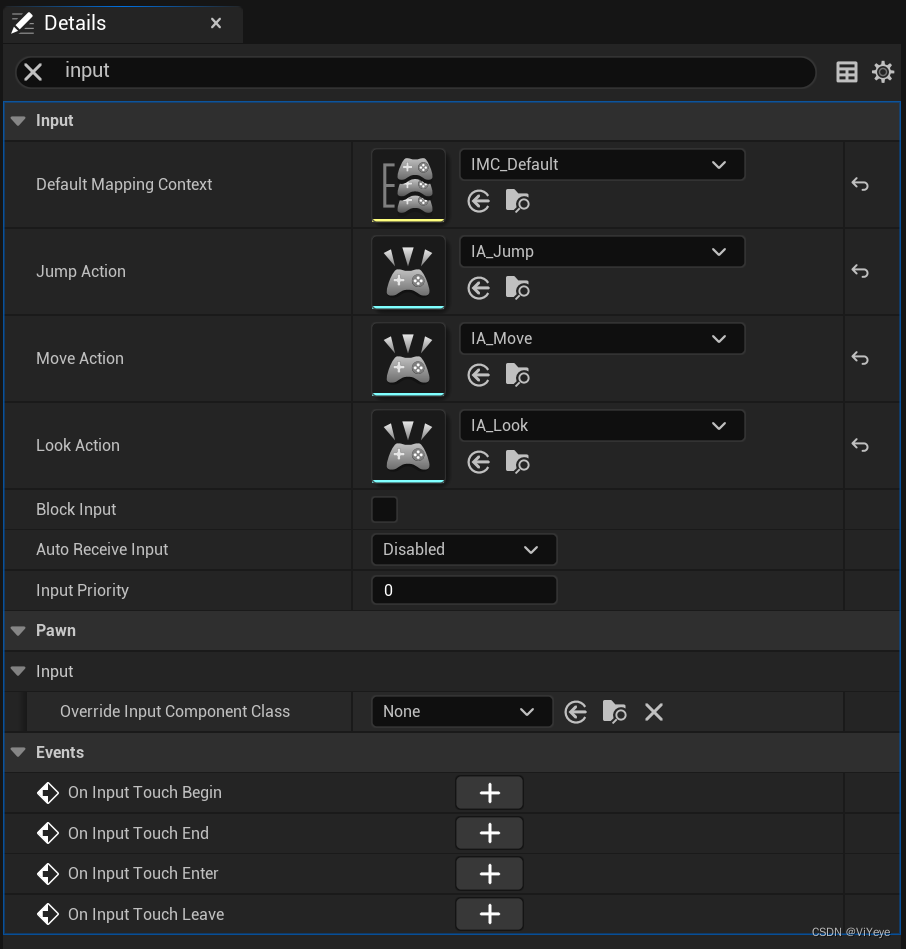
配置好后,全选那几个 IA 右键→AssetActions→Bulk Edit via Property Matrix(属性矩阵更改值)修改 DisPlay 中 的ValueType。配置好后关闭
进入映射文件IMC对这些动作进行配置
- 其中Negate 表示 负向的
在Project Settings 中配置增强输入 
在.h文件中声明以下函数并创建函数体
    /** Called for movement input */
	void Move(const FInputActionValue& Value);

	/** Called for looking input */
	void Look(const FInputActionValue& Value);
以下就属于业务逻辑了
最后再提一遍坐标轴向:z轴上下,x轴前后,y轴左右
void AMyCharacter::Move(const FInputActionValue& Value)
{
	// input 是 FVector2D类型
	FVector2D MovementVector = Value.Get<FVector2D>();

	// 控制器
	if (Controller != nullptr)
	{
		// 找转向 并转为矢量
		// Pitch:	上下俯视:	绕Y轴旋转为Pitch
		// Yaw:		左右转向:	绕Z轴旋转为
		// Roll:	左右滚动:	绕X轴旋转

		const FRotator Rotation = Controller->GetControlRotation();
		const FRotator YawRotation(0, Rotation.Yaw, 0);

		//FRotator  ->  FVector
		// 得到正向单位向量					  矩阵						单位向量
		const FVector ForwardDirection = FRotationMatrix(YawRotation).GetUnitAxis(EAxis::X);
		// 得到右向单位向量
		const FVector RightDirection = FRotationMatrix(YawRotation).GetUnitAxis(EAxis::Y);


		AddMovementInput(ForwardDirection, MovementVector.Y);
		AddMovementInput(RightDirection, MovementVector.X);
	}
}
void AMyCharacter::Look(const FInputActionValue& Value)
{
FVector2D LookAxisVector = Value.Get<FVector2D>();
if (Controller != nullptr)
{
AddControllerYawInput(LookAxisVector.X);
AddControllerPitchInput(LookAxisVector.Y);
}
}在 MyCharacter.cpp 中绑定 IMC 事件
void AMyCharacter::SetupPlayerInputComponent(UInputComponenet* PlayerInputComponenet)
{
    Super::SetupPlayerInputComponent(PlayerInputComponenet);

    // 获取玩家控制器
    if(APlayerController* PlayerController = CastChecked<APlayerController>(GetController()))
    {
        // 从玩家控制器获取 SubSystem 并将类型转换 赋值给增强输入子系统
        if(UEnhancedInputLocalPlayerSubsystem* EnhancedInputLocalPlayerSubsystem = ULocalPlayer::GetSubsystem<UEnhancedInputLocalPlayerSubsystem>(PlayerController->GetLocalPlayer()))
        {
            // 将增强输入子系统与映射文件(IMC)绑定
            EnhancedInputLocalPlayerSubsystem->AddMappingContext(DefaultMappingContext, 0);
        }
    }

    // 对 Action 进行绑定
    if(UEnhancedInputComponent* EnhancedInputComponent = CastChecked<UEnhancedInputComponent>(PlayerInputComponent))
    {
        EnhancedInputComponent->BindAction(JumpAction, ETriggerEvent::Started, this, &ACharacter::Jump);
        EnhancedInputComponent->BindAction(JumpAction, ETriggerEvent::Completed, this, &ACharacter::StopJumping);
        EnhancedInputComponent->BindAction(MoveAction, ETriggerEvent::Triggered, this, &AMyCharacter::Move);
        EnhancedInputComponent->BindAction(LookAction, ETriggerEvent::Triggered, this, &AMyCharacter::Look);
    }
}
在构造函数中添加 GetCharacterMovement()->bOrientRotationToMovement = true;来确保角色旋转
AMyCharacter::AMyCharacter()
{
 	// Set this character to call Tick() every frame.  You can turn this off to improve performance if you don't need it.
	PrimaryActorTick.bCanEverTick = true;

	// Don't rotate when the controller rotates. Let that just affect the camera.
	bUseControllerRotationPitch = false;
	bUseControllerRotationYaw = false;
	bUseControllerRotationRoll = false;

	// Configure character movement
	GetCharacterMovement()->bOrientRotationToMovement = true; // Character moves in the direction of input...
	GetCharacterMovement()->RotationRate = FRotator(0.0f, 500.0f, 0.0f); // ...at this rotation rate

	CameraBoom = CreateDefaultSubobject<USpringArmComponent>(TEXT("CameraBoom"));
	CameraBoom->SetupAttachment(RootComponent);

	FollowCamera = CreateDefaultSubobject<UCameraComponent>(TEXT("FollowCamera"));
	FollowCamera->SetupAttachment(CameraBoom, USpringArmComponent::SocketName);
	FollowCamera->bUsePawnControlRotation = false;
}
碰撞检测(Collision)
在BP文件夹中创建一个 Pawn 命名为 “Item”。
添加 StaticMesh 与 Box Collision
- StaticMesh 中随便找一个mesh赋上
- 调整碰撞框位置
- 给物体添加一个tag :Item
- 修改碰撞检测:Collision Presets 使角色能与道具产生碰撞(不改也行,默认是对所有类型产生碰撞)
在BeginPlay中添加获取Capsule组件
在 .cpp文件中添加头文件引用
#include "Components/CapsuleComponent.h"void AMyCharacter::BeginPlay()
{
Super::BeginPlay();
GetCapsuleComponent()->OnComponentBeginOverlap.AddDynamic(this, &AMyCharacter::OnBeginOverlap);
}在 .h文件中声明OnBeginOverlap函数并创建函数体
UFUNCTION()
void OnBeginOverlap(UPrimitiveComponent* HitComponent, AActor* OtherActor, UPrimitiveComponent* OtherComponent, int32 OtherBodyIndex, bool bFromSweep, const FHitResult &SweepResult);
在 .cpp文件中书写相关业务逻辑
void AMyCharacter::OnBeginOverlap(UPrimitiveComponent* HitComponent, AActor* OtherActor, UPrimitiveComponent* OtherComponent, int32 OtherBodyIndex, bool bFromSweep, const FHitResult &SweepResult)
{
    if(OtherActor->ActorHasTag("Item"))
    {
        // 销毁
        OtherActor->Destroy();
    }
}
画面UI
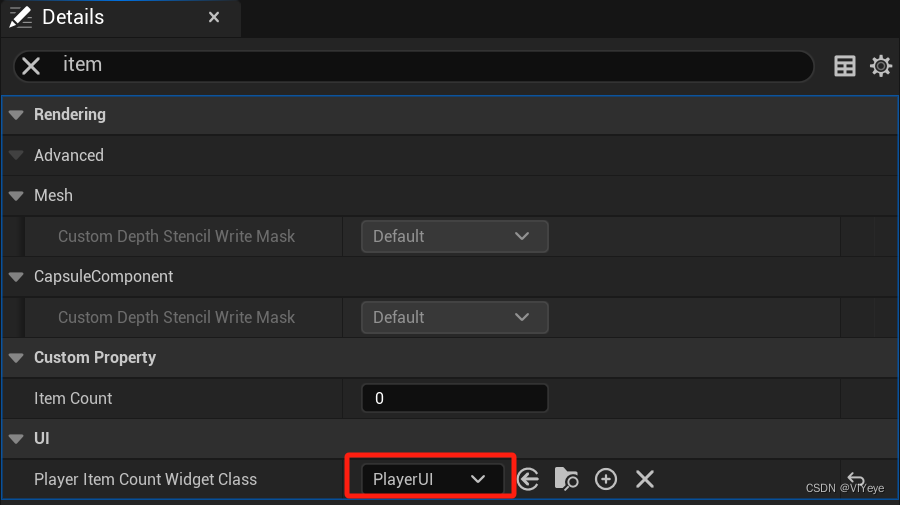
定义一个道具属性并在Details面板显示出来
	UPROPERTY(EditAnywhere, BlueprintReadOnly, Category = CustomProperty);
	int ItemCount = 0;
在碰到道具后数量+1操作
void AMyCharacter::OnBeginOverlap(UPrimitiveComponent* HitComponent, AActor* OtherActor, UPrimitiveComponent* OtherComponent, int32 OtherBodyIndex, bool bFromSweep, const FHitResult& SweepResult)
{
	if (OtherActor->ActorHasTag("Item"))
	{
		UE_LOG(LogTemp, Warning, TEXT("collision"));
		ItemCount++;
		// 销毁
		OtherActor->Destroy();
	}
}
在.Build.cs 脚本中添加 UMG 以使用UI相关的代码

引用UI,添加代码
	UPROPERTY(EditAnywhere, Category = UI);
	TSubclassOf<UUserWidget> PlayerItemCountWidget_Class;
	UUserWidget* PlayerItemCountWidget;
创建Widget并命名为 “PlayerUI”
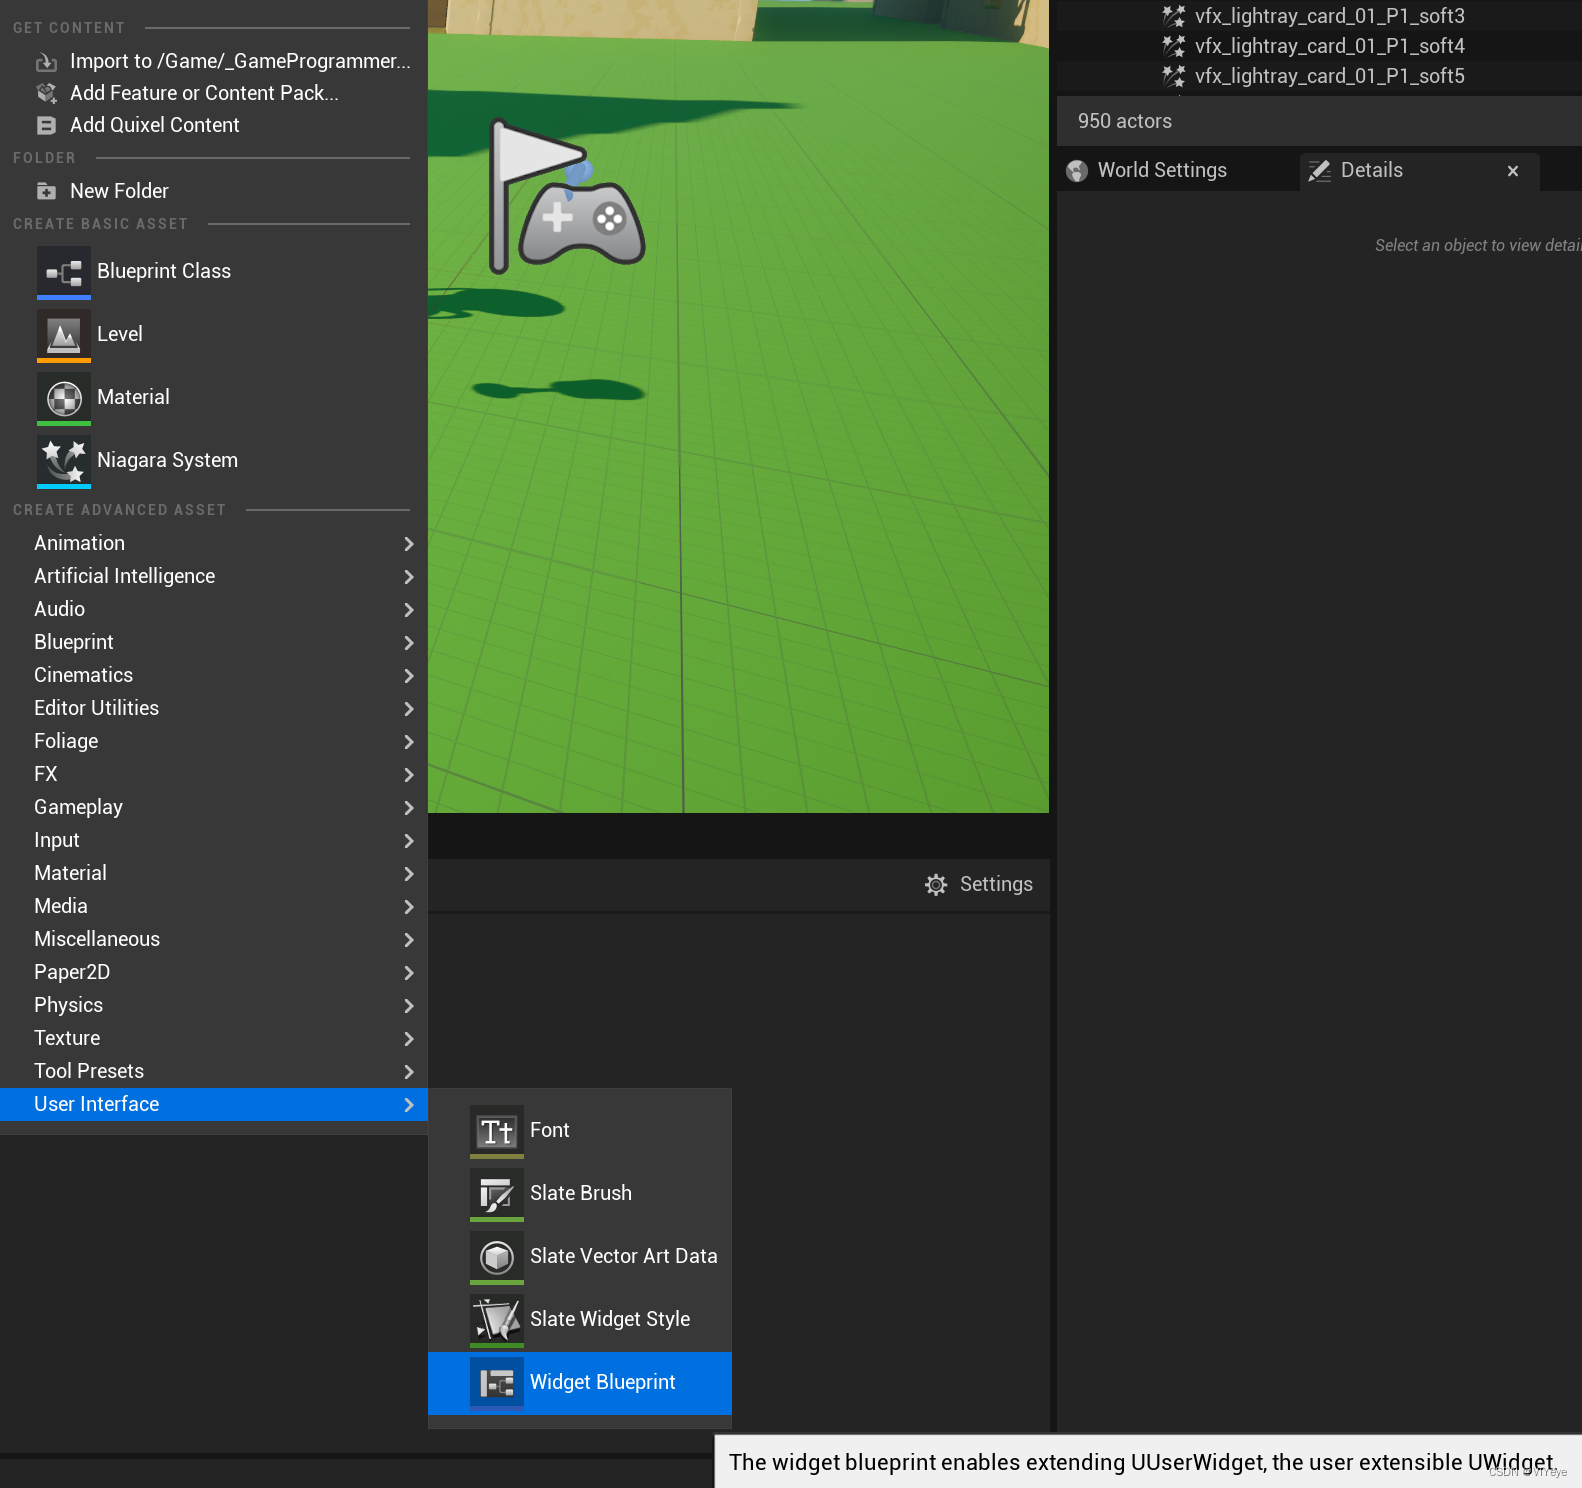
添加Canvas与text
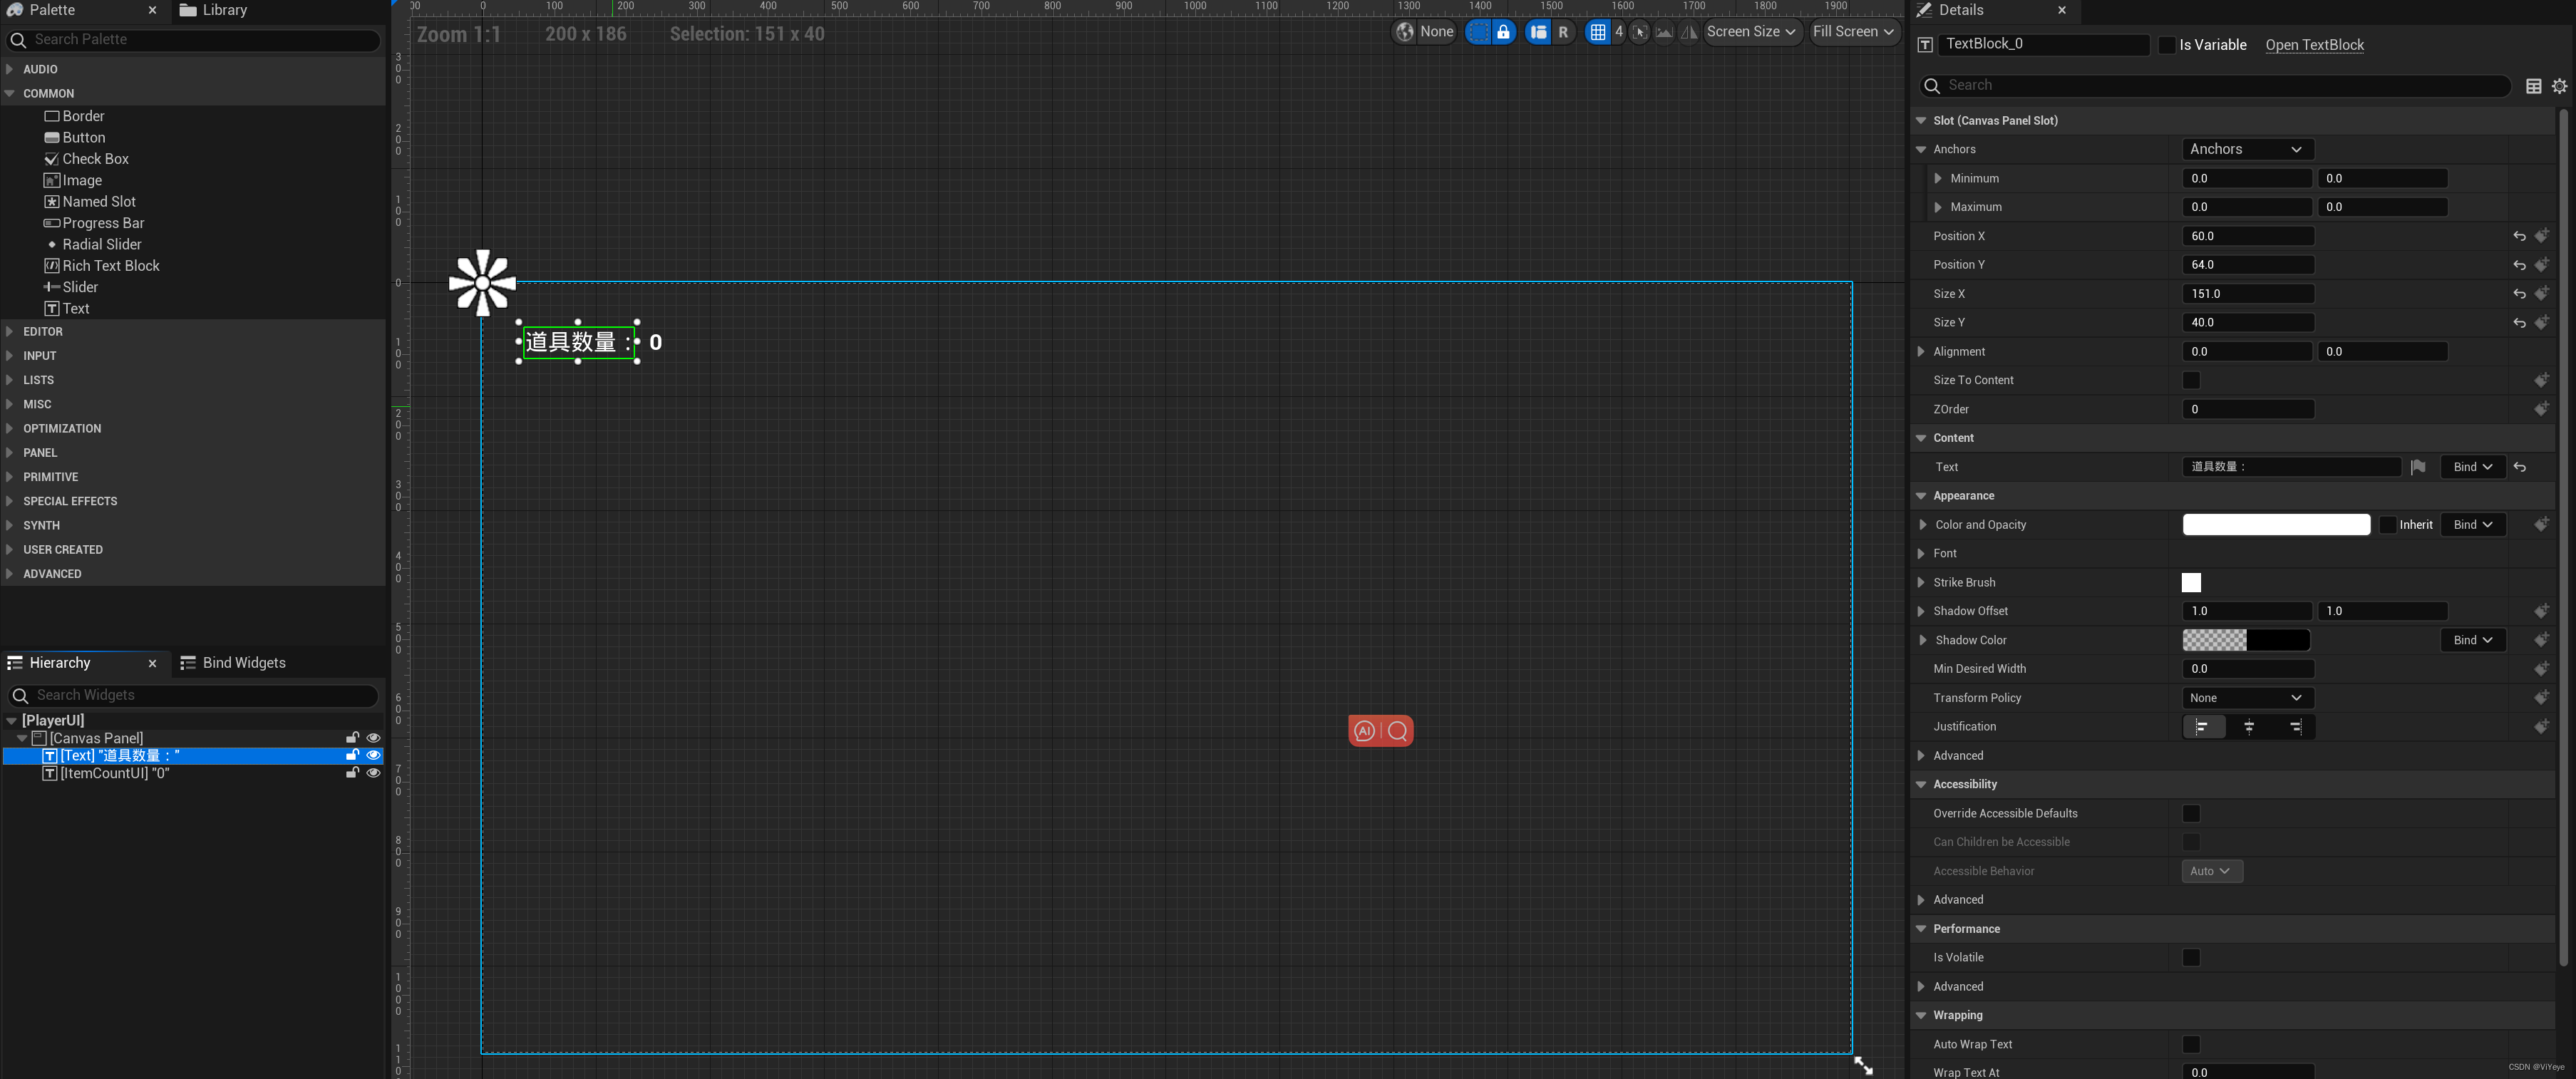
创建一个绑定
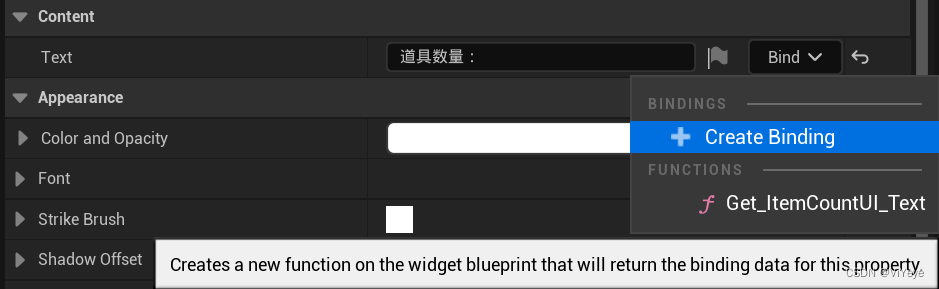
方法名称

蓝图内容(这边就不解释了,之前学过的内容)

再将"PlayerUI"拖拽给角色蓝图
在BeginPlay中添加UI绑定
void AMyCharacter::BeginPlay()
{
	Super::BeginPlay();

	GetCapsuleComponent()->OnComponentBeginOverlap.AddDynamic(this, &AMyCharacter::OnBeginOverlap);

	if (PlayerItemCountWidget_Class != nullptr)
	{
		PlayerItemCountWidget = CreateWidget(GetWorld(), PlayerItemCountWidget_Class);
		PlayerItemCountWidget->AddToViewport();
	}
}
保存所有后运行,碰到Item后数量 +1 并在UI中显示
在使用过程中遇到的一些问题
*编译期间我总会遇到 “使用了未定义类型xxx”
然后就去官网搜 "ULocalPlayer" 的头文件
将 #include "Engine/LocalPlayer.h" 贴在.cpp上边后再编译

我在 VS2022中每次编译后都没有那个更新到UE引擎成功 "叮" 的声音。且新更改的代码内容也没有实现。ctrl + alt + f11 没有反应
- 尝试了保存后返回UE5点击个按钮,但还是不行
- 后打开Enable Live Coding 就好了

结尾
至此学习用的小demo结束,有关小demo用到的API都在下一篇有详细介绍。再之后就是把官方文档主页上学到的东西复习一遍就可以开始正式制作了


 109
109


 被折叠的 条评论
为什么被折叠?
被折叠的 条评论
为什么被折叠?
 到【灌水乐园】发言


