


实例----使用jenkins集成sonarqube实现代码扫描
1.0 环境准备
| 节点名称 | 节点名称 | ip地址 |
|---|---|---|
| jenkins | jenkins | 10.0.0.40 |
| 开发机 | gc | 10.0.0.8 |
| gitlab | gitlab | 10.0.0.30 |
| sonarqube | sonarqube | 10.0.0.61 |
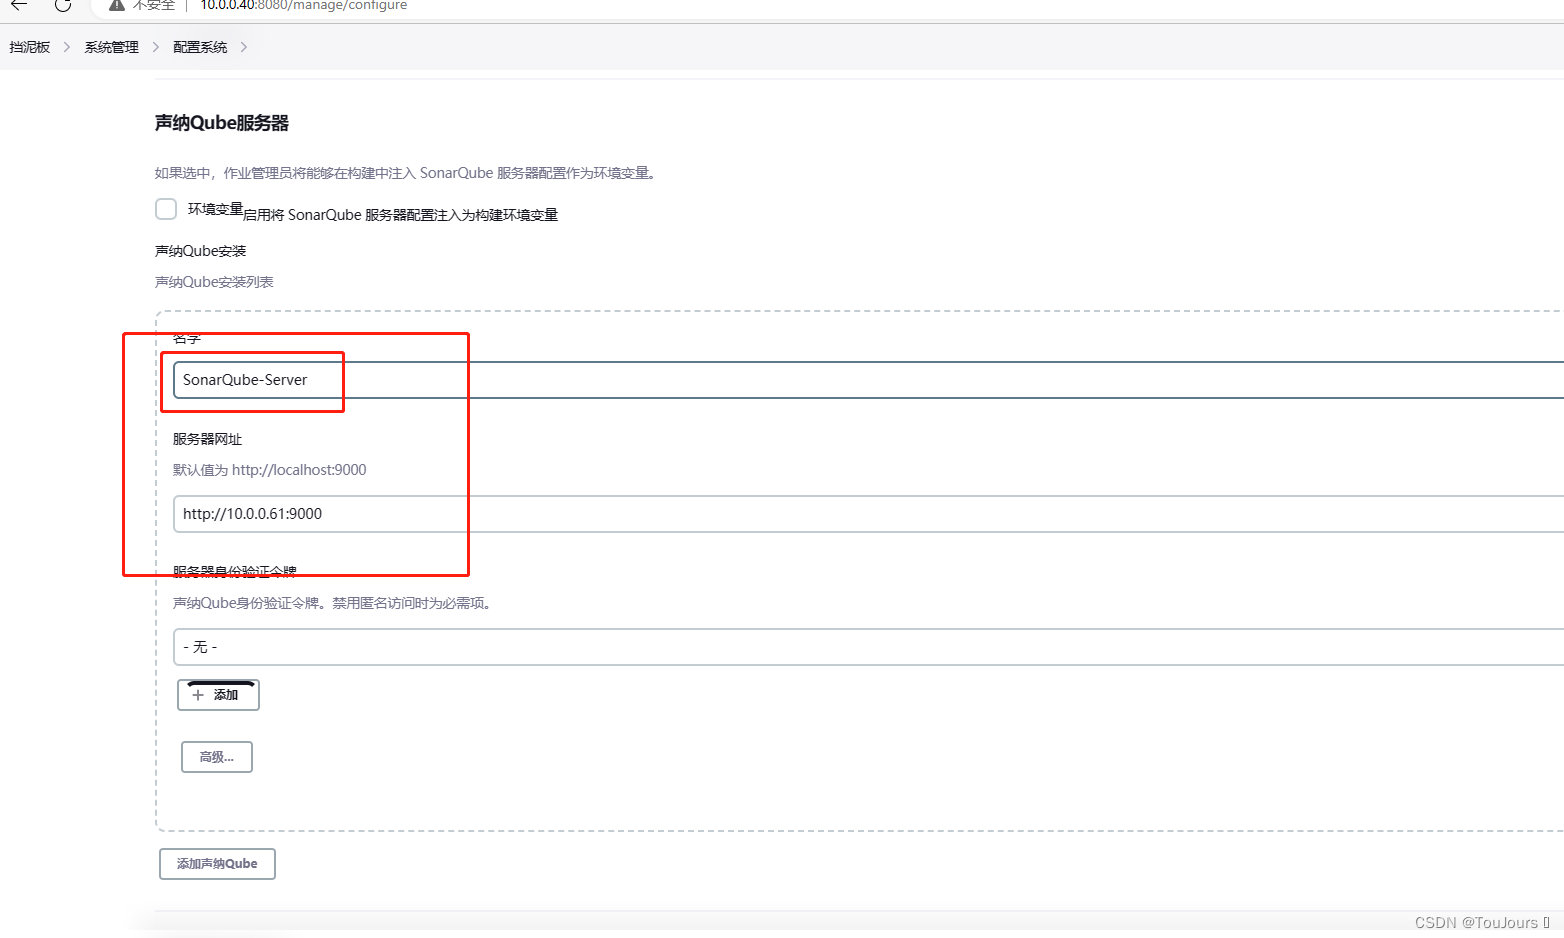
1.1 Jenkins配置SonarQube
系统管理----系统配置----SonarQube,配置完后,把名字复制一下,下面要用(复制防止敲错)
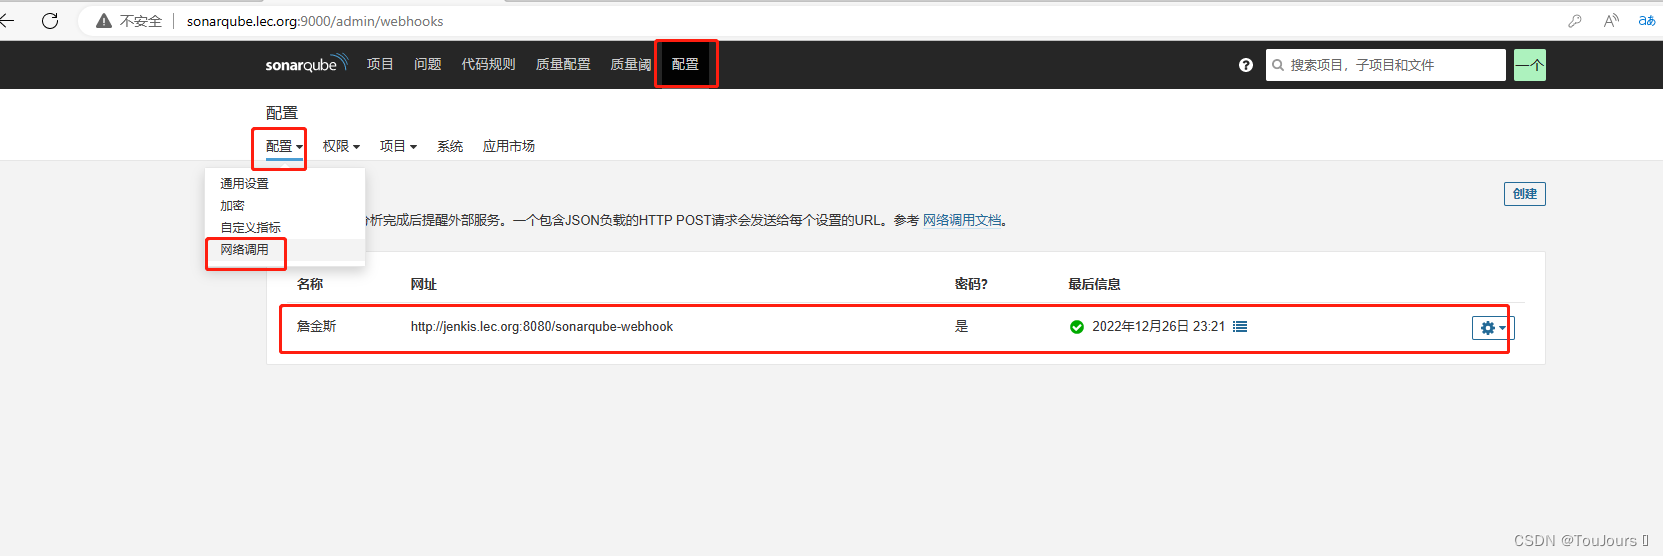
1.2 SonarQube新增网络调用
1.3 准备项目的 Jenkinsfile 文件
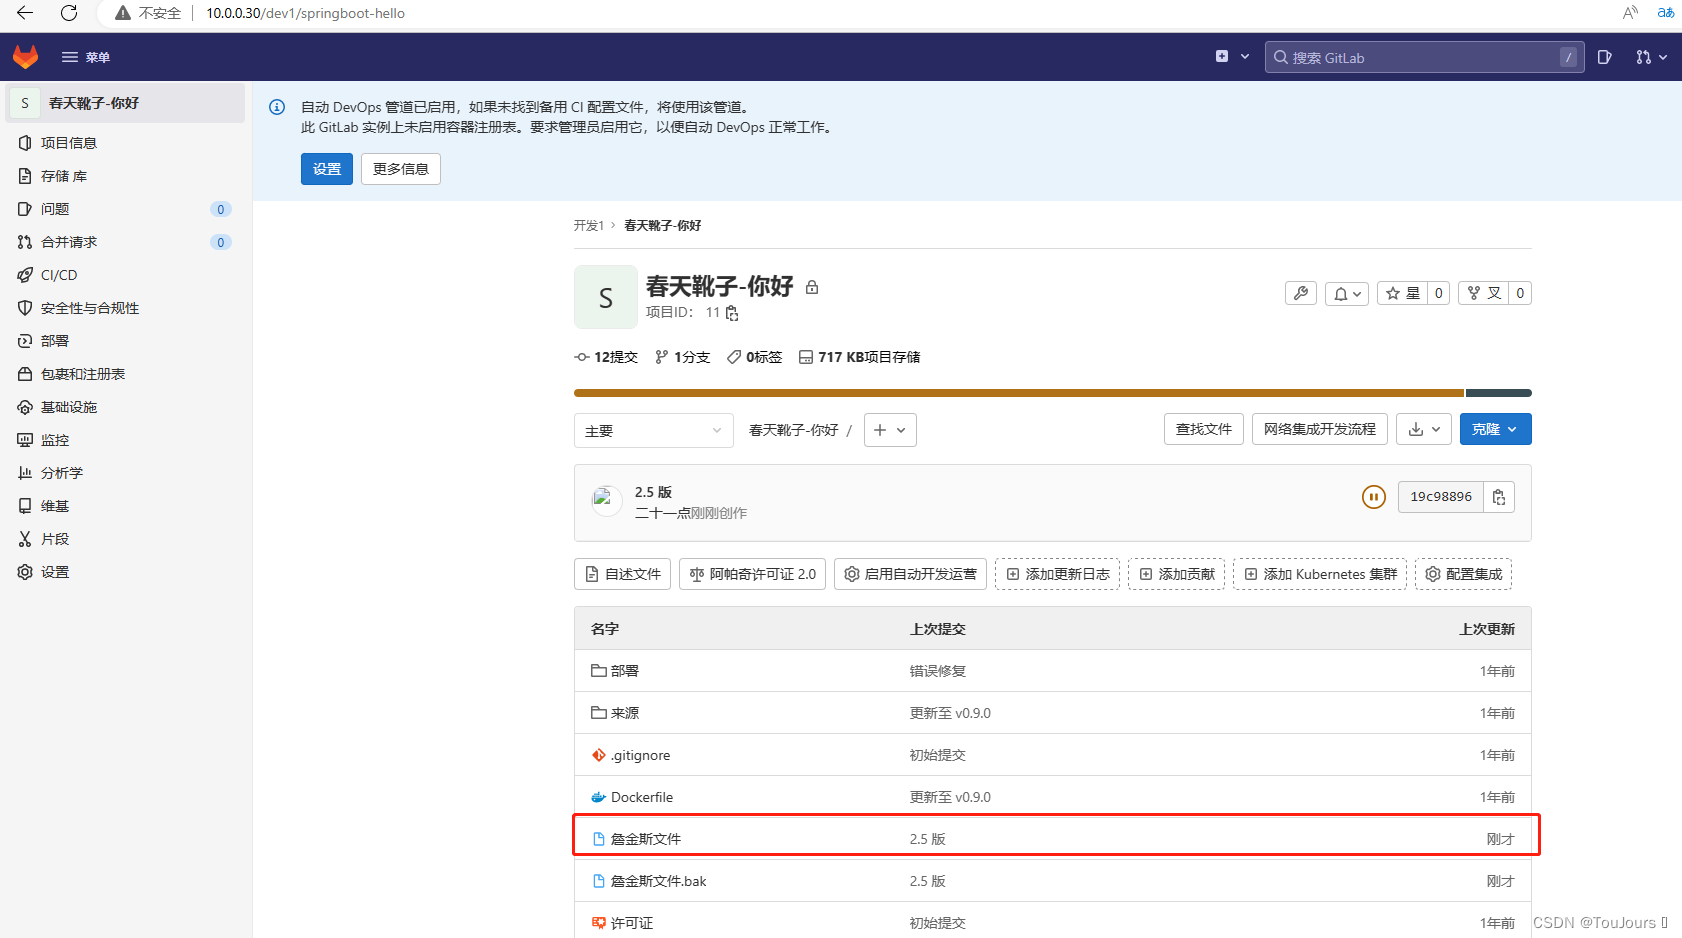
开发机上在项目所在路径下创建Jenkinsfile 文件,然后git commit 此文件到git上
[root@gc spring-boot-helloWorld]# pwd
/data/spring-boot-helloWorld
[root@gc spring-boot-helloWorld]# ls
deploy  Dockerfile  Jenkinsfile  Jenkinsfile.bak  LICENSE  pom.xml  README.md  src  test.txt
Jenkinsfile
[root@gc spring-boot-helloWorld]# cat Jenkinsfile
pipeline {
        agent any
        stages {
                stage("SonarQube analysis"){
                        steps {
        //注意:下面的SonarQube-Server和系统配置SonarQube installations的Name必须一致,大小写敏感
                                withSonarQubeEnv("SonarQube-Server"){
                                        sh '/usr/bin/sonar-scanner'
                                }
                        }
                }
                stage("Quality Gate") {
                        steps {
        //代码检测失败,将不再继续执行后面的任务,直接退出,报告返回的超时时长设为5分钟
                                timeout(time: 5,unit: 'MINUTES'){
                                        waitForQualityGate abortPipeline: true
                                }
                        }
                }
                stage('Build') {
                        steps {
                                sh 'mvn clean package -Dmaven.test.skip=true'
                        }
                }
                stage('Test') {
                        steps {
                                echo "Test"
                        }
                }
                stage('Deploy') {
                        steps {
                                echo "Deploy"
                        }
                }
        }

   }
推送到git上
[root@gc spring-boot-helloWorld]# git add . ; git commit -am 'v2.5';git push
[main 19c9889] v2.5
 2 files changed, 37 insertions(+), 69 deletions(-)
 rewrite Jenkinsfile (99%)
 copy Jenkinsfile => Jenkinsfile.bak (100%)
Enumerating objects: 5, done.
Counting objects: 100% (5/5), done.
Compressing objects: 100% (3/3), done.
Writing objects: 100% (3/3), 731 bytes | 731.00 KiB/s, done.
Total 3 (delta 1), reused 0 (delta 0), pack-reused 0
To gitlab.lec.org:dev1/springboot-hello.git
   5e3bef6..19c9889  main -> main
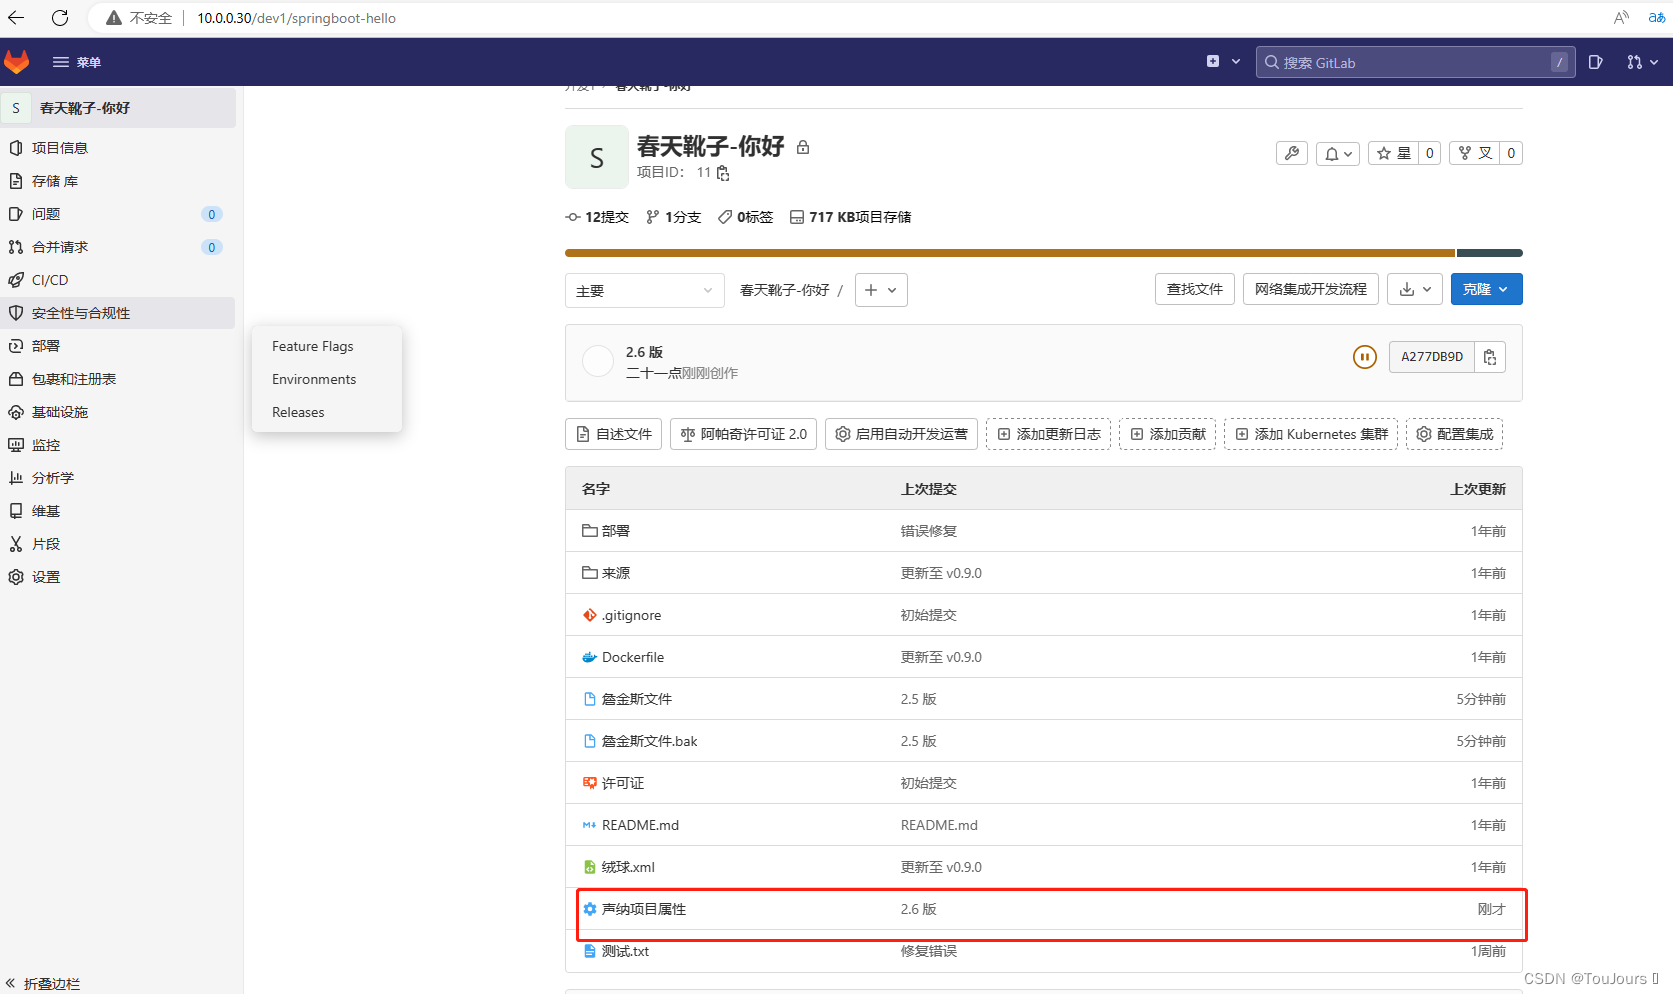
1.4 准备项目目录中的 sonar-project.properties 文件
开发机准备 sonar scanner 所需的项目目录中 sonar-project.properties 文件之后需要git commit 此文件
[root@gc spring-boot-helloWorld]# cat sonar-project.properties
#项目的唯一标识
sonar.projectKey=sprint-boot-helloworld
#项目的名称,用于显示在 sonarqube web 界面
sonar.projectName=sprint-boot-helloworld
#项目版本
sonar.projectVersion=1.0
#项目源码所在目录
sonar.sources=.
#项目源码编译生成的二进制文件路径
sonar.java.binaries=.
#编程语言
sonar.language=java
#编码格式
sonar.sourceEncoding=UTF-8
推送到git上
[root@gc spring-boot-helloWorld]# git add . ; git commit -am 'v2.6';git push
[main a277db9] v2.6
 1 file changed, 14 insertions(+)
 create mode 100644 sonar-project.properties
Enumerating objects: 4, done.
Counting objects: 100% (4/4), done.
Compressing objects: 100% (3/3), done.
Writing objects: 100% (3/3), 549 bytes | 549.00 KiB/s, done.
Total 3 (delta 1), reused 0 (delta 0), pack-reused 0
To gitlab.lec.org:dev1/springboot-hello.git
   19c9889..a277db9  main -> main
1.5 Jenkins创建任务
创建pipeline-sonarqube-test任务

配置—流水线—Git----git地址和分支
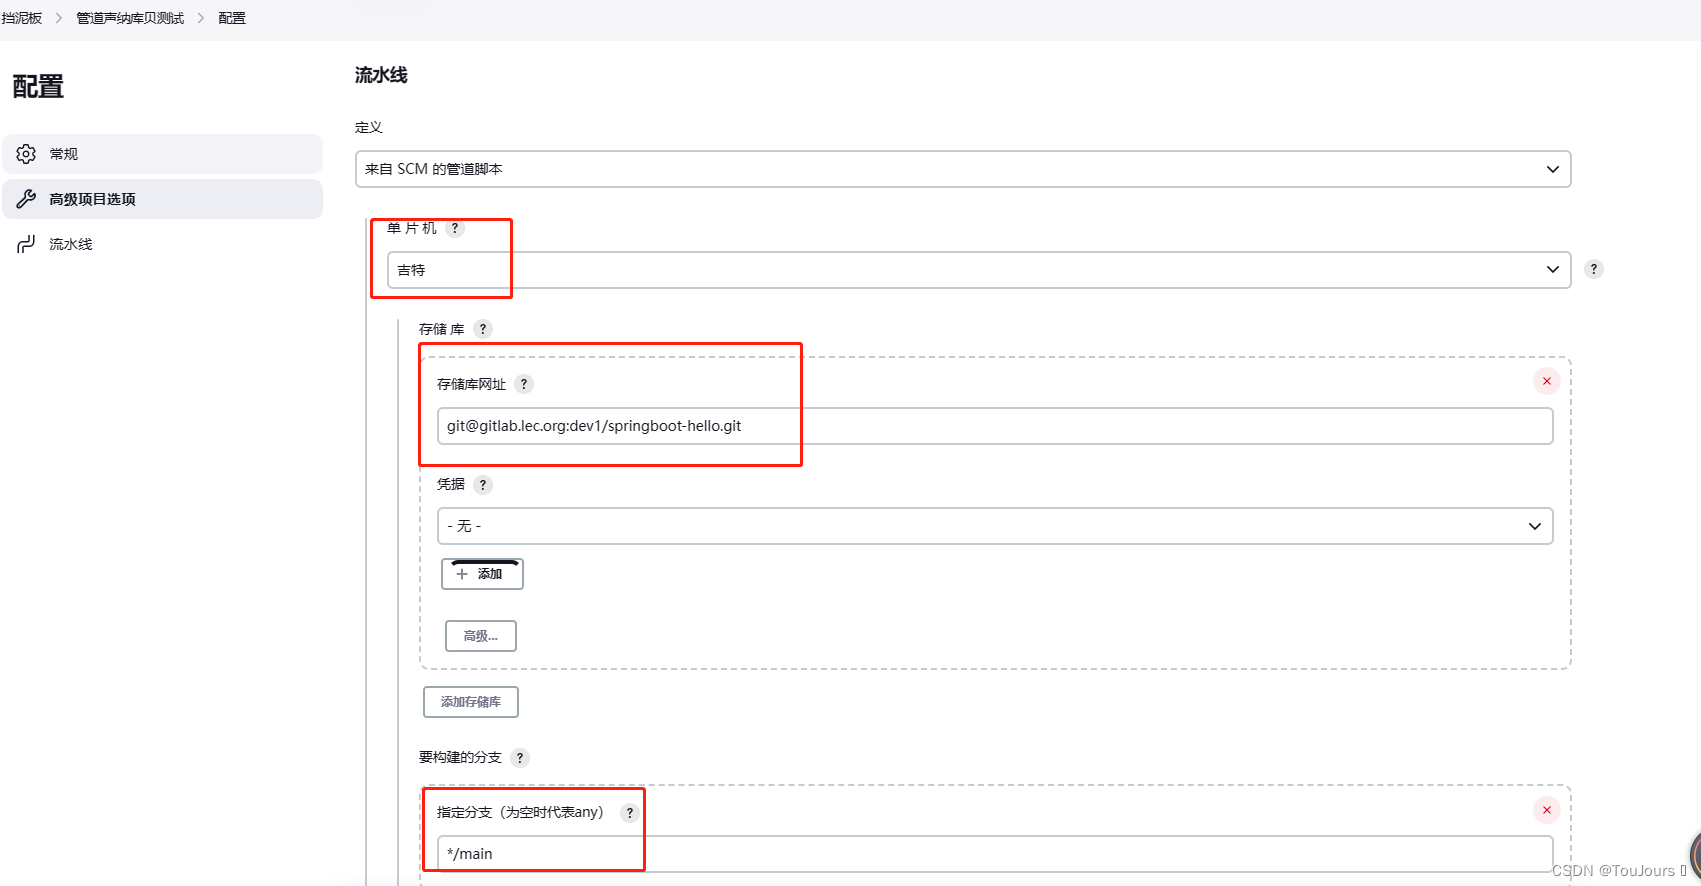
脚本路径就是上面添加的Jenkinsfile

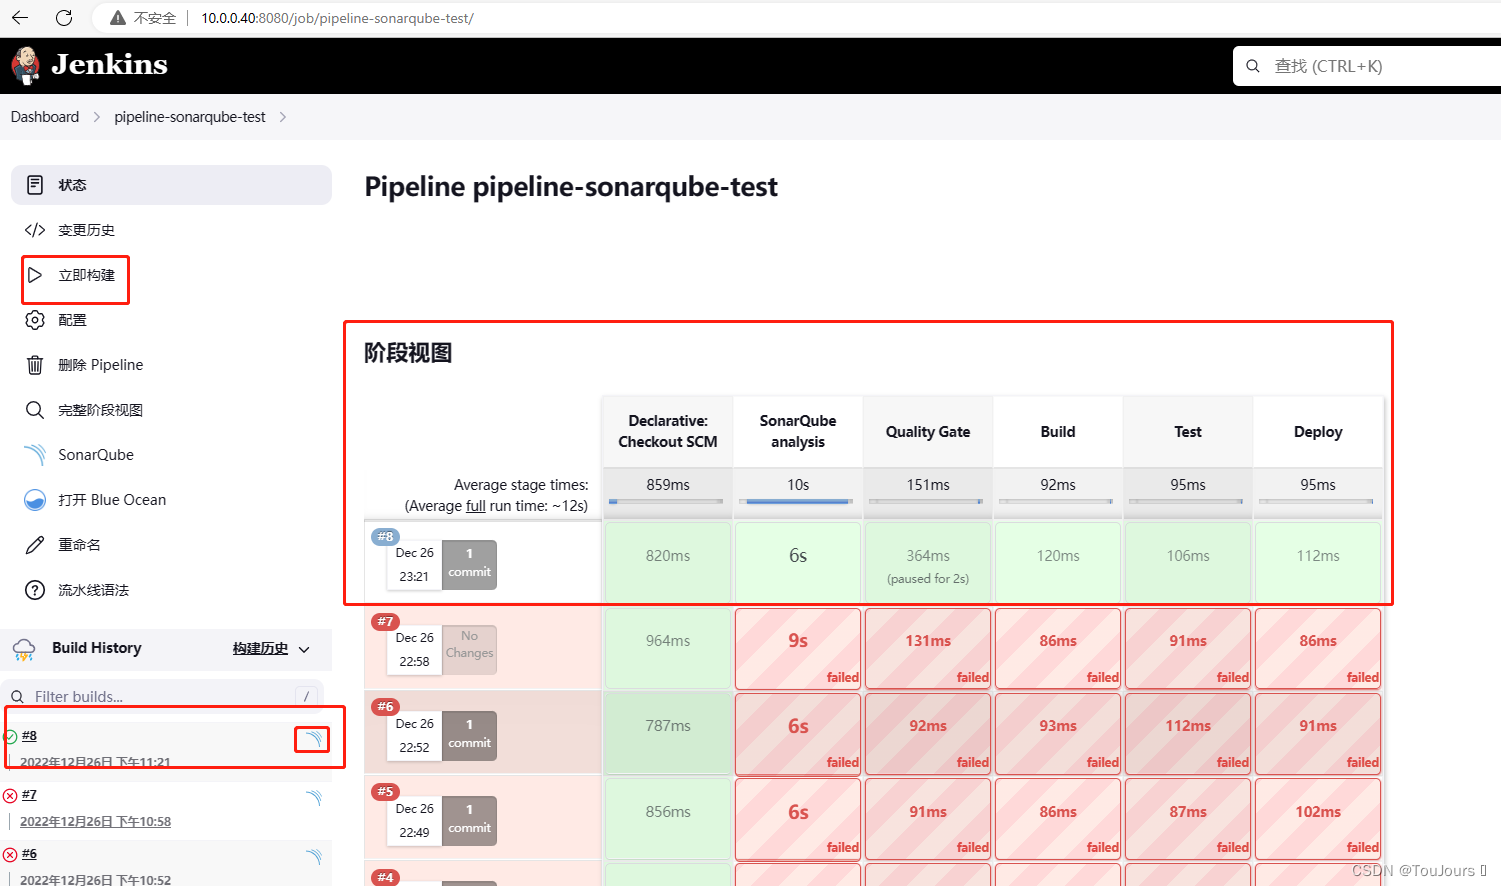
1.6 Jenkins执行任务
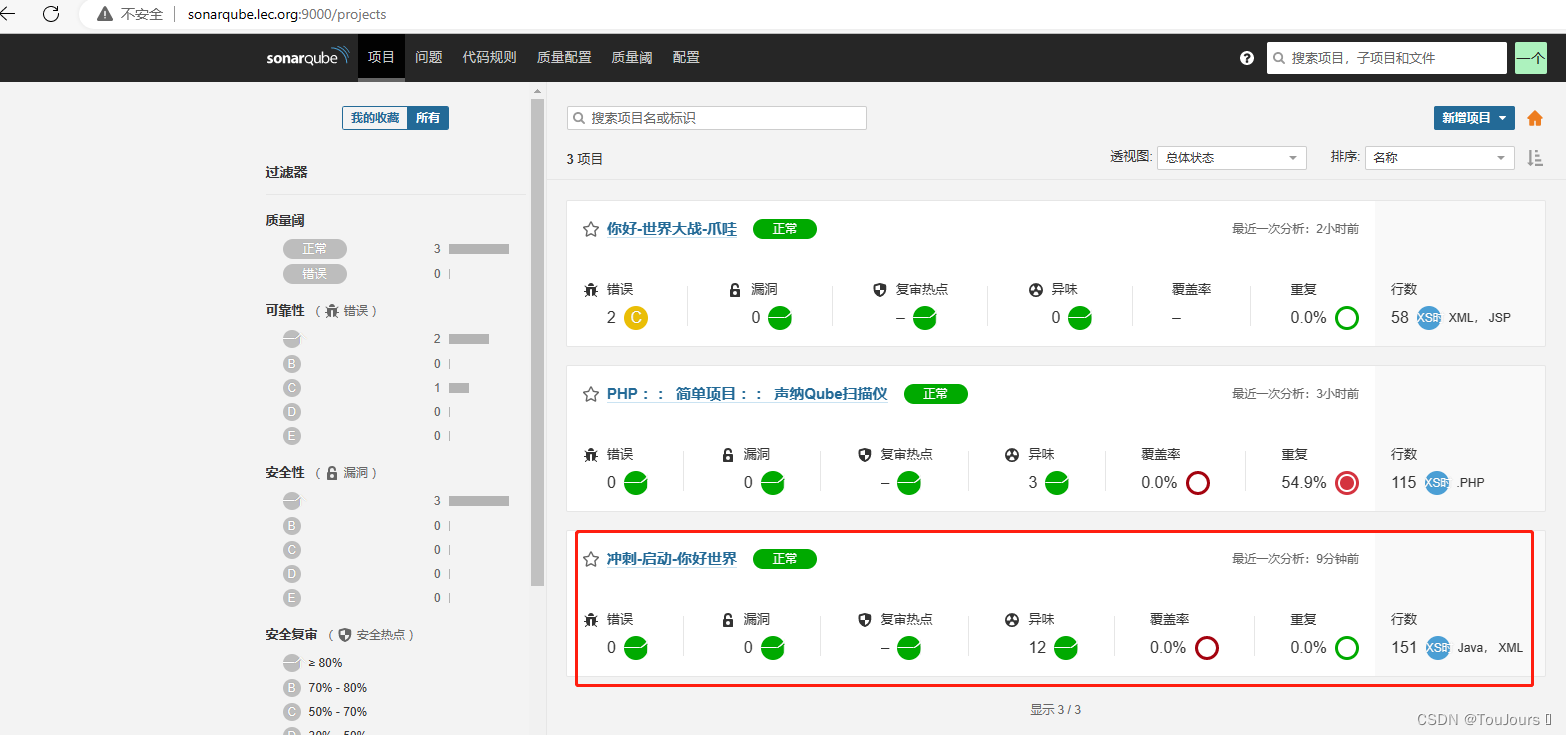
1.7 sonarqube查看


 1590
1590


 被折叠的 条评论
为什么被折叠?
被折叠的 条评论
为什么被折叠?
 到【灌水乐园】发言


