


签名:但行好事,莫问前程。
SpringBoot+Vue 博客系统(连载系列)
YangCunle`s Blog 博客网址:http://www.yangcunle.com
SpringBoot+Vue 博客系统(一):个人网站的由来
SpringBoot+Vue 博客系统(二):个人博客的搭建
SpringBoot+Vue 博客系统(三):个人博客的设计
SpringBoot+Vue 博客系统(五):整合阿里云OSS
SpringBoot+Vue 博客系统(六):整合Redis
SpringBoot+Vue 博客系统(七):Blog前端Vue项目的搭建
SpringBoot+Vue 博客系统(八):前端项目引入Element-UI
SpringBoot+Vue 博客系统(九):安装Axios处理跨域
SpringBoot+Vue 博客系统(十):VUE路由 vue-route
SpringBoot+Vue 博客系统(十一):博客后台管理
SpringBoot+Vue 博客系统(十二):博客前台展示
SpringBoot+Vue 博客系统(十三):项目打包部署到服务器

前台整体风格一致,导航栏、右侧边栏、底部页脚保持不变,根据导航栏改变主体展示内容。
用户不需要登录,访问网站就可以直接定位到博客首页、技术博文、资源站点、留言反馈、关于作者等页面。
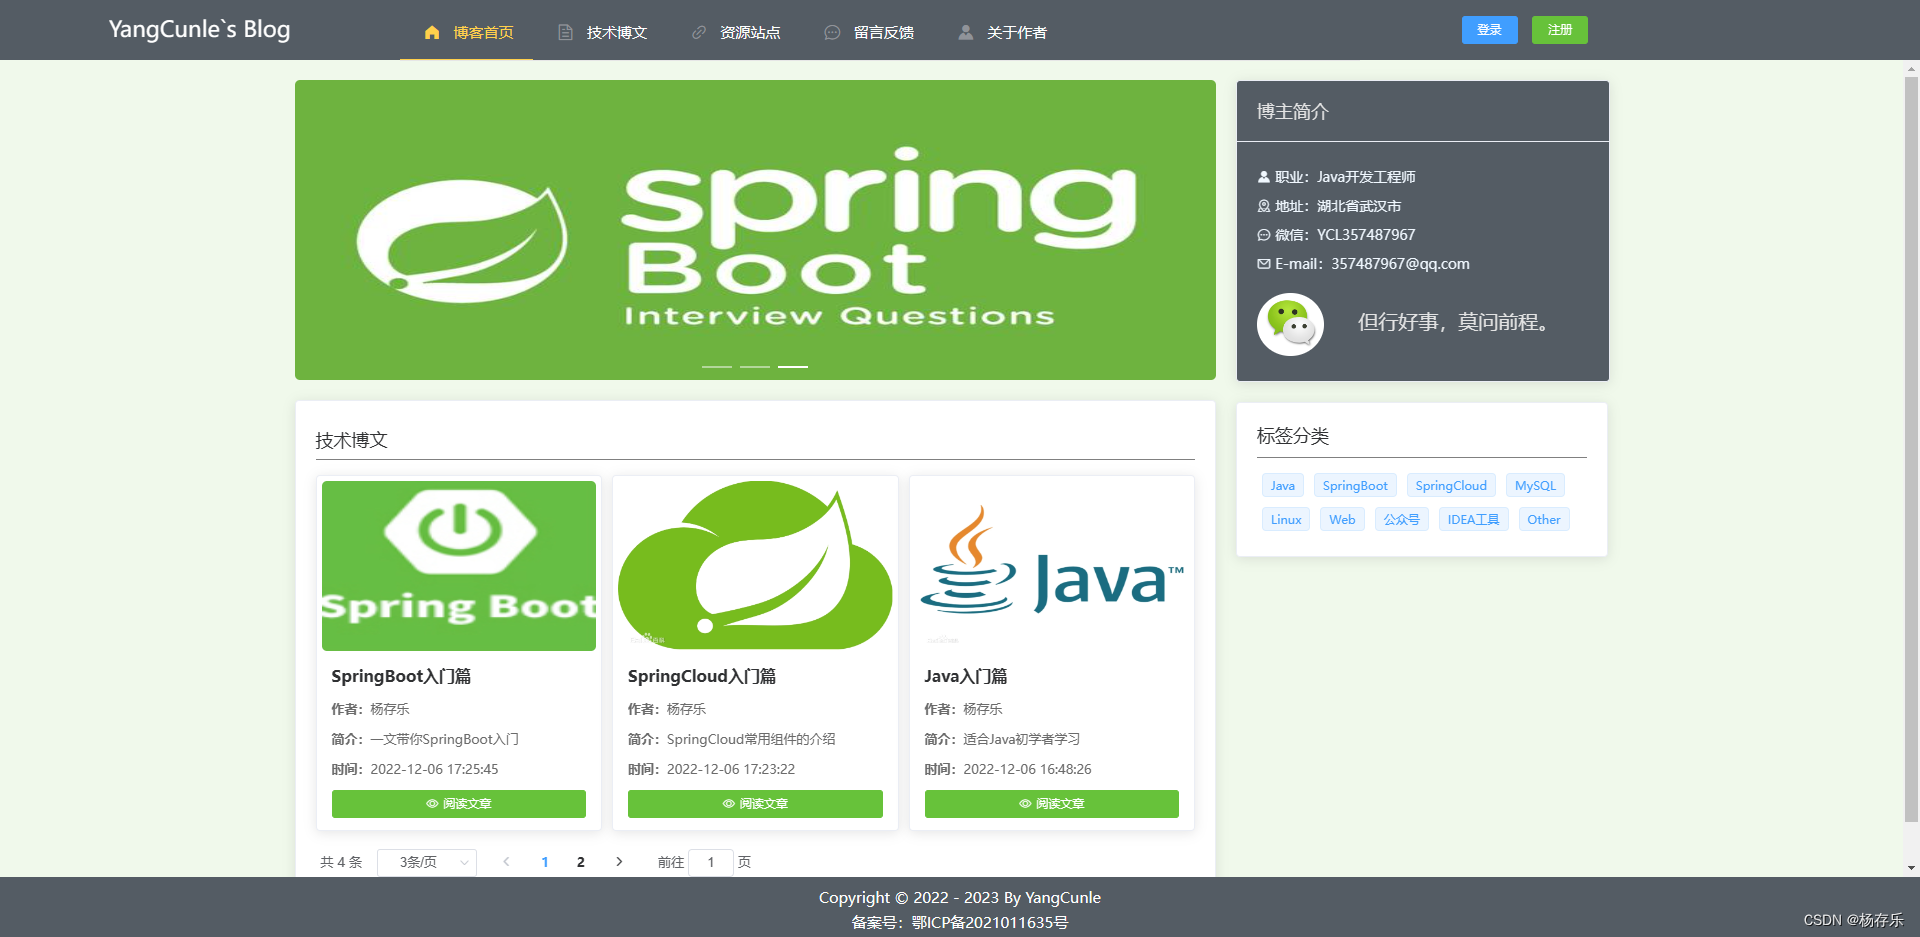
一、博客首页
首页由轮播图、技术博文填充主体内容
轮播图
<!--        轮播图-->
        <el-carousel style="height: 300px; width: 100%">
          <el-carousel-item v-for="(item,index) in carouselList" :key="index">
            <a target="_blank">
              <img style="width: 100%; height: 100%; border-radius: 5px" :src='item'>
            </a>
          </el-carousel-item>
        </el-carousel>
        <el-card style="margin-top: 20px">
技术博文
<el-card style="margin-top: 20px">
          <!--        技术博文-->
          <div style="border-bottom: 1px solid gray; padding: 7px 0; font-size: 18px">技术博文</div>
          <div style="margin: 10px 0">
            <el-row :gutter="10">
              <el-col :span="8" v-for="(item,index) in blogData" :key="index" style="margin: 5px 0;">
                <el-card :body-style="{ padding: '5px' }">
                  <img :src="item.img" style="width: 100%; height: 170px; border-radius: 5px" class="image">
                  <div style="padding: 10px; height: 150px">
                    <div style="font-size: 16px; height: 35px"><strong>{{ item.title }}</strong></div>
                    <div style="font-size: 13px;">
                      <div style="color: #6b6b6b; height: 30px;"><strong>作者:</strong>{{ item.author }}</div>
                      <div style="color: #6b6b6b; height: 30px;"><strong>简介:</strong>{{ item.description }}</div>
                      <div style="color: #6b6b6b; height: 30px;"><strong>时间:</strong>{{ item.createTime }}</div>
                      <div>
                        <el-button style="width: 100%" size="mini" type="success" icon="el-icon-view"
                                   @click="toDetail(item.id)">阅读文章
                        </el-button>
                      </div>
                    </div>
                  </div>
                </el-card>
              </el-col>
            </el-row>
          </div>
          <!--    Pagination 分页-->
          <el-pagination
            @size-change="handleSizeChange"
            @current-change="handleCurrentChange"
            :current-page="pageNum"
            :page-sizes="[3, 6, 9, 12]"
            :page-size="pageSize"
            layout="total, sizes, prev, pager, next, jumper"
            :total="total"
          >
          </el-pagination>
        </el-card>
点击“阅读文章”按钮,即可跳转到阅读博客页面
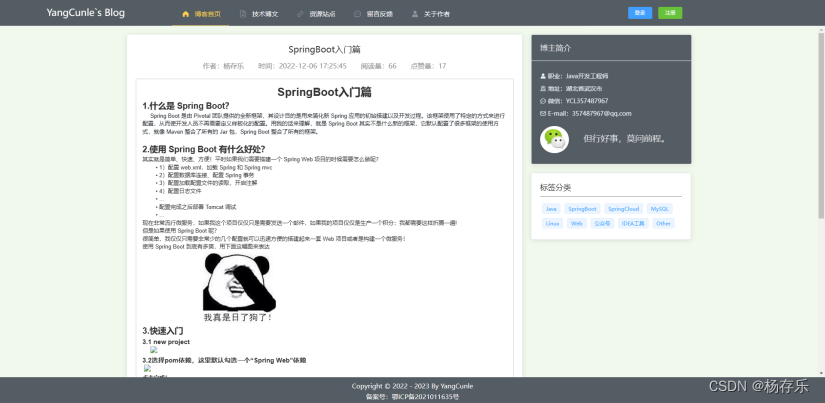
每篇文章还做阅读量和点赞数统计

read(id){
      // 阅读量+1
      this.$axios.get('/api/blog/read?id=' + id).then(res => res.data).then(res => {
      })
    },
liked(id){
      // 点赞量+1
      this.$axios.get('/api/blog/liked?id=' + id).then(res => res.data).then(res => {
        if (res.code == 200) {
          this.queryBlogById(id)
          // 提示添加成功信息
          this.$message({
            message: '点赞成功',
            type: 'success'
          })
        }
      })
    }
二、技术博文
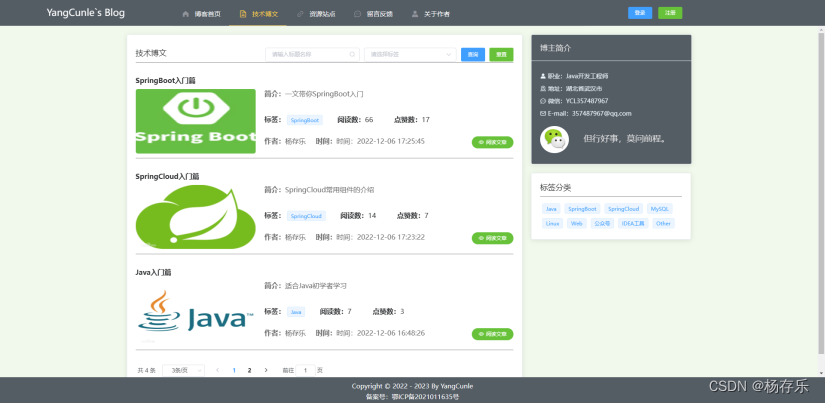
技术博文页面分页展示了博客数据,支持标题名称模糊搜索和文章分类查询
<template>
<div>
<el-card>
<div style="border-bottom: 1px solid gray; padding: 10px 0; font-size: 18px">
<span>技术博文</span>
<div style="float: right">
<el-input v-model="title" placeholder="请输入标题名称"
suffix-icon="el-icon-search" style="width: 220px;margin-left: 5px"
@keyup.enter.native="queryByPage"></el-input>
<!-- 下拉框-->
<el-select v-model="tag" placeholder="请选择标签" style="margin-left: 5px">
<el-option
v-for="item in tagList"
:key="item.value"
:label="item.label"
:value="item.value">
</el-option>
</el-select>
<el-button type="primary" style="margin-left: 5px" @click="queryByPage">查询</el-button>
<el-button type="success" style="margin-left: 5px" @click="reset">重置</el-button>
</div>
</div>
<div style="margin: 30px 0" v-for="(item,index) in blogData" :key="index">
<div style="margin-bottom: 10px; font-size: 16px;">
<strong>{{ item.title }}</strong>
</div>
<el-row :gutter="20">
<el-col :span="8">
<img :src="item.img" style="width: 100%; height: 150px; border-radius: 5px" class="image">
</el-col>
<el-col :span="16">
<div style="color: #6b6b6b; height: 50px; margin-bottom: 10px"><strong>简介:</strong>{{ item.description }}
</div>
<div style="height: 50px">
<strong>标签:</strong>
<el-tag>{{ item.tag }}</el-tag>
<strong style="margin-left: 30px">阅读数:</strong>{{ item.views }}
<strong style="margin-left: 30px">点赞数:</strong>{{ item.liked }}
</div>
<div style="height: 50px">
<span style="color: #6b6b6b">
<strong>作者:</strong>{{ item.author }}
<strong>时间:</strong>时间:{{ item.createTime }}
</span>
<el-button style="float: right" type="success" size="mini" icon="el-icon-view" round
@click="toDetail(item.id)">阅读文章</el-button>
</div>
</el-col>
</el-row>
<hr/>
</div>
<!-- Pagination 分页-->
<el-pagination
@size-change="handleSizeChange"
@current-change="handleCurrentChange"
:current-page="pageNum"
:page-sizes="[3, 6, 9, 12]"
:page-size="pageSize"
layout="total, sizes, prev, pager, next, jumper"
:total="total"
>
</el-pagination>
</el-card>
</div>
</template>
<script>
export default {
name: 'Blog',
data () {
return {
title: '',
tag:'',
blogData:[],
tagList: [],
pageNum: 1,
pageSize: 3,
total: 0,
}
},
methods:{
handleSizeChange (val) {
console.log(`每页 ${val} 条`)
this.pageNum = 1
this.pageSize = val
this.queryByPage()
},
handleCurrentChange (val) {
console.log(`当前页: ${val}`)
this.pageNum = val
this.queryByPage()
},
// 重置
reset () {
this.title = ''
this.tag = ''
this.queryByPage()
},
// 去详情页面
toDetail (id) {
this.$router.push({
path: "/BlogDetail",
query: { id: id }
});
},
// 获取后端数据
queryByPage () {
this.$axios.post('/api/blog/queryByPage', {
title: this.title,
tag: this.tag,
pageNum: this.pageNum,
pageSize: this.pageSize
}).then(res => res.data).then(res => {
if (res.code == 200) {
this.blogData = res.data.list
this.pageNum = res.data.currentPage
this.pageSize = res.data.pageSize
this.total = res.data.total
} else {
this.$message({
message: res.message,
type: 'warning'
})
}
})
},
// 查询标签列表
queryTagList (){
this.$axios.get('/api/tag/getTagList').then(res => res.data).then(res => {
if (res.code == 200) {
this.tagList = res.data
}
})
},
},
mounted () {
this.queryByPage()
this.queryTagList()
}
}
</script>
<style scoped>
</style>
三、资源站点
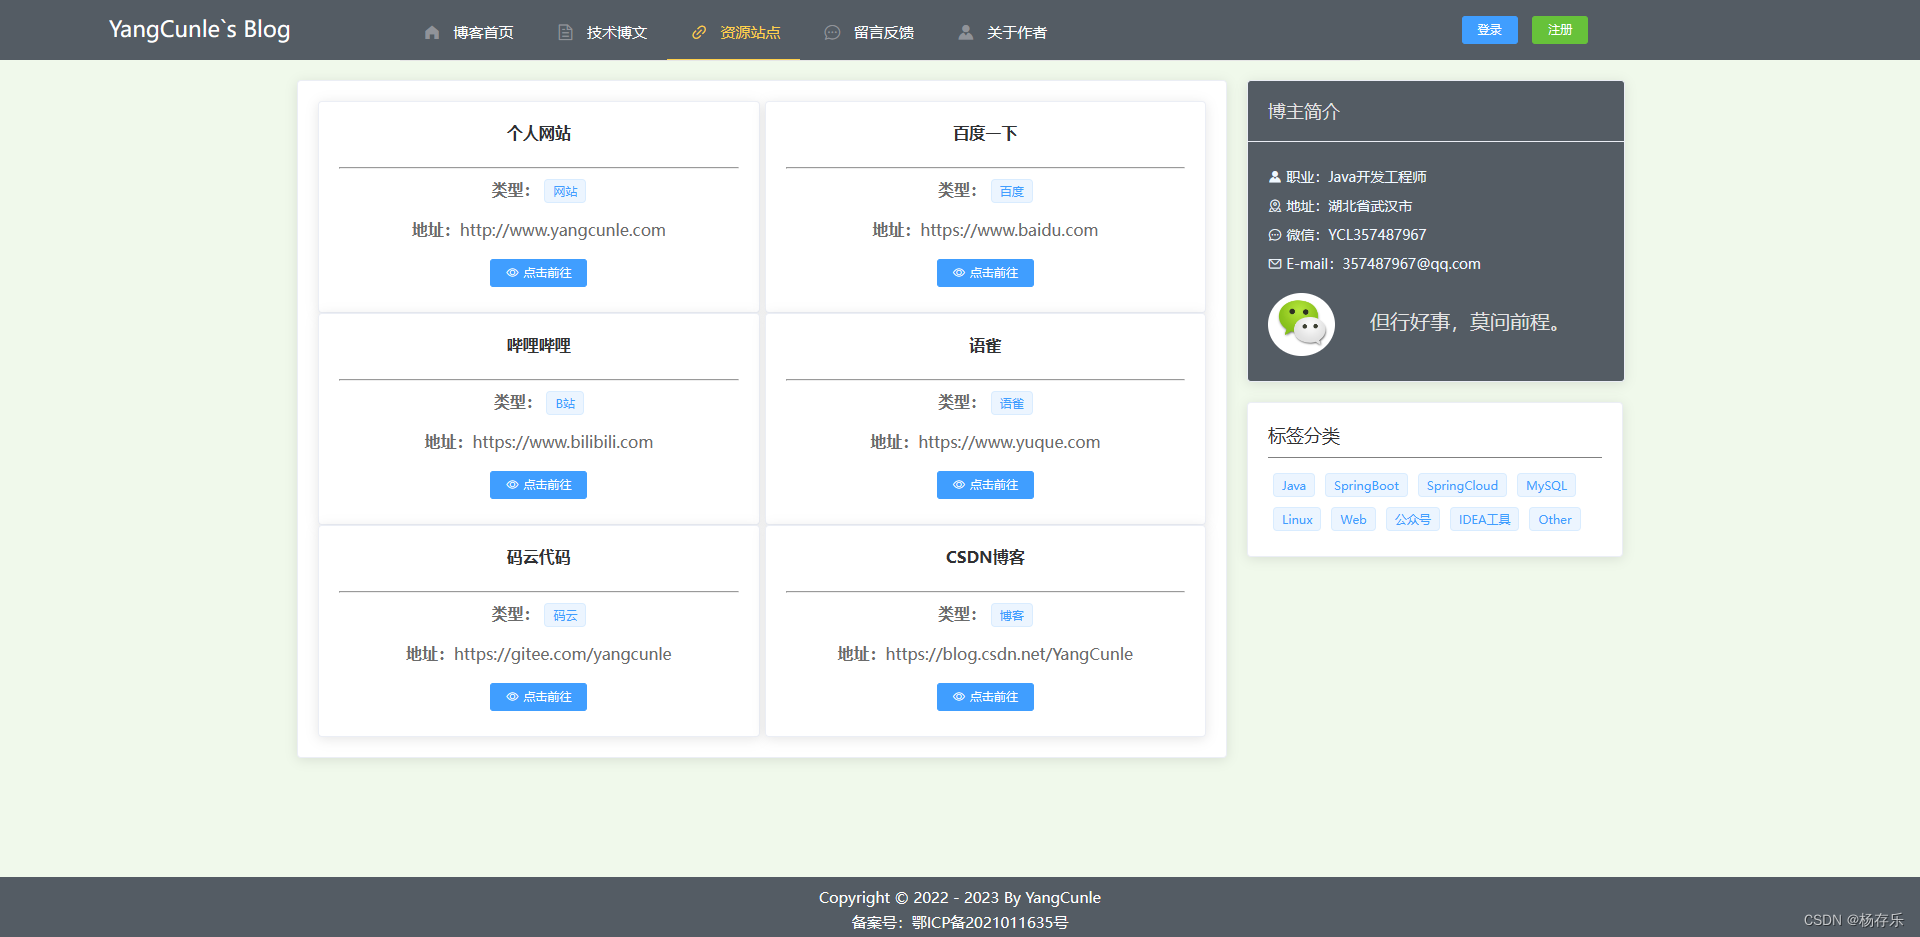
展示后台添加的一些资源站点,点击“立即前往”按钮,即可实现跳转
<template>
  <div>
    <el-card>
      <div>
        <el-row :gutter="5">
          <el-col :span="12" v-for="(item,index) in tableData" :key="index">
            <el-card>
              <div style="height: 170px">
                <div style="font-size: 16px; text-align: center; height: 45px"><strong>{{ item.name }}</strong></div>
                <hr/>
                <div style="margin-top: 10px;text-align: center">
                  <div style="color: #6b6b6b; height: 40px;"><strong>类型:</strong>
                    <el-tag>{{ item.linkType }}</el-tag>
                  </div>
                  <div style="color: #6b6b6b; height: 40px;"><strong>地址:</strong>{{ item.linkUrl }}</div>
                  <el-button style="text-align: center" size="mini" icon="el-icon-view" type="primary"
                             @click="toLinkUrl(item.linkUrl)">点击前往
                  </el-button>
                </div>
              </div>
            </el-card>
          </el-col>
        </el-row>
      </div>
      <!--    Pagination 分页-->
      <!--      <el-pagination
              @size-change="handleSizeChange"
              @current-change="handleCurrentChange"
              :current-page="pageNum"
              :page-sizes="[3, 6, 9, 12]"
              :page-size="pageSize"
              layout="total, sizes, prev, pager, next, jumper"
              :total="total"
            >
            </el-pagination>-->
    </el-card>
  </div>
</template>

<script>
export default {
  name: 'Link',
  data () {
    return {
      tableData: [],
      pageNum: 1,
      pageSize: 10,
      total: 0,
      link: {
        id: '',
        name: '',
        linkUrl: '',
        linkType: '',
        createTime: '',
      }
    }
  },
  methods: {
    // 链接跳转
    toLinkUrl (linkUrl) {
      // 通过此方法可以跳转到外部链接
      window.location.href = linkUrl;
    },
    handleSizeChange (val) {
      console.log(`每页 ${val} 条`)
      this.pageNum = 1
      this.pageSize = val
      this.queryByPage()
    },
    handleCurrentChange (val) {
      console.log(`当前页: ${val}`)
      this.pageNum = val
      this.queryByPage()
    },
    // 获取后端数据
    queryByPage () {
      this.$axios.post('/api/link/queryByPage', {
        name: this.linkName,
        pageNum: this.pageNum,
        pageSize: this.pageSize
      }).then(res => res.data).then(res => {
        if (res.code == 200) {
          this.tableData = res.data.list
          this.pageNum = res.data.currentPage
          this.pageSize = res.data.pageSize
          this.total = res.data.total
        } else {
          this.$message({
            message: res.message,
            type: 'warning'
          })
        }
      })
    }
  },
  mounted () {
    this.queryByPage()
  }
}
</script>

<style scoped>

</style>
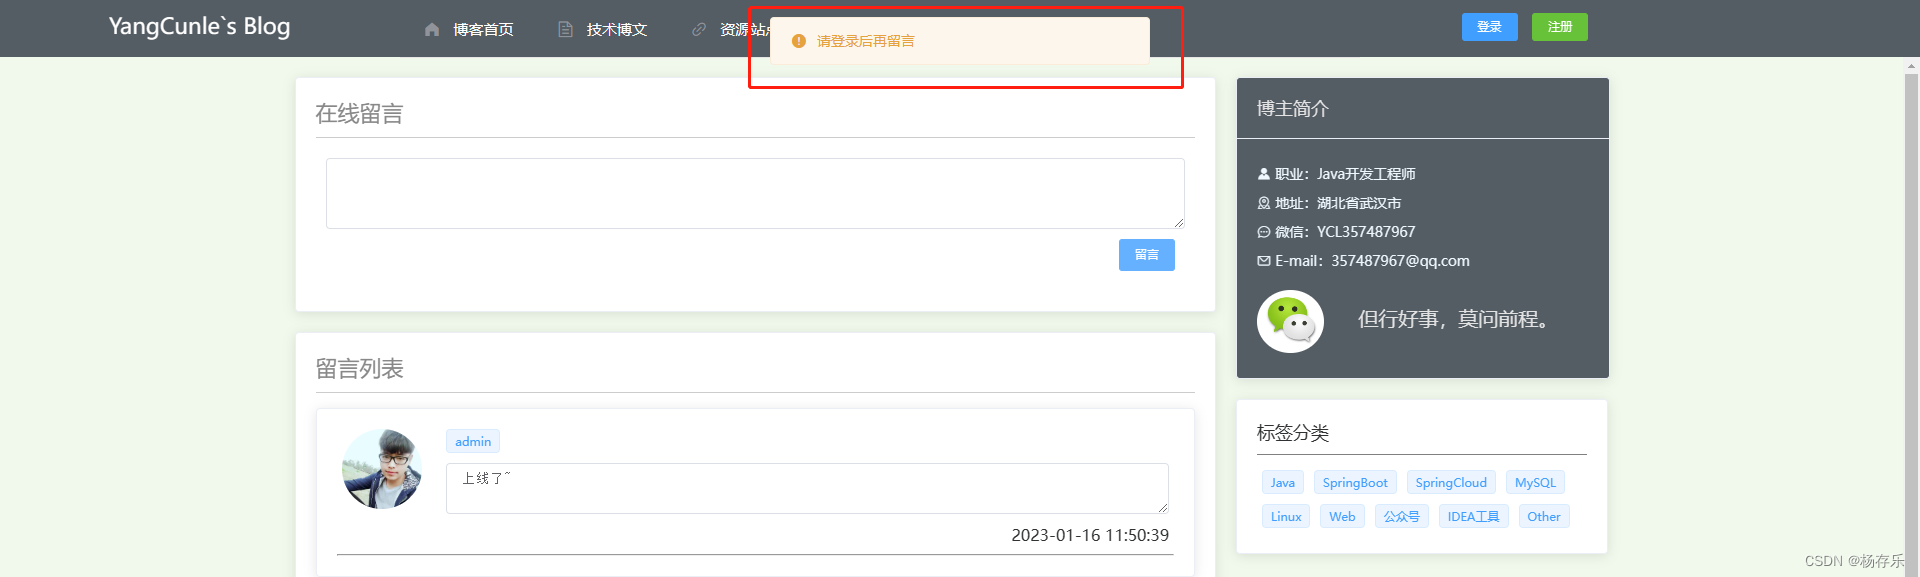
四、留言反馈
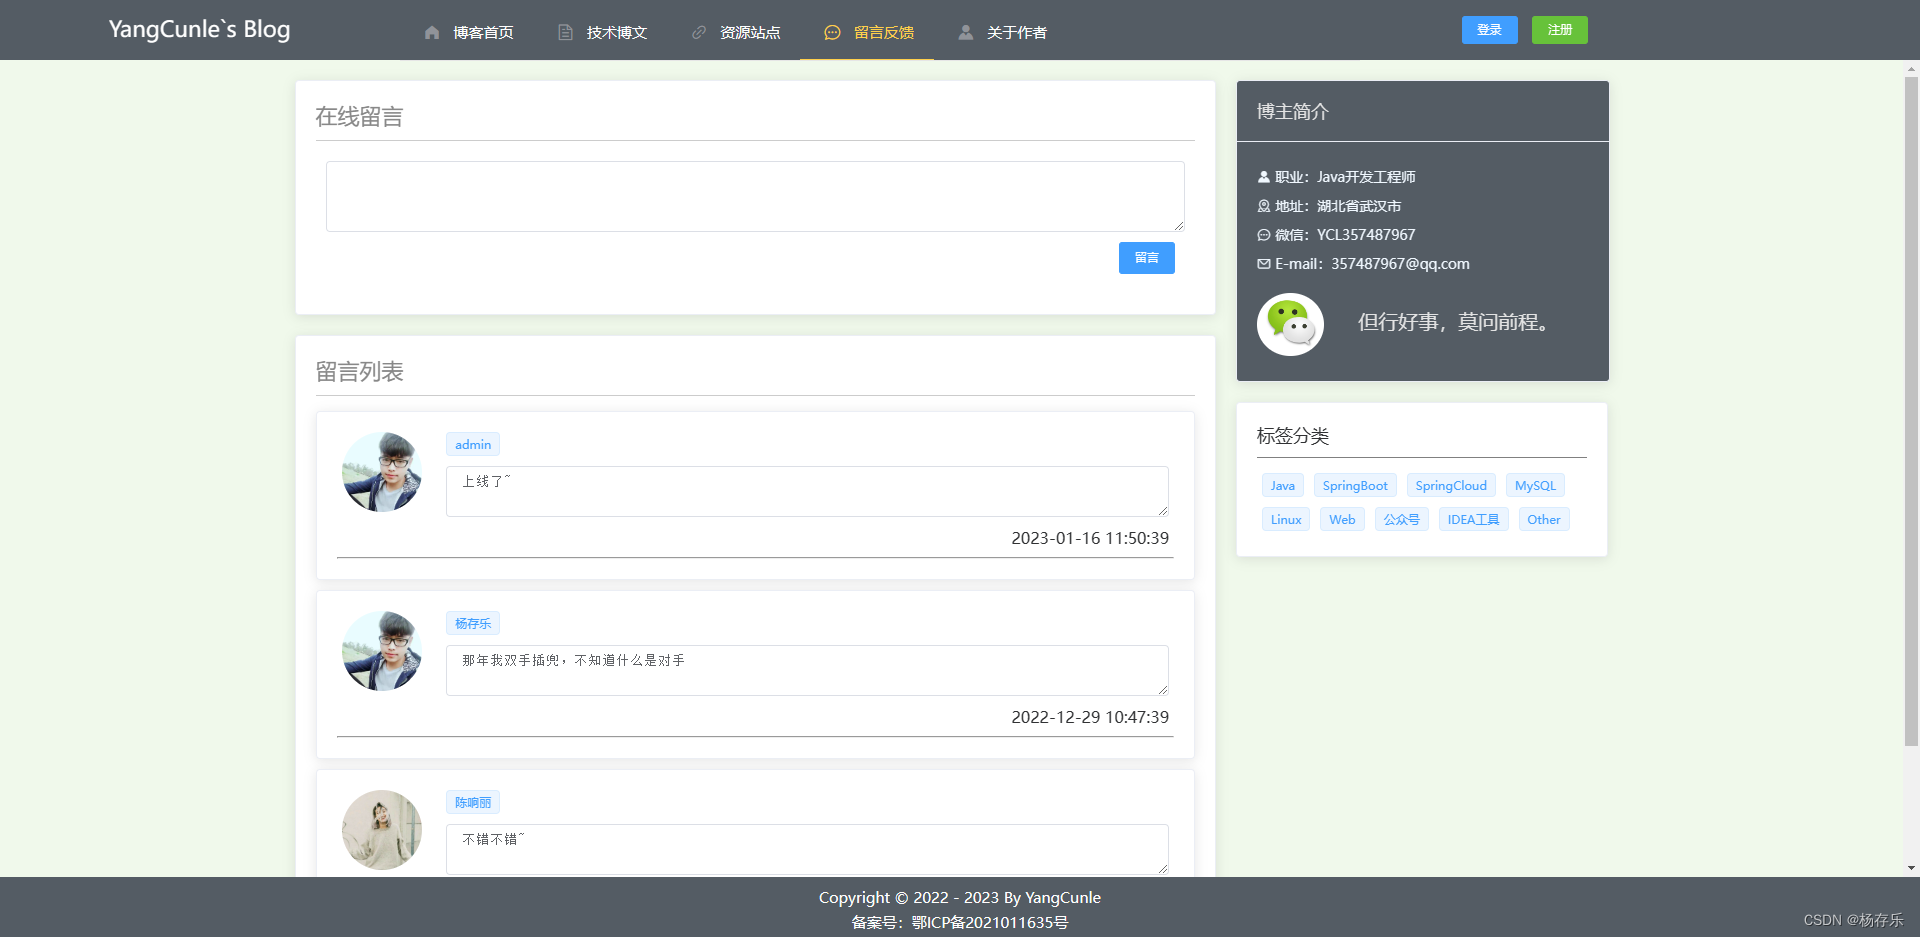
用户不登录可以看到别人的留言,如果想留言需要先注册账号再登录方可留言。
<template>
  <div>
    <el-card style="margin-bottom: 20px">
      <div style="display: flex">
        <div style="color: #888; font-size: 22px; flex: 1">在线留言</div>
      </div>
      <!--  分割线-->
      <div style="height: 1px; margin: 10px 0; background-color: #ccc"></div>

      <div style="padding: 10px; color: #888">
        <div>
          <el-input type="textarea" :rows="3" v-model="message.message"></el-input>
          <div style="text-align: right; padding: 10px">
            <el-button type="primary" @click="saveMsg()">留言</el-button>
          </div>
        </div>
      </div>
    </el-card>
    <!--    列表展示-->
    <div>
      <el-card>
        <div>
          <div style="color: #888; font-size: 22px; flex: 1">留言列表</div>
          <!--  分割线-->
          <div style="height: 1px; margin: 10px 0; background-color: #ccc"></div>
          <el-row :gutter="10">
            <el-col :span="24" v-for="(item,index) in tableData" :key="index" style="margin: 5px 0;">
              <el-card>
                <div style="height: 125px">
                  <el-col :span="3">
                    <el-image style="width: 80px; height: 80px;border-radius: 50%"
                              :src="item.headImg">
                    </el-image>
                  </el-col>
                  <el-col :span="21">
                    <el-tag>{{ item.username }}</el-tag>
                    <el-input type="textarea" v-model="item.message" style="margin: 10px 0;"></el-input>
                    <span style="float: right">{{ item.createTime }}</span>
                  </el-col>
                </div>
                <hr/>
              </el-card>
            </el-col>
          </el-row>
        </div>
        <!--            Pagination 分页-->
        <el-pagination
          @size-change="handleSizeChange"
          @current-change="handleCurrentChange"
          :current-page="pageNum"
          :page-sizes="[3, 6, 9, 12]"
          :page-size="pageSize"
          layout="total, sizes, prev, pager, next, jumper"
          :total="total"
        >
        </el-pagination>
      </el-card>
    </div>
  </div>
</template>

<script>
export default {
  name: 'Msg',
  data () {
    return {
      tableData: [],
      pageNum: 1,
      pageSize: 3,
      total: 0,
      // 对象
      message: {
        id: '',
        username: '',
        headImg: '',
        message: '',
        createTime: '',
      },
    }
  },
  methods: {
    // 留言
    saveMsg(){
      //获取用户token信息
      let isLogin = window.sessionStorage.getItem('token')
      if (isLogin){
        this.$axios.post('/api/message/save', this.message,{
          //添加请求头
          headers: {
            'token': isLogin,
          },
        }).then(res => res.data).then(res => {
          if (res.code == 200) {
            // 重新加载数据
            this.queryByPage()
            // 提示添加成功信息
            this.$message({
              message: "留言成功",
              type: 'success'
            })
          } else {
            // 提示错误信息
            this.$message({
              message: res.message,
              type: 'warning'
            })
          }
        })
      }else {
        // 提示错误信息
        this.$message({
          message: "请登录后再留言",
          type: 'warning'
        })
      }
      this.message.message = ''
    },
    handleSizeChange (val) {
      console.log(`每页 ${val} 条`)
      this.pageNum = 1
      this.pageSize = val
      this.queryByPage()
    },
    handleCurrentChange (val) {
      console.log(`当前页: ${val}`)
      this.pageNum = val
      this.queryByPage()
    },
    // 获取后端数据
    queryByPage () {
      this.$axios.post('/api/message/queryByPage', {
        username: this.username,
        pageNum: this.pageNum,
        pageSize: this.pageSize
      }).then(res => res.data).then(res => {
        if (res.code == 200) {
          this.tableData = res.data.list
          this.pageNum = res.data.currentPage
          this.pageSize = res.data.pageSize
          this.total = res.data.total
        } else {
          this.$message({
            message: res.message,
            type: 'warning'
          })
        }
      })
    }
  },
  mounted () {
    this.queryByPage()
  }
}
</script>

<style scoped>

</style>
五、关于作者
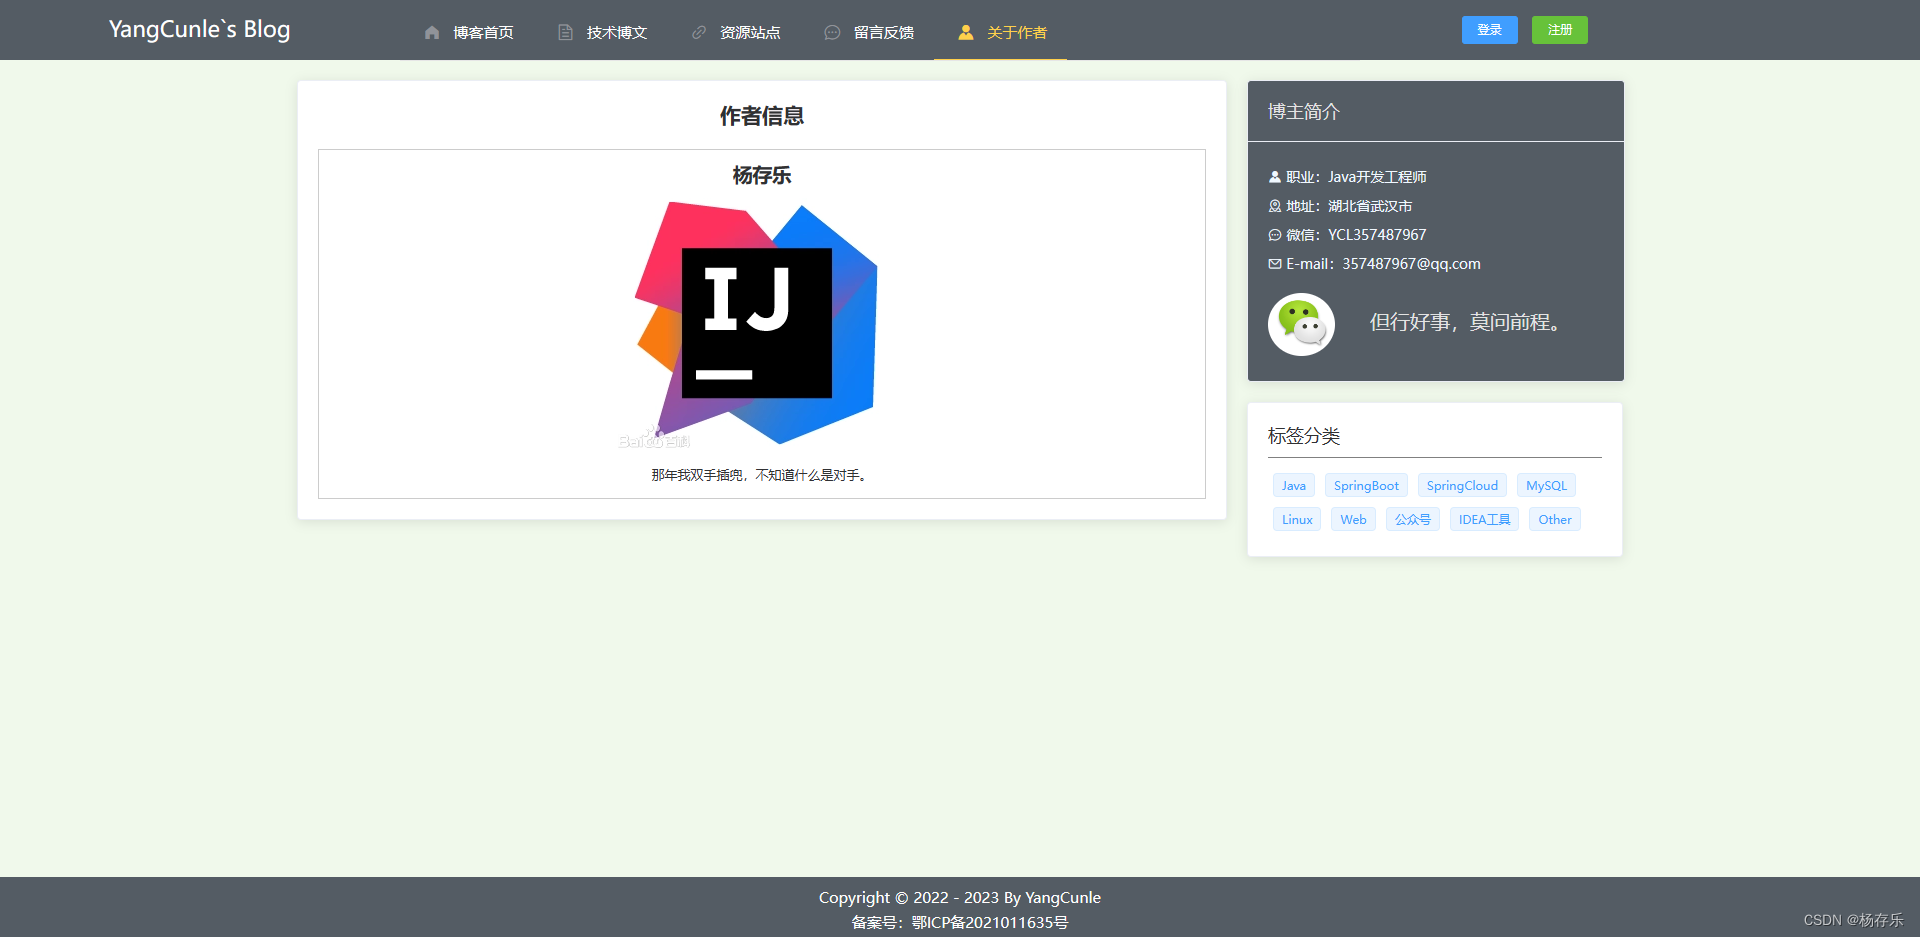
展示作者基本信息,作者的信息可以登录管理员账号在后台编辑展示。
<template>
  <div style="color: #888; font-size: 18px;">
    <el-card>
      <h3 style="text-align: center ;padding-bottom: 20px">作者信息</h3>
      <quill-editor ref="text" v-model="author.content" class="editor" :options="editorOption" disabled/>
    </el-card>
  </div>
</template>

<script>
export default {
  name: 'Author',
  data () {
    return {
      // 富文本编辑器选项
      editorOption: {
        modules: {
          toolbar: ''
        }
      },
      author: {
        id: '',
        content: ''
      }
    }
  },
  methods: {
    // 查询作者详情
    queryBlogById () {
      this.$axios.get('/api/author/query?id=' + 1).then(res => res.data).then(res => {
        if (res.code == 200) {
          this.author = res.data
        }
      })
    },
  },
  mounted () {
    this.queryBlogById()
  }
}
</script>

<style scoped>

</style>
总结
以上记录了博客前台页面每个菜单的展示及代码,如果对你有所帮助,请一键三连。


 1592
1592


 被折叠的 条评论
为什么被折叠?
被折叠的 条评论
为什么被折叠?
 到【灌水乐园】发言


