


一、下载需要的移植库及开发环境
1. 下载LVGL主代码+Demo代码,防止GitHub地址更换,请直接访问LVGL官网地址:LVGL官网直通GitHub。我们需要下载LVGL移植库与demo例程两个文件。点击GitHub小黑猫图标来到右上方页面,点击master选择release/v7版本。点击左上方蓝色lvgl,进入到左下方页面,下拉找到lv_demos,进入下载release/v7版本。(暂没有试过其他版本,读者可自行尝试,两个文件版本号要保持一致)
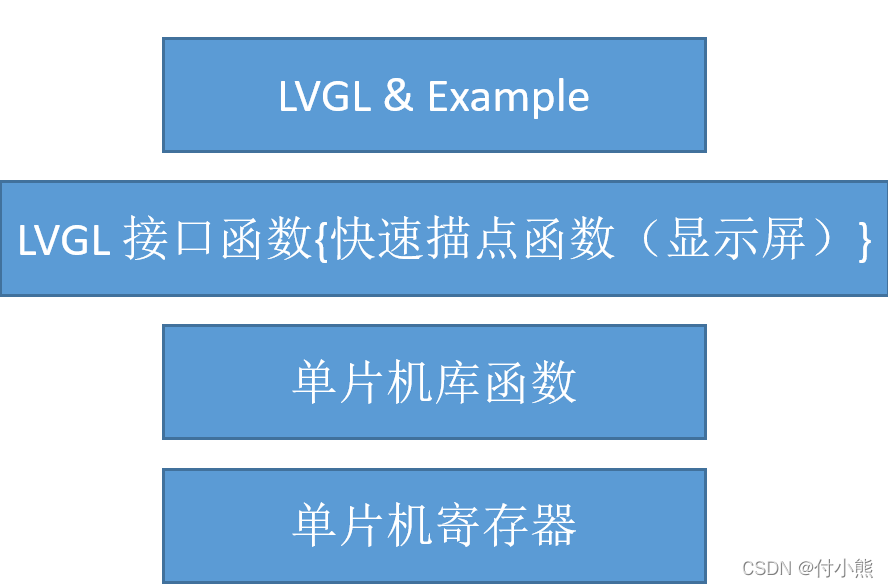
2. LVGL为了保持移植的通用性,仅通过一个快速描点函数与单片机连接,下图简单绘制了单片机与LVGL图形库之间的位置关系。这个快速描点函数是TFT LCD显示屏驱动的一部分,可以找厂家直接索要,本着不重复造轮子的原则,我们把沁恒微电子LCD例程作为移植基础。
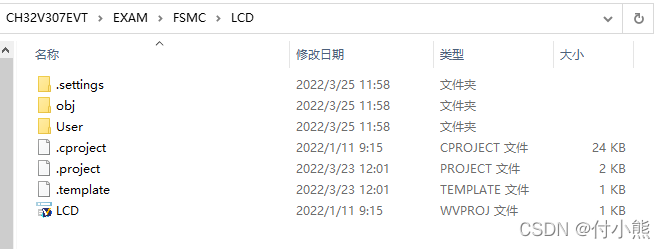
3. 下载Mountain River编译器,下载CH32V307 VCT6参考应用例程点我下载历程,并双击打开。


4. 在计算机文件目录打开LCD工程
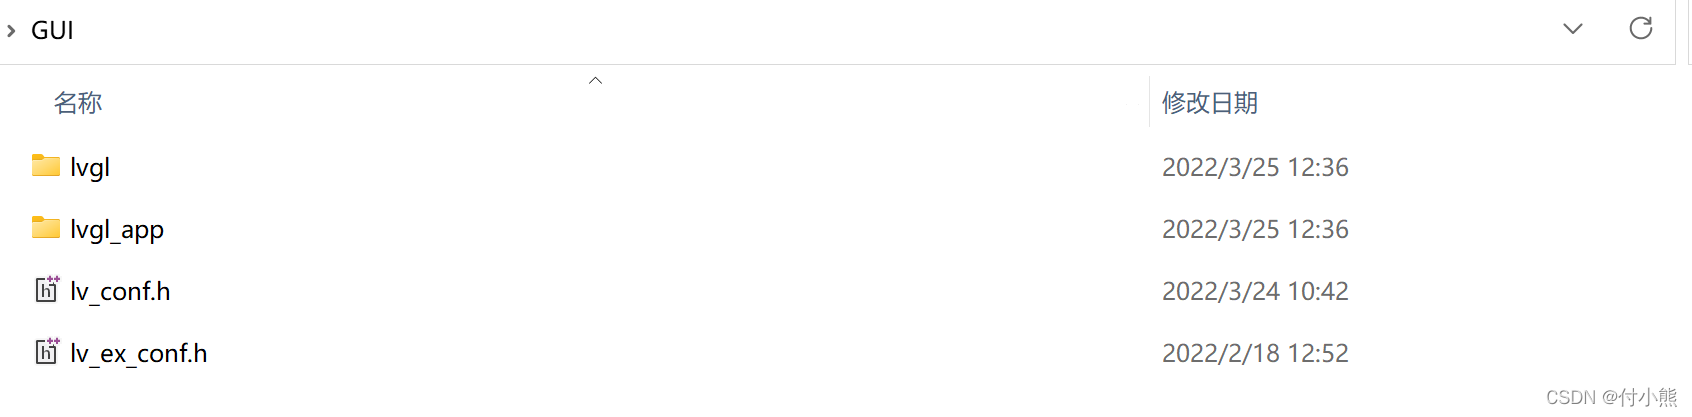
新建文件夹GUI,GUI\lvgl,GUI\lvgl_app。将下载好的lvgl-release-v7文件解压,所有文件移动到GUI\lvgl。将下载好的lvgl-demo-release-v7文件解压,所有文件移动到GUI\lvgl_app。 将GUI\lvgl_app\lv_examples内的lv_ex_conf_template.h文件更名lv_ex_conf.h, 将GUI\lvgl内的lv_conf_template.h文件更名lv_conf.h,更名后的两个文件复制到GUI目录下。

5. GUI\lvgl\examples\porting下的文件更名操作,去掉_template。

6. 将lv_ex_conf.h,lv_ex_conf.h这两个文件打开,开启宏定义。

7. 我们可以对lvgl进行一些定制配置,这些配置内容在lv_conf.h文件中,下面进行一些关键配置:
显示器宽度: #define LV_HOR_RES_MAX (240)
显示器高度: #define LV_VER_RES_MAX (480)
色彩深度: #define LV_COLOR_DEPTH 16
DPI: #define LV_DPI 100
提供给lvgl的空间: #define LV_MEM_SIZE (32U * 1024U)
其中调整LV_DPI 可以调整各控件间的紧凑,可根据实际情况进行更改;LV_MEM_SIZE 为lvgl可用空间,资源允许的情况下可以稍微设大些,这个设置过小的话,在跑一些稍微复杂的demo时界面就会刷不出来。lv_conf.h还有很多的配置,可根据实际情况进行配置。
lv_port_disp.c函数配置,开启宏定义,头文件lv_port_disp_template.h变更为lv_port_disp.h,增加led.h头文件。
/**
 * @file lv_port_disp_templ.c
 *
 */

 /*Copy this file as "lv_port_disp.c" and set this value to "1" to enable content*/
#if 1

/*********************
 *      INCLUDES
 *********************/
#include "lv_port_disp.h"
#include "lcd.h"
c
lv_port_disp_init函数里主要要选择一种写缓存的方式及设置显示分辨。我们选择第一种写缓存的方式,修改后的函数如:
void lv_port_disp_init(void)
{
    /*-------------------------
     * Initialize your display
     * -----------------------*/
    disp_init();

    /*-----------------------------
     * Create a buffer for drawing
     *----------------------------*/

    /* LVGL requires a buffer where it internally draws the widgets.
     * Later this buffer will passed your display drivers `flush_cb` to copy its content to your display.
     * The buffer has to be greater than 1 display row
     *
     * There are three buffering configurations:
     * 1. Create ONE buffer with some rows:
     *      LVGL will draw the display's content here and writes it to your display
     *
     * 2. Create TWO buffer with some rows:
     *      LVGL will draw the display's content to a buffer and writes it your display.
     *      You should use DMA to write the buffer's content to the display.
     *      It will enable LVGL to draw the next part of the screen to the other buffer while
     *      the data is being sent form the first buffer. It makes rendering and flushing parallel.
     *
     * 3. Create TWO screen-sized buffer:
     *      Similar to 2) but the buffer have to be screen sized. When LVGL is ready it will give the
     *      whole frame to display. This way you only need to change the frame buffer's address instead of
     *      copying the pixels.
     * */

    /* Example for 1) */
    static lv_disp_buf_t draw_buf_dsc_1;
    static lv_color_t draw_buf_1[LV_HOR_RES_MAX * 10];                          /*A buffer for 10 rows*/
    lv_disp_buf_init(&draw_buf_dsc_1, draw_buf_1, NULL, LV_HOR_RES_MAX * 10);   /*Initialize the display buffer*/

//    /* Example for 2) */
//    static lv_disp_buf_t draw_buf_dsc_2;
//    static lv_color_t draw_buf_2_1[LV_HOR_RES_MAX * 10];                        /*A buffer for 10 rows*/
//    static lv_color_t draw_buf_2_2[LV_HOR_RES_MAX * 10];                        /*An other buffer for 10 rows*/
//    lv_disp_buf_init(&draw_buf_dsc_2, draw_buf_2_1, draw_buf_2_2, LV_HOR_RES_MAX * 10);   /*Initialize the display buffer*/

//    /* Example for 3) */
//    static lv_disp_buf_t draw_buf_dsc_3;
//    static lv_color_t draw_buf_3_1[LV_HOR_RES_MAX * LV_VER_RES_MAX];            /*A screen sized buffer*/
//    static lv_color_t draw_buf_3_2[LV_HOR_RES_MAX * LV_VER_RES_MAX];            /*An other screen sized buffer*/
//    lv_disp_buf_init(&draw_buf_dsc_3, draw_buf_3_1, draw_buf_3_2, LV_HOR_RES_MAX * LV_VER_RES_MAX);   /*Initialize the display buffer*/

    /*-----------------------------------
     * Register the display in LVGL
     *----------------------------------*/

    lv_disp_drv_t disp_drv;                         /*Descriptor of a display driver*/
    lv_disp_drv_init(&disp_drv);                    /*Basic initialization*/

    /*Set up the functions to access to your display*/

    /*Set the resolution of the display*/
    disp_drv.hor_res = 240;
    disp_drv.ver_res = 400;

    /*Used to copy the buffer's content to the display*/
    disp_drv.flush_cb = disp_flush;

    /*Set a display buffer*/
    disp_drv.buffer = &draw_buf_dsc_1;

#if LV_USE_GPU
    /*Optionally add functions to access the GPU. (Only in buffered mode, LV_VDB_SIZE != 0)*/

    /*Blend two color array using opacity*/
    disp_drv.gpu_blend_cb = gpu_blend;

    /*Fill a memory array with a color*/
    disp_drv.gpu_fill_cb = gpu_fill;
#endif

    /*Finally register the driver*/
    lv_disp_drv_register(&disp_drv);
}
disp_flush需要调用底层lcd操作接口,填入快速描点函数LCD_Fast_DrawPoint(x,y,color_p->full),程序修改为:
static void disp_flush(lv_disp_drv_t * disp_drv, const lv_area_t * area, lv_color_t * color_p)
{
    /*The most simple case (but also the slowest) to put all pixels to the screen one-by-one*/

    int32_t x;
    int32_t y;
    for(y = area->y1; y <= area->y2; y++) {
        for(x = area->x1; x <= area->x2; x++) {
            /* Put a pixel to the display. For example: */
            /* put_px(x, y, *color_p)*/
			LCD_Fast_DrawPoint(x,y,color_p->full);
            color_p++;
        }
    }

    /* IMPORTANT!!!
     * Inform the graphics library that you are ready with the flushing*/
    lv_disp_flush_ready(disp_drv);
}
最后,需要再头文件中声明lv_port_disp_init函数:
/**********************
 * GLOBAL PROTOTYPES
 **********************/
void lv_port_disp_init(void);
/**********************
 *      MACROS
 **********************/
8. lvgl需要一个心跳节拍,可以使用滴答定时器,或者其他定时器,或者while(1)循环。目的是每隔一段时间进入一边遍 lv_tick_inc()函数我们这里的配置main.c如下:
    while(1)
    {
        lv_tick_inc(5);
        lv_task_handler();
        delay_ms(5);
    }
选则一个demo运行一下,运行LV_USE_DEMO_WIDGETS =1。想运行哪一个demo,就要使能哪一个为1,同时添加对应头文件路径。
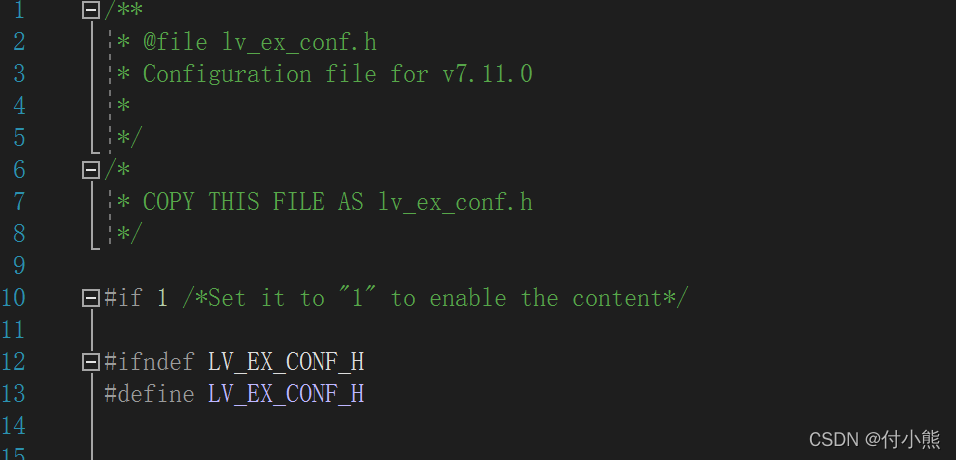
/**
 * @file lv_ex_conf.h
 * Configuration file for v7.11.0
 *
 */
/*
 * COPY THIS FILE AS lv_ex_conf.h
 */

#if 1 /*Set it to "1" to enable the content*/

#ifndef LV_EX_CONF_H
#define LV_EX_CONF_H


/*******************
 * GENERAL SETTING
 *******************/
#define LV_EX_PRINTF       0       /*Enable printf-ing data in demoes and examples*/
#define LV_EX_KEYBOARD     0       /*Add PC keyboard support to some examples (`lv_drivers` repository is required)*/
#define LV_EX_MOUSEWHEEL   0       /*Add 'encoder' (mouse wheel) support to some examples (`lv_drivers` repository is required)*/

/*********************
 * DEMO USAGE
 *********************/

/*Show some widget*/
#define LV_USE_DEMO_WIDGETS        1
#if LV_USE_DEMO_WIDGETS
#define LV_DEMO_WIDGETS_SLIDESHOW  0
#endif

/*Printer demo, optimized for 800x480*/
#define LV_USE_DEMO_PRINTER     0

/*Demonstrate the usage of encoder and keyboard*/
#define LV_USE_DEMO_KEYPAD_AND_ENCODER     0

/*Benchmark your system*/
#define LV_USE_DEMO_BENCHMARK   0

/*Stress test for LVGL*/
#define LV_USE_DEMO_STRESS      0

/*Music player for LVGL*/
#define LV_USE_DEMO_MUSIC      0
#if LV_USE_DEMO_MUSIC
#define LV_DEMO_MUSIC_AUTO_PLAY 0
#endif

#endif /*LV_EX_CONF_H*/

#endif /*End of "Content enable"*/
9. 右键工程,点击properties,点击右上框include path(-l)右边的绿色+,添加编译路径。需要额外添加的路径为:
GUI
GUI/lvgl
GUI/lvgl_app/lv_examples/src/lv_demo_widgets
GUI/lvgl_app
GUI/lvgl/examples/porting
GUI/lvgl/src/lv_core
GUI/lvgl/src/lv_draw
GUI/lvgl/src/lv_font
GUI/lvgl/src/lv_gpu
GUI/lvgl/src/lv_hal
GUI/lvgl/src/lv_misc
GUI/lvgl/src/lv_themes
GUI/lvgl/src/lv_widgets

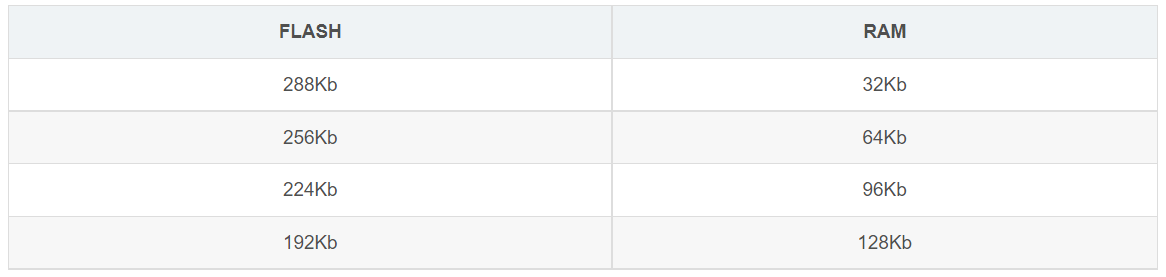
10. 编译一下,如果提示找不到函数定义之类的错误,可能需要额外添加以下对应的路径。没有路径问题,不出意外,还是出意外了~编译不通过,提示memory问题。CH32V307这块单片机FLASH与RAM有四种配置法则,我们选择[256,64]的组合方式。在工程目录下Ld文件夹中更改link的LENGTH部分。

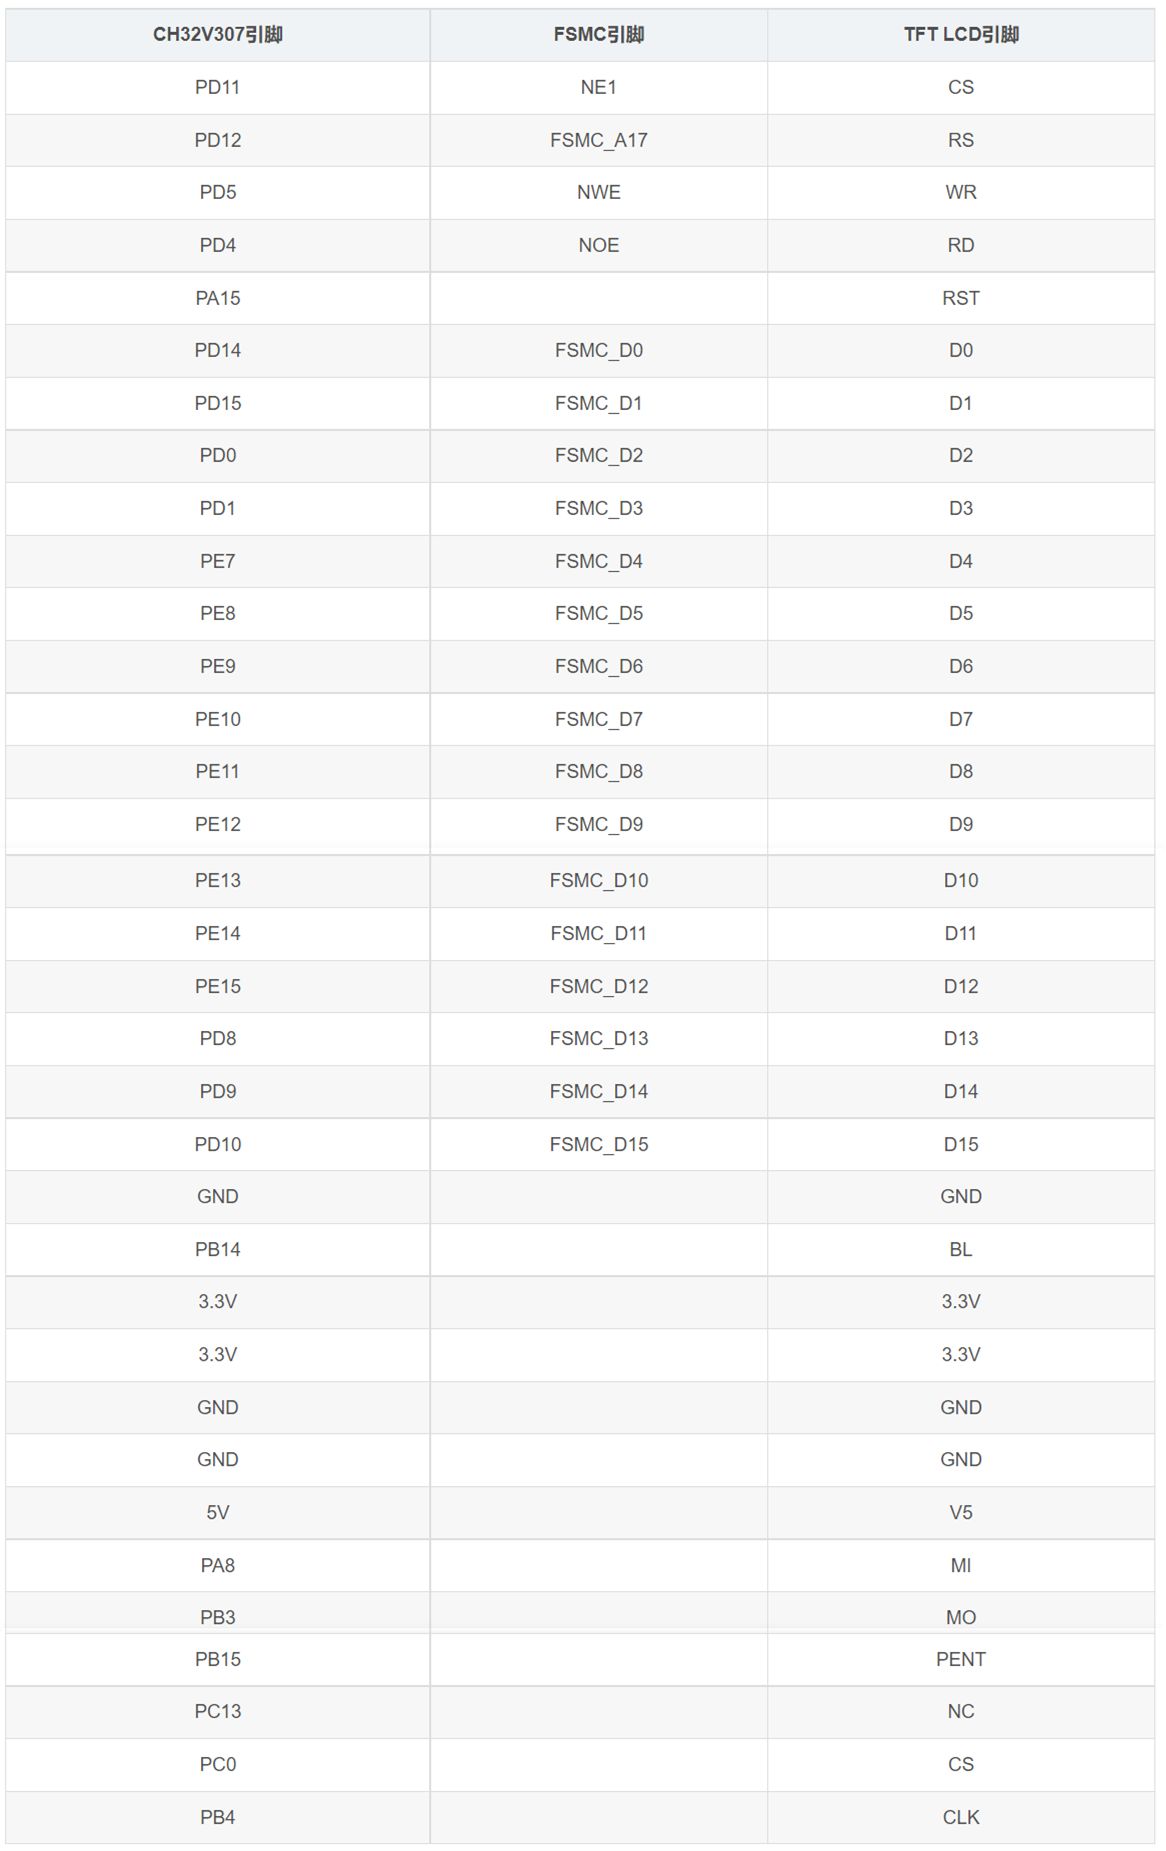
11. 移植情况

硬件连接
额,我把工程上传了,自行下载工程看代码吧:https://download.csdn.net/download/weixin_44845994/85034781


 6156
6156


 被折叠的 条评论
为什么被折叠?
被折叠的 条评论
为什么被折叠?
 到【灌水乐园】发言


