


threejs 卷积描边处理
目录
前言
这里分享一个threejs卷积的个性化描边方式。
主要流程为
1.复制需要描边的物体到另一个scene中
2.使用WebGLRenderTarget渲染获得颜色数据,或者深度数据等
3.在后期处理中添加之前获得的数据 (这样既有描边底色,也可以自定义颜色)
4.使用sobel算子获取描边,渲染
一、复制到scene
//这里有两个scene
let scene = new THREE.Scene();
let sceneTest = new THREE.Scene();//用于描边

...


sceneTest.add(new THREE.AmbientLight(0x444444));//添加环境光防止全黑

const boxGeometry = new THREE.BoxGeometry( 10, 10, 10 );
const chromeMaterial = new THREE.MeshLambertMaterial();
const box = new THREE.Mesh( boxGeometry, chromeMaterial );
box.position.set(0,10,0)

scene.add( box );
sceneTest.add(box.clone());//需要描边的物体
二、使用WebGLRenderTarget
webglRenderTarget:https://threejs.org/docs/index.html?q=WebGLRend#api/zh/renderers/WebGLRenderTarget
const depthTexture = new THREE.DepthTexture(200, 200);//深度图
target = new THREE.WebGLRenderTarget(200, 200,{ minFilter: THREE.LinearFilter, magFilter: THREE.LinearFilter, format: THREE.RGBFormat,depthBuffer: true,depthTexture:depthTexture });

...


//渲染
this.renderer.setRenderTarget( this.target );
this.renderer.clear();
this.renderer.render( this.sceneTest, this.camera );
this.renderer.setRenderTarget( null );

this.composer.render();//后期处理渲染

...


//添加到自定义后期处理通道
let myPass = new testPass(
    new THREE.Vector2(200, 200),
    scene,
    camera
)
composer.addPass(myPass);
const uniforms = myPass.fsQuad.material.uniforms;
uniforms.mytexture.value = this.target.texture;
uniforms.myDeptBuffer.value = this.target.depthTexture;
三、使用sobel算子获取描边,渲染
fs:

uniform vec4 screenSize;
uniform sampler2D sceneColorBuffer;
uniform sampler2D mytexture;
uniform sampler2D myDeptBuffer;

//深度
float readDepth (sampler2D depthSampler, vec2 coord) {
	float fragCoordZ = texture2D(depthSampler, coord).x;
	float viewZ = perspectiveDepthToViewZ( fragCoordZ, cameraNear, cameraFar );
	return viewZToOrthographicDepth( viewZ, cameraNear, cameraFar );
}

float getPixelDepth(sampler2D deptBuffer,int x, int y) {
	return readDepth(deptBuffer, vUv + screenSize.zw * vec2(x, y));
}

//获取颜色数据
vec3 getColor(sampler2D buffer,int x,int y) {
	vec3 nowColor =  texture2D(buffer, vUv + screenSize.zw * vec2(x, y)).rgb;
	return nowColor;
}

//获取颜色灰度
float getGrayscale(int x,int y) {
	vec4 nowColor =  texture2D(mytexture, vUv + screenSize.zw * vec2(x, y));
	return nowColor.x/3.0 + nowColor.y/3.0 + nowColor.z/3.0;
}

void main() {
	vec3 textureColor = getColor(mytexture,0,0);
	vec3 sceneColor = getColor(sceneColorBuffer,0,0);
    float pixelDepth = getPixelDepth(myDeptBuffer,0,0);

	//sobel算子
	float sobelX = (-1.0)*getGrayscale(-1, -1)
	+ (-2.0)*getGrayscale(-1, 0)
	+ (-1.0)*getGrayscale(-1, 1)
	+ getGrayscale(1, -1)
	+ (2.0)*getGrayscale(1, 0)
	+ getGrayscale(1, 1);
	float sobelY = getGrayscale(-1, -1)
	+ (2.0)*getGrayscale(0, -1)
	+ getGrayscale(1, -1)
	+ (-1.0)*getGrayscale(-1, 1)
	+ (-2.0)*getGrayscale(0, 1)
	+ (-1.0)*getGrayscale(1, 1);

	float G = abs(sobelX)+abs(sobelY);
	float G2 = G>colorThreshold?1.0:0.0;

	// gl_FragColor = vec4( textureColor ,1.0);
	// gl_FragColor = vec4( G2,G2,G2 ,1.0);
    // gl_FragColor = vec4( pixelDepth,pixelDepth,pixelDepth ,1.0);
	// gl_FragColor = vec4( sceneColor ,1.0);

	// gl_FragColor = vec4( mix( sceneColor , vec3(0,0,0) , G2 ) , 1.0 );
	gl_FragColor = vec4( mix( sceneColor , sceneColor*0.5 , G2 ) , 1.0 );
}
总结
例图:
颜色sobel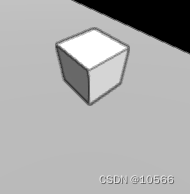
深度sobel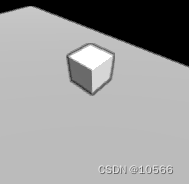
不需要修改描边物体shader,又兼具自由的描边颜色,也可以自定义描边物体,非常好用。就是性能会低一些。


 354
354


 被折叠的 条评论
为什么被折叠?
被折叠的 条评论
为什么被折叠?
 到【灌水乐园】发言


