


RMI
RMI 英文全称(Remote Method Invocation ) ,它让客户端在使用远程对象提供的服务时,就如同使用本地对象一样。配置rmi过程繁杂,但是使用spring管理后,你会发现spring帮我们简化了使用RMI的手续,让我们只需3分钟就能写出自己的远程服务api。
1.首先创建一个spring_test作为服务端,spring_client作为客户端,其中的spring包我这里就不说了哈。
2.在spring_test中,创建自己的api:
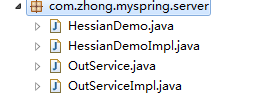
其中我们只需看OutService.java和OutServiceImpl.java,OutService.java是接口,OutServiceImpl.java是实现类。
代码如下:
OutService.java
public interface OutService {
	public void login();
	public String getStr();
}public class OutServiceImpl implements OutService {
@Override
public void login() {
System.out.println("OutService服务使用login()");
}
@Override
public String getStr() {
return "我是服务端的东西-->OutService服务使用getStr()";
}
}<?xml version="1.0" encoding="UTF-8"?>
<beans xmlns="http://www.springframework.org/schema/beans"
xmlns:xsi="http://www.w3.org/2001/XMLSchema-instance" xmlns:p="http://www.springframework.org/schema/p"
xmlns:cache="http://www.springframework.org/schema/cache"
xmlns:aop="http://www.springframework.org/schema/aop" xmlns:tx="http://www.springframework.org/schema/tx"
xsi:schemaLocation="http://www.springframework.org/schema/beans
http://www.springframework.org/schema/beans/spring-beans-3.0.xsd
http://www.springframework.org/schema/cache
http://www.springframework.org/schema/cache/spring-cache-3.1.xsd
http://www.springframework.org/schema/tx
http://www.springframework.org/schema/tx/spring-tx-3.0.xsd
http://www.springframework.org/schema/aop
http://www.springframework.org/schema/aop/spring-aop-3.0.xsd">
<!-- 实现类 -->
<bean id="outService" class="com.zhong.myspring.server.OutServiceImpl" ></bean>
<!-- 开发的接口 -->
<bean id="serverExporter" class="org.springframework.remoting.rmi.RmiServiceExporter" >
<!-- 接口对应的服务 -->
<property name="service">
<ref bean="outService" />
</property>
<!-- 接口名称 -->
<property name="serviceName">
<value>outServiceName</value>
</property>
<!-- 接口 -->
<property name="serviceInterface">
<value>com.zhong.myspring.server.OutService</value>
</property>
<!-- 启动端口 -->
<property name="registryPort">
<value>1199</value>
</property>
</bean>
</beans>
配好之后可以启动tomcat开启远程服务了。
然后将OutService.class 打成jar包,导入spring_client工程,供客户端调用。
4.在客户端spring_client调用服务,工程目录如下:
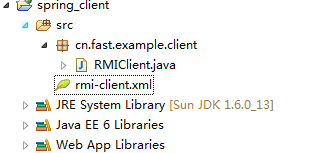
配置:rmi-client.xml:
<?xml version="1.0" encoding="UTF-8"?>
<beans xmlns="http://www.springframework.org/schema/beans"
	xmlns:xsi="http://www.w3.org/2001/XMLSchema-instance" xmlns:p="http://www.springframework.org/schema/p"
	xmlns:cache="http://www.springframework.org/schema/cache"
	xmlns:aop="http://www.springframework.org/schema/aop" xmlns:tx="http://www.springframework.org/schema/tx"
	xsi:schemaLocation="http://www.springframework.org/schema/beans
						http://www.springframework.org/schema/beans/spring-beans-3.0.xsd
						http://www.springframework.org/schema/cache
						http://www.springframework.org/schema/cache/spring-cache-3.1.xsd
						http://www.springframework.org/schema/tx
						http://www.springframework.org/schema/tx/spring-tx-3.0.xsd
						http://www.springframework.org/schema/aop
						http://www.springframework.org/schema/aop/spring-aop-3.0.xsd">
	<!-- 接口代理 -->
	<bean id="someServiceProxy" class="org.springframework.remoting.rmi.RmiProxyFactoryBean" >
		<!-- 接口路径 -->
		<property name="serviceUrl">
			<value>rmi://localhost:1199/outServiceName</value>
		</property>
		<!-- 接口 -->
		<property name="serviceInterface">
			<value>com.zhong.myspring.server.OutService</value>
		</property>
	</bean>

</beans>public class RMIClient {
static ApplicationContext context ;
public static ApplicationContext getApplicationContext(){
return new ClassPathXmlApplicationContext(
"rmi-client.xml");
}
public static void test_rmi(){
context = getApplicationContext();
OutService outService = (OutService) context.getBean("someServiceProxy");
System.out.println("start");
outService.login();
System.out.println("open --> "+outService.getStr());
System.out.println("end");
}
public static void main(String[] args) {
test_rmi();
}
start
open --> 我是服务端的东西-->OutService服务使用getStr()
end
open --> 我是服务端的东西-->OutService服务使用getStr()
end
======================================
到这里调用结束啦!!


 598
598

 被折叠的 条评论
为什么被折叠?
被折叠的 条评论
为什么被折叠?
 到【灌水乐园】发言


