1.MFC,BCB绘图有Teechart控件,很好用。QT绘图有QWT和QCustomPlot,QWT比较麻烦一些,相比来说QCustomPlot简单易用。
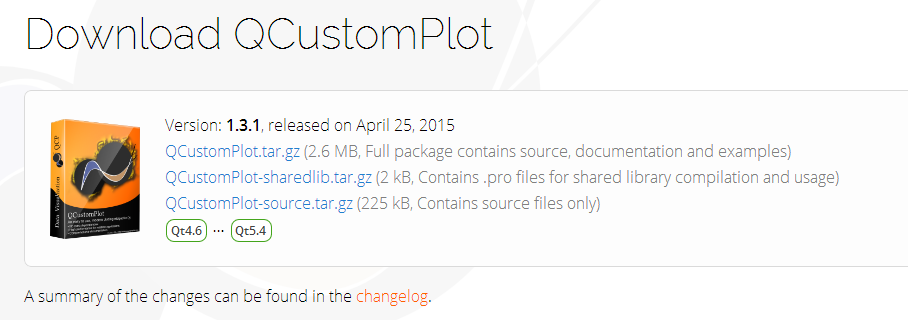
2.官网下载地址:http://www.qcustomplot.com/index.php/download

如上图,下载第一个QCustomPlot.tar.gz,包括源文件和文档demo等。
demo比较重要,可以参考demo代码。
3.只有一个qcustomplot.cpp和和一个qcustomplot.h头文件,解压可见。
4.新建Widget 工程,添加上面的两个文件。
然后工程的pro文件的第9行末尾加入:printsupport,如下:
greaterThan(QT_MAJOR_VERSION, 4): QT += widgets printsupport
(这是因为Qt 5中将所有打印的相关类都放到了Qt Print Support模块。)
5.向主窗口添加一个widget容器控件,在容器组内,或搜索widget。
对着所添加的widget区域点击右键,选择“提升为”。
输入提升类名称输入“QCustomPlot”,点击添加。
双击控件,修改名称为customPlot(或直接在属性栏修改)。
6.运行即可。
7.添加曲线:
    //定义两个可变QVector数组存放绘图的坐标数据
    QVector<double> x(100),y(100);//分别存放x和y坐标的数据,100为数据长度
    //添加数据,我们这里演示y=x^3,为了正负对称,我们x从-10到+10
    for(int i=0;i<100;i++)
    {
        x[i] = i/5 - 10;
        y[i] = x[i] * x[i] * x[i];
    }

    //设置属性可缩放,移动等
    ui->customPlot->setInteractions(QCP::iRangeDrag | QCP::iRangeZoom | QCP::iSelectAxes |
                                     QCP::iSelectLegend | QCP::iSelectPlottables);
    //设置坐标轴标签名称
    ui->customPlot->xAxis->setLabel("x");
    ui->customPlot->yAxis->setLabel("y");
    ui->customPlot->legend->setVisible(true);
    //  ui->customPlot->axisRect()->setupFullAxesBox();
    ui->customPlot->addGraph();//向绘图区域QCustomPlot(从widget提升来的)添加一条曲线
    ui->customPlot->graph(0)->setName("曲线1");//曲线名称
    ui->customPlot->graph(0)->setData(x,y); //设置曲线数据

    //设置坐标轴显示范围,否则我们只能看到默认的范围
    ui->customPlot->xAxis->setRange(-11,11);
    ui->customPlot->yAxis->setRange(-1100,1100);

    //重绘,这里可以不用,官方例子有,执行setData函数后自动重绘
    //我认为应该用于动态显示或者是改变坐标轴范围之后的动态显示,我们以后探索
    //ui->customPlot->replot();

    //设置曲线颜色
    QPen pen;
    pen.setWidth(5);
    pen.setColor(Qt::blue);// line color blue for first graph
    ui->customPlot->graph(0)->setPen(pen);
    ui->customPlot->graph(0)->setBrush(QBrush(QColor(0, 0, 255, 20))); // first graph will be filled with translucent blue
    ui->customPlot->addGraph();//添加第二条曲线
    ui->customPlot->graph(1)->setName("曲线2");//曲线名称
    ui->customPlot->graph(1)->setPen(QPen(Qt::red)); // line color red for second graph
    for(int i=0;i<100;i++)//101
    {
        y[i] +=100;
    }
    ui->customPlot->graph(1)->setData(x,y);
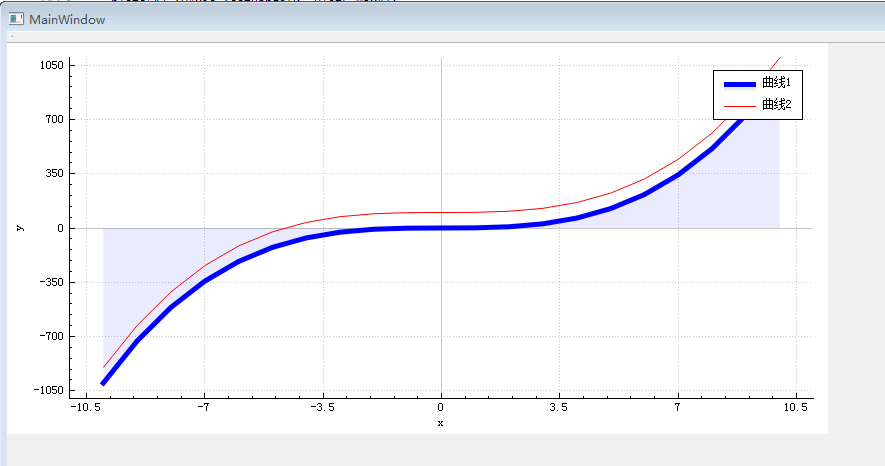
效果如下图:

参考了其他的程序。
 //设置坐标颜色/坐标名称颜色
    ui->qCustomPlot->yAxis->setLabelColor(TextColor);
    ui->qCustomPlot->xAxis->setTickLabelColor(TextColor);
    ui->qCustomPlot->yAxis->setTickLabelColor(TextColor);
    ui->qCustomPlot->xAxis->setBasePen(QPen(TextColor, TextWidth));
    ui->qCustomPlot->yAxis->setBasePen(QPen(TextColor, TextWidth));
    ui->qCustomPlot->xAxis->setTickPen(QPen(TextColor, TextWidth));
    ui->qCustomPlot->yAxis->setTickPen(QPen(TextColor, TextWidth));
    ui->qCustomPlot->xAxis->setSubTickPen(QPen(TextColor, TextWidth));
    ui->qCustomPlot->yAxis->setSubTickPen(QPen(TextColor, TextWidth));
    //设置画布背景色
    QLinearGradient plotGradient;
    plotGradient.setStart(0, 0);
    plotGradient.setFinalStop(0, 350);
    plotGradient.setColorAt(0, QColor(80, 80, 80));
    plotGradient.setColorAt(1, QColor(50, 50, 50));
    ui->qCustomPlot->setBackground(plotGradient);

    //设置坐标背景色
    QLinearGradient axisRectGradient;
    axisRectGradient.setStart(0, 0);
    axisRectGradient.setFinalStop(0, 350);
    axisRectGradient.setColorAt(0, QColor(80, 80, 80));
    axisRectGradient.setColorAt(1, QColor(30, 30, 30));
    ui->qCustomPlot->axisRect()->setBackground(axisRectGradient);

    //设置图例提示位置及背景色
    ui->qCustomPlot->axisRect()->insetLayout()->setInsetAlignment(0, Qt::AlignTop | Qt::AlignRight);
    ui->qCustomPlot->legend->setBrush(QColor(255, 255, 255, 200));
    ui->qCustomPlot->replot();


 1万+
1万+


 被折叠的 条评论
为什么被折叠?


