


 本文详述如何使用Python API和TensorRT引擎对单幅图像进行推理,包括预处理、推断和解码步骤。文章涵盖图像读取、模型精度设置、输入输出缓冲区管理以及CUDA内存拷贝。最后,展示了推理结果的解码和显示过程。
在上一篇文章中,对构建TensorRT引擎进行了介绍,本文将详细介绍如何使用Python API通过TensorRT引擎加速,实现单幅图像的推断
Workflow
单幅图像的推理过程大致如下
-
读入图像文件,并进行预处理
-
加载TensorRT引擎文件并进行反序列化,创建执行上下文context
-
根据引擎申请输入输出Buffers,并进行绑定
-
调用推断API进行推断
-
输出解码
-
画框并显示
实现
首先是导入需要的包
import cv2
import time
import numpy as np
import logging
import argparse
import tensorrt as trt
cv2用于进行图像文件加载、图像预处理以及画框,time用于进行耗时统计,numpy用于进行前后处理中的张量操作,argparse用于构造一个参数解析器,tensorrt是TensorRT封装API包
预先设置锚框和锚框掩码,这里需要和训练的模型输出对应上,训练中使用的9个锚框分为了3个尺度,掩码用于标记锚框属于哪个尺度。另外训练过程的锚框数值是用的归一化值还是绝对值必须清楚,我这里锚框的归一化是在解码函数中处理的,因此这里放的是绝对值
anchors = np.array([(10, 13), (16, 30), (33, 23), (30, 61), (62, 45),
                         (59, 119), (116, 90), (156, 198), (373, 326)],
                        np.float32)

anchors_mask = np.array([[6, 7, 8], [3, 4, 5], [0, 1, 2]])
参数解析
def parse_args():
    parser = argparse.ArgumentParser()
    parser.add_argument('--engine', help='TensorRT engine file')
    parser.add_argument('--image', help='input image')
    parser.add_argument('--input_size', default=640, type=int,
        help='model input size')
    parser.add_argument('--inout_dtype', default='fp32',
        choices=['fp32', 'fp16', 'int8'],
        help='fp32/fp16/int8')
    parser.add_argument('--model_type', default='yolov5s',
        choices=['yolov3', 'yolov5s'],
        help='yolo model type select')
    parser.add_argument('--display_width', default=1920, type=int,
        help='display image width')
    parser.add_argument('--display_height', default=1080, type=int,
        help='display image height')
    parser.add_argument('--num_classes', default=20, type=int,
        help='classes num')
    return parser.parse_args()
主要接收参数
-
engine:引擎文件路径
-
image:图像文件路径
-
input_size:模型输入尺寸
-
inout_dtype:模型精度
这里需要注意,运行程序时模型与程序的input_size、精度以及num_classes需要正确对应
准备
程序入口首先解析参数,然后调用main进行处理
if __name__ == '__main__':
    args = parse_args()
    try:
        main(args)
    except SystemExit:
        pass
main函数中首先根据精度参数设置精度类型
if args.inout_dtype == 'fp32':
    inout_dtype = np.float32
elif args.inout_dtype == 'fp16':
    inout_dtype = np.float16
elif args.inout_dtype == 'int8':
    inout_dtype = np.int8
然后调用tensorrt初始化函数
TRT_LOGGER = trt.Logger()
trt.init_libnvinfer_plugins(TRT_LOGGER, namespace="")
根据输入尺度和类别数目初始化模型输出的形状
pred_shape = get_pred_shape(args.input_size, args.num_classes)
get_pred_shape定义如下
def get_pred_shape(input_size, num_classes):
    shape = []
    scale = [int(input_size/x) for x in [8,16,32]]
    for i in range(3):
        shape.append([1, scale[i], scale[i], 3, num_classes+5])
    return shape
做这一步的原因是使用tensorrt推断API的输入和输出buffer的shape都是一维的,转换成nchw4维shape方便后续解码处理
因此在输入尺度为416x416、类别为1的情况下,输出的尺度一共3个:
[[1,13,13,3,6]], [1,26,26,3,6], [1,52,52,3,6]]3是每个尺度下有3个锚框,6是4+1+1,分别是预测框位置和有目标置信度以及类别置信度,这些属于YOLO基础概念的内容就不再详细介绍了
预处理
读入图像并进行预处理
im_raw = cv2.imread(args.image)
im = image_preprocess(im_raw, args, inout_dtype)
预处理函数定义如下
def image_preprocess(im, args, dtype):
    im = cv2.cvtColor(im, cv2.COLOR_BGR2RGB)
    im = cv2.resize(im, (args.input_size, args.input_size))
    im = np.array(im, dtype='float32')
    im = im / 255.0
    im = np.expand_dims(im, axis=0)
    im = np.array(im, dtype=dtype, order='C')
    return im
由于opencv默认颜色空间为BRG,因此要转换为RGB,后面显示图像颜色才正常。经过颜色转换后,做一个resize,将图像尺度变换到输入参数的size,然后数值归一化,expand_dims是为了扩展维度,因为模型输入还有一个batch维度,最后进行精度转换
推断
经过预处理后的数据就可以进行推断了
推断过程处理如下
with get_engine(args.engine, TRT_LOGGER) as engine, engine.create_execution_context() as context:
    inputs, outputs, bindings, stream = allocate_buffers(engine)
    inputs[0].host = im
    inference_outs = do_inference_v2(context, bindings=bindings, inputs=inputs, outputs=outputs, stream=stream)
首先是通过get_engine反序列化引擎
def get_engine(engine_file, logger):
    with open(engine_file, "rb") as f, trt.Runtime(logger) as runtime:
        return runtime.deserialize_cuda_engine(f.read())
然后通过反序列化的引擎engine得到执行上下文context,在上下文中,通过allocate_buffers预先分配好输入输出的内存
def allocate_buffers(engine):
    inputs = []
    outputs = []
    bindings = []
    stream = cuda.Stream()
    for binding in engine:
        size = trt.volume(engine.get_binding_shape(binding)) * engine.max_batch_size
        dtype = trt.nptype(engine.get_binding_dtype(binding))
        # Allocate host and device buffers
        host_mem = cuda.pagelocked_empty(size, dtype)
        device_mem = cuda.mem_alloc(host_mem.nbytes)
        # Append the device buffer to device bindings.
        bindings.append(int(device_mem))
        # Append to the appropriate list.
        if engine.binding_is_input(binding):
            inputs.append(HostDeviceMem(host_mem, device_mem))
        else:
            outputs.append(HostDeviceMem(host_mem, device_mem))
    return inputs, outputs, bindings, stream
熟悉CUDA编程的朋友对这块的内存分配肯定不会陌生,由于计算是在GPU上完成的,CUDA编程中将主机端叫做Host,GPU端叫做Device,要调用CUDA核进行计算,首先需要在Host端创建好输入和输出缓冲区,然后拷贝输入buffer到GPU,计算完成后,将输出buffer拷贝到Host端,这里也是一样的道理。这里的遍历engine的binding就是在遍历引擎中的输入和输出层的内存需求,本模型中一共4个binding,1个输入,3个输出,每次遍历会计算该binding的内存需求大小,然后为该binding分配好主机端和设备端内存,然后将分配好的内存添加到inputs、outputs、bindings数组中
这里定义了一个HostDeviceMem的类,用于方便管理每个Buffer的两个内存空间
class HostDeviceMem(object):
    def __init__(self, host_mem, device_mem):
        self.host = host_mem
        self.device = device_mem

    def __str__(self):
        return "Host:\n" + str(self.host) + "\nDevice:\n" + str(self.device)

    def __repr__(self):
        return self.__str__()
然后退回到执行上下文中,将预处理后的图像数据赋值给inputs[0],因为只有一个input。然后调用do_inference_v2()函数进行推理
def do_inference_v2(context, bindings, inputs, outputs, stream):
    # copy host to device
    [cuda.memcpy_htod_async(inp.device, inp.host, stream) for inp in inputs]
    # run inference
    context.execute_async_v2(bindings=bindings, stream_handle=stream.handle)
    # Transfer predictions back from the GPU.
    [cuda.memcpy_dtoh_async(out.host, out.device, stream) for out in outputs]
    # sync stream
    stream.synchronize()
    # return output
    return [out.host for out in outputs]
该函数中首先将所有的输入buffer拷贝到设备中,然后调用execute_async_v2进行推断,推断完成后将输出buffer从设备拷贝到host端,最后进行cuda流的同步等待,返回的outputs就是模型的3个尺度的输出,尺寸和初始化过程中预先设定的3个尺度是一致的
由于默认的模型输出是1维数据,因此需要进行reshape操作,方便后续解码
for i, out in enumerate(inference_outs):
    pred = out.reshape(pred_shape[i])
    outputs.append(pred)
outputs.reverse()
解码
out_boxes, out_scores, out_classes = decode_box(outputs, anchors, anchors_mask,
    args.num_classes, [args.input_size, args.input_size], [im_raw.shape[1], im_raw.shape[0]])
def decode_box(outputs, anchors, anchors_mask, num_classes, input_shape, image_shape,
    max_boxes=100, score_thresh=0.5, iou_thresh=0.3):

    box_xy      = []
    box_wh      = []
    box_scores  = []
    box_classes = []
    out_boxes   = []
    out_scores  = []
    out_classes = []

    for i in range(len(anchors_mask)):
        sub_xy, sub_wh, sub_scores, sub_classes = \
            yolo_boxes_decode(outputs[i], anchors[anchors_mask[i]], input_shape)
        box_xy.append(np.reshape(sub_xy, [-1, 2]))
        box_wh.append(np.reshape(sub_wh, [-1, 2]))
        box_scores.append(np.reshape(sub_scores, [-1, 1]))
        box_classes.append(np.reshape(sub_classes, [-1, num_classes]))
    box_xy = np.concatenate(box_xy, axis=0)
    box_wh = np.concatenate(box_wh, axis=0)
    box_scores = np.concatenate(box_scores, axis=0)
    box_classes = np.concatenate(box_classes, axis=0)

    boxes = yolo_boxes_transform(box_xy, box_wh, input_shape, image_shape)
    box_scores = box_scores * box_classes
    mask = box_scores >= score_thresh

    for c in range(num_classes):
        class_boxes = boxes[mask[:, c]]
        class_box_scores = box_scores[:, c]
        class_box_scores = class_box_scores[mask[:, c]]
        nms_index = utils.nms_boxes(class_boxes, class_box_scores, max_boxes,
            iou_thresh, score_threshold=0.1)
        if len(nms_index) > 0:
            class_boxes = class_boxes[nms_index]
            class_box_scores = class_box_scores[nms_index]
            classes = np.ones_like(class_box_scores, 'int32') * c
            out_boxes.append(class_boxes)
            out_scores.append(class_box_scores)
            out_classes.append(classes)
    if len(out_boxes) > 0:
        out_boxes      = np.concatenate(out_boxes, axis=0)
        out_scores     = np.concatenate(out_scores, axis=0)
        out_classes    = np.concatenate(out_classes, axis=0)
    return out_boxes, out_scores, out_classes
首先是3个尺度下的输出后处理,调用yolo_boxes_decode定义如下
def yolo_boxes_decode(feature, anchors, num_classes, input_shape):
    grid_size = np.array(feature.shape[1:3])
    grid = utils.meshgrid(grid_size[1], grid_size[0])
    grid = np.expand_dims(np.stack(grid, axis=-1), axis=2)
    pred_xy, pred_wh, pred_obj, pred_cls = np.split(feature,
        (2, 4, 5), axis=-1)
    pred_xy = 2 * sigmoid_np(pred_xy) - 0.5
    pred_wh = (sigmoid_np(pred_wh)*2) ** 2
    pred_obj = sigmoid_np(pred_obj)
    pred_cls = sigmoid_np(pred_cls)
    box_xy = (pred_xy + grid.astype(np.float32)) / \
        grid_size[..., ::-1].astype(np.float32)
    box_wh = pred_wh * anchors / input_shape

    return box_xy, box_wh, pred_obj, pred_cls
将输出维度拆分为xy、wh、obj和cls,并将预测的网格坐标转换为真实坐标,obj和cls直接进行sigmoid运算
3个尺度的所有预测框进行合并,得到13x13x3+26x26x3+52x52x3个一维的xy、wh、scores和classes
然后调用yolo_boxes_transform将归一化的坐标转换为绝对坐标
def yolo_boxes_transform(box_xy, box_wh, input_shape, image_shape):
    #input_shape = np.cast(input_shape, np.dtype(box_xy))
    #image_shape = np.cast(image_shape, np.dtype(box_xy))
    box_mins    = box_xy - (box_wh / 2.)
    box_maxes   = box_xy + (box_wh / 2.)
    boxes  = np.concatenate([box_mins[..., 0:1], box_mins[..., 1:2],
        box_maxes[..., 0:1], box_maxes[..., 1:2]], axis=-1)
    boxes *= np.concatenate([image_shape, image_shape], axis=-1)
    return boxes
最后是一个非极大值抑制,将符合阈值要求的候选框提取出来
最后是根据预测框画矩形框
def draw_output(img, outputs, class_names):
boxes, objectness, classes, nums = outputs
wh = np.flip(img.shape[0:2], 0)
for i in range(nums):
x1y1 = tuple((np.array(boxes[i][0:2])).astype(np.int32))
x2y2 = tuple((np.array(boxes[i][2:4])).astype(np.int32))
img = cv2.rectangle(img, x1y1, x2y2, (255, 0, 0), 2)
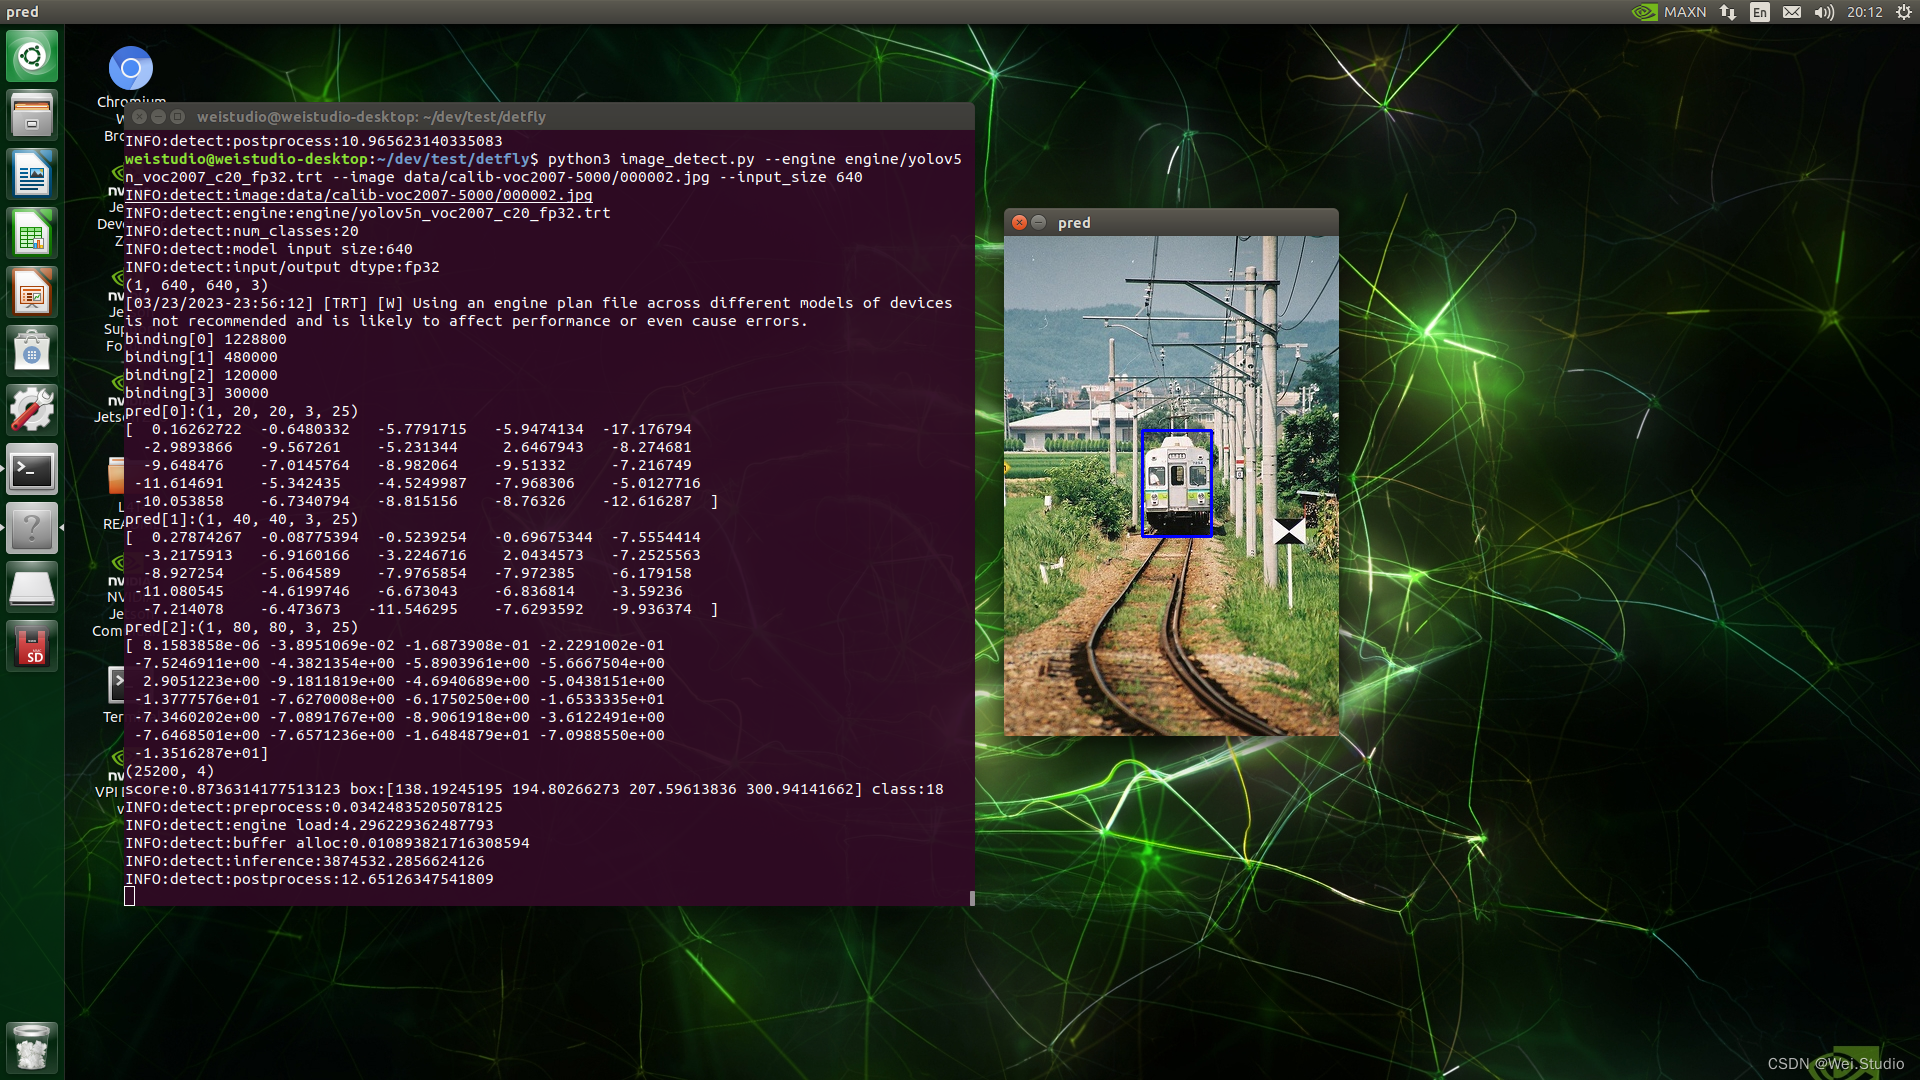
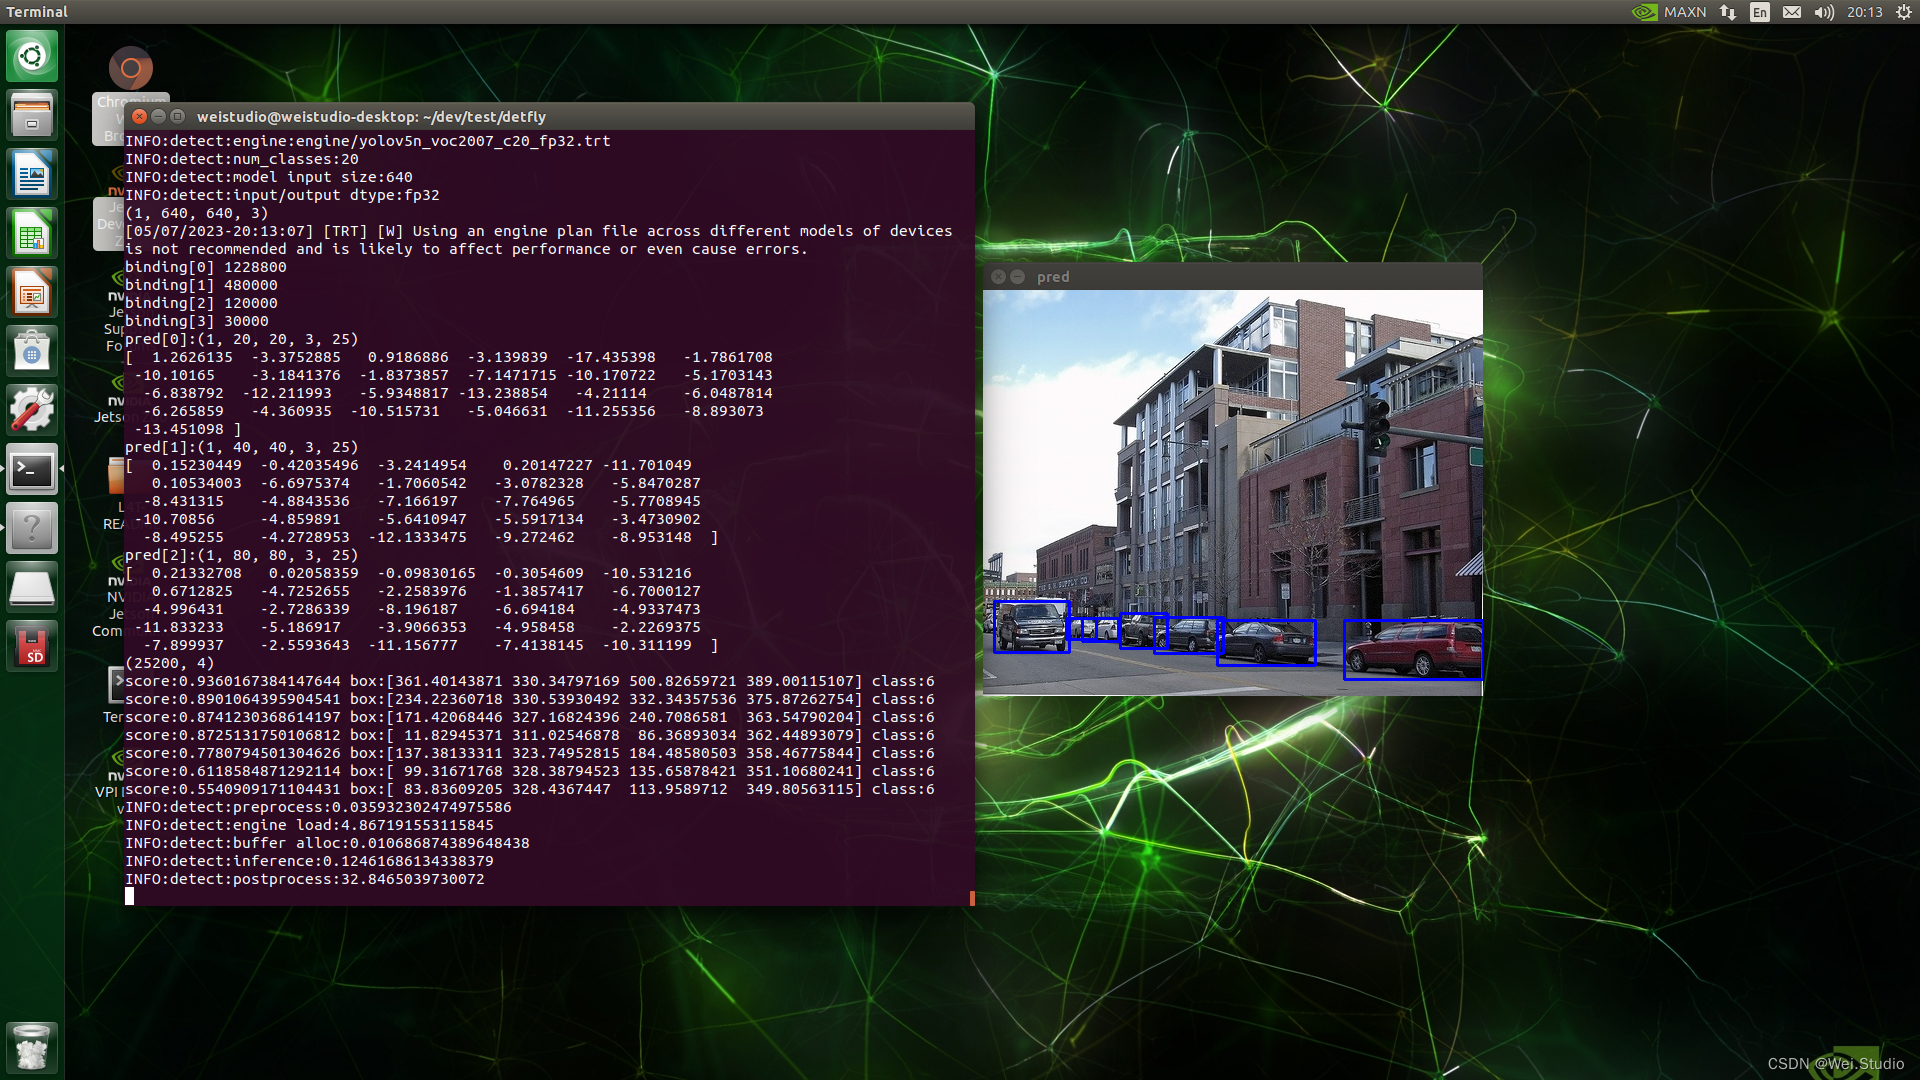
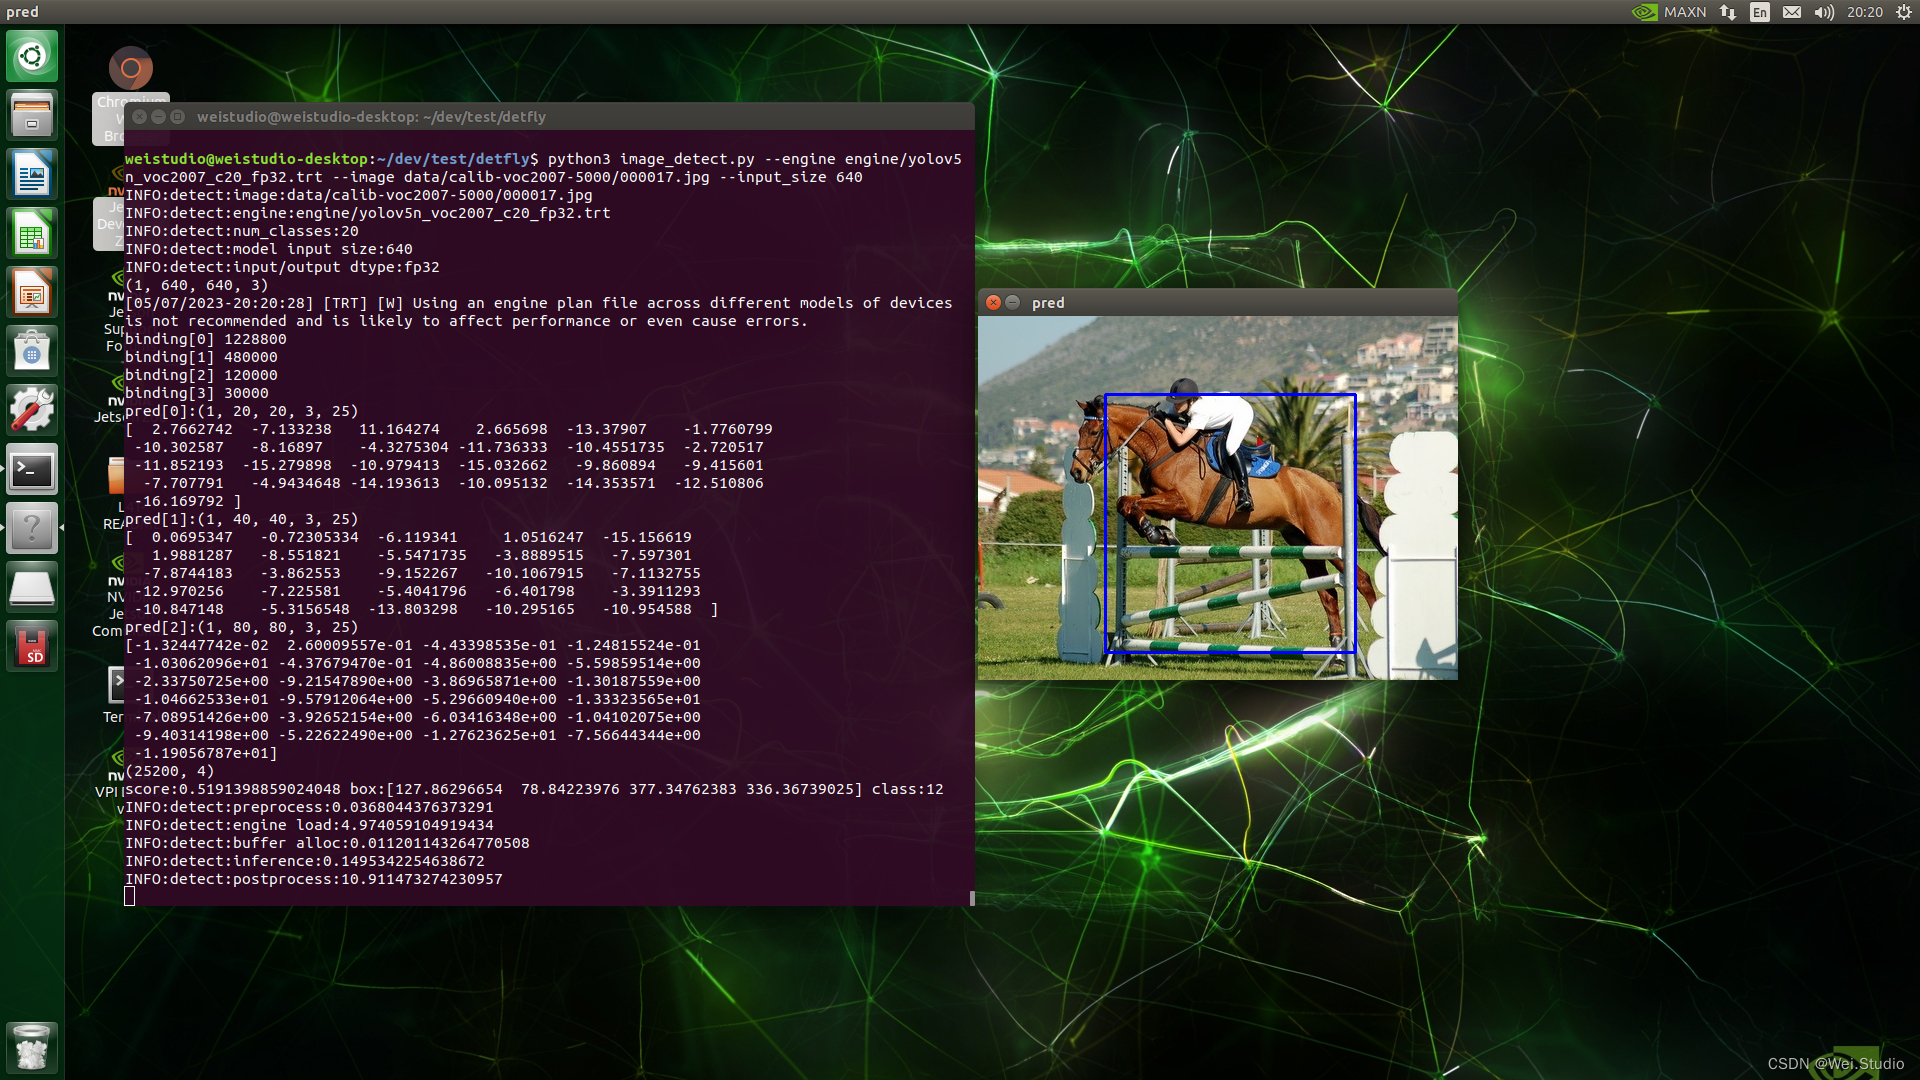
return img运行示例


 795
795

 被折叠的 条评论
为什么被折叠?
被折叠的 条评论
为什么被折叠?
 到【灌水乐园】发言


