


Hello World - for MCUs
As the setup of Qt for MCU can be a bit tricky, we will start with a Hello World like example to ensure that the toolchain works, and so that we can discuss the basic differences between Qt Quick Ultralite and standard Qt Quick.
由于Qt for MCU的设置可能有点棘手,我们将从一个类似Hello World的示例开始,以确保工具链正常工作,从而讨论Qt Quick Ultralite和标准Qt Quick之间的基本区别。
First up, we need to start by creating a Qt for MCUs project in Qt Creator to get a C++ entry point into the system. When working with Qt Quick Ultralite, we cannot use a common runtime such as qml. This is because Qt Quick Ultralite is translated into C++ together with optimized versions of all the assets. These are then built into a target executable. This means that there is no support for dynamic loading of QML and such - as there is no interpreter running on the target.
首先,我们需要在Qt Creator中创建一个Qt for MCUs项目,以获得C++进入系统的入口点。在使用Qt Quick Ultralite时,我们不能使用诸如qml这样的公共运行时。这是因为Qt Quick Ultralite被翻译成C++,连同所有资产的优化版本。然后,它们被内置到目标可执行文件中。这意味着不支持动态加载QML等,因为目标上没有运行解释器。

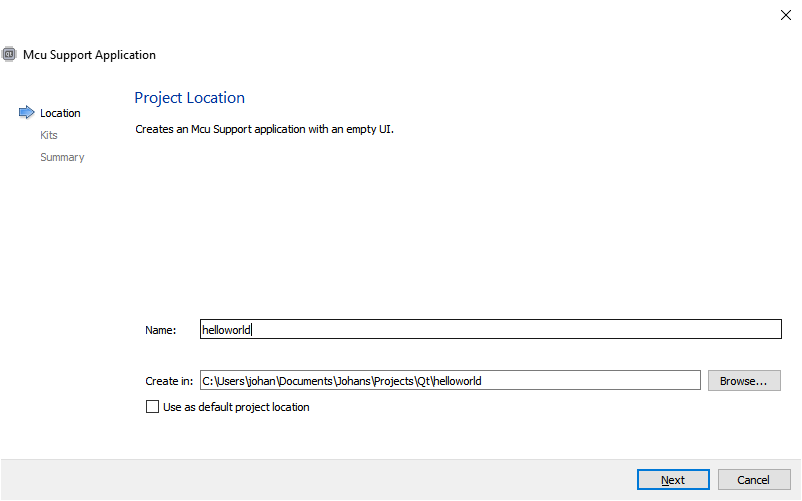
I call the project helloworld. Feel free to pick a name of your own. The only thing changing is the name of the entry-point QML-file of the project.
我把这个项目叫做helloworld。请随意选择自己的名字。唯一改变的是项目的入口点QML文件的名称。
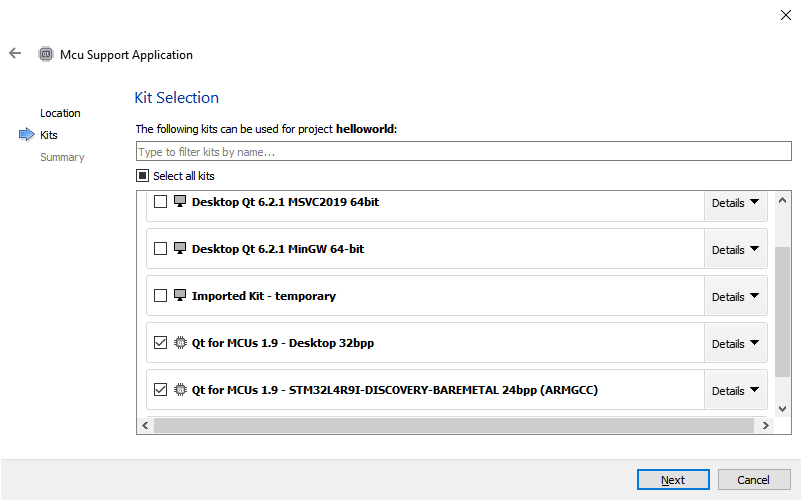
Also, make sure to pick the Qt for MCUs kits when creating your project.
此外,在创建项目时,请确保为Qt for MCUs套件选择。
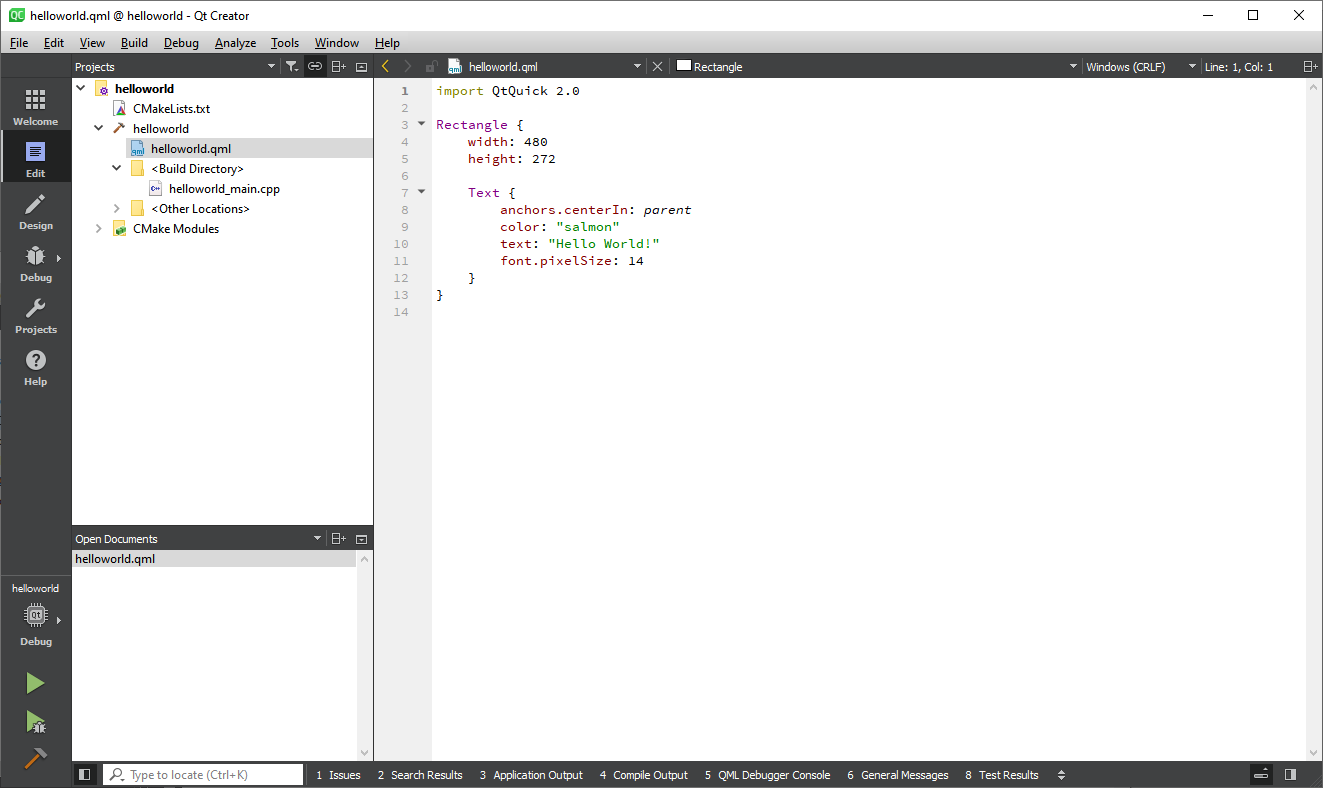
After a few more configuration pages, you will end up with a project as shown below.
在完成更多的配置页面后,您将得到一个项目,如下所示。
Once the basic project is setup, run the project on your desktop and ensure that you get a window like the one shown below.
基本项目设置完成后,在桌面上运行该项目,并确保获得如下所示的窗口。

Now that we know that the installation works, replace the QML in helloworld.qml with the code shown below. We will walk through this example line by line below, but first, build and run it for your Qt for MCU Desktop target. This should result in a window looking like the screenshot below the code.
既然我们知道安装工作正常,替换QML文件helloworld.qml,代码如下所示。我们将在下面逐行介绍这个示例,但首先,为您的Qt for MCU桌面目标构建并运行它。这将导致一个窗口看起来像代码下面的屏幕截图。
import QtQuick
import QtQuickUltralite.Extras

Rectangle {
    width: 480
    height: 272

    Rectangle {
        id: rect
        anchors.fill: parent
        anchors.margins: 60

        color: "orange"
        Behavior on color {
            ColorAnimation { duration: 400 }
        }

        MouseArea {
            anchors.fill: parent

            onClicked: {
                if (rect.color == "red")
                    rect.color = "orange";
                else
                    rect.color = "red";
            }
        }
    }

    StaticText {
        anchors.centerIn: parent
        color: "black"
        text: "Hello World!"
        font.pixelSize: 52
    }
}
Click the orange rectangle, and it fades to red. Click it again and it fades back to orange.
单击橙色矩形,它将淡入红色。再次点击它,它会变回橙色。

Now, let's have a look at the source code from a Qt Quick perspective and compare.
现在,让我们从Qt Quick的角度看一下源代码,并进行比较。
First up, Qt Quick Ultralight ignores the version numbers after import statements. This is supported in Qt Quick since Qt 6 too by leaving out the version number, so if you can manage without it and need compatibility, make sure to leave out the version number.
首先,Qt Quick Ultralight忽略导入语句后的版本号。这在Qt Quick中也得到了支持,因为Qt 6中省略了版本号,所以如果您可以在没有版本号的情况下进行管理,并且需要兼容性,请确保省略版本号。
import QtQuick
import QtQuickUltralite.Extras
In the root of our scene, we place a Rectangle. This is because Qt Quick Ultralite does not provide a default, white, background. By using a Rectangle as root, we ensure that we control the background color of the scene.
在场景的根部,我们放置一个矩形。这是因为Qt Quick Ultralite不提供默认的白色背景。通过使用矩形作为根,我们可以确保控制场景的背景色。
Rectangle {
    width: 480
    height: 272
The next part, the clickable Rectangle, is straight forward QML, with some Javascript bound to the onClicked event. Qt for MCUs has limited support for Javascript, so ensure to keep such scripts simple. You can read more about the specific limitations in the links at the end of this section.
下一部分,可点击矩形,是直接的QML,一些Javascript绑定到onClicked事件。Qt for MCUs对Javascript的支持有限,因此请确保这些脚本保持简单。您可以在本节末尾的链接中阅读更多有关特定限制的信息。
    Rectangle {
        id: rect
        anchors.fill: parent
        anchors.margins: 60

        color: "orange"
        Behavior on color {
            ColorAnimation { duration: 400 }
        }

        MouseArea {
            anchors.fill: parent

            onClicked: {
                if (rect.color == "red")
                    rect.color = "orange";
                else
                    rect.color = "red";
            }
        }
    }
Finally, the text is rendered using a StaticText element, which is a version of the Text element for static texts. This means that the text can be rendered once, or even pre-rendered, which can save a lot of resources on a small, MCU-based, system.
最后,使用StaticText元素呈现文本,该元素是文本元素Text的一个版本。这意味着文本可以渲染一次,甚至可以预渲染,这可以在基于MCU的小型系统上节省大量资源。
    StaticText {
        anchors.centerIn: parent
        color: "black"
        text: "Hello World!"
        font.pixelSize: 52
    }
}
In Qt Creator, you will notice that the you get warnings around the StaticText element. This is because Qt Creator assumes that you are working with Qt Quick. To make Qt Creator aware of Qt Quick Ultralite, you need to set the QML_IMPORT_PATH to the path of your Qt for MCUs compatibility module. You can do this in your CMakeLists.txt file, or in your project settings. The project settings for a standard Windows 10 install is shown below.
在Qt Creator中,您会注意到,在StaticText元素周围会出现警告。这是因为Qt Creator假设您正在使用Qt Quick。要使Qt Creator了解Qt Quick Ultralite,需要将QML_IMPORT_PATH设置为Qt for MCU兼容模块的路径。你可以在你的CMakeLists.txt文件中这样做。或在项目设置中。标准Windows 10安装的项目设置如下所示。

In addition to what has been stated above, there are more differences. For instance, the Qt Quick Ultralite Item class, and hence the Rectangle class, lacks a lot of properties that could be found in Qt Quick. For instance, the scale and rotation properties are missing. These are only available for specific elements such as Image, and there it is made available through the Rotation and Scale types instead of properties.
除了以上所述,还有更多的差异。例如,Qt Quick Ultralite项目类,以及矩形类,缺少Qt Quick中可以找到的许多属性。例如,缺少缩放scale和旋转rotation属性。这些元素仅适用于特定元素,例如图像Image,并且通过旋转Rotation和缩放Scale类型(而不是属性)使其可用。
Going beyond the eaxmple above, there are fewer QML elements in general in Qt Quick Ultralite, but the supported types is continously growing. The intention is that the provided types cover the use-cases of the intended target devices. You can read more about this and general compatibility issues in the links provided below.
除了上面的示例之外,Qt Quick Ultralite中的QML元素通常较少,但支持的类型在不断增长。目的是提供的类型涵盖预期目标设备的用例。在下面提供的链接中,您可以阅读更多关于此问题和一般兼容性问题的信息。
Links
链接
Further reading at qt.io:


 3345
3345


 被折叠的 条评论
为什么被折叠?
被折叠的 条评论
为什么被折叠?
 到【灌水乐园】发言


