


引言
本文将介绍如何使用 PyQt6 创建一个简单的绘图应用程序。这个应用程序实现了常用的绘图功能,如自由绘制、画直线、矩形和椭圆。此外,还提供了选择画笔颜色、调整画笔宽度、清空画布和导出图像的功能。
环境设置
首先,需要安装 PyQt6,可以使用以下命令进行安装:
pip install PyQt6
实现绘图板
绘图板是应用程序的核心部分,主要负责处理绘图逻辑。我们创建一个 DrawingBoard 类,继承自 QWidget,并在其中处理鼠标事件和绘图操作。
初始化绘图板
在 __init__ 方法中,我们初始化画布、画笔颜色、画笔宽度和绘图模式。
class DrawingBoard(QWidget):
    def __init__(self):
        super().__init__()
        self.image = QImage(self.size(), QImage.Format.Format_RGB32)
        self.image.fill(Qt.GlobalColor.white)
        self.penColor = Qt.GlobalColor.black
        self.penWidth = 2
        self.mode = DrawingMode.Pen
        self.tempImage = None
处理鼠标事件
通过重写 mousePressEvent、mouseMoveEvent 和 mouseReleaseEvent 方法,我们实现了自由绘制、画直线、矩形和椭圆的功能。
def mousePressEvent(self, event):
    if event.button() == Qt.MouseButton.LeftButton:
        self.drawing = True
        self.lastPoint = event.position().toPoint()

def mouseMoveEvent(self, event):
    if event.buttons() & Qt.MouseButton.LeftButton:
        currentPoint = event.position().toPoint()
        # 绘图逻辑

def mouseReleaseEvent(self, event):
    if event.button() == Qt.MouseButton.LeftButton and self.drawing:
        self.drawing = False
        # 完成绘图
绘制图像
我们使用 paintEvent 方法在窗口上绘制图像,并处理临时图像的绘制。
def paintEvent(self, event):
    canvasPainter = QPainter(self)
    canvasPainter.drawImage(self.rect(), self.image, self.image.rect())
    if self.tempImage:
        canvasPainter.drawImage(self.rect(), self.tempImage, self.tempImage.rect())
创建主窗口
主窗口负责整合所有控件,包括颜色选择、画笔宽度调整、绘图模式选择等。我们创建一个 MainWindow 类,继承自 QMainWindow。
初始化界面
在 initUI 方法中,我们创建并布局各种控件,如按钮、颜色选择器和画笔宽度选择器。
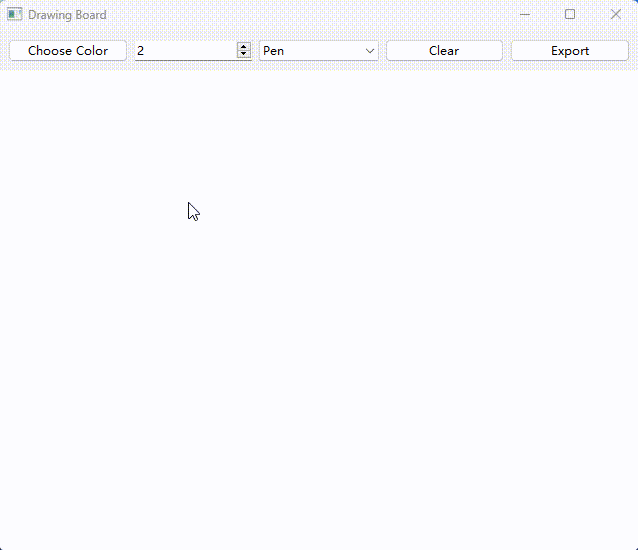
def initUI(self):
    self.setWindowTitle('Drawing Board')

    mainLayout = QVBoxLayout()
    buttonLayout = QHBoxLayout()

    colorButton = QPushButton('Choose Color')
    colorButton.clicked.connect(self.chooseColor)
    buttonLayout.addWidget(colorButton)

    self.widthSpinBox = QSpinBox()
    self.widthSpinBox.setValue(2)
    self.widthSpinBox.valueChanged.connect(self.changePenWidth)
    buttonLayout.addWidget(self.widthSpinBox)

    modeComboBox = QComboBox()
    modeComboBox.addItems(['Pen', 'Line', 'Rectangle', 'Ellipse'])
    modeComboBox.currentIndexChanged.connect(self.changeDrawingMode)
    buttonLayout.addWidget(modeComboBox)

    clearButton = QPushButton('Clear')
    clearButton.clicked.connect(self.drawingBoard.clear)
    buttonLayout.addWidget(clearButton)

    exportButton = QPushButton('Export')
    exportButton.clicked.connect(self.exportImage)
    buttonLayout.addWidget(exportButton)

    mainLayout.addLayout(buttonLayout)
    container = QWidget()
    container.setLayout(mainLayout)
    self.setMenuWidget(container)
选择颜色和调整画笔宽度
我们为颜色选择和画笔宽度调整功能添加槽函数:
def chooseColor(self):
    color = QColorDialog.getColor()
    if color.isValid():
        self.drawingBoard.setPenColor(color)

def changePenWidth(self):
    self.drawingBoard.setPenWidth(self.widthSpinBox.value())
导出图像
实现图像导出功能,允许用户将绘制的图像保存到本地:
def exportImage(self):
    filePath, _ = QFileDialog.getSaveFileName(self, "Save Image", "", "PNG(*.png);;JPEG(*.jpg *.jpeg);;All Files(*.*) ")
    if filePath:
        self.drawingBoard.exportImage(filePath)
启动应用程序
最后,我们编写主函数启动应用程序:
def main():
    app = QApplication(sys.argv)
    mainWindow = MainWindow()
    mainWindow.show()
    sys.exit(app.exec())

if __name__ == '__main__':
    main()
将上述代码整合到一个 Python 文件中,运行后你将看到一个简单的绘图应用程序。你可以选择颜色、调整画笔宽度、选择绘图模式、清空画布以及导出图像。
总结
通过本文,我们学习了如何使用 PyQt6 创建一个简单的绘图应用程序。该应用程序实现了基本的绘图功能,并提供了友好的用户界面。希望这能为你进一步开发更复杂的绘图应用程序提供一些启发。


 1107
1107


 被折叠的 条评论
为什么被折叠?
被折叠的 条评论
为什么被折叠?
 到【灌水乐园】发言


