


Instancing and Material Property Blocks
February 11, 2020
Table Of Contents
- Current State
- Changing Properties via Script
- Setting Material Property Blocks
- Making your Shader support Instancing
- Profiling
- Sources
Current State 🔗︎
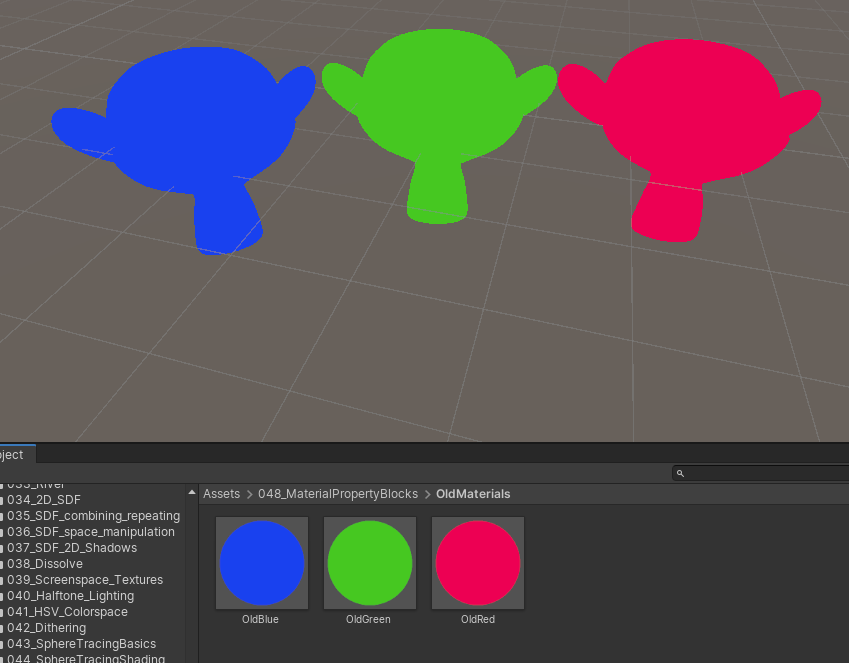
I’m going to go off a basic unlit shader in this tutorial. In all tutorials since that one we always set the properties at a “per material” basis. This allows us to do everything we ever need to do in theory, but depending on the circumstances it might also force us to use tons of different materials. This not only makes a scene harder to author, but can also significantly slow down your game as by default objects with different materials cannot be instanced together and switching drawcalls is one of the main performance sinks of rendering. Material property blocks (MPBs) allow us a way around that which we can use to change properties on a per object basis without
Important to mention here is that if you’re using one of Unity’s new scriptable render pipelines the performance slowdown might be way less and you can even make the performance worse by using property blocks. That’s because of the new SRP batcher which is able to batch models with different materials, but doesn’t support property block as far as I know (it’s better to read yourself into the current state of tech yourself and trying out what works better).
Changing Properties via Script 🔗︎
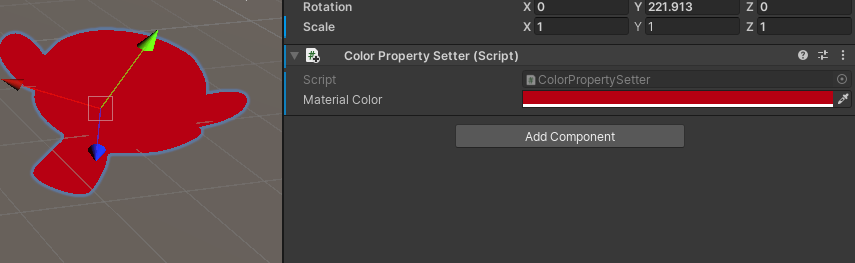
If we want to decouple some properties from the materials, we sadly can’t set them from the material inspector as that would modify all objects with that material. Instead we create a new C# script which will allow us to set our materials from there. In this instance we just add a public color field and set the _Color property of the shader every time any field is changed in the inspector, which is when the OnValidate method is called automatically.
using UnityEngine;

public class ColorPropertySetter : MonoBehaviour
{
    public Color MaterialColor;

    // OnValidate is called in the editor after the component is edited
    void OnValidate()
    {
        //Get a renderer component either of the own gameobject or of a child
        Renderer renderer = GetComponentInChildren<Renderer>();
        //get the material of the renderer
        Material mat = renderer.material;
        //set the color property
        mat.SetColor("_Color", MaterialColor);
        //reassign the material to the renderer
        renderer.material = mat;
    }
}
With this setup we can change the properties via a script on a per object basis. What unity hides from us and what makes this very bad is that by using the .material field of the renderer like this, we create a new Material every time we want to modify it. Unity even gives us a little warning to nevr do this in editor code. To get the material without cloning the existing one, we have to use the .sharedMaterial property instead. When we use this property, we also don’t have to reassign the material in the last line of the function because we’re getting a real reference instead of just a copy.
If you used the previous version of the script, be sure to apply the same material to all copies again since the renderers are using the clone materials we don’t want now.
// OnValidate is called in the editor after the component is edited
void OnValidate()
{
    //Get a renderer component either of the own gameobject or of a child
    Renderer renderer = GetComponentInChildren<Renderer>();
    //get the material of the renderer
    Material mat = renderer.sharedMaterial;
    //set the color property
    mat.SetColor("_Color", MaterialColor);
}
Now editing the material via the script is the same as editing it via the material inspector, with the same disadvantages. You can use this knowledge to change materials whenever you want, you can clone a material by passing a new material a old one to clone like Material clone = new Material(oldMaterial);. You can do this in runtime, at awake and if you want a complex system without needing the performance benefits (for example when using the SRP batcher) this should be a good place to start. But to change materials on a per object basis without cloning them, we still need material property blocks.
Setting Material Property Blocks 🔗︎
To pass MPBs to shaders, we first have to create a representation of them in C#. It’s generally recommended to create them once and reuse it every frame. I check whether a property block already exists at the start of the function and create a new one if it doesn’t, if you’re only changing the propertyblock in the game and not in the editor creating it during the Awake function is probably more reasonable. With the MPB created we can use the same functions as we did on the material on the propertyblock, after setting the properties we apply it to the renderer via the SetPropertyBlock function.
using UnityEngine;

public class ColorPropertySetter : MonoBehaviour
{
    //The color of the object
    public Color MaterialColor;

    //The material property block we pass to the GPU
    private MaterialPropertyBlock propertyBlock;

    // OnValidate is called in the editor after the component is edited
    void OnValidate()
    {
        //create propertyblock only if none exists
        if (propertyBlock == null)
            propertyBlock = new MaterialPropertyBlock();
        //Get a renderer component either of the own gameobject or of a child
        Renderer renderer = GetComponentInChildren<Renderer>();
        //set the color property
        propertyBlock.SetColor("_Color", MaterialColor);
        //apply propertyBlock to renderer
        renderer.SetPropertyBlock(propertyBlock);
    }
}
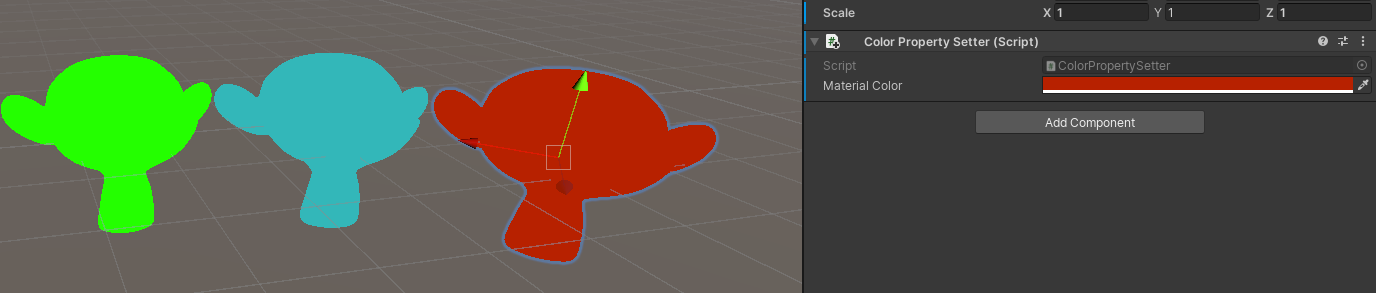
With this we are setting the MPBs correctly and we can see 3 models with the same material, but different colors. Sadly our material doesn’t support instancing yet, so we don’t get the performance benefits of using material property blocks and still have to pay with one drawcall per unique MPB.
Making your Shader support Instancing 🔗︎
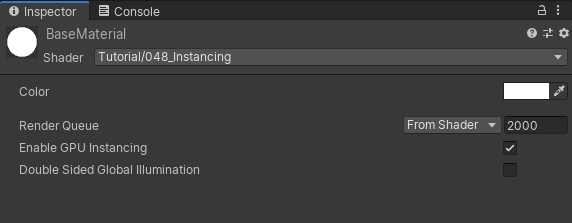
First we have to tell Unity that the shader is able to be instanced, to do this we add the line #pragma multi_compile_instancing next to the #pragma declarations for the shader functions, this makes the material inspector show the “Enable GPU Instancing” option which we want to enable. In the case of surface shaders this shouldn’t be needed.
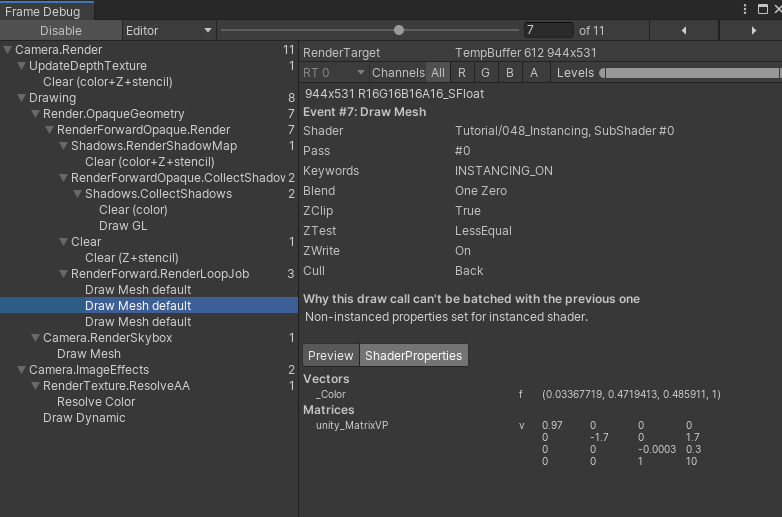
If you don’t use MaterialPropertyBlocks this is all you need to do to enable instancing, and if you’re using hundreds of thousands of instances of the same model, it can save you a good bit of performance. If we look into the frame debugger we can see that using MaterialPropertyBlocks currently breaks our instancing though because the properties aren’t setup for instancing yet. (You can find the frame debugger under Window > Analysis > Frame Debugger)
First we have to set up the instance id. In Unity theres macros for that, so we’ll use those. We add UNITY_VERTEX_INPUT_INSTANCE_ID to both the appdata struct as well as the v2f struct. Then in the vertex function we use UNITY_SETUP_INSTANCE_ID(input_stuct) to do the setup in the appdata input stuct and then pass the ID to the vertex to fragment struct for use in the fragment shader via the UNITY_TRANSFER_INSTANCE_ID(input_stuct, output_stuct) macro. In the fragment shader we add another UNITY_SETUP_INSTANCE_ID to also do the setup there.
With this work done, we can actually look at the properties to convert. For this we have to add a code block in our hlsl area, but outside of any functions thats framed by the two macros UNITY_INSTANCING_BUFFER_START(name) and UNITY_INSTANCING_BUFFER_END(name). Inside this block we can then define variables via the UNITY_DEFINE_INSTANCED_PROP(datatype, variable_name) macro. After that is also done, we can finally access the properties of the MPB via the UNITY_ACCESS_INSTANCED_PROP(buffer_name, variable_name) macro.
I also added the [PerRendererData] attribute to the _Color property in the property definitions at the top, though this should only make it so the property isn’t shown in the regular material inspector where it doesn’t have any effect anymore when a MPB is used.
With all of this done, the shader looks like this:
Shader "Tutorial/048_Instancing" {
  //show values to edit in inspector
  Properties{
    [PerRendererData] _Color ("Color", Color) = (0, 0, 0, 1)
  }

  SubShader{
    //the material is completely non-transparent and is rendered at the same time as the other opaque geometry
    Tags{ "RenderType"="Opaque" "Queue"="Geometry"}

    Pass{
      CGPROGRAM
      //allow instancing
      #pragma multi_compile_instancing

      //shader functions
      #pragma vertex vert
      #pragma fragment frag

      //use unity shader library
      #include "UnityCG.cginc"

      //per vertex data that comes from the model/parameters
      struct appdata{
        float4 vertex : POSITION;
        UNITY_VERTEX_INPUT_INSTANCE_ID
      };

      //per vertex data that gets passed from the vertex to the fragment function
      struct v2f{
        float4 position : SV_POSITION;
        UNITY_VERTEX_INPUT_INSTANCE_ID
      };

      UNITY_INSTANCING_BUFFER_START(Props)
        UNITY_DEFINE_INSTANCED_PROP(float4, _Color)
      UNITY_INSTANCING_BUFFER_END(Props)

      v2f vert(appdata v){
        v2f o;

        //setup instance id
        UNITY_SETUP_INSTANCE_ID(v);
        UNITY_TRANSFER_INSTANCE_ID(v, o);

        //calculate the position in clip space to render the object
        o.position = UnityObjectToClipPos(v.vertex);
        return o;
      }

      fixed4 frag(v2f i) : SV_TARGET{
          //setup instance id
          UNITY_SETUP_INSTANCE_ID(i);
          //get _Color Property from buffer
          fixed4 color = UNITY_ACCESS_INSTANCED_PROP(Props, _Color);
        //Return the color the Object is rendered in
        return color;
      }

      ENDCG
    }
  }
}
And when checking the frame debugger we can actually see that all of our objects are drawn in a single drawcall.

Profiling 🔗︎
If you’re asking yourself what the use of all of this was apart from some abstract concept of “drawcalls” I made a little test. Lots of small meshes with small different changes like color are a best case szenario for instancing, but it can show you what instancing is capable of in theory.

For profiling I used a new script which assigns a random color instead of a authored one:
using UnityEngine;

public class RandomColorPropertySetter : MonoBehaviour
{
    //The material property block we pass to the GPU
    MaterialPropertyBlock propertyBlock;

    // OnValidate is called in the editor after the component is edited
    void OnValidate()
    {
        //create propertyblock only if none exists
        if (propertyBlock == null)
            propertyBlock = new MaterialPropertyBlock();
        //Get a renderer component either of the own gameobject or of a child
        Renderer renderer = GetComponentInChildren<Renderer>();
        //set the color property
        propertyBlock.SetColor("_Color", GetRandomColor());
        //apply propertyBlock to renderer
        renderer.SetPropertyBlock(propertyBlock);
    }

    static Color GetRandomColor()
    {
        return Color.HSVToRGB(Random.value, 1, .9f);
    }
}
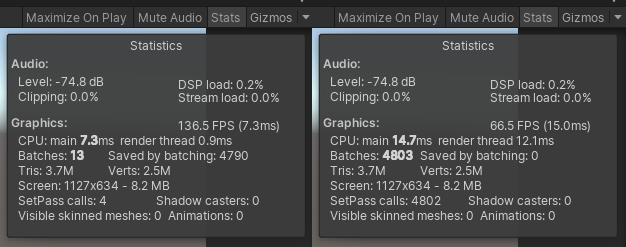
With 4800 Spheres with our newly written shader plus this random color script the whole screen renders with 13 batches and takes about 7-8ms on the CPU while taking 1.1ms on the GPU (That means the frame takes 7-8ms and the program is “CPU bound” meaning optimisations should focon on how to lessen the CPU load). Taking the CPU into consideration is fair here because the CPU has to figure out which meshes can be batches each frame and dispatch the data. When disabling instancing the batches jump up to 4803 taking around 14-15ms on the CPU and 11ms on the GPU, what I consider a clear improvement. As always if you have performance critical things in your own application theres no magic bullet, the best thing you can have is being aware of the possibilities and trying all of them and seeing the advantages and disadvantages for your use case.
Sources 🔗︎
using UnityEngine;

public class ColorPropertySetter : MonoBehaviour
{
    //The color of the object
    public Color MaterialColor;

    //The material property block we pass to the GPU
    private MaterialPropertyBlock propertyBlock;

    // OnValidate is called in the editor after the component is edited
    void OnValidate()
    {
        //create propertyblock only if none exists
        if (propertyBlock == null)
            propertyBlock = new MaterialPropertyBlock();
        //Get a renderer component either of the own gameobject or of a child
        Renderer renderer = GetComponentInChildren<Renderer>();
        //set the color property
        propertyBlock.SetColor("_Color", MaterialColor);
        //apply propertyBlock to renderer
        renderer.SetPropertyBlock(propertyBlock);
    }
}
Shader "Tutorial/048_Instancing" {
	//show values to edit in inspector
	Properties{
		[PerRendererData] _Color ("Color", Color) = (0, 0, 0, 1)
	}

	SubShader{
		//the material is completely non-transparent and is rendered at the same time as the other opaque geometry
		Tags{ "RenderType"="Opaque" "Queue"="Geometry"}

		Pass{
			CGPROGRAM
			//allow instancing
			#pragma multi_compile_instancing

            //shader functions
			#pragma vertex vert
			#pragma fragment frag

			//use unity shader library
			#include "UnityCG.cginc"

            //per vertex data that comes from the model/parameters
			struct appdata{
				float4 vertex : POSITION;
				UNITY_VERTEX_INPUT_INSTANCE_ID
			};

            //per vertex data that gets passed from the vertex to the fragment function
			struct v2f{
				float4 position : SV_POSITION;
				UNITY_VERTEX_INPUT_INSTANCE_ID
			};

			UNITY_INSTANCING_BUFFER_START(Props)
                UNITY_DEFINE_INSTANCED_PROP(float4, _Color)
            UNITY_INSTANCING_BUFFER_END(Props)

			v2f vert(appdata v){
				v2f o;

				//setup instance id
                UNITY_SETUP_INSTANCE_ID(v);
                UNITY_TRANSFER_INSTANCE_ID(v, o);

				//calculate the position in clip space to render the object
				o.position = UnityObjectToClipPos(v.vertex);
				return o;
			}

			fixed4 frag(v2f i) : SV_TARGET{
			    //setup instance id
                UNITY_SETUP_INSTANCE_ID(i);
			    //get _Color Property from buffer
			    fixed4 color = UNITY_ACCESS_INSTANCED_PROP(Props, _Color);
				//Return the color the Object is rendered in
				return color;
			}

			ENDCG
		}
	}
}
I hope you enjoyed my tutorial ✨. If you want to support me further feel free to follow me on twitter, throw me a one-time donation via ko-fi or support me on patreon (I try to put updates also there, but I fail most of the time, bear with me 💖).
转载地址:https://www.ronja-tutorials.com/post/048-material-property-blocks/#current-state


 6672
6672


 被折叠的 条评论
为什么被折叠?
被折叠的 条评论
为什么被折叠?
 到【灌水乐园】发言


