


wordpress表单调用
Anyone running an online business will know the importance of offering visitors (read: potential customers) a seamless checkout experience. Aside from your sales copy, it’s the single most important means of generating direct revenue for your online business.
任何经营在线业务的人都会知道为访问者(阅读:潜在客户)提供无缝结帐体验的重要性。 除了销售副本,它是为在线业务产生直接收入的最重要的单一方法。
Out of the box, WordPress doesn’t give you the option to create forms, this will require the installation of a plugin.
开箱即用,WordPress没有为您提供创建表单的选项,这需要安装插件。
In this tutorial, we will be creating a simple order form in WordPress using the Gravity Forms plugin which is commercially available for around $39 for an individual license and up to $199 for a developer license.
在本教程中,我们将使用Gravity Forms插件在WordPress中创建一个简单的订单表单,该插件在商业上的售价为单个许可证39美元,开发者许可证199美元。
However, in the interest of impartiality, I’d like to point out there are several other free and almost free solutions available which all have their advantages and disadvantages compared to Gravity Forms. Some of these include:
但是,为了公正起见,我想指出还有几种其他的免费和几乎免费的解决方案,与重力形式相比,它们都有优点和缺点。 其中一些包括:
Ninja Forms is one of the main competitors to Gravity Forms and is free for the base version. However, if you want additional functionality, such as PayPal checkout and MailChimp/AWeber options, you could be paying around $199 for the add-ons.
Ninja Forms是Gravity Forms的主要竞争对手之一,基本版本免费。 但是,如果您需要其他功能,例如PayPal结帐和MailChimp / AWeber选项,则可能需要为这些附件支付199美元左右。
WordPress Form Manger is another popular, and completely free option. However, it has very limited functionality compared to the paid versions and is suitable for those looking to implement the simplest forms.
WordPress表单管理器是另一个受欢迎且完全免费的选项。 但是,与付费版本相比,它的功能非常有限,适合希望实现最简单形式的用户。
Form Maker has a free version which limits you to only five fields in your form. To have full functionality, including a PayPal option, you’ll have to buy a licence. It’s still one of the cheaper commercial form plugins available for WordPress, but it doesn’t have near the same amount of developer options as Ninja Forms or Gravity Forms.
表格制作工具有一个免费版本,可将您的表格限制为五个字段。 要拥有包括PayPal选项在内的全部功能,您必须购买许可证。 它仍然是可用于WordPress的更便宜的商业表单插件之一,但是它没有与Ninja Forms或Gravity Forms差不多的开发人员选项。
Formidable is another premium form plugin, it offers many of the features of the other form plugins.
强大是另一个高级表单插件,它提供了其他表单插件的许多功能。
Contact Form 7 is one of the most popular of the true free form plugins, with a nice range of extensions.
Contact Form 7是最流行的真正的自由格式插件之一,具有一系列扩展。
Wufoo Shortcode Integration is a good option for users of the Wufoo form builder web application.
Wufoo短代码集成对于Wufoo表单构建器Web应用程序的用户来说是一个不错的选择。
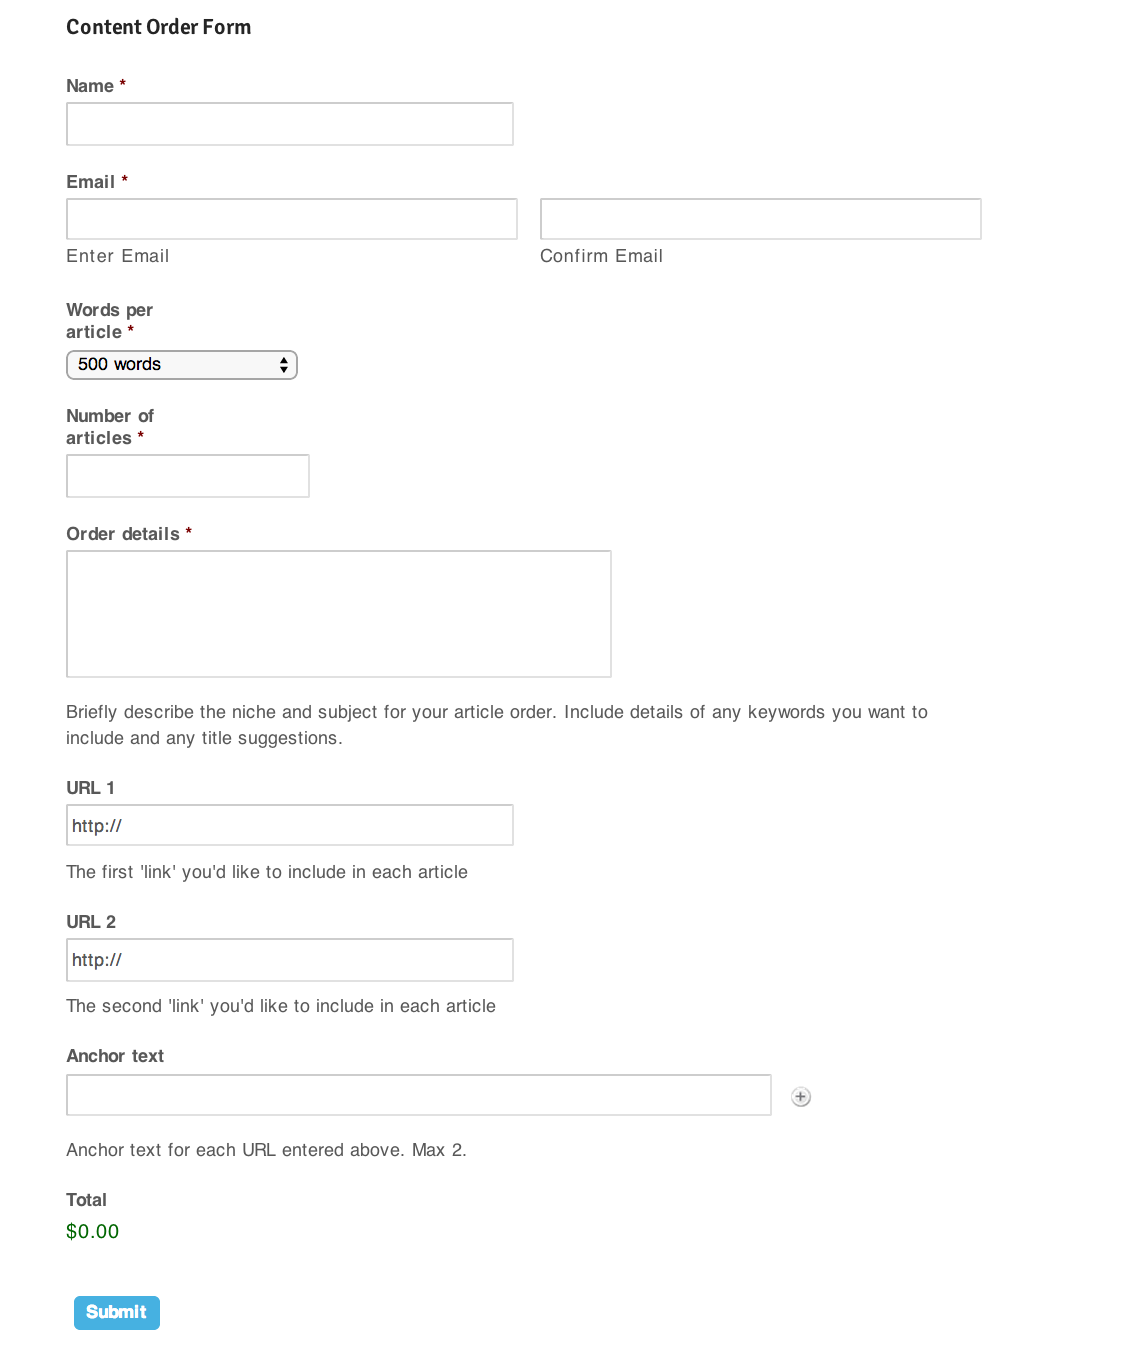
Whatever option you choose will depend on the specific product or service you’re selling on your website and the types of fields you need for your customers. For my purposes, I needed a form for a content writing business I’ve been developing, called WordsExpress. The business sells ready-made articles for internet marketers. This requires a user to input fields relating to length of article, number of articles, subject and various keyword and URL options.
您选择的任何选项将取决于您在网站上出售的特定产品或服务以及客户所需的字段类型。 出于我的目的,我需要一个用于开发内容写作业务的表格,称为WordsExpress。 该企业为互联网营销商销售现成的商品。 这要求用户输入与文章的长度,文章的数量,主题以及各种关键字和URL选项有关的字段。
You can see the finished form below:
您可以在下面看到完成的表格:
Now you know what we’ll be creating, let’s get started.
现在您知道了我们将要创建的内容,让我们开始吧。
Once you’ve installed the Gravity Forms plugin, in your WordPress Dashboard in the left menu, you’ll see a new selection available called ‘Forms’.
安装Gravity Forms插件后,在左侧菜单的WordPress仪表盘中,您会看到一个名为“ Forms”的新选择。
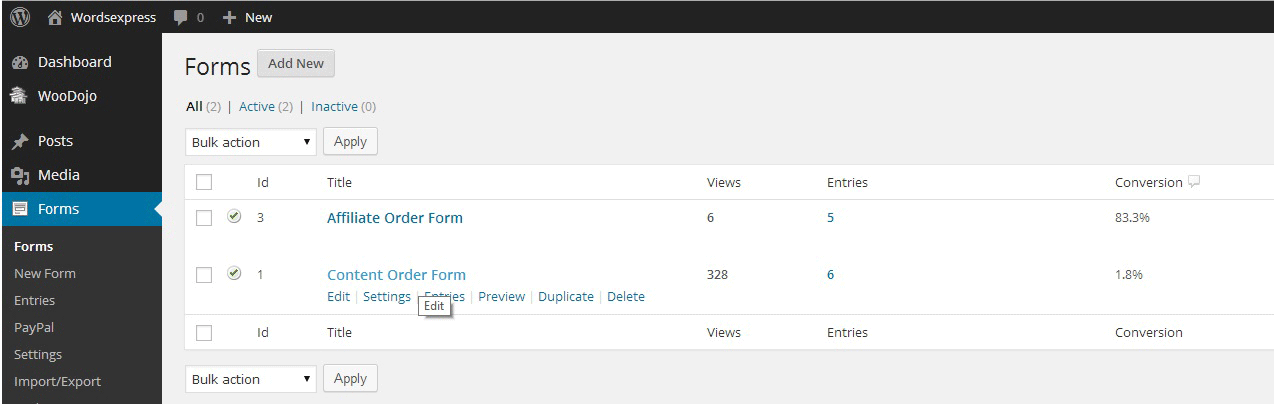
Inside the Forms menu, click ‘Add New’. In the box that pops up, write a title for your form, in this case ‘Content Order Form’. You do not need to enter a description, but if you do, it will appear as text under the title when you publish the form.
在“表单”菜单中,单击“添加新的”。 在弹出的框中,为表格填写标题,在本例中为“内容订购表格”。 您不需要输入描述,但是如果您输入了描述,则在发布表单时该描述将显示为标题下的文本。
Once you’ve created the form, you can start building it field by field. Below is the version used on my site.
创建表单后,即可开始逐字段构建表单。 以下是我网站上使用的版本。
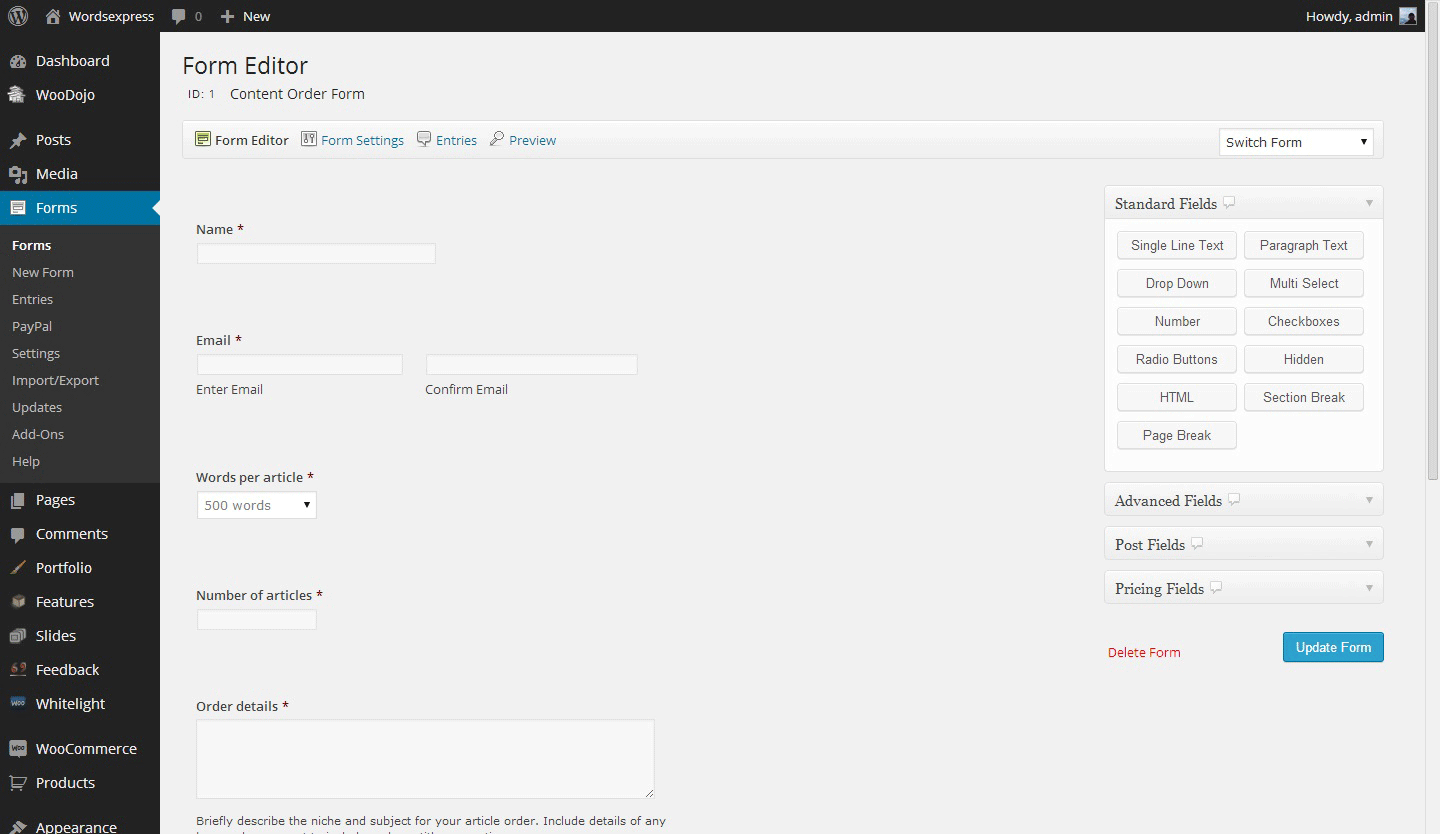
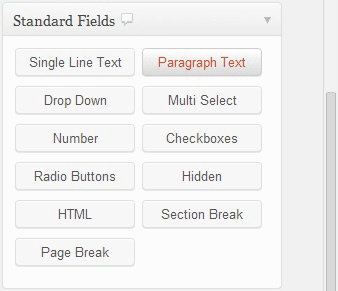
The first field we need is the name field. You can create this simply by selecting the ‘Single Line Text’ from the ‘Standard Fields’ options on the right hand side. However, Gravity Forms has an ‘Advanced Fields’ option called ‘Name’ which creates a nifty name field with space for both the first and last name.
我们需要的第一个字段是名称字段。 您可以通过从右侧的“标准字段”选项中选择“单行文本”来简单地创建此文本。 但是,Gravity Forms具有一个名为“ Name”的“ Advanced Fields”选项,该选项可创建一个漂亮的名称字段,并在名称和姓氏之间留有空格。
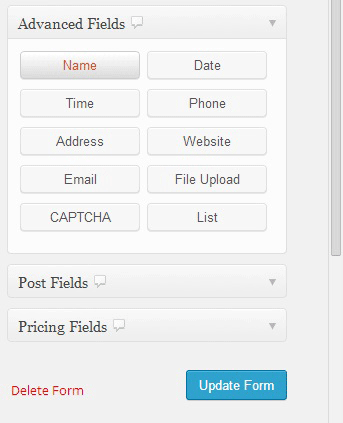
When selected, this should insert the ‘Name’ field at the top of the form. We want to make this a required field, so click on the small down arrow in the top right hand corner of this newly added field.
选中后,应在表单顶部插入“名称”字段。 我们希望将此字段设为必填字段,因此请单击此新添加的字段右上角的向下小箭头。

Leave the ‘Field Label’ as ‘Name’ and at the bottom, check ‘Required’ to make this a required option for visitors to complete. You have a similar option for ‘Email’, via the ‘Advanced Fields’ menu, which will automatically insert an email field. The email field, like the others, has an edit menu which we’ll use to add a ‘Confirm Email’ option. Once you’ve inserted the email field, click on the small down arrow in the top right hand corner of this newly added field.
将“字段标签”保留为“名称”,并在底部选中“必填”,以使此选项成为访问者必须填写的选项。 您可以通过“高级字段”菜单为“电子邮件”提供类似的选项,该选项将自动插入电子邮件字段。 电子邮件字段与其他字段一样,具有一个编辑菜单,我们将使用该菜单添加“确认电子邮件”选项。 插入电子邮件字段后,单击此新添加字段右上角的向下小箭头。
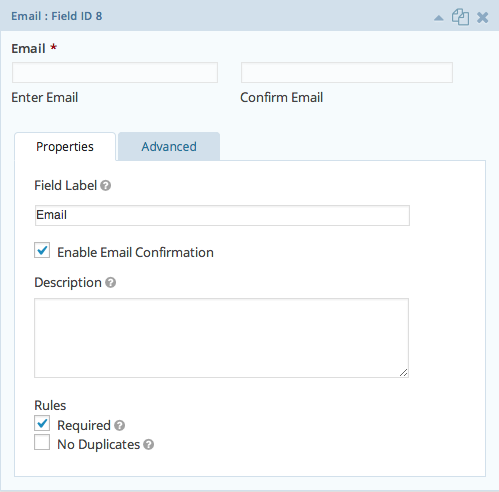
In the email edit box, we only need to check the ‘Enable Email Confirmation’ option and the ‘Required’ option.
在电子邮件编辑框中,我们只需要选中“启用电子邮件确认”选项和“必需”选项。
Now we want to begin creating the options for customers to choose and customise the product they want to buy from the site. For my site, an article writing business, this means choosing the length of the article and the number of articles. Gravity Forms has specific options for creating product selections which allows you to calculate the values between two or more fields and display the total cost to the user.
现在,我们要开始为客户创建选项,以便客户选择和自定义要从站点购买的产品。 对于我的网站,这是一篇文章写作业务,这意味着选择文章的长度和文章的数量。 Gravity Forms具有用于创建产品选择的特定选项,允许您计算两个或多个字段之间的值并向用户显示总成本。
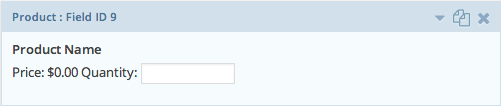
In the right hand side, select the ‘Pricing Fields’ menu and click ‘Product’.
在右侧,选择“定价字段”菜单,然后单击“产品”。

This will create the default product field for the form which we want to edit.
这将为我们要编辑的表单创建默认产品字段。
We need to make this specific to the content writing business which has options to produce 500 word articles and 300 word articles. For that reason, we’ll name the field ‘Words per article’ to make it clear to the user, and we’ll also choose ‘Drop Down’; from the field type options available, since there are two product variations for users to choose from. There are also other standard form components should they be more suitable for your project.
我们需要专门针对内容写作业务,该业务可以选择生成500个单词文章和300个单词文章。 因此,我们将字段“每篇文章的单词数”命名为便于用户理解,并且还选择“下拉”。 从可用的字段类型选项中选择,因为有两种产品可供用户选择。 如果它们更适合您的项目,则还有其他标准表单组件。
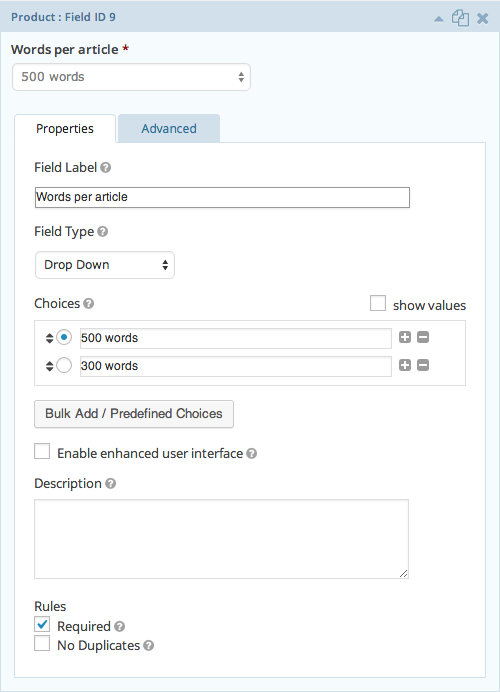
Once you select ‘Drop Down’ you can choose a name for the two product options – in this case, 500 words and 300 words – and select a price for both options. We’ll also check the left circle on the 500 words option to make this the default value. Finally, we’ll check the ‘Required’ option to make it a required field.
选择“下拉”后,您可以为两个产品选项(在这种情况下为500个单词和300个单词)选择一个名称,并为两个选项选择一个价格。 我们还将检查500个单词选项的左圆,将其设置为默认值。 最后,我们将选中“必填”选项,以使其成为必填字段。
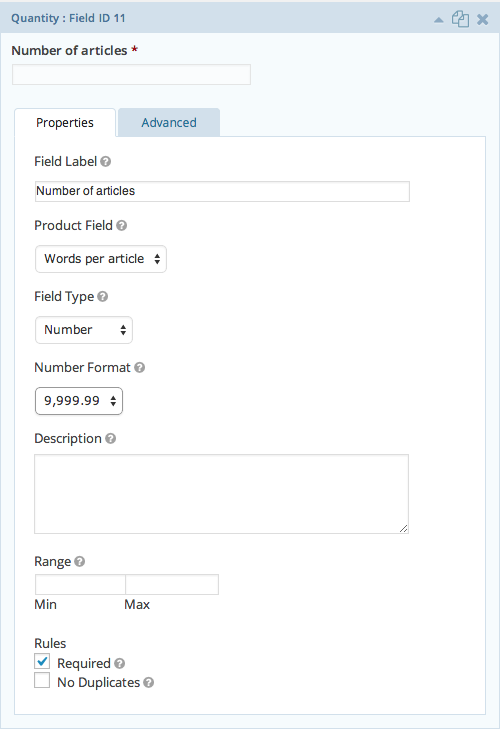
The next field we need is for the quantity of articles. This is easily done by selecting ‘Quantity’ in the ‘Pricing Fields’ menu, allowing us to use this as a multiplier for the products option above and producing a total. Name this field ‘Number of articles’ and make it required.
我们需要的下一个字段是商品数量。 只需在“定价字段”菜单中选择“数量”,即可轻松完成此操作,使我们可以将其用作上面乘积选项的乘数并产生总计。 将此字段命名为“文章数”,并将其为必填字段。
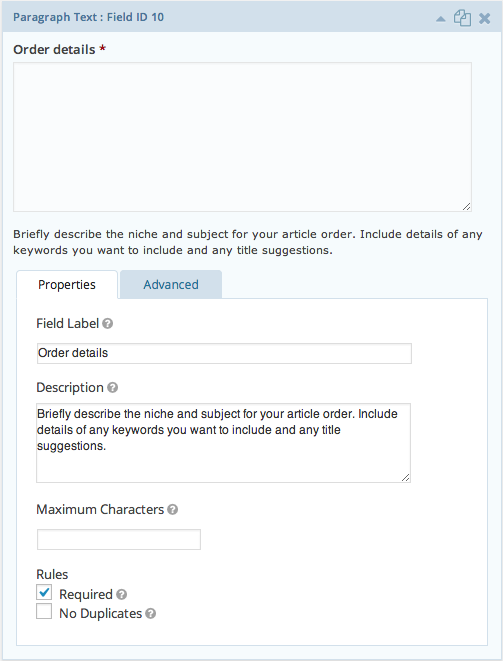
Finally, we need the customer to input details of their order, regarding the subject of the articles they require as well as any URL and anchor text options they want to include. This process should be simple. The first ‘Order details’ field is created using the ‘Paragraph Text’ field option in the ‘Standard Fields’ menu on the right.
最后,我们需要客户输入订单详细信息,涉及他们需要的文章主题,以及他们想要包括的任何URL和锚文本选项。 这个过程应该很简单。 使用右侧“标准字段”菜单中的“段落文本”字段选项创建第一个“订单明细”字段。
Name this field ‘Order details’ and make it required. This particular field will require some explanation to the user, as the title is a little ambiguous. For this, we’ll fill in the ‘Description’ box for this paragraph text field we just created. Describe exactly what you would like the user to enter here.
将此字段命名为“订单明细”,并使其必填。 由于标题有点模棱两可,因此该特定字段将需要对用户进行一些解释。 为此,我们将在刚创建的此段落文本字段中填写“描述”框。 确切描述您希望用户在此处输入的内容。
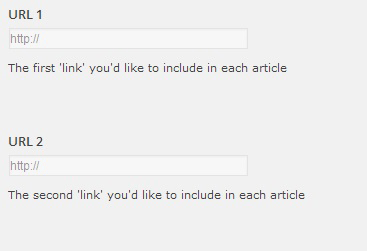
The final two options will allow the user to enter up to two URLs to include in their articles. The ‘Advanced’ field menu allows us to select the ‘Website’ option which neatly constricts the user to entering a web address, and automatically adds the ‘http://’ prefix. We’ll create two of these and name them ‘URL 1’ and ‘URL 2’ and add a description. We don’t need to make this required.
最后两个选项将允许用户输入最多两个URL,以包括在他们的文章中。 “高级”字段菜单使我们可以选择“网站”选项,该选项完全限制用户输入网址,并自动添加“ http://”前缀。 我们将创建其中两个,并将其命名为“ URL 1”和“ URL 2”,并添加描述。 我们不需要这样做。
Next, we’ll give the user the option to add up to two anchor texts. We want to be flexible with this, allowing the user to add and subtract their anchor texts at will. For this we’ll use the ‘List’ option in the ‘Advanced Fields’ menu.
接下来,我们将为用户提供添加两个锚文本的选项。 我们希望对此保持灵活性,允许用户随意添加和减去其锚文本。 为此,我们将使用“高级字段”菜单中的“列表”选项。
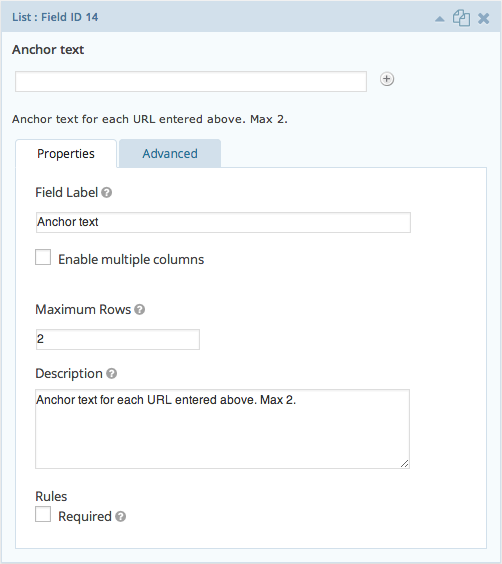
Call this field ‘Anchor text’ and choose ‘2’ as the number of rows (to correspond to the two URL options), and write this information in the ‘Description’ box. Again, leave the ‘Required’ option unchecked as this should be optional.
将该字段称为“锚文本”,并选择“ 2”作为行数(以对应于两个URL选项),然后将此信息写在“说明”框中。 同样,请不要选中“必需”选项,因为这应该是可选的。
Finally, you want to be able to calculate the total cost of their order and present this to the user. This is easily done in Gravity Forms in the ‘Pricing Fields’ menu by selecting ‘Total’.
最后,您希望能够计算其订单的总成本并将其呈现给用户。 通过选择“总计”,可以在“定价字段”菜单中的“重力形式”中轻松完成此操作。
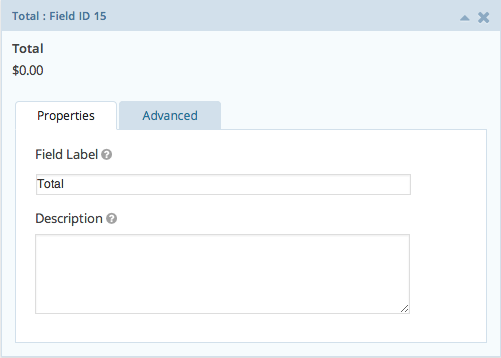
This should automatically insert the total of the order, calculated by multiplying the product selection and quantity, which will be displayed at the bottom of the form. Once this is done, select the ‘Update Form’ button on the right of the page, which should automatically save the form.
这将自动插入通过将产品选择和数量相乘得出的订单总数,该总数将显示在表单底部。 完成此操作后,选择页面右侧的“更新表单”按钮,这将自动保存表单。
Now, it’s a simple case of inserting the form on a page or post. You can do this by inserting a shortcode for the form where appropriate in the ‘Text’ view. It should look something like this:
现在,这是在页面或帖子中插入表单的简单情况。 您可以通过在“文本”视图中的适当位置插入表单的简码来实现。 它看起来应该像这样:
[gravityform id="3" name="Content Order Form" ajax="true"]However, if this is too complicated for you, there is another way to insert your form. Simply go to your page or post, put your cursor into the description box where you would like your form to appear and click the ‘Add Form’ button which is next to ‘Add Media’ just below your page or post title.
但是,如果这对您来说太复杂了,那么还有另一种插入表格的方法。 只需转到页面或帖子,将光标置于要显示表单的描述框中,然后单击页面或帖子标题下方“添加媒体”旁边的“添加表单”按钮。

And that’s it. This was a very simple tutorial on creating a basic order form using Gravity Forms, which will email the user’s submission to whatever email is specified in the ‘admin’ login of your WordPress settings.
就是这样。 这是使用Gravity Forms创建基本订单表单的非常简单的教程,它将通过电子邮件将用户提交的内容发送到WordPress设置的“管理员”登录名中指定的任何电子邮件。
You can, of course, change this in the form’s options area. There are many other customisations that can be done with this plugin such as creating multipage forms, adding a PayPal checkout option, and collecting more user data if you so wish. I’ll leave that up to you to explore.
您当然可以在表单的选项区域中进行更改。 此插件还可以进行许多其他自定义,例如创建多页表单,添加PayPal检出选项以及根据需要收集更多用户数据。 我让你去探索。
翻译自: https://www.sitepoint.com/create-a-simple-order-form-in-wordpress-in-under-5-minutes/
wordpress表单调用


 616
616

 被折叠的 条评论
为什么被折叠?
被折叠的 条评论
为什么被折叠?
 到【灌水乐园】发言


