


In 2001, a blog tool called b2/cafelog was launched by Michel Valdrighi. Matt Mullenweg and Mike Little forked b2/cafelog and created WordPress in 2003. According to WordPress.org, “WordPress was born out of a desire for an elegant, well-architectured personal publishing system built on PHP and MySQL and licensed under the GPL”. In 2004, plugins were introduced to extend WordPress’ core functionality. Here’s what the WordPress Plugin Directory looked like in November 2004:
在2001年,Michel Valdrighi启动了一个名为b2 / cafelog的博客工具。 马特·穆伦维格(Matt Mullenweg)和迈克·利特尔(Mike Little)分叉了b2 / cafelog,并于2003年创建了WordPress。根据WordPress.org的说法,“ WordPress诞生于对一种优雅,结构精巧的个人发布系统的渴望,该系统基于PHP和MySQL并获得GPL许可” 。 2004年,引入了插件来扩展WordPress的核心功能。 这是WordPress插件目录在2004年11月的样子:
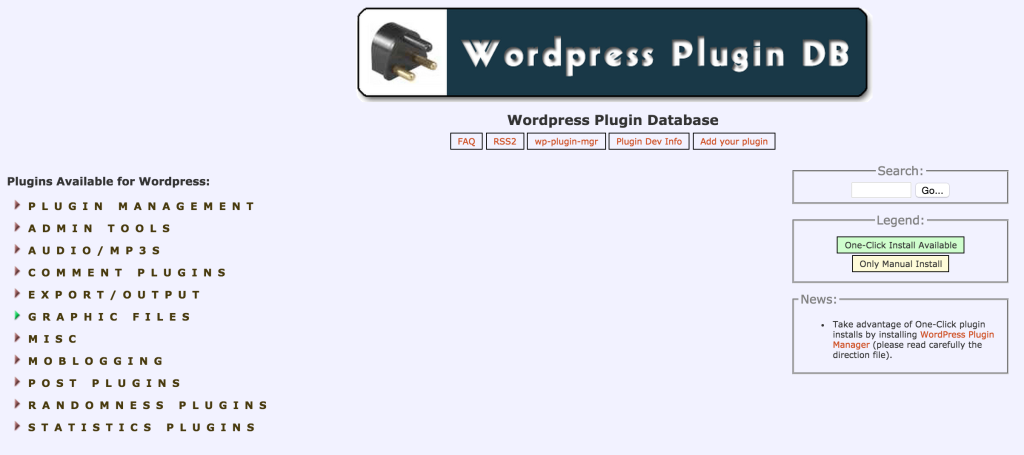
Source: http://web.archive.org/web/20041129215547/http://wp-plugins.net/
来源: http : //web.archive.org/web/20041129215547/http : //wp-plugins.net/
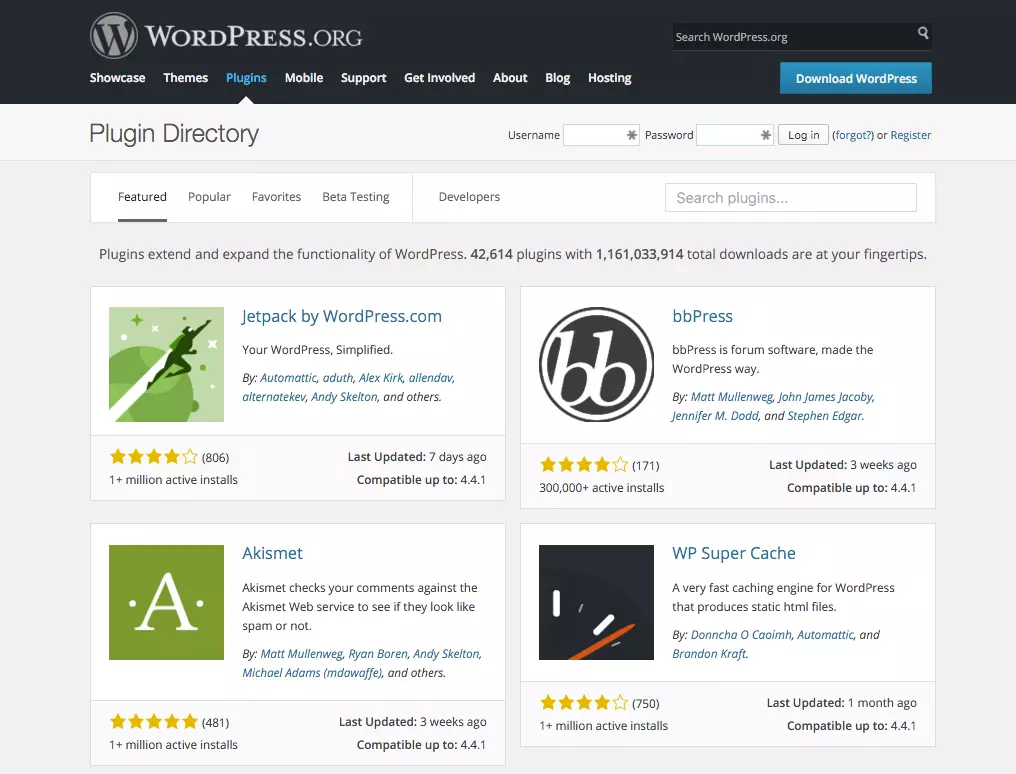
At that point in 2004, there were 46 plugins available for WordPress. In just under eleven years, there are now over 42,697 plugins available in the WordPress Plugin Directory and there have been over 1,161,033,914 plugin downloads. Here’s what the WordPress Plugin Directory looks like in January 2016:
在2004年那时,有46个可用于WordPress的插件。 在不到11年的时间里,WordPress插件目录中已有超过42,697个插件可用,并且下载了超过1,161,033,914个插件。 这是WordPress插件目录在2016年1月的样子:
All of the plugins that appear in the WordPress Plugin Directory are free to use and distribute. They are licensed under the General Public License (GPL). Many pioneers have published plugins in the WordPress Plugin Directory and my brother and I wanted to be a part of this exclusive club. We’ll give you an inside look at the WordPress Plugin Directory submission process by sharing our experience on deciding to create, creating, and publishing a plugin in the WordPress Plugin Directory. We’ll also provide step-by-step instructions on how to add your plugin to WordPress’ central Subversion repository for both Mac and Windows users.
WordPress插件目录中显示的所有插件均可免费使用和分发。 它们根据通用公共许可证(GPL)获得许可。 许多先驱者已在WordPress插件目录中发布了插件,而我的兄弟和我想成为这个独家俱乐部的一员。 通过分享我们决定在WordPress插件目录中创建,创建和发布插件的经验,我们将深入了解WordPress插件目录的提交过程。 我们还将为Mac和Windows用户提供有关如何将插件添加到WordPress的中央Subversion存储库中的分步说明。
为什么发布您的WordPress插件? (Why Publish Your WordPress Plugin?)
The reasons people publish plugins in the WordPress Plugin Directory are obviously varied. A couple of examples are explained below:
人们在WordPress插件目录中发布插件的原因显然各不相同。 下面说明几个示例:
- You see a need for functionality that doesn’t exist in a plugin in the directory 您会看到目录中的插件中不存在的功能需求
- You see a market opportunity 你看到一个市场机会
- You want to build a community around your plugin 您想围绕您的插件建立社区
- Your favorite plugin doesn’t offer additional functionality that you want 您最喜欢的插件不提供您想要的其他功能
- You’re frustrated by how much some plugins charge for extra extensions and you think you could build those features at a lower cost 您对某些插件为额外的扩展收费多少感到沮丧,并且您认为可以以较低的成本构建这些功能
- You want to simplify functionality in a way that doesn’t exist 您想以一种不存在的方式简化功能
- You want to contribute to the WordPress Plugin Directory in order to be a part of the community 您想加入WordPress插件目录,以便成为社区的一部分
我们的推理 (Our Reasoning)
Having done loads of client work with WordPress, both ourselves and our clients were really unhappy with the complexity and cost of plugins in the eCommerce space. These two factors prevented some clients from exploring new opportunities with WordPress and taking steps forward to changing their lives. We wanted to simplify the whole eCommerce process as well as offer lower cost options so that anyone could partake. We also believed that we could do a better job with user on-boarding, innovating, creating new functionality and customer service requests. So, we decided to build our WPMerchant eCommerce plugin.
使用WordPress完成了许多客户工作后,我们自己和我们的客户都对电子商务领域中插件的复杂性和成本感到非常不满意。 这两个因素使一些客户无法利用WordPress探索新的机会,并无法采取步骤改变自己的生活。 我们希望简化整个电子商务流程,并提供成本更低的选择,以便任何人都可以参与。 我们还相信,通过用户入职,创新,创建新功能和客户服务请求,我们可以做得更好。 因此,我们决定构建WPMerchant电子商务插件。
WordPress插件提交流程 (The WordPress Plugin Submission Process)
Below, we break the process down into its most simple parts so that anyone can partake in this plugin creation adventure. We also present these steps in the order that we wish we had taken when we decided to create our plugin!
下面,我们将整个过程分解为最简单的部分,以便任何人都可以参与此插件创建之旅。 我们还按照决定创建插件时希望执行的顺序介绍了这些步骤!
1.阅读准则。 (1. Read the Guidelines.)
Save yourself time and money by reading the detailed guidelines before creating and submitting your plugin. Make sure that you’re in compliance with all of these rules. Some of these rules include:
在创建和提交插件之前,请先阅读详细指南 ,以节省时间和金钱。 确保您遵守所有这些规则。 其中一些规则包括:
- Making sure your plugin is GPL compatible 确保您的插件兼容GPL
- Requiring user consent before storing user information 存储用户信息之前需要用户同意
- Not spamming users 不向用户发送垃圾邮件
- Not including obfuscated code 不包括混淆的代码
- Not doing anything that is illegal or morally offensive 不做任何违法或违反道德的事情
- Not embedding external links on the public site 没有在公共网站上嵌入外部链接
2.检查WordPress目录中的插件名称。 (2. Check the Plugin Name in the WordPress Directory.)
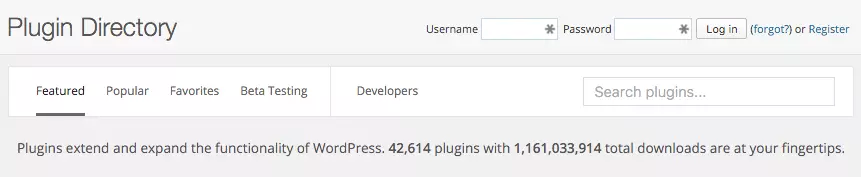
Go to wordpress.org/plugins and enter your desired plugin name into the “Search plugins…” input.
转到wordpress.org/plugins,然后在“搜索插件...”输入中输入所需的插件名称。
If no plugins exist with that name, there’s still a chance that a plugin has been submitted under that name and the user just hasn’t submitted their first Subversion commit; so don’t get too excited. You’ll want to submit your plugin as soon as possible in order to guarantee that you get the name. If the plugin name does exist, we are really sorry; that downright sucks. You’ll need to brainstorm to get a new one.
如果没有使用该名称的插件存在,那么仍然有可能使用该名称提交了一个插件,而用户只是没有提交他们的第一次Subversion提交; 所以不要太兴奋。 您需要尽快提交插件,以确保获得名称。 如果插件名称确实存在,我们真的很抱歉。 彻头彻尾的烂透了。 您需要集思广益以获取新的。
3.创建一个有效的插件。 (3. Create a Plugin That Works.)
We created our plugin using the WordPress Plugin BoilerPlate framework (http://wppb.io/). It’s a great way to get up and running fast with a solid foundation.
我们使用WordPress插件BoilerPlate框架( http://wppb.io/ )创建了插件。 这是在坚实的基础上快速启动并运行的好方法。
SitePoint has a series of articles that explore the plugin development process with the WordPress Plugin Boilerplate. 1. Speed up Development Using the WordPress Plugin Boilerplate is the first in the series and it gives you a good understanding of the purpose behind the different files in WPPB. 2. The second article in the series walks you through creating a plugin with WPPB and creating an options page with different fields that you can use throughout your plugin. 3. Part Three walks you through implementing the public facing functionality of the demo plugin.
SitePoint有一系列文章,探讨了WordPress插件模板的插件开发过程。 1. 使用WordPress插件样板加快开发速度是本系列中的第一个,它使您可以很好地了解WPPB中不同文件的目的。 2. 本系列的第二篇文章将引导您逐步使用WPPB创建一个插件,并创建一个选项页面,其中包含可在整个插件中使用的不同字段。 3. 第三部分将引导您实现演示插件的面向公众的功能。
After creating our plugin, we had to update the code and test through all of the functionality countless times so that all of the different pieces and parts worked in the exact way that we wanted it to.
创建插件后,我们不得不无数次更新代码并通过所有功能进行测试,以使所有不同的零件和部件都能以我们希望的方式工作。
4.验证自述文件。 (4. Validate the Readme file.)
The ReadMe file is used to populate your plugin’s WordPress Plugin Directory page. If you really want to make your plugin page stand out, Jérémy Heleine wrote a great article on Creating Awesome WordPress.org Pages for your Plugin. To give you a general overview, you should enter in your plugin name, contributors (WordPress author IDs), donate link, tags, the WordPress version that is required and the WordPress version the plugin has been tested on, license (it must be GPL) and a short description of your plugin. For the tags, we suggest choosing tags based on those listed in a competing plugin and popular tags that are relevant to your plugin. You can find tags from competing plugins by looking at their directory page and scrolling to the bottom of their page or by checking out their readme.txt file.
自述文件用于填充插件的WordPress插件目录页面。 如果您真的想让您的插件页面脱颖而出,JérémyHeleine撰写了一篇很棒的文章, 为您的插件创建WordPress.org真棒页面 。 为了给您一个总体的概述,您应该输入插件名称,贡献者(WordPress作者ID),捐赠链接,标签,所需的WordPress版本和经过测试的WordPress版本,许可证(必须为GPL) )以及您的插件的简短说明。 对于标签,我们建议您根据竞争插件中列出的标签以及与您的插件相关的常用标签来选择标签。 您可以通过查看竞争插件的目录页面并滚动到其页面底部,或者查看其readme.txt文件,从竞争插件中找到标签。
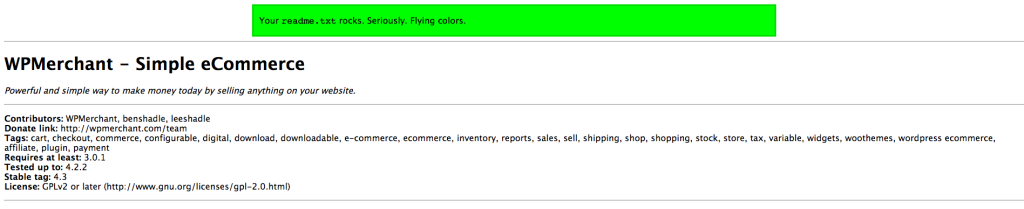
After adding that information, you should add a main description, installation instructions, frequently asked questions and screenshots of your plugin. Make sure to include the screenshots, banner and icon in your plugin’s assets directory. The more screenshots the better. Once you’re happy with your readme file, run it through the ReadMe Validator. Our readme.txt passed with flying colors (aren’t we special!):
添加该信息后,您应该添加主要说明,安装说明,常见问题和插件的屏幕截图。 确保在您的插件的资产目录中包含屏幕截图,横幅和图标。 屏幕截图越多越好。 对readme文件满意后,可通过ReadMe Validator运行该文件。 我们的readme.txt传递的是鲜艳的颜色(不是我们很特别!):
5.提交您的插件以供审查。 (5. Submit Your Plugin for Review. )
Once you’ve done all of the above, it’s time to submit your plugin for manual review.
完成上述所有操作后,就该提交插件进行人工审核了。
You need to create a WordPress account first.
您需要先创建一个WordPress帐户。

Then, go to https://wordpress.org/plugins/add/
然后,转到https://wordpress.org/plugins/add/
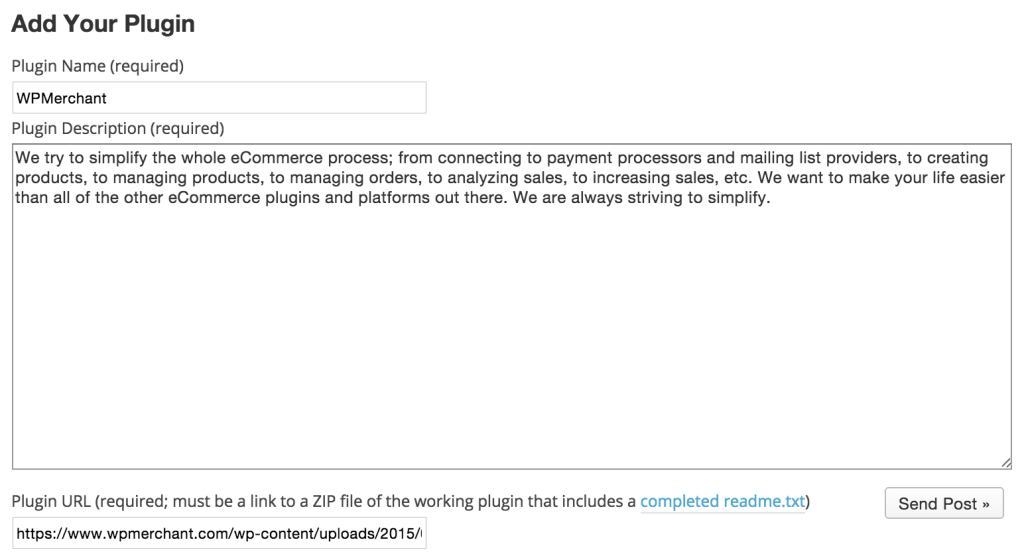
Add your plugin name as well as a description of your plugin. For the plugin URL, you need to compress your plugin files and upload your plugin.zip file to your website or to a website that you have access to. You should be able to upload the compressed file to Dropbox or Google Drive and add a public link to the plugin zip file.
添加您的插件名称以及插件说明。 对于插件URL,您需要压缩插件文件并将plugin.zip文件上载到您的网站或有权访问的网站。 您应该能够将压缩文件上传到Dropbox或Google云端硬盘,并向插件zip文件添加公共链接。
Alternatively, you can add it to a website of your choice.
或者,您可以将其添加到您选择的网站。
6.等待批准。 (6. Waiting for Approval.)
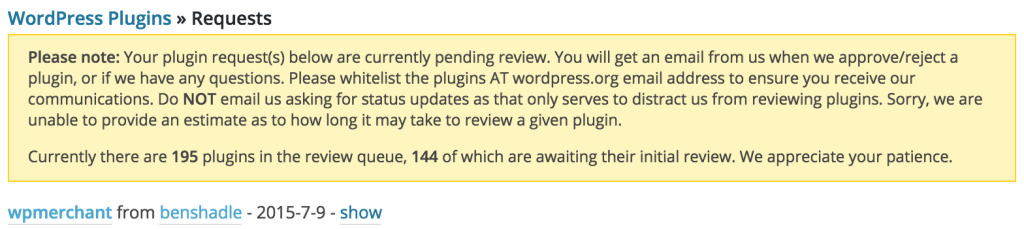
All WordPress Plugin Directory plugins are manually reviewed, and according to WordPress, you should hear back “within some vaguely defined amount of time”. This isn’t very helpful. However, it took about 8 hours for WPMerchant to be reviewed and approved.
所有WordPress插件目录插件均经过人工审核,根据WordPress,您应该“在一段模糊的时间内听到”。 这不是很有帮助。 但是,WPMerchant大约花费了8个小时进行审核和批准。
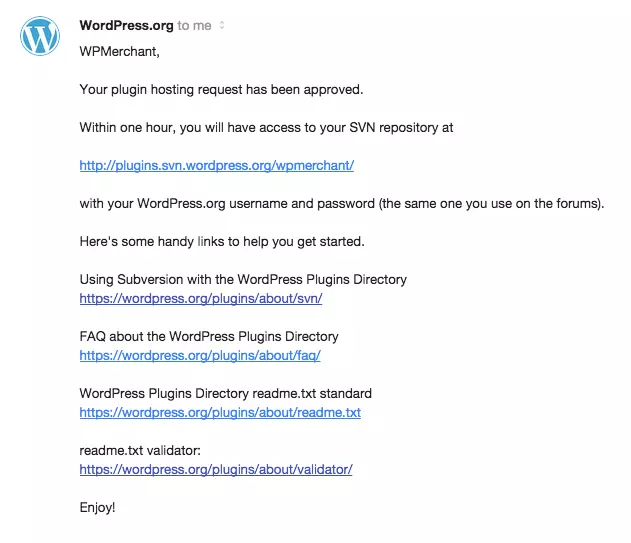
7.批准。 (7. Approval.)
You just heard back from WordPress and they let you know that your plugin was approved (woot woot!). We did a little dance after getting this email!
您刚刚收到WordPress的回复,他们告诉您您的插件已获批准(呼!)。 收到此电子邮件后,我们跳了一点舞!
8.将您的插件存储在WordPress Subversion存储库中。 (8. Store Your Plugin in the WordPress Subversion Repository.)
Subversion is a version control tool that allows you to track all of the “changes [made to your plugin] so that you can go back and look at old versions or revisions later if you ever need to”. If you’re familiar with Git (another version control system), you’ll pick this up very quickly.
Subversion是一个版本控制工具,可让您跟踪所有“ [对插件所做的更改],以便您以后可以回头查看旧版本或修订”。 如果您熟悉Git(另一个版本控制系统),则将很快掌握它。
Now that your plugin has been approved, it’s time to store a copy in your WordPress Subversion repository. This repository is where your plugin files are stored. Anyone can get a copy of your plugin files from the repository, but the contributors listed in your readme file are the only ones that can make changes to your plugin’s repository.
现在您的插件已获得批准,是时候将副本存储在WordPress Subversion存储库中了。 该存储库是您的插件文件存储的位置。 任何人都可以从存储库中获取插件文件的副本,但是readme文件中列出的贡献者是唯一可以更改插件存储库的人。
We have two sets of instructions for storing your plugin in the WordPress Subversion repository; one for those using a Mac and another for those using a Windows. We start with the Mac instructions below.
我们有两组指令将您的插件存储在WordPress Subversion存储库中; 一个针对使用Mac的用户,另一个针对使用Windows的用户。 我们从下面的Mac说明开始。
在Mac上: (On a Mac:)
We’re going to be storing your plugin in the WordPress Subversion repository using the command line. Open up your Terminal application. Find the parent directory where you want your plugin to live.
我们将使用命令行将您的插件存储在WordPress Subversion存储库中。 打开终端应用程序。 找到您希望插件驻留的父目录。
Use the cd ‘directory name’ command to open a directory.
使用cd'目录名称'命令打开目录。
Use the cd .. command to move out of the current directory and into its parent directory.
使用cd ..命令移出当前目录并进入其父目录。
Use the ls -a command to list all of the files and directories in the current directory.
使用ls -a命令列出当前目录中的所有文件和目录。
When you’ve navigated to the parent directory, run the command below in your terminal window (svn is short for Subversion and co is short for checkout).
导航到父目录后,在终端窗口中运行以下命令(svn是Subversion的缩写,而co是签出的缩写)。

This command adds all of your central WordPress Subversion repository’s files into your local repository. An important note, make sure to replace https://plugins.svn.wordpress.org/wpmerchant with the URL that is provided in your plugin approval email (you can see our repository’s URL in the email above); it should be in the format of https://plugins.svn.wordpress.org/your-plugin-name. And, replace wpmerchant at the end of the command with what you would like to name the directory (we just went with the name of our plugin).
此命令将所有中央WordPress Subversion存储库的文件添加到本地存储库中。 重要说明,请确保将https://plugins.svn.wordpress.org/wpmerchant替换为插件批准电子邮件中提供的URL(您可以在上面的电子邮件中看到我们存储库的URL); 它应该采用https://plugins.svn.wordpress.org/your-plugin-name的格式。 并且,将命令末尾的wpmerchant替换为您要命名目录的名称(我们只是使用了插件的名称)。
You’ll get a response asking the following:
您会收到以下询问的答复:
(R)eject, accept (t)emporarily or accept (p)ermanently?Type in t or p and hit Enter. Then, you’ll receive the message below. This indicates that the wpmerchant directory was created on your computer and the tags, assets, trunk and branches directories were added within the wpmerchant Subversion repository directory.
Enter t或p并按Enter 。 然后,您会收到以下消息。 这表明wpmerchant目录是在您的计算机上创建的,并且标记,资产,主干和分支目录已添加到wpmerchant Subversion存储库目录中。
A    wpmerchant/tags
A    wpmerchant/assets
A    wpmerchant/trunk
A    wpmerchant/branches
Checked out revision 111111.
Place all of your plugin files in the trunk directory. Now that you have your plugin files in the trunk directory, you need to add those files to your Subversion repository so that they can be tracked. You can do this by running the terminal command below.
将所有插件文件放在主目录中。 现在,您的插件文件已保存在主干目录中,您需要将这些文件添加到Subversion存储库中,以便对其进行跟踪。 您可以通过运行以下终端命令来执行此操作。

You then need to push the changes made to your local repository to the central WordPress repository by running the following command in your terminal window.
然后,您需要通过在终端窗口中运行以下命令,将对本地存储库所做的更改推送到中央WordPress存储库。

You’ll need to enter your computer’s logged in username and password.
您需要输入计算机的登录用户名和密码。
Then, you will be asked for your WordPress username and password.
然后,将要求您提供WordPress用户名和密码。
Once those are credentials are provided, your plugin’s files will be transferred to the WordPress central repository. A Transmitting File Data message will be displayed and when complete, a Committed revision message will be displayed.
提供这些凭据后,您插件的文件将被传输到WordPress中央存储库。 将显示“正在发送文件数据”消息,完成后将显示“已提交修订”消息。
DONE! You should get an email from WordPress explaining the new commit. Now, let’s go checkout our WordPress Plugin Directory Page.
完成! 您应该从WordPress收到一封电子邮件,解释新提交。 现在,让我们检查WordPress插件目录页面。
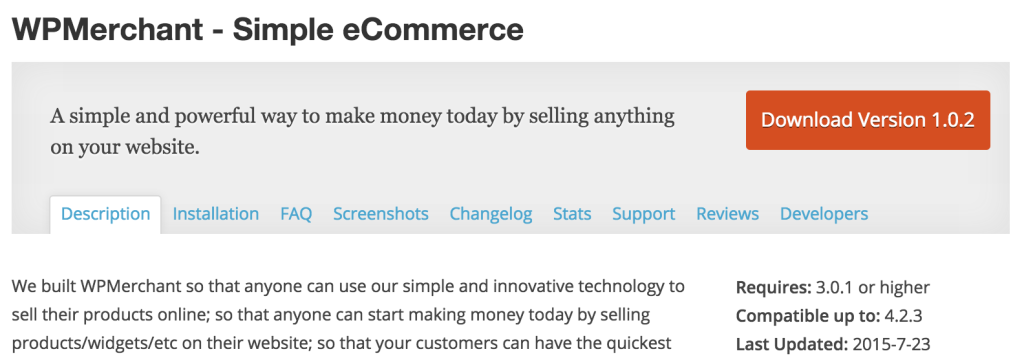
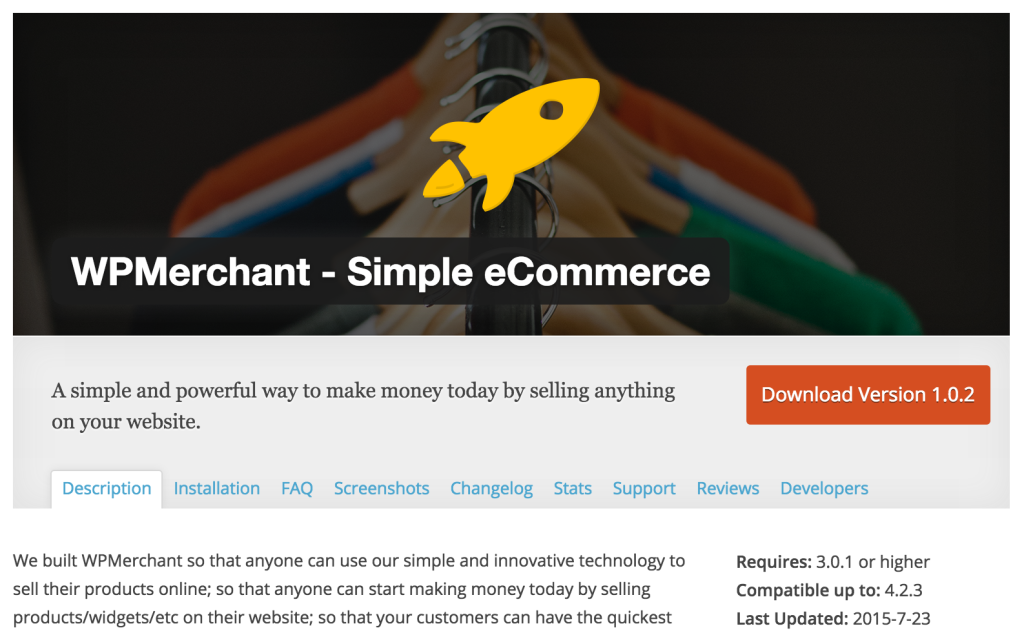
As you can see, ours doesn’t include the banner at the top. It also doesn’t contain the screenshots that we wanted to be shown in the screenshots section. We really want that banner and those screenshots – what did we do wrong? We didn’t add our images to the assets directory (that is a sibling of the trunk directory). Make sure that you place your assets images in that directory. Then, run the following terminal command:
如您所见,我们的横幅没有在顶部。 它还不包含我们希望在屏幕截图部分中显示的屏幕截图。 我们真的想要那个横幅和那些屏幕截图–我们做错了什么? 我们没有将图像添加到资产目录(这是主干目录的同级目录)。 确保将资产映像放置在该目录中。 然后,运行以下终端命令:

Now, you need to commit the change to the central repository.
现在,您需要将更改提交到中央存储库。

Check out your WordPress Plugin Directory page now and you should see images. Yay, we do!!
立即查看WordPress插件目录页面,您应该会看到图像。 是的,我们做到了!
If you are developing your plugin on multiple computers or with multiple contributors, make sure to run the update command (visible below) before committing any changes. This pulls the changes that exist in the central WordPress repository into your local plugin repository.
如果要在多台计算机上或有多个贡献者的情况下开发插件,请确保在提交任何更改之前运行update命令(如下所示)。 这会将中央WordPress存储库中存在的更改拉到本地插件存储库中。

在PC上: (On a PC:)
In order to publish your plugin on a Windows machine, you need to start off by downloading a compatible version of the Subversion client, Tortoise SVN is a popular choice. Once the download is complete, double click and you should be shown the first step of the Setup Wizard.
为了在Windows机器上发布您的插件,您需要首先下载兼容版本的Subversion客户端, Tortoise SVN是一个受欢迎的选择。 下载完成后,双击,然后会显示安装向导的第一步。
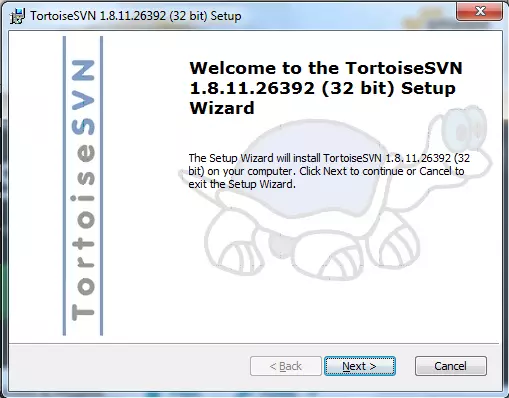
Click the Next button.
单击下一步按钮。
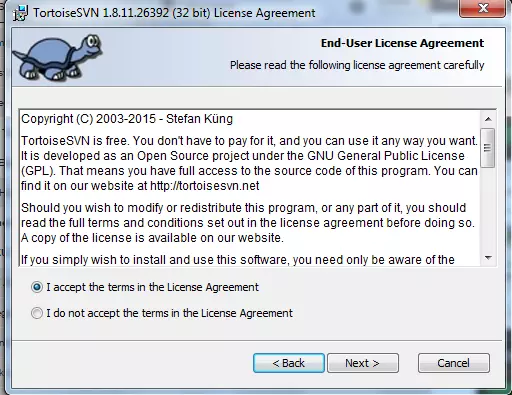
Agree to the Terms and Conditions and then click the Next button.
同意条款和条件,然后单击下一步按钮。
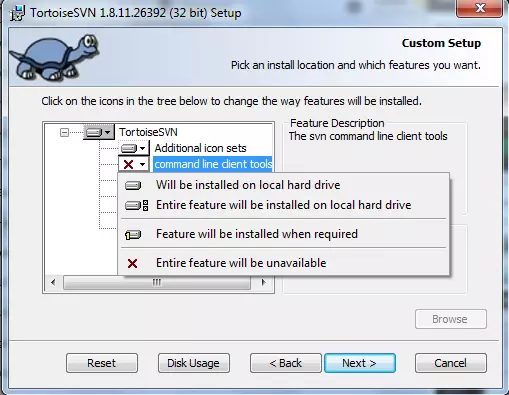
If you want to install the command line tools, click on command line client tools and select ‘Will be installed on local hard drive.’ Either way though, click the Next button.
如果要安装命令行工具,请单击命令行客户端工具,然后选择“将在本地硬盘驱动器上安装”。 无论哪种方式,请单击“下一步”按钮。
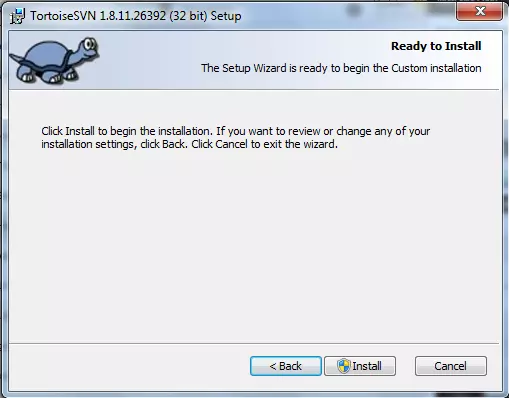
Click the Install button.
单击安装按钮。
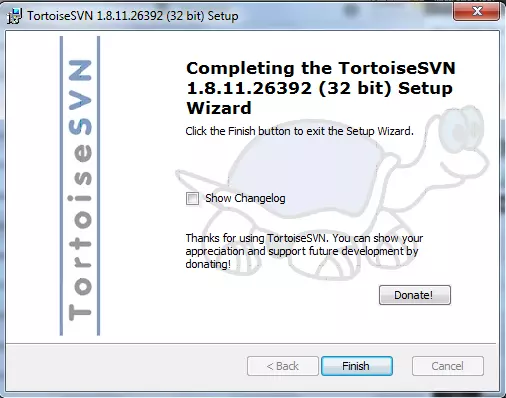
Click the Finish button to complete the install. Awesome! Since that junk is all done, we get to the fun part of actually working with Subversion (SVN). Open up Windows Explorer. Navigate to the directory you want your WordPress SVN repository to live in, click on that directory and then right click on that directory icon.
单击完成按钮以完成安装。 太棒了! 既然完成了所有垃圾操作,我们就可以开始真正使用Subversion(SVN)的乐趣了。 打开Windows资源管理器。 导航到您希望WordPress SVN存储库驻留的目录,单击该目录,然后右键单击该目录图标。
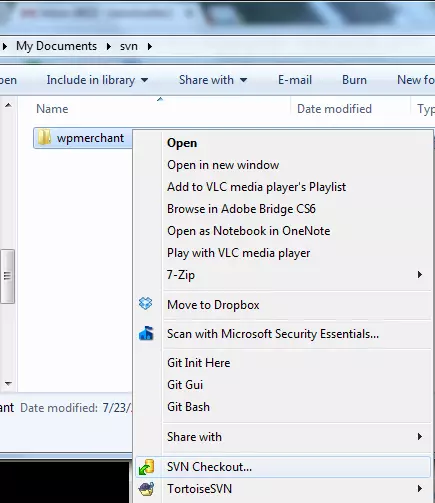
Click on the SVN Checkout drop down menu option.
单击SVN Checkout下拉菜单选项。
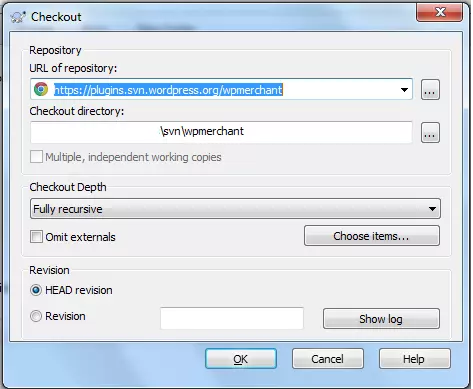
Enter the URL of the repository into the field; look at your WordPress approval email to find that URL. Yours will likely be in the format of https://plugins.svn.wordpress.org/your-plugin-name. Click the OK button.
在字段中输入存储库的URL; 查看您的WordPress批准电子邮件以找到该URL。 您的格式可能为https://plugins.svn.wordpress.org/your-plugin-name 。 单击确定按钮。
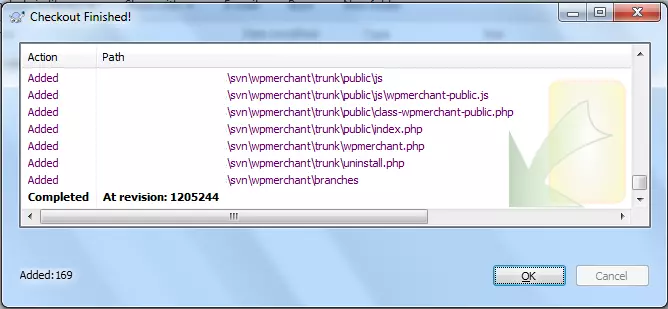
The screenshot above confirms that your checkout was completed. This means that all of the files and directories that exist in the WordPress central repository have been downloaded onto your computer, into the directory that you specified.
上面的屏幕快照确认您的结帐已完成。 这意味着WordPress中央存储库中存在的所有文件和目录都已下载到您的计算机上,即您指定的目录中。
The directory that you chose should now hold assets, trunk, branches and tags directories. You need to add all of your plugin’s files to the newly added trunk directory. Then, you need to open up Windows Explorer, click on your SVN repository directory icon, and right click on that directory icon.
您选择的目录现在应该包含资产,主干,分支和标签目录。 您需要将所有插件文件添加到新添加的中继目录中。 然后,您需要打开Windows资源管理器,单击SVN存储库目录图标,然后右键单击该目录图标。
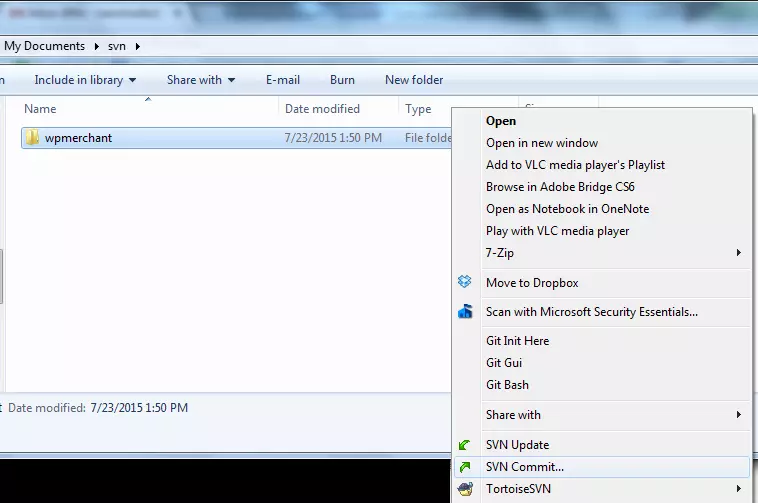
Click on the SVN Commit option. This next screenshot shows the different files that have been added and modified in your SVN repository. Make sure to only check boxes next to the files that you want to be tracked in the repository. You should likely check all of the checkboxes in order for all of your plugin files to be added to the WordPress central repository.
单击“ SVN提交”选项。 下一个屏幕截图显示了已在SVN存储库中添加和修改的不同文件。 确保仅选中要在存储库中跟踪的文件旁边的复选框。 您可能应该选中所有复选框,以将所有插件文件添加到WordPress中央存储库。

Click on the OK button. Now, all of your modified and newly added files should exist in the central WordPress SVN repository, as well as on your local machine. If you’re working on multiple computers, make sure to run the SVN Update function to sync your local repository with the WordPress central repository. Do this by using Windows Explorer to find your SVN repository directory, click on that directory, and then right click on that directory icon.
单击确定按钮。 现在,所有修改和新添加的文件都应存在于中央WordPress SVN存储库以及本地计算机中。 如果您在多台计算机上工作,请确保运行SVN更新功能以将本地存储库与WordPress中央存储库同步。 通过使用Windows资源管理器找到SVN存储库目录,单击该目录,然后右键单击该目录图标,可以执行此操作。
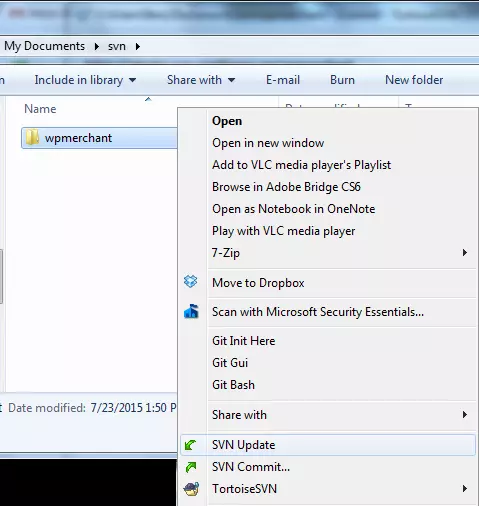
Click on the SVN Update option. As described previously, this makes sure that your copy of the repository is up to date with the central WordPress repository.
单击“ SVN更新”选项。 如前所述,这可确保您的存储库副本与中央WordPress存储库保持最新。
有什么问题吗 (Questions?)
That’s all she (or he in this case) wrote! Let us know if you have any questions/improvements that we can make, we would love to hear from you!
这就是她(或他的情况)写的全部内容! 让我们知道您是否有任何疑问/改进,我们很乐意收到您的来信!
翻译自: https://www.sitepoint.com/publishing-a-plugin-to-the-wordpress-plugin-directory/


 985
985

 被折叠的 条评论
为什么被折叠?
被折叠的 条评论
为什么被折叠?
 到【灌水乐园】发言


