


Welcome to Flash 101 – the 6 part tutorial that’s guaranteed to take you from Flash newbie to know-it-all, fast!
欢迎使用Flash 101 –这是由6部分组成的教程,可以确保您快速入门Flash新手!
In this, Part 1, we’ll cover the basics – Flash tools and functionality.
在第1部分中,我们将介绍基础知识– Flash工具和功能。
Part 2 looks at flash symbols, frames and the library, and then shows you how to export flash files and embed them into Web pages.
第2部分将介绍Flash符号,框架和库,然后向您展示如何导出Flash文件并将其嵌入到Web页面中。
In Part 3 you’ll learn the technique of tweening – a handy alternative to frame-by-frame development of your Flash animations.
在第3部分中,您将学习补间技术-替代Flash动画逐帧开发的一种便捷方法。
Part 4 builds on your skills and explores how tweening can be used with Flash text to create some very cool effects.
第4部分将基于您的技能,并探讨如何将补间与Flash文本配合使用以创建一些非常酷的效果。
Next, Part 5 delves into Flash actions and explores the mouse and keyboard triggers that activate them.
接下来,第5部分深入研究Flash动作,并探讨激活它们的鼠标和键盘触发器。
And finally, in Part 6 you’ll learn how to integrate audio files into your Flash movies, including synching, looping fading and more!
最后, 在第6部分中,您将学习如何将音频文件集成到Flash电影中,包括同步,循环衰落等等!
Let’s get started!
让我们开始吧!
华丽的跑车 (Flashy Sports Cars)
Flash-based Web sites have one thing in common with expensive sports cars – each time you see one, you experience a faint tinge of envy that yours doesn’t look quite as good…
基于Flash的网站与昂贵的跑车有一个共同点-每次看到一个,都会感到一丝羡慕,有些嫉妒,您的外观并不那么好……
Well, envy no more.
好吧,不要再羡慕了。
Designed especially for new users, this tutorial will get you up to speed on everything you need to know to begin designing your very own Flash animations and movies. Before long, you’ll be the toast of the town, and people will be throwing themselves (not to mention bags of the green stuff) at you in the hope that you will condescend to apply your Flash wizardry to their dull, boring staton wagons… uhhh, Web sites.
本教程是专门为新用户设计的,它将使您快速掌握开始设计自己的Flash动画和电影所需的一切。 不久之后,您将成为小镇上的敬酒者,人们将向您投掷自己(更不用说一堆绿色的东西了),以希望您愿意屈服于将Flash巫术应用于他们沉闷而乏味的Staton旅行车……呃,网站。
闪光的奇迹 (The Wonder That Is Flash)
Before we get started, there’s one very important thing you should be aware of. Flash is a program designed to create, edit and animate vector graphics only. A vector graphic differs from a traditional bitmap graphic in that it uses lines and/or curves, rather than pixels, to define an image; this offers an advantage in that vector-based graphics can be displayed independent of the resolution of the display device.
在开始之前,您应该意识到一件事。 Flash是仅用于创建,编辑和制作矢量图形的程序。 矢量图形与传统位图图形的不同之处在于,它使用线和/或曲线而不是像素来定义图像。 这提供了一个优点,即可以独立于显示设备的分辨率显示基于矢量的图形。
What does this mean? It means that your Flash files will look the same regardless of whether they’re playing on a 7-inch screen running at 320×240 resolution, or a 21-inch monitor running at 1024×768 resolution – a feature that should immediately endear the program to the millions of Web developers currently struggling with browser- and resolution-dependent interface designs.
这是什么意思? 这意味着无论您是在运行320×240分辨率的7英寸屏幕,还是运行在1024×768分辨率的21英寸显示器上播放Flash文件,它们的外观都一样。该程序适用于数百万目前正在努力解决与浏览器和分辨率相关的界面设计问题的Web开发人员。
It should also be mentioned at this point that the Flash files you create will function exactly as advertised in any browser equipped with a Flash player (free from the Macromedia Web site at http://www.macromedia.com/).
在这一点上还应该提到,您创建的Flash文件将完全按照任何配备Flash播放器的浏览器中的广告功能运行(可从Macromedia网站http://www.macromedia.com/免费获得)。
With that out of the way, let’s get started. When you first start the program up, you’ll be presented with a screen interface which looks something like this.
有了这一点,让我们开始吧。 首次启动程序时,将显示一个类似于以下的屏幕界面。
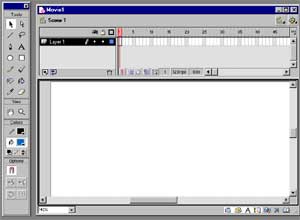
For the moment, don’t worry too much about all the control panels and buttons you see – the two most important areas at this point are the toolbox on the left side, which contains the various drawing and painting tools, and the Stage, which is the main work area in the center. Over the next few pages, I’m going to show you what the various tools are used for, so that you have a broad idea of what you can (and cannot) do with them.
目前,不必太担心所看到的所有控制面板和按钮-此时两个最重要的区域是左侧的工具箱,其中包含各种绘图和绘画工具,以及舞台,它是中心的主要工作区域。 在接下来的几页中,我将向您展示各种工具的用途,以便您对可以(也不能)使用它们做一个广泛的了解。
像铅笔一样工作 (Works Like A Pencil)
The drawing tools available in Flash 5 can broadly be grouped into four categories. You have the selection tools, like the Lasso and Subselection tool; the drawing tools, like the Line, Pen and Brush tools; the fill tools, like the Ink Bottle and Paint Bucket tools; and the view tools, like the Zoom tool.
Flash 5中可用的绘图工具可以大致分为四类。 您拥有选择工具,例如套索和子选择工具; 绘图工具,例如“线条”,“笔”和“画笔”工具; 填充工具,例如“墨水瓶”和“油漆桶”工具; 和查看工具,例如“缩放”工具。
If you take a close look at the toolbar, you’ll also notice a couple of "colour pickers" – these are used to select the stroke colour and fill colour for the currently active tool – and a section at the bottom which changes to display tool-specific options.
如果您仔细查看工具栏,还会注意到几个“颜色选择器”(用于选择当前活动工具的笔触颜色和填充颜色)以及底部的一部分,该部分会更改为显示特定于工具的选项。
Let’s start with the drawing tools, which allow you to draw clearly-defined geometric shapes like lines, circles and squares, in addition to free-form shapes and irregular curves.
让我们从绘图工具开始,它允许您绘制清晰定义的几何形状,例如线条,圆形和正方形,以及自由形状和不规则曲线。
The Pencil tool is primarily used to draw lines and polygons (other than circles and rectangles) – you can also activate it with the keyboard shortcut Y.
铅笔工具主要用于绘制线条和多边形(圆形和矩形除外)–您也可以使用键盘快捷键Y激活它。
Simply select it and then drag the mouse pointer across the Stage to draw a line. Notice how Flash automatically straightens your lines for you – this behaviour can be controlled with the Pencil tool modifiers, discussed below.
只需选择它,然后在舞台上拖动鼠标指针即可画一条线。 请注意,Flash如何自动为您拉直线条-可以通过下面讨论的“铅笔”工具修改器控制此行为。

Copyright Melonfire, 2000. All rights reserved.
版权所有Melonfire ,2000。保留所有权利。
You can keep drawing lines until you have the polygon of your dreams.
您可以一直画线,直到拥有梦想的多边形。
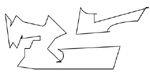
As you can see, my dreams are a little… odd.
如您所见,我的梦想有些奇怪。

If you take a look at the Options section of the toolbar, you’ll notice that the Pencil tool also has a couple of modifiers – in fact, three different drawing modes which affect the behavior of the Pencil tool. The "Straighten" modifier attempts to automatically convert your drawing into a geometric shape; the "Smooth" modifier allows you to draw smooth curves; and the "Ink" modifier is used when you would prefer not to apply any automatic correction to your drawing.
如果看一下工具栏的“选项”部分,您会注意到“铅笔”工具也有几个修改器–实际上,三种不同的绘制模式会影响“铅笔”工具的行为。 “拉直”修改器会尝试将图形自动转换为几何形状。 “平滑”修改器允许您绘制平滑曲线; 而当您不想对图形应用任何自动校正时,将使用“墨水”修饰符。
A variant of the Pencil tool is the Line tool, used specifically to draw lines. You can activate it with the keyboard shortcut N.
铅笔工具的一种变体是“线条”工具,专门用于绘制线条。 您可以使用键盘快捷键N激活它。
As with the Pencil tool, using it is a simple click-and-drag operation.
与“铅笔”工具一样,使用它是一个简单的单击并拖动操作。
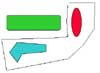
If you specifically want to draw circles and rectangles, Flash offers the Oval and Rectangle tools, which work in much the same manner.
如果您特别想绘制圆形和矩形,Flash提供了“椭圆”和“矩形”工具,它们的工作方式几乎相同。
Note that if you already have a fill colour selected, Flash will automatically fill the circle or rectangle with that colour.
请注意,如果您已经选择了填充色,则Flash会自动用该颜色填充圆形或矩形。
There are a couple of interesting things you should know about the Oval and Rectangle tools. For example, the "Round Rectangle" modifier allows you to give your rectangles rounded corners (can you say corner radius?), and you can draw perfect circles or squares by holding down the Shift key while using the tool.
关于椭圆形和矩形工具,您应该了解一些有趣的事情。 例如,使用“圆角矩形”修改器可以为矩形赋予圆角(可以说圆角半径吗?),并且可以在使用工具时按住Shift键来绘制完美的圆形或正方形。
Want to see the Rectangle tool turn into the Circle tool? Set a high corner radius – 50 – and watch as your rectangles begin to resemble circles!
是否希望将“矩形”工具变成“圆形”工具? 设置高的拐角半径– 50 –并注意您的矩形开始类似于圆形!
在正确的地方弯曲 (Curves In All The Right Places)
If you like curves, Flash has a new – and powerful – Pen tool which lets you draw curves with a tremendous degree of control. You can activate it with the keyboard shortcut P.
如果您喜欢曲线,Flash会提供一个新的且功能强大的钢笔工具,使您可以在高度控制的情况下绘制曲线。 您可以使用键盘快捷键P激活它。
The Pen tool can be used to draw both straight and curved paths. Both types of paths are drawn by first setting anchor points on the Stage, and then connecting them with straight or curved lines.
笔工具可用于绘制直线和曲线路径。 通过首先在舞台上设置锚点,然后将它们与直线或曲线连接,可以绘制两种类型的路径。
Drawing straight lines with the Pen tool is simplicity itself – simply click to set the first anchor point, then click again to set the next anchor point, and Flash will automatically connect the two points with a straight line.
使用钢笔工具绘制直线本身很简单-只需单击以设置第一个锚点,然后再次单击以设置下一个锚点,Flash就会自动将两个点与一条直线连接起来。
You can continue setting anchor points by clicking at different positions on the Stage. When you’re done, you can close the object by double-clicking the last point.
您可以通过在舞台上的不同位置单击来继续设置锚点。 完成后,可以通过双击最后一点来关闭对象。
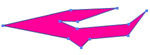
Note how Flash automatically fills closed objects with the currently selected fill colour.
请注意,Flash如何使用当前选择的填充颜色自动填充关闭的对象。
Drawing curved paths is a little more complicated – you need to first position the mouse pointer at the curve’s starting point and then click-drag the pointer in the direction of the curve. The mouse pointer will change to display a tangent to the curve.
绘制曲线路径要稍微复杂一些-您需要先将鼠标指针放在曲线的起点,然后在曲线方向上单击并拖动指针。 鼠标指针将更改为显示曲线的切线。
Once you have the first segment of the curve drawn to your satisfaction, position the cursor at the point where the curve should end, hold down the mouse button, and click-drag the pointer in the opposite direction. Flash will complete the curved path for you.
绘制完曲线的第一段后,请将光标置于曲线应终止的位置,按住鼠标按钮,然后在相反方向单击并拖动指针。 Flash将为您完成弯曲的路径。

You can alter the curve (or line) at any time by clicking on it and modifying anchor points and tangents.
您可以随时通过单击曲线并修改锚点和切线来更改曲线(或直线)。
Copyright Melonfire, 2000. All rights reserved.
版权所有Melonfire ,2000。保留所有权利。
看油漆干 (Watching Paint Dry)
As you’ve already seen, Flash comes with two colour pickers, one for the fill colour, and the other for the stroke colour. The Paint Bucket tool, accessed via the keyboard shortcut K, allows you to fill selected shapes with the currently selected fill colour.
如您所见,Flash带有两个颜色选择器,一个用于填充色,另一个用于描边色。 通过键盘快捷键K访问的“油漆桶”工具可让您用当前选定的填充色填充选定的形状。
To fill a specified object, you need to first select the colour in the fill colour picker, and then click on the object with the Paint Bucket tool – Flash will automatically fill it with the colour selected (you can also control fills from the Fill tab of the Window->Panels->Stroke panel).
要填充指定的对象,您需要首先在“填充颜色选择器”中选择颜色,然后使用“油漆桶”工具单击该对象– Flash会自动以选定的颜色填充该对象(您也可以从“填充”选项卡中控制填充“窗口”->“面板”->“描边”面板。
You can also use a gradient fill – you’ll find a bunch of them at the bottom of the fill colour picker.
您还可以使用渐变填充-在填充颜色选择器的底部可以找到一堆。

Now try clicking on different parts of the filled object -you’ll see that Flash changes the angle of the gradient depending on where you click.
现在尝试单击填充对象的不同部分-您会看到Flash会根据您单击的位置更改渐变的角度。
To change the fill colour of a specified object, simply select a new fill colour in the colour picker and apply the Paint Bucket tool to the selected object.
要更改指定对象的填充颜色,只需在颜色选择器中选择一种新的填充颜色,然后将“油漆桶”工具应用于所选对象。
The Paint Bucket tool comes with a "gap size" modifier which allows you to close open objects with a fill. You can decide whether "small", "medium" or "large" gaps are to be closed.
油漆桶工具带有“间隙大小”修改器,使您可以用填充关闭打开的对象。 您可以决定缩小“小”,“中”或“大”的差距。
And just as the Paint Bucket tool allows you to control the fill of an object, there’s also an Ink Bottle tool designed to control the outline of an object. You can activate it with the keyboard shortcut S.
就像“涂料桶”工具允许您控制对象的填充一样,还有一个“墨水瓶”工具设计用来控制对象的轮廓。 您可以使用键盘快捷键S激活它。
The Ink Bottle tool allows you to control the style and colour of an object outline. All the important options are hidden in the Window->Panels->Stroke panel, on the Stroke tab – you can choose from a variety of different styles, modify the thickness of the outline, and select an appropriate colour. Once you’re done, simply click an object with the Ink Bottle tool active, and Flash will apply your settings to the object.
使用墨水瓶工具可以控制对象轮廓的样式和颜色。 所有重要选项都隐藏在“窗口”->“面板”->“描边”面板的“描边”选项卡上–您可以从各种不同的样式中进行选择,修改轮廓的厚度并选择适当的颜色。 完成后,只需在墨水瓶工具处于活动状态的情况下单击一个对象,Flash便会将您的设置应用于该对象。

毕加索提防! (Picasso Beware!)
In case clean lines aren’t your thing, Flash also makes provision for the Picasso in you with its Brush tool, which allows you to draw brush strokes with your mouse. The Brush tool can be activated with the keyboard shortcut B.
万一不是干净的线条,Flash还会通过其“画笔”工具在您的毕加索中提供备用,该工具可让您用鼠标绘制画笔描边。 可以使用键盘快捷键B激活“画笔”工具。
Once you’ve selected the Brush tool, you should also select a fill colour from the colour picker below the tool set – this is the colour in which your brush strokes will appear. This is also a good time to select brush type and size modifiers from the options available.
选择“画笔”工具后,还应该从工具集下方的颜色选择器中选择一种填充颜色-这是画笔笔触将显示的颜色。 这也是从可用选项中选择笔刷类型和大小修改器的好时机。
All done? You can paint with the Brush tool just as you would draw with the Pencil tool – drag the mouse pointer while holding down the mouse button.
全做完了? 您可以使用“画笔”工具进行绘画,就像使用“铅笔”工具进行绘画一样–在按住鼠标按钮的同时拖动鼠标指针。

One of the Brush tool’s most powerful features is its ability to selectively paint areas of your images. This power comes to you courtesy of the "brush mode" modifier, which allows you to work in:
画笔工具最强大的功能之一就是它能够选择性地绘制图像区域。 借助“画笔模式”修饰符,可以使用此功能,该修饰符使您可以在以下环境中工作:
- "normal" mode (also known as "paint over everything" mode); “正常”模式(也称为“覆盖所有内容”模式);
- "paint inside" mode (which constrains brush strokes to a specific area); “内部绘画”模式(将笔触限制到特定区域);
- "paint behind" mode (which constrains brush strokes to the empty area behind an object, leaving the object unaffected); “在后面绘画”模式(将笔触限制到对象后面的空白区域,使对象不受影响);
- or "paint fills" mode (which paints both filled and empty areas and leaves lines unaffected). 或“绘制填充”模式(绘制填充区域和空白区域,并使线条不受影响)。
Copyright Melonfire, 2000. All rights reserved.
版权所有Melonfire ,2000。保留所有权利。
消除过去的错误 (Erasing Past Mistakes)
To err is human – and Flash is particularly forgiving of errors. The Eraser tool lets you rub out past mistakes, and can be activated with the keyboard shortcut E.
犯错是人为的-Flash特别容忍错误。 橡皮擦工具可让您清除过去的错误,并可以使用键盘快捷键E激活。
The Eraser tool has many of the same modifiers you’ve just seen in the Brush tool – it allows you to erase either fills or lines, erase everything, or erase inside selected objects, leaving the rest of the image untouched. Erasing is accomplished by holding and dragging the mouse across the area you wish to erase – take a look:
橡皮擦工具具有许多您在画笔工具中看到过的相同修改器–它允许您擦除填充或线条,擦除所有内容或擦除所选对象内部,而其余图像保持不变。 擦除是通过在要擦除的区域上按住鼠标并拖动鼠标来完成的-看一下:

You can select an eraser "brush size" as well – perfect for situations when you need precise control over what you’re wiping out (didn’t they use this technology in Desert Storm too?).
您也可以选择橡皮擦的“笔刷大小”,非常适合需要精确控制要擦除的内容的情况(它们在沙漠风暴中也不使用该技术吗?)。
An interesting feature of the Eraser tool is its "faucet" modifier, which allows you to erase everything within a specific area with a single click – try it out and you’ll see what I mean.
橡皮擦工具的一个有趣功能是它的“水龙头”修饰符,它使您可以单击一次擦除特定区域内的所有内容–试试看,您将明白我的意思。
And, of course, Flash also offers an Undo tool, which allows you to revert to a previous version of your composition at any time.
而且,当然,Flash还提供了“撤消”工具,使您可以随时还原到合成的早期版本。
所有牛仔都去了哪里? (Where Have All The Cowboys Gone?)
Now, that pretty much covers the various drawing tools available in Flash 5 – but there are a few other tools you should know about as well. For example, the Arrow and Lasso tools (keyboard: V and L respectively) both come in handy when you need to select an object, or a bunch of objects, on the Stage.
现在,这几乎涵盖了Flash 5中可用的各种绘图工具-但您还应该了解其他一些工具。 例如,当您需要在舞台上选择一个对象或一堆对象时,“箭头”和“套索”工具(分别为键盘:V和L)都很方便。
The Arrow tool allows you to select an object by clicking on it with your mouse; you can also use it to select a group of objects by click-dragging to surround them with a rectangular selection box.
箭头工具使您可以通过使用鼠标单击来选择对象。 您还可以使用它通过单击并用矩形选择框将其包围来选择一组对象。

The Lasso tool works in a similar manner – it allows you to select groups of objects by drawing a freehand or polygonal box around them.
套索工具以类似的方式工作–它允许您通过在对象组周围绘制手绘或多边形框来选择对象组。
The Lasso tool comes with a "polygon mode" modifier that allows you to use it in a manner similar to the Pen tool – click to set a start point for a line segment, then click to set the end point. Continue until the object(s) is(are) completely enclosed, and double-click to close the box and select the items within it.
套索工具带有“多边形模式”修饰符,可让您以类似于“笔”工具的方式使用它-单击以设置线段的起点,然后单击以设置终点。 继续进行操作,直到完全封闭对象为止,然后双击以关闭该框并选择其中的项目。
Alternatively, you can draw a freehand box around the object(s) by dragging the Lasso tool around it(them).
或者,可以通过在对象周围拖动套索工具在对象周围绘制徒手画框。
If you need to view or modify control points on line segments or curves, Flash offers the Subselection tool, activated with the keyboard shortcut A.
如果需要查看或修改线段或曲线上的控制点,则Flash提供了使用键盘快捷键A激活的“子选择”工具。
The Subselection tool offers a simple and elegant way of making all the important control points on a line segment or curve visible so that they can be easily modified. To use it, simply click on an object on the Stage, and watch as its control points immediately become visible. You can then manipulate these control points to alter the size, shape or position of the object.
子选择工具提供了一种简单而优雅的方法,使线段或曲线上的所有重要控制点均可见,从而可以轻松对其进行修改。 要使用它,只需在舞台上单击一个对象,然后观察其控制点立即可见。 然后,您可以操纵这些控制点来更改对象的大小,形状或位置。

Copyright Melonfire, 2000. All rights reserved.
版权所有Melonfire ,2000。保留所有权利。
伸展自己 (Stretching Yourself)
Thus far, everything you’ve read has been about drawing different shapes and filling them with colour. But once you’ve drawn an object, Flash also allows you to modify it further by scaling it, rotating it or grouping it with other objects.
到目前为止,您已阅读的所有内容都是关于绘制不同形状并用颜色填充它们的。 但是,一旦绘制了对象,Flash还允许您通过缩放,旋转对象或将其与其他对象分组来对其进行进一步修改。
In order to modify an object (or a group of objects), you need to first select it (them) with the Arrow or Lasso tool (you can select more than one object by holding down the Shift key at the time of selection.) You also have the option of treating multiple objects as a single "group" – this allows you to manipulate more than one object at a time. You can group objects by selecting them and using the Modify->Group menu item (the grouped items will appear in an enclosed box.)
为了修改一个对象(或一组对象),您需要首先使用Arrow或Lasso工具(将其选中)(可以在选择时按住Shift键来选择多个对象)。您还可以选择将多个对象视为一个“组” –这使您一次可以操作多个对象。 您可以通过选择对象并使用“修改”->“组”菜单项来对它们进行分组(分组的项目将显示在一个封闭的框中。)
Once you have your object or group the way you want it, you can:
一旦有了所需的对象或组,便可以:
delete the object (or group) by hitting the Delete key;
按下Delete键删除对象(或组);
move the object (or group) by click-dragging the selected object (or group);
通过点击拖动所选择的对象(或组) 移动的对象(或组);
copy the object (or group) by holding down the Alt key and click-dragging the selected object (or group);
按住Alt键并单击并拖动选定的对象(或组),以复制对象(或组);
scale the object (or group) via the Windows->Panels->Transform panel. You can also scale an object by right-clicking the object (or group), picking the "Scale" option, and dragging the scaling handles that appear at the corners of the objects. Dragging a corner handle scales the object along both X- and Y-axes without affecting the aspect ratio, while dragging any other handle scales the object along that axis only.
通过Windows-> Panels-> Transform面板缩放对象(或组)。 您还可以通过右键单击对象(或组),选择“缩放”选项并拖动出现在对象角上的缩放手柄来缩放对象。 拖动角手柄将沿X轴和Y轴缩放对象,而不会影响纵横比,而拖动任何其他手柄将仅沿该轴缩放对象。
rotate the object (or group) via the Windows->Panels->Transform tool panel, or via the "Rotate" option on the right-click menu;
通过Windows-> Panels-> Transform工具面板,或通过右键单击菜单上的“ Rotate”选项, 旋转对象(或组);
skew the object (or group) via the Windows->Panels->Transform tool panel;
通过Windows-> Panels-> Transform工具面板倾斜对象(或组);
flip the object via the Modify->Transform->Flip Vertical and Modify->Transform->Flip Vertical menu items;
翻转经由该对象的修改- >变换- >垂直翻转和修改- >变换- >垂直翻转菜单项;

缩小 (Zoom Out)
As with every single image manipulation package out there, Flash also has a Zoom tool, available against the keyboard shortcut Z, and a Hand tool, which is accessible by hitting H.
与那里的每个图像处理程序包一样,Flash还具有“缩放”工具(可通过键盘快捷键Z使用)和“手动”工具(可通过按H进行访问)。
The Zoom tool allows you to increase or decrease the level of magnification at which you view your Flash scene – you can zoom in or out of the scene by using the "enlarge" and "reduce" modifiers on the toolbar.
使用“缩放”工具可以增大或减小查看Flash场景的放大率-您可以使用工具栏上的“放大”和“缩小”修饰符来放大或缩小场景。
The Hand tool allows you to alter your view of the scene by moving the visible area, so that you can view different parts of the composition without needing to resort to the scroll bars – this comes in very handy if your composition spans more than one screen.
手动工具可让您通过移动可见区域来更改场景的视图,这样您就可以查看构图的不同部分而无需诉诸滚动条–如果您的构图跨越一个以上的屏幕,这将非常方便。
As you can see, the toolbar offers quite a lot of power – more than sufficient for most requirements. You should now play with it a little, and get comfortable with what each tool does. In the meanwhile, I’m outta here – but I’ll be back next week with the second part of this tutorial, where I’ll be talking about the basic components of a Flash animation.
如您所见,工具栏提供了很多功能-足以满足大多数要求。 现在,您应该尝试一下,并熟悉每种工具的功能。 同时,我不在这里–但是下周我将回到本教程的第二部分,在该部分中我将讨论Flash动画的基本组成部分。
Be good, now!
好,现在!
Note: All examples in this article have been tested on Macromedia Flash 5. Examples are illustrative only, and are not meant for a production environment.
注意:本文中的所有示例均已在Macromedia Flash 5上进行了测试。示例仅用于说明,并不用于生产环境。
Copyright Melonfire, 2000. All rights reserved.
版权所有Melonfire ,2000。保留所有权利。


 2万+
2万+

 被折叠的 条评论
为什么被折叠?
被折叠的 条评论
为什么被折叠?
 到【灌水乐园】发言


