jquery缩略图

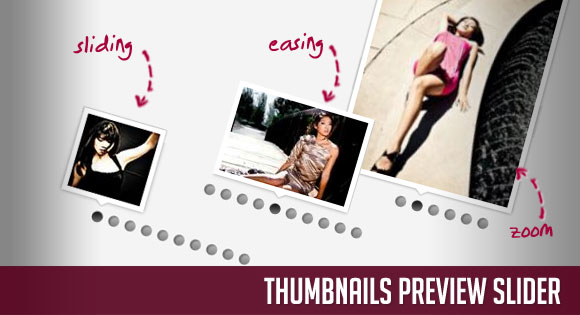
In this tutorial we will show you how to create and use a thumbnails preview slider with jQuery. Since we got a lot of requests to show how to make the preview slider work separately from the full image view, we decided to make a tutorial on how to use the little thumbnails preview part only.
在本教程中,我们将向您展示如何在jQuery中创建和使用缩略图预览滑块。 由于我们有很多要求说明如何使预览滑块与完整图像视图分开工作,因此我们决定制作一个教程,介绍如何仅使用小缩略图预览部分。
Check out the Sweet Thumbnails Preview Gallery where me make use of the thumbnails slider idea.
签出Sweet Thumbnails Preview Gallery ,我在其中利用了缩略图滑块的想法。
The images are by talented tibchris and you can find them on his Flickr photostream: tibchris’ photostream
这些图像是由有才华的tibchris拍摄的,您可以在他的Flickr照片流上找到它们: tibchris的照片流
So, let’s start with the markup.
因此,让我们从标记开始。
标记 (The Markup)
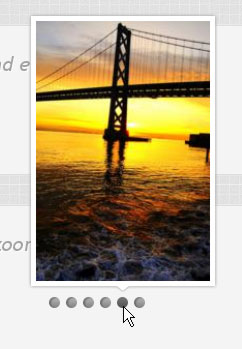
The HTML structure will be built up of a main container list that will hold the dot items and a special list item for the thumbnails. The special list item will have the class “ts_thumbnails” and it will be the element that holds the little window where we will see the thumbnails once we hover over a dot.
HTML结构将由一个主容器列表构建,该容器列表将包含点项目和一个缩略图的特殊列表项目。 特殊列表项将具有“ ts_thumbnails”类,它将是包含小窗口的元素,一旦我们将鼠标悬停在一个点上,便可以在其中看到缩略图。
<ul class="ts_container">
	<li><a href="#">Image 1</a></li>
	<li><a href="#">Image 2</a></li>
	<li><a href="#">Image 3</a></li>
	<li><a href="#">Image 4</a></li>
	<li><a href="#">Image 5</a></li>
	<li><a href="#">Image 6</a></li>
	<li><a href="#">Image 7</a></li>
	<li><a href="#">Image 8</a></li>
	<li><a href="#">Image 9</a></li>
	<li><a href="#">Image 10</a></li>
	<li class="ts_thumbnails">
		<div class="ts_preview_wrapper">
			<!-- List with thumbnails/preview items -->
		</div>
		<span></span>
	</li>
</ul>
The empty span will be the little triangle that points to the current dot. The thumbnails list which will be inside of the div with the class “ts_preview_wrapper” will have the following structure:
空跨度将是指向当前点的小三角形。 缩略图列表位于类“ ts_preview_wrapper”的div内部,其结构如下:
<ul class="ts_preview">
	<li><img src="images/thumbs1/1.jpg" alt="Thumb 1" /></li>
	<li><img src="images/thumbs1/2.jpg" alt="Thumb 2" /></li>
	<li><img src="images/thumbs1/3.jpg" alt="Thumb 3" /></li>
	<li><img src="images/thumbs1/4.jpg" alt="Thumb 4" /></li>
	<li><img src="images/thumbs1/5.jpg" alt="Thumb 5" /></li>
	<li><img src="images/thumbs1/6.jpg" alt="Thumb 6" /></li>
	<li><img src="images/thumbs1/7.jpg" alt="Thumb 7" /></li>
	<li><img src="images/thumbs1/8.jpg" alt="Thumb 8" /></li>
	<li><img src="images/thumbs1/9.jpg" alt="Thumb 9" /></li>
	<li><img src="images/thumbs1/10.jpg" alt="Thumb 10" /></li>
</ul>
Now, let’s take a look at the style.
现在,让我们看一下样式。
CSS (The CSS)
The main container list will be of relative positioning and its width will be the sum of the all the dots’ widths:
主容器列表将相对定位,其宽度将是所有点的宽度之和:
ul.ts_container{
	list-style:none;
	margin:0;
	padding:0;
	width:170px;
	margin:20px auto;
	position:relative;
	height:17px;
}
Like we will see later, the width of a dot is 11 plus a padding on each side of 3 pixels. This is just a general style for the main that we will we using in all three showcases. If you have more than 10 dots, you will need to adapt this value to fit all the items (same for the height).
就像我们将在后面看到的那样,点的宽度是11加上3像素每侧的填充。 这只是我们将在所有三个展示柜中使用的主体的通用样式。 如果点数超过10,则需要调整此值以适合所有项目(高度相同)。
The list items, i.e. the dots, will float left:
列表项(即点)将向左浮动:
ul.ts_container li{
	float:left;
}
The dots itself will be a background image and we will indent the text so that we don’t see it:
点本身将是背景图像,我们将缩进文本以使我们看不到它:
ul.ts_container li a{
	display:block;
	text-indent:-9000px;
	width:11px;
	height:11px;
	outline:none;
	padding:0px 3px;
	background:transparent url(../images/sliderIcons/dot.png) no-repeat top center;
}
On hover, we will change the position of the background image so that we see the lower part of it:
悬停时,我们将更改背景图像的位置,以便看到其下部:
ul.ts_container li a:hover,
ul.ts_container li.selected a{
	background-position:50% -11px;
}
The last list item which is our special thumbnails container will be of absolute positioning since we want to move it around. It’s initially not visible:
最后一个列表项是我们的特殊缩略图容器,因为我们要移动它,所以它的位置绝对正确。 最初不可见:
ul.ts_container li.ts_thumbnails{
	display:none;
	position:absolute;
}
The empty span will be our little triangle. We will set it’s position dynamically since it depends on the size of your thumbnails:
空跨将是我们的小三角形。 我们将动态设置它的位置,因为它取决于缩略图的大小:
ul.ts_container li.ts_thumbnails span{
	background:transparent url(../images/sliderIcons/triangle.png) no-repeat top center;
	width:15px;
	height:6px;
	position:absolute;
}
Tip: If you feel generally uncomfortable with using empty elements in your HTML, simply add a meaningful text to it and set the text-indent to a very low value so that it’s not visible. Your HTML will be more readable and you can sleep better 🙂
提示:如果您通常对在HTML中使用空元素感到不舒服,只需向其中添加有意义的文本,并将text-indent设置为非常低的值即可使其不可见。 您HTML将更具可读性,您可以睡得更好🙂
The preview wrapper will have a white border and a nice box shadow. The dimensions are, again, set dynamically since they depend on the size of your thumbnails. The overflow should be hidden, because we will have a row of thumbnails in the list inside of this wrapper:
预览包装器将具有白色边框和漂亮的框阴影。 尺寸是动态设置的,因为它们取决于缩略图的尺寸。 溢出应该被隐藏,因为在此包装器内的列表中将有一行缩略图:
.ts_preview_wrapper{
	border:5px solid #fff;
	overflow:hidden;
	position:relative;
	-moz-box-shadow:0px 0px 5px #999;
	-webkit-box-shadow:0px 0px 5px #999;
	box-shadow:0px 0px 5px #999;
}
The list with all the thumbnails will be absolute, since we want to animate its left position in order to show the right thumbnail. The dimensions are calculated dynamically, for example, the width will be the sum of all thumbnails widths. But we will look into that when we define our JavaScript function.
具有所有缩略图的列表将是绝对的,因为我们要设置其左侧位置的动画以便显示右侧的缩略图。 尺寸是动态计算的,例如,宽度将是所有缩略图宽度的总和。 但是我们在定义JavaScript函数时会对此进行研究。
ul.ts_preview{
	position:absolute;
	left:0px;
	top:0px;
	margin:0;
	padding:0;
	list-style-type:none;
}
The list items that hold the thumbnails will be floating left, so that they are stacked horizontally:
包含缩略图的列表项将向左浮动,以便它们水平堆叠:
ul.ts_preview li{
	float:left;
}
The thumbnails need to be display block, to avoid any spacing in the li:
缩略图必须是显示块,以避免在li中有任何间距:
ul.ts_preview li img{
	display:block;
}
And that’s all the style! Let make some magic and go through one example.
这就是所有样式! 让我们做一些魔术,并举一个例子。
JavaScript (The JavaScript)
The main idea of this little thumbnail slider is to be able to use it with any (reasonable) size of thumbnails and to add certain effects to it. So, we will make a plugin which will look as follows:
这个小缩略图滑块的主要思想是能够与任何(合理)大小的缩略图一起使用,并为其添加某些效果。 因此,我们将制作一个如下所示的插件:
(function($) {
	$.fn.thumbnailSlider = function(options) {
		var opts = $.extend({}, $.fn.thumbnailSlider.defaults, options);
		return this.each(function() {
			...
		});
	};
	$.fn.thumbnailSlider.defaults = {
		speed		: 100, //speed of each slide animation
		easing		: 'jswing', //easing effect for the slide animation
		thumb_width	: 75, //your photos width
		thumb_height: 75, //your photos height
		zoom		: false, //zoom animation for the thumbs
		zoomratio	: 1.3, //multiplicator for zoom (must be > 1)
		zoomspeed	: 15000, //speed of zoom animation
		onClick		: function(){return false;} //click callback
	};
})(jQuery);
Now let’s take a deeper look at the plugin functionality. First, we need to define some variables:
现在让我们更深入地了解插件功能。 首先,我们需要定义一些变量:
var $this 				= $(this),
	o 					= $.meta ? $.extend({}, opts, $pxs_container.data()) : opts;

var $ts_container		= $this.children('.ts_container'),
	$ts_thumbnails		= $ts_container.children('.ts_thumbnails'),
	$nav_elems			= $ts_container.children('li').not($ts_thumbnails),
	total_elems			= $nav_elems.length,
	$ts_preview_wrapper	= $ts_thumbnails.children('.ts_preview_wrapper'),
	$arrow				= $ts_thumbnails.children('span'),
	$ts_preview			= $ts_preview_wrapper.children('.ts_preview');
We also need to calculate some values that we need to set to certain elements. The “ts_thumbnails” container which is our little white frame that holds the list of thumbnails, will have a width composed of the thumbnail width and its border (which is 5 pixels on each side). The height will also contain the height of the little triangle span which is 6 pixels. The top will always be the same, a negative value since we need to “pull it up” to be above the dot list. The left value is calculated by getting the left position of the current dot and subtracting half of the thumbnails width. This will position it at the beginning of the respective dot, so we need to add half of the dot’s width in order really center it correctly above the dot:
我们还需要计算一些需要设置为某些元素的值。 “ ts_thumbnails”容器是保存缩略图列表的白色小框,其宽度由缩略图宽度及其边框组成(每边5像素)。 该高度还将包含6个像素的小三角形跨度的高度。 顶部将始终相同,为负值,因为我们需要将其“拉起”到点列表上方。 左值是通过获取当前点的左位置并减去缩略图宽度的一半来计算的。 这会将其放置在各个点的开始处,因此我们需要添加点宽度的一半,以便将其正确正确地居于点上方:
/*
calculate sizes for $ts_thumbnails:
width 	-> width thumbnail + border (2*5)
height 	-> height thumbnail + border + triangle height(6)
top		-> -(height plus margin of 5)
left	-> leftDot - 0.5*width + 0.5*widthNavDot
	this will be set when hovering a dot,
	and the default value will correspond to the first nav dot
*/
var w_ts_thumbnails	= o.thumb_width + 2*5,
	h_ts_thumbnails	= o.thumb_height + 2*5 + 6,
	t_ts_thumbnails	= -(h_ts_thumbnails + 5),
	$first_nav		= $nav_elems.eq(0),
	l_ts_thumbnails	= $first_nav.position().left - 0.5*w_ts_thumbnails + 0.5*$first_nav.width();
Now we need to set all those values:
现在我们需要设置所有这些值:
$ts_thumbnails.css({
	width	: w_ts_thumbnails + 'px',
	height	: h_ts_thumbnails + 'px',
	top		: t_ts_thumbnails + 'px',
	left	: l_ts_thumbnails + 'px'
});
Next step is to position the triangle correctly. For calculating the top of the triangle we need the height of the thumb plus its border. The left value will depend on the width of the thumbnail: we take the width plus the border and take half of that, and then we subtract half of the width of the triangle. This will center the little triangle:
下一步是正确放置三角形。 为了计算三角形的顶部,我们需要拇指的高度加上其边界。 左值将取决于缩略图的宽度:我们取宽度加上边框,然后取一半,然后减去三角形宽度的一半。 这将使小三角形居中:
/*
calculate the top and left for the triangle/tooltip
top		-> thumb height + border(2*5)
left	-> (thumb width + border)/2 -width/2
*/
var t_arrow	= o.thumb_height + 2*5,
	l_arrow	= (o.thumb_width + 2*5) / 2 - $arrow.width() / 2;
$arrow.css({
	left	: l_arrow + 'px',
	top		: t_arrow + 'px',
});
The list “ts_preview” that holds all the thumbnails, needs a width and we can calculate it by multiplying the width of a thumbnail with the number of total thumbnails:
包含所有缩略图的列表“ ts_preview”需要一个宽度,我们可以通过将缩略图的宽度乘以总缩略图数来进行计算:
/*
calculate the $ts_preview width -> thumb width times number of thumbs
*/
$ts_preview.css('width' , total_elems*o.thumb_width + 'px');
Then we set its width and also its height, which will simply be the height of a thumbnail:
然后我们设置它的宽度和高度,这将仅仅是缩略图的高度:
$ts_preview_wrapper.css({
	width	: o.thumb_width + 'px',
	height	: o.thumb_height + 'px'
});
Now we will define what happens when we hover a navigation element i.e. a dot. We’ll get the index of the dot to know to which thumbnail item we need to slide to. Then we calculate the left value to which we want to slide the frame to, i.e. the “ts_thumbnails” list item. We also animate the list of thumbnails to the right position which we know because of the current index of the dot.
现在,我们将定义将鼠标悬停在导航元素(即点)上时发生的情况。 我们将获得点的索引,以了解需要滑动到哪个缩略图项。 然后,我们计算要将框架滑动到的左侧值,即“ ts_thumbnails”列表项。 由于当前点的索引,我们还将缩略图列表设置为已知的正确位置。
If the zoom option was chosen, we will increase the width and height of the thumbnail:
如果选择了缩放选项,我们将增加缩略图的宽度和高度:
$nav_elems.bind('mouseenter',function(){
	var $nav_elem	= $(this),
		idx			= $nav_elem.index();

	/*
	calculate the new left
	for $ts_thumbnails
	*/
	var new_left	= $nav_elem.position().left - 0.5*w_ts_thumbnails + 0.5*$nav_elem.width();

	$ts_thumbnails.stop(true)
				  .show()
				  .animate({
					left	: new_left + 'px'
				  },o.speed,o.easing);

	/*
	animate the left of the $ts_preview to show the right thumb
	*/
	$ts_preview.stop(true)
			   .animate({
					left	: -idx*o.thumb_width + 'px'
			   },o.speed,o.easing);

	//zoom in the thumb image if zoom is true
	if(o.zoom && o.zoomratio > 1){
		var new_width	= o.zoomratio * o.thumb_width,
			new_height	= o.zoomratio * o.thumb_height;

		//increase the $ts_preview width in order to fit the zoomed image
		var ts_preview_w	= $ts_preview.width();
		$ts_preview.css('width' , (ts_preview_w - o.thumb_width + new_width)  + 'px');

		$ts_preview.children().eq(idx).find('img').stop().animate({
			width		: new_width + 'px',
			height		: new_height + 'px'
		},o.zoomspeed);
	}

}).bind('mouseleave',function(){
	//if zoom set the width and height to defaults
	if(o.zoom && o.zoomratio > 1){
		var $nav_elem	= $(this),
			idx			= $nav_elem.index();
		$ts_preview.children().eq(idx).find('img').stop().css({
			width	: o.thumb_width + 'px',
			height	: o.thumb_height + 'px'
		});
	}

	$ts_thumbnails.stop(true)
				  .hide();

}).bind('click',function(){
	var $nav_elem	= $(this),
		idx			= $nav_elem.index();

	o.onClick(idx);
});
And that’s it! Now, let’s take a look at some examples!
就是这样! 现在,让我们看一些示例!
例 (Example)

In the demo you will see four different examples, we will show you how to apply the last one. For that, we need to set the width and the height of the thumbnails and define some other parameters. We want the image to zoom in when we hover over the dot, so the following parameters are set:
在演示中,您将看到四个不同的示例,我们将向您展示如何应用最后一个示例。 为此,我们需要设置缩略图的宽度和高度并定义其他一些参数。 当我们将鼠标悬停在点上时,我们希望图像放大,因此设置了以下参数:
$('#demo4').thumbnailSlider({
	thumb_width	: 174,
	thumb_height: 260,
	speed		: 200,
	zoom		: true,
	zoomspeed	: 10000,
	zoomratio	: 1.7
});
We hope you enjoyed the tutorial and find it useful!
我们希望您喜欢本教程并发现它有用!
翻译自: https://tympanus.net/codrops/2011/01/27/thumbnails-preview-slider/
jquery缩略图


 128
128

 被折叠的 条评论
为什么被折叠?


