


Pretty much every router on the market comes with the ability to forward ports, and the Eero Wi-Fi system is no exception, despite its easy-to-use interface.
市场上几乎每台路由器都具有转发端口的能力,尽管Eero Wi-Fi系统具有易于使用的界面,但也不例外。
If you came across this post on purpose, then you probably already know what port forwarding is, how it works, and why you’d want to use it. But if not, you can check our other guide on port forwarding that goes into great detail on the subject.
如果您是故意看到这篇文章的,那么您可能已经知道什么是端口转发,它如何工作以及为什么要使用它。 但是,如果没有,您可以查看我们有关端口转发的其他指南,该指南对这一主题进行了详细介绍。
Before I get started, this will only work if your Eero is not in bridge mode. If yours is in bridge mode and you have another router doing all the heavy lifting instead, you’ll need to forward ports on that router instead of the Eero.
在我开始之前,这仅在您的Eero不在桥接模式下才有效 。 如果您的路由器处于桥接模式,则由另一台路由器来承担所有繁重的工作,则需要转发该路由器上的端口而不是Eero。
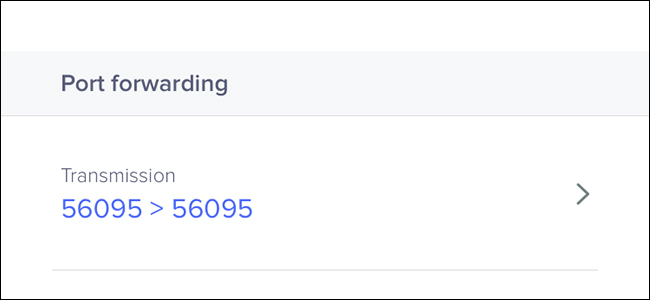
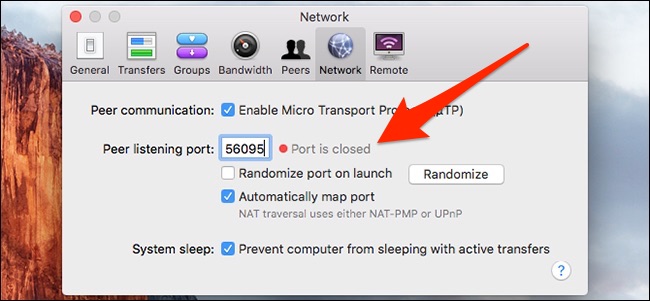
In my example, I’ll be forwarding a port that I need open in order to use Transmission on my iMac. As you can see below, Transmission is telling me that port 56095 is closed.
在我的示例中,我将转发一个需要打开的端口,以便在iMac上使用Transmission 。 如下所示,传输告诉我端口56095已关闭。
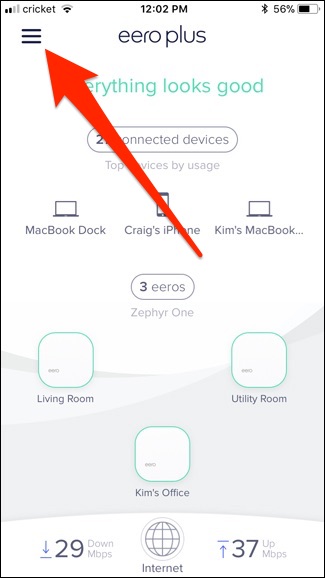
To get started, open up the Eero app and tap on the menu button in the top-left corner of the screen.
首先,打开Eero应用程序,然后点击屏幕左上角的菜单按钮。
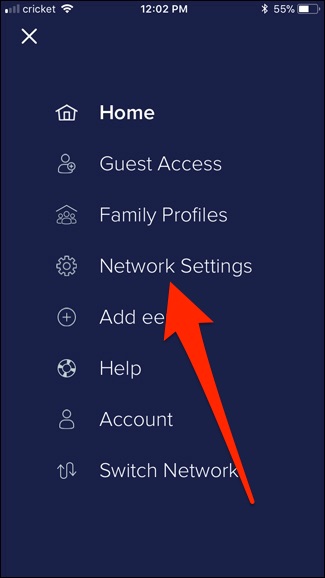
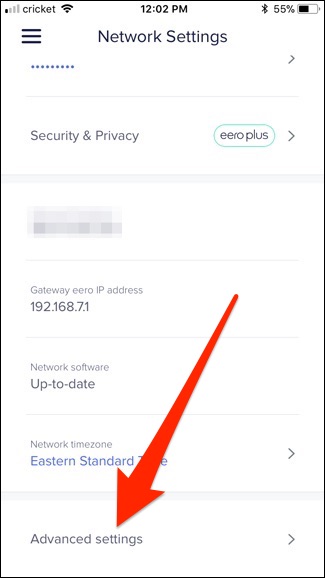
Select “Network Settings” from the list.
从列表中选择“网络设置”。
Scroll down and tap on “Advanced Settings” at the bottom.
向下滚动并点击底部的“高级设置”。
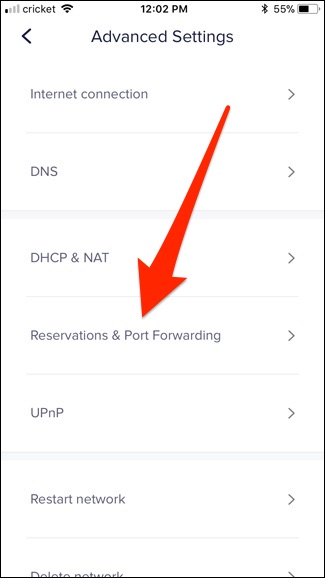
Tap on “Reservations & Port Forwarding”.
点击“预订和端口转发”。
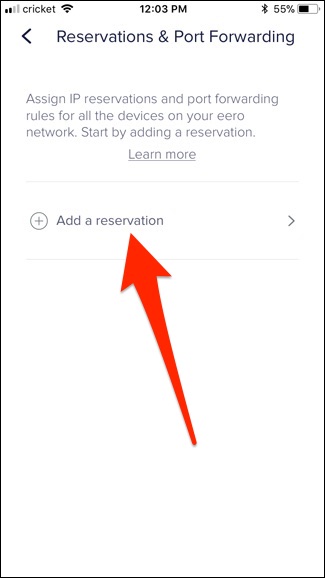
Tap on “Add a Reservation”.
点击“添加预订”。
Scroll down and select the device that you want to forward the port on. In my case, it’s my iMac.
向下滚动并选择要在其上转发端口的设备。 就我而言,这是我的iMac。

Tap on “Open a Port”.
点击“打开端口”。
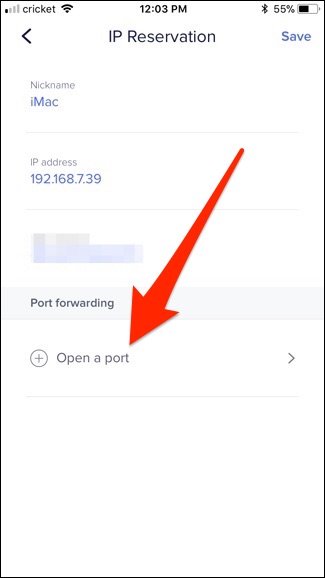
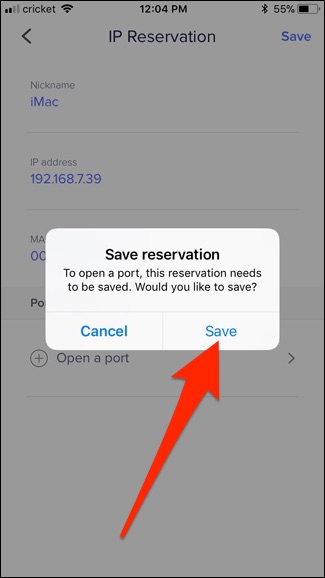
Hit “Save” when the pop-up appears. On the Eero, port forwarding requires giving your computer a static IP address through the router, which keeps the IP address from changing (since the port is assigned to a specific IP address).
出现弹出窗口时,单击“保存”。 在Eero上,端口转发需要通过路由器为计算机提供一个静态IP地址 ,以防止IP地址更改(因为端口已分配给特定的IP地址)。
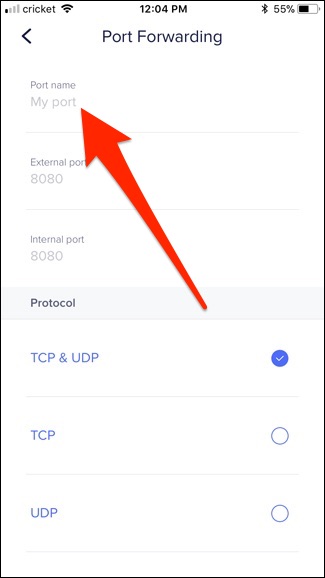
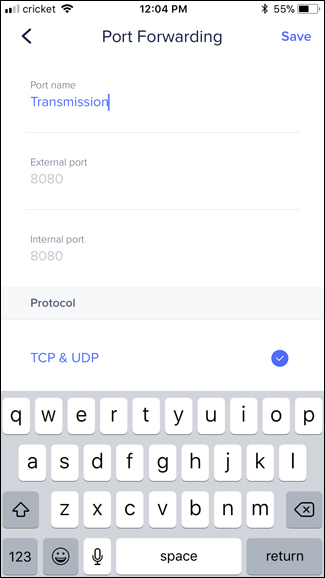
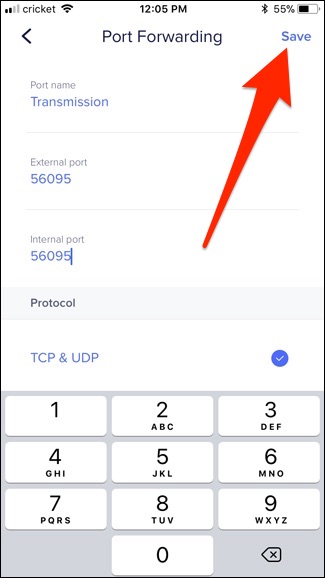
At the top, tap on “Port Name” and give it a name. This can be anything.
在顶部,点击“端口名称”并为其命名。 这可以是任何东西。
Next, enter in the port number for both “External Port” and “Internal Port”.
接下来,输入“外部端口”和“内部端口”的端口号。
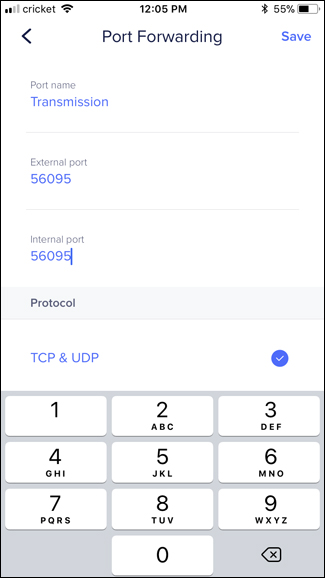
Next, hit “Save” in the top-right corner.
接下来,点击右上角的“保存”。
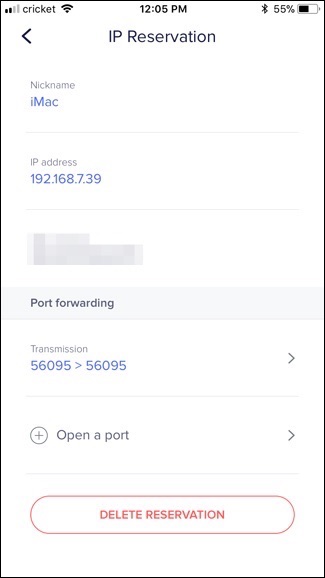
The port is now forwarded and you’ll now see an overview of your reservation. You can make any changes from here, as well as delete the reservation at any time.
现在,端口已转发,您现在将看到预订概述。 您可以从此处进行任何更改,也可以随时删除预订。
If I go back into Transmission, it’s now telling me that the port is open!
如果我回到“传输”,则表明端口已打开!

翻译自: https://www.howtogeek.com/333343/how-to-forward-ports-on-your-eero-wi-fi-system/


 1412
1412

 被折叠的 条评论
为什么被折叠?
被折叠的 条评论
为什么被折叠?
 到【灌水乐园】发言


