


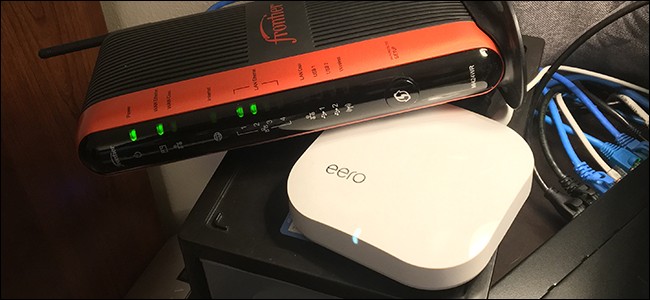
The Eero Wi-Fi system is meant to replace your current router, but if your current router has advanced features you rely on, you can put the Eero in bridge mode—thus allowing you use of your normal router, while still getting Eero’s great mesh Wi-Fi coverage.
Eero Wi-Fi系统旨在替换您当前的路由器,但是如果您当前的路由器具有您所依赖的高级功能,则可以将Eero置于桥接模式-这样您就可以使用常规路由器,同时仍然获得Eero的强大网状结构Wi-Fi覆盖范围。
Depending on how your network is set up, you could come across some conflicts where the two are butting heads. If that’s the case, putting one or the other in bridge mode can solve those problems.
根据您网络的设置方式,您可能会遇到一些冲突,而这两者是相互冲突的。 如果是这种情况,将一个或另一个置于桥接模式可以解决这些问题。
You can put your main router in bridge mode instead of the Eero, which will simply push your internet connection right through the router and let Eero handle everything on your network, but some users may still want to continue to use their router’s features and settings instead of having to rely on the Eero, especially since the Eero app doesn’t offer a whole lot in the way of advanced features. In that case, putting the Eero in bridge mode is the best option.
您可以将主路由器设置为桥接模式,而不是Eero,这将直接通过路由器推动Internet连接,并让Eero处理网络上的所有内容,但有些用户可能仍希望继续使用其路由器的功能和设置不得不依赖Eero,尤其是因为Eero应用程序并没有以高级功能提供很多功能。 在这种情况下,将Eero置于桥接模式是最佳选择。
如何将Eero置于桥接模式 (How to Put the Eero into Bridge Mode)
When you put your Eero into bridge mode, you still keep the separate mesh Wi-Fi network that’s set up on it, but most of the features are turned off, including the ability to restrict internet access to specific family members, as well as setting up port forwarding and messing with other advanced features.
当您将Eero设置为桥接模式时,您仍将保留建立在其上的单独的网状Wi-Fi网络,但是大多数功能都已关闭,包括将互联网访问限制为特定家庭成员的功能以及设置端口转发和其他高级功能混乱。
In bridge mode, your Eeros act like nothing more than an mesh extenders for your current network.
在桥接模式下,您的Eeros就像是当前网络的网状扩展器。
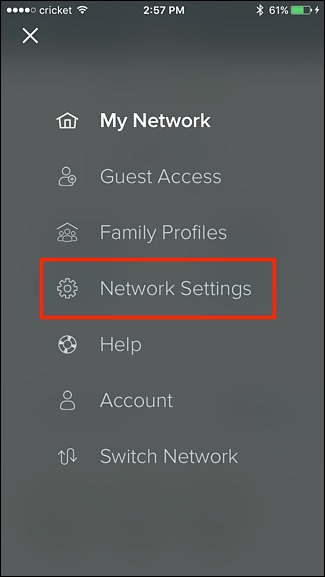
To enable bridge mode, start by opening up the Eero app on your phone and tapping on the menu button in the top-right corner of the screen.
要启用桥接模式,请先打开手机上的Eero应用程序,然后点击屏幕右上角的菜单按钮。

Select “Network Settings”.
选择“网络设置”。
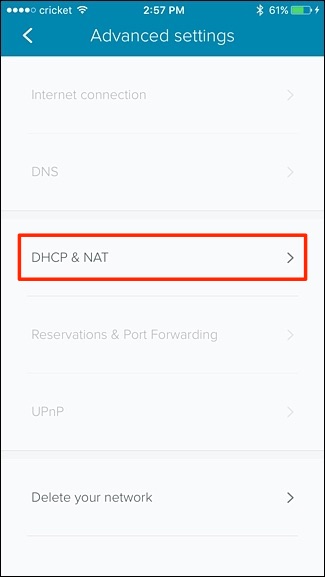
Tap on “Advanced Settings” at the bottom.
点击底部的“高级设置”。

Select “DHCP & NAT”.
选择“ DHCP&NAT”。
Tap on “Bridge”.
点击“桥”。
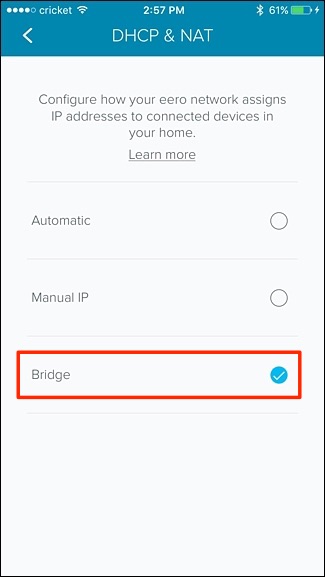
Your Eero system will need to reboot, but once it restarts it will be in bridge mode and all network duties will be handled by your current router.
您的Eero系统将需要重新启动,但是一旦重新启动,它将处于桥接模式,并且所有网络任务将由您当前的路由器处理。
From now on, your Eero system will simply just provide you with a basic mesh Wi-Fi network that you can connect to, but you’ll still have your current router if you ever want to change around any advanced network settings.
从现在开始,您的Eero系统将只为您提供可以连接的基本网状Wi-Fi网络,但是如果您想更改任何高级网络设置,仍将拥有当前的路由器。
Also keep in mind that your Eero will still broadcast a Wi-Fi network separate from your main router’s Wi-Fi network, so be sure to disable your router’s wireless signal to avoid any interference. You want your old router to essentially act as a wired router—not a wireless one. The Eero will handle all the wireless stuff for you.
另外请记住,您的Eero仍将广播与主路由器的Wi-Fi网络分开的Wi-Fi网络,因此请确保禁用路由器的无线信号,以避免任何干扰。 您希望您的旧路由器本质上充当有线路由器,而不是无线路由器。 Eero将为您处理所有无线内容。


 593
593

 被折叠的 条评论
为什么被折叠?
被折叠的 条评论
为什么被折叠?
 到【灌水乐园】发言


