


metro ui
Recently, we showed you how to use the Windows 7 Start menu in Windows 8. Now, we’ll show you how to have the functionality of Metro UI and the Windows 7 Start menu in Windows 8 at the same time.
最近,我们向您展示了如何在Windows 8中使用Windows 7的“开始”菜单 。 现在,我们将向您展示如何在Windows 8中同时具有Metro UI和Windows 7“开始”菜单的功能。
7Stacks is a program that allows you to have “stacks” of icons on your Taskbar. You can reduce icon clutter by grouping related icons into a single icon. We will use to create a Windows 7-style Start menu beside the Windows 8 one. Their website says that 7Stacks works in Windows 7, Vista, and XP, but we tested it in Windows 8 Developer Preview and found it to work.
7Stacks是一个程序,可让您在任务栏上放置图标“堆栈”。 您可以通过将相关图标分组为单个图标来减少图标混乱。 我们将用来在Windows 8旁边创建一个Windows 7风格的“开始”菜单。 他们的网站说7Stacks可以在Windows 7,Vista和XP中运行,但是我们在Windows 8 Developer Preview中对其进行了测试,发现它可以正常工作。
Before installing 7Stacks, you need to make sure hidden items are being shown. Open Windows Explorer and select any folder. Click the View tab. if your window is not wide enough to show all the groups on the View tab, click the tall, narrow arrow button on the right side to access the rest of the groups.
在安装7Stacks之前,您需要确保显示隐藏的项目。 打开Windows资源管理器,然后选择任何文件夹。 单击查看选项卡。 如果您的窗口不够宽,无法在“视图”选项卡上显示所有组,请单击右侧的又高又窄的箭头按钮以访问其余的组。
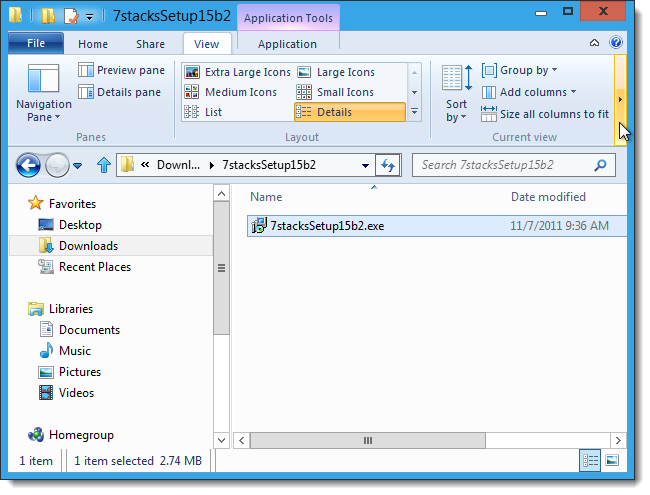
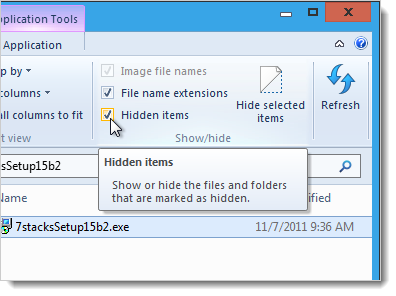
Click the Hidden items check box in the Show/hide group so there is a check mark in the box. Once you have turned on Hidden items, double-click on the .exe file you downloaded (see the link at the end of this article) to run the 7Stacks installation.
单击“显示/隐藏”组中的“隐藏的项目”复选框,以使该复选框中有一个复选标记。 启用“隐藏项目”后,双击下载的.exe文件(请参阅本文结尾处的链接)以运行7Stacks安装。
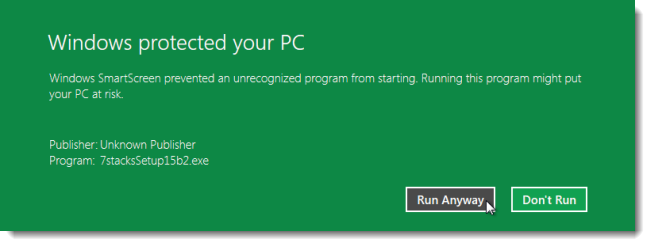
Before the installation begins, the following dialog box may display. Click the More Info link.
在开始安装之前,可能会显示以下对话框。 单击更多信息链接。
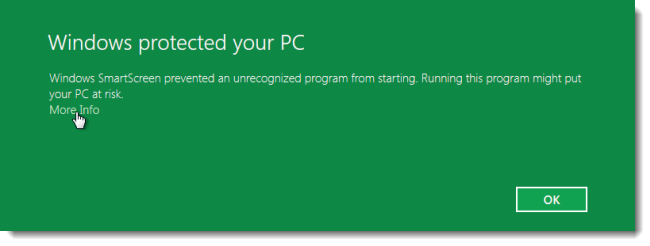
Click the Run Anyway button that becomes available.
单击“仍然运行”按钮。
Follow the instructions on each screen of the setup wizard.
按照安装向导每个屏幕上的说明进行操作。
You can use 7Stacks to create other stacks in addition to the Start menu stack we show you here. When the Select Additional Tasks screen displays, you may want to turn on the Create a desktop icon check box to make it easier to create new stacks using 7Stacks from the desktop.
除了我们在此处显示的“开始”菜单堆栈之外,您还可以使用7Stacks创建其他堆栈。 显示“选择其他任务”屏幕时,您可能需要打开“创建桌面图标”复选框,以使从桌面使用7Stacks轻松创建新堆栈。
On the final screen in the setup wizard, there is a check box that allows you to start 7Stacks immediately upon exiting the setup wizard. If you want to start 7Stacks right away, select this check box.
在安装向导的最后一个屏幕上,有一个复选框,可让您在退出安装向导后立即启动7Stacks。 如果要立即启动7Stacks,请选中此复选框。

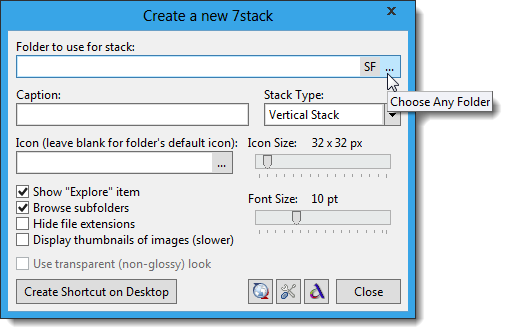
Once 7Stacks starts, click the … button on the right side of the Folder to use for stack edit box.
7Stacks启动后,单击文件夹右侧的…按钮以用于堆栈编辑框。
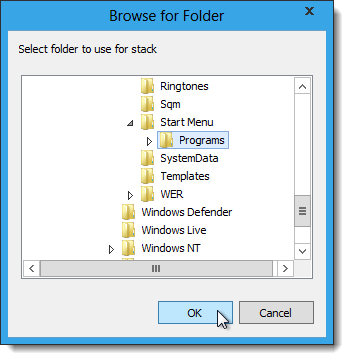
In the Browse for Folder dialog box, navigate to the following folder, select it, and click OK.
在“浏览文件夹”对话框中,导航到以下文件夹,将其选中,然后单击“确定”。
C:\ProgramData\Microsoft\Windows\Start Menu\Programs
C:\ ProgramData \ Microsoft \ Windows \开始菜单\程序
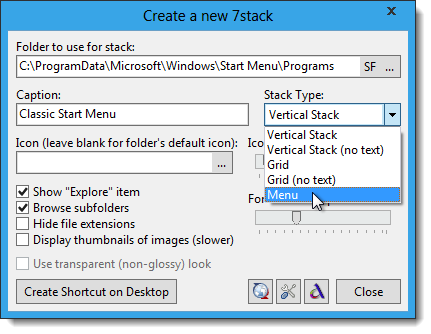
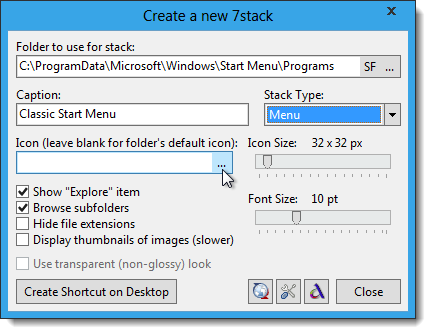
Enter a title in the Caption edit box. This title will display as the text on the shortcut you create. Select an option from the Stack Type drop-down list. We chose Menu, but you can choose Vertical Stack, if desired. They both produce a popup menu that looks similar to the classic Start menu.
在标题编辑框中输入标题。 该标题将显示为您创建的快捷方式上的文本。 从“堆栈类型”下拉列表中选择一个选项。 我们选择了菜单,但是如果需要,您可以选择垂直堆叠。 它们都产生一个看起来类似于经典“开始”菜单的弹出菜单。
To select an icon for the shortcut, click the … button on the right side of the Icon edit box.
要选择快捷方式的图标,请单击“图标”编辑框右侧的…按钮。
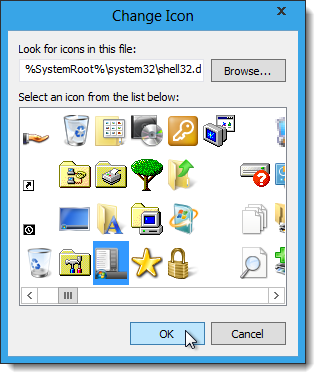
The Change Icon dialog box displays. There are many icons available in the default selected .dll file. Scroll through them and click on one to select it. Click OK.
显示“更改图标”对话框。 默认选择的.dll文件中有许多图标。 滚动浏览它们,然后单击以选中它。 单击确定。
NOTE: You may also use the Browse button to select another .exe, .dll, or .ico file to use.
注意:您也可以使用“浏览”按钮来选择另一个要使用的.exe,.dll或.ico文件。
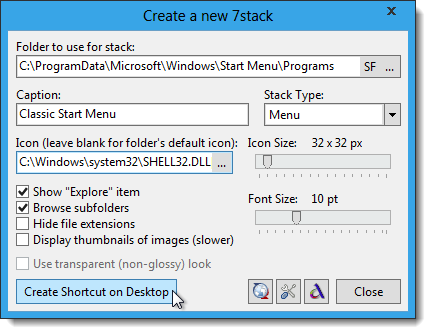
We accepted the default values for the rest of the options. Click Create Shortcut on Desktop.
我们接受其余选项的默认值。 单击在桌面上创建快捷方式。
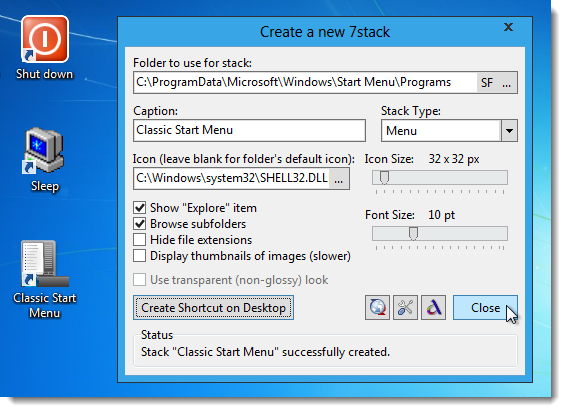
The Status box displays at the bottom of the Create a new 7stack dialog box telling you that the stack was successfully created. Click Close.
“状态”框显示在“创建新的7stack”对话框的底部,告诉您已成功创建堆栈。 单击关闭。
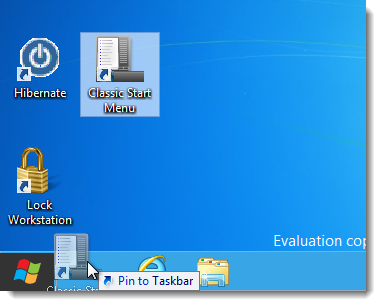
To put the stack on the Taskbar, drag the new shortcut you created to the Taskbar. We put it right next to the Windows 8 Start button.
要将堆栈放在任务栏上,请将您创建的新快捷方式拖到任务栏上。 我们将其放在Windows 8“开始”按钮旁边。
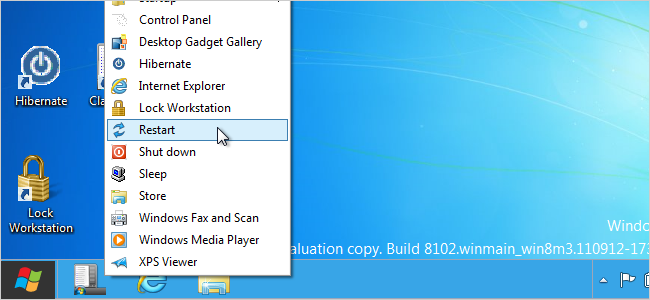
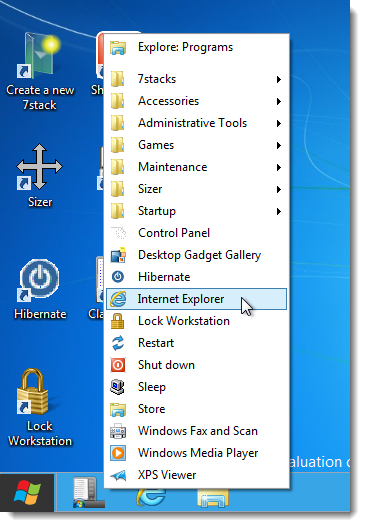
Now, when you click on the shortcut you put on the Taskbar, a classic-style Start menu pops up. The Windows 8 Metro UI-style Start menu is also available for use next to the classic-style Start menu.
现在,当您单击放在任务栏上的快捷方式时,将弹出一个经典样式的“开始”菜单。 Windows 8 Metro UI风格的“开始”菜单也可在经典风格的“开始”菜单旁边使用。
7Stacks does not provide search functionality on the classic start menu. If you want a different search tool to use in Windows 8, you can use FileSearchEX. It is meant for Windows 7, but because Windows 8 is built based on Windows 7, FileSearchEX will work. We installed it in Windows 8 and tested it and it seemed to work. The installation process is a little different than we described in the article linked to above. They now offer a .exe file that installs the program for you. The “Windows protected your PC” message displays just like we described for 7Stacks earlier in this article. Click More Info and then Run Anyway to install FileSearchEX.
7Stacks在经典的开始菜单上不提供搜索功能。 如果要在Windows 8中使用其他搜索工具,可以使用FileSearchEX 。 它适用于Windows 7,但是因为Windows 8是基于Windows 7构建的,所以FileSearchEX可以使用。 我们在Windows 8中安装了它并对其进行了测试,它似乎可以正常工作。 安装过程与我们在上面链接的文章中描述的稍有不同。 他们现在提供一个.exe文件来为您安装程序。 就像我们在本文前面为7Stacks所描述的那样,显示“ Windows保护了您的PC”消息。 单击“更多信息”,然后单击“仍然运行”以安装FileSearchEX。
Download 7Stacks from http://alastria.com/software/7stacks/.
从http://alastria.com/software/7stacks/下载7Stacks。
翻译自: https://www.howtogeek.com/97124/use-both-the-metro-ui-and-the-classic-start-menu-in-windows-8/
metro ui


 4526
4526


 被折叠的 条评论
为什么被折叠?
被折叠的 条评论
为什么被折叠?
 到【灌水乐园】发言


