
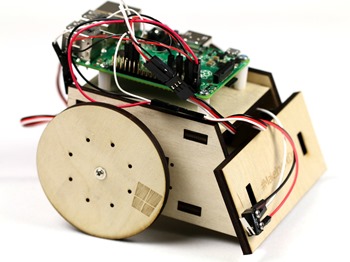
This week at the BUILD conference in San Francisco Microsoft released the first preview of Windows 10 IoT (Internet of Things) for Raspberry Pi 2 (as well as other lovely devices like the Intel Galileo and MinnowBoard Max).
本周在旧金山举行的BUILD会议上,微软发布了Raspberry Pi 2(以及其他可爱的设备,如Intel Galileo和MinnowBoard Max)的Windows 10 IoT(物联网)的第一版预览。
First, as I mentioned in February the Raspberry Pi 2 runs the Windows 10 IoT version. That means there is no "shell" or Windows Explorer. It's not a tiny desktop PC, but rather the core brain of whatever embedded maker thing you choose to build with it. The core of it is Windows. You've got PowerShell, you can run Windows Universal Apps that you write in C#, and you can talk to peripherals.
首先,正如我在二月份提到的那样,Raspberry Pi 2运行Windows 10 IoT版本。 这意味着没有“外壳”或Windows资源管理器。 它不是一台小型台式PC,而是您选择与其一起构建的任何嵌入式制造商产品的核心大脑。 它的核心是Windows。 您已经拥有PowerShell,可以运行用C#编写的Windows Universal Apps,并且可以与外围设备对话。
Over here at http://microsoft.hackster.io there is a great list of projects you can build with Windows IoT, including a cool robot you can control with an Xbox Controller.
在http://microsoft.hackster.io上,您可以使用Windows IoT构建大量项目,其中包括可以使用Xbox Controller控制的出色机器人。
在Raspberry Pi 2上安装Windows 10 (Installing Windows 10 on your Raspberry Pi 2)
This is an early build so things will change and get easier I'm sure. To be frank, getting the builds for Raspberry Pi took some confusing on my part to download.
这是一个较早的版本,因此我敢肯定,情况将会改变并且变得更加容易。 坦率地说,下载Raspberry Pi的版本使我有些困惑。
Go to the Windows Embedded Connect site and sign in.
Pick the Build you want. I got Windows 10 IoT Core Insider Preview Image for Raspberry Pi 2.
选择您想要的版本。 我获得了Raspberry Pi 2的Windows 10 IoT核心内部预览图像。
You'll need to install this older "File Transfer Manager" if you don't have it. If you have Chrome, you'll need to click the ".dlm" file and open it with the File Transfer Manager. You'll also need to accept two EULAs.
如果没有,则需要安装此较旧的“ File Transfer Manager ”。 如果您使用的是Chrome,则需要单击“ .dlm”文件,然后使用文件传输管理器将其打开。 您还需要接受两个EULA。
- Then you'll get a large ZIP file with the image you want inside. Unzip somewhere. 然后,您将获得一个包含所需图像的大型ZIP文件。 解压缩某处。
Here's a kicker, you'll need a Windows 10 Preview machine to run these commands and install.
这是一个好主意,您需要一台Windows 10 Preview计算机来运行这些命令并安装。
- I built one with a laptop I had around. I'm not sure why Windows 10 is needed. However, once it's setup you can use Windows 8.1 to talk to the Pi 2 or Remote PowerShell in. 我用随身携带的笔记本电脑建造了一个。 我不确定为什么需要Windows 10。 但是,设置完成后,您可以使用Windows 8.1与Pi 2或远程PowerShell进行通信。
Here's a kicker, you'll need a Windows 10 Preview machine to run these commands and install.
这是一个好主意,您将需要一台Windows 10预览计算机来运行这些命令并进行安装。
You should also get Microsoft Visual Studio 2015 RC.
您还应该获得Microsoft Visual Studio 2015 RC。
- After you install 2015, go try to make a Universal App and it will download the Universal Apps SDK. 安装2015年后,请尝试制作通用应用,它将下载通用应用SDK。
You should also get Microsoft Visual Studio 2015 RC.
您还应该获得Microsoft Visual Studio 2015 RC。
Follow the instructions here. Below is my summary along with the gotchas that slowed me down.
Now, plug your micro SD card into your Windows 10 PC (I use a micro to USB adapter) and open an Administrator PowerShell and run:
现在,将您的micro SD卡插入Windows 10 PC(我使用micro-USB适配器),然后打开Administrator PowerShell并运行:
wmic diskdrive list brief and make note of the physical disk number of your SD Card.
wmic diskdrive列表简短,并记下SD卡的物理磁盘号。
next run this and change PhysicalDriveN to whatever your SD Card's physical number is.
下一步运行此命令,然后将PhysicalDrive N更改为SD卡的物理编号。
dism.exe /Apply-Image /ImageFile:flash.ffu /ApplyDrive:\\.\PhysicalDriveN /SkipPlatformCheck
dism.exe / Apply-Image /ImageFile:flash.ffu /ApplyDrive:\\.\PhysicalDrive N / SkipPlatformCheck
NOTE: I had some issues and got "Error 50" on one of my micro SD cards. Changing cards worked. Not sure what's up.
注意:我遇到了一些问题,其中一张micro SD卡上出现“错误50”。 换卡工作。 不知道怎么了。
Now, just put your micro SD card into your Pi 2 and boot up your Pi 2 while connected to a display and Ethernet. It will initially startup very slow. It could be 2 to 4 minutes before you get to the main screen. Just hang in there until you see this screen. This is the Default app and just shows the IP Address of your Raspberry Pi 2.
现在,只需将Micro SD卡放入Pi 2中,并在连接到显示器和以太网的同时启动Pi 2。 最初启动会很慢。 您可能需要2到4分钟才能进入主屏幕。 只需挂在那里,直到看到此屏幕。 这是默认应用程序,仅显示Raspberry Pi 2的IP地址。
Now, from your local admin PowerShell run these commands to remote into your Pi 2. The default name is MINWINPC but you can also use the IP Address.
现在,从本地管理员PowerShell运行这些命令以远程访问您的Pi2。默认名称为MINWINPC,但您也可以使用IP地址。
net start WinRM
Set-Item WSMan:\localhost\Client\TrustedHosts -Value MINWINPC
remove-module psreadline -force
Enter-PsSession -ComputerName MINWINPC -Credential MINWINPC\Administrator
When the credentials dialog opens, make sure you use yourrpi2machinename\Administrator or yourrpi2ipaddress\Administrator for the user name. I was just using Administrator. The default password is p@ssw0rd and you should change it.
凭据对话框打开后,请确保使用yourrpi2machinename \ Administrator或yourrpi2ipaddress \ Administrator作为用户名。 我只是在使用管理员。 默认密码为p @ ssw0rd,您应该更改它。
See here how the PowerShell prompt changes to include the remote machine's name after I've remoted in?
在此处查看我远程登录后,PowerShell提示如何更改为包括远程计算机的名称?
On your Windows machine install the MSI that was included in the download. It will start a small watcher utility that will scan your network and look for Microsoft IoT devices. It's easy to lose them if their IP address changes. It also has a nice right click menu for getting to its embedded web server.
在Windows计算机上,安装下载中包含的MSI。 它将启动一个小型观察程序实用程序,该实用程序将扫描您的网络并寻找Microsoft IoT设备。 如果IP地址发生变化,很容易丢失它们。 它还具有一个不错的右键菜单,可以访问其嵌入式Web服务器。
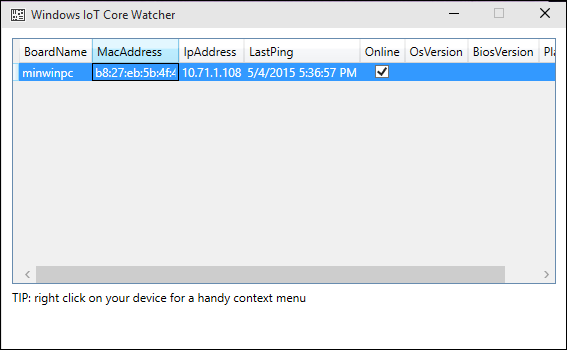
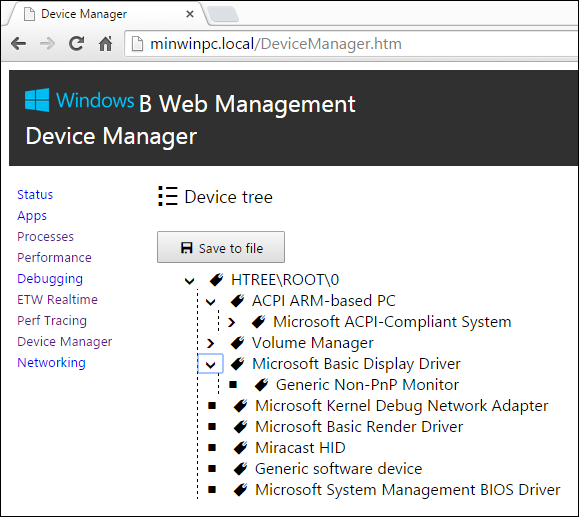
Included and running on the image is a web server that will let you explore attached devices and running processes.
包含在映像中并在映像上运行的是Web服务器,可让您浏览连接的设备和运行的进程。
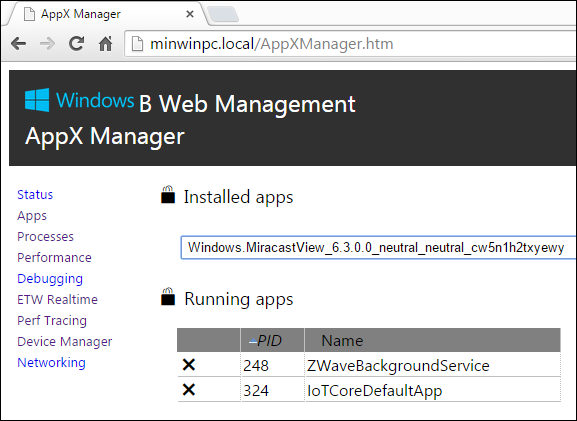
You can also deploy applications from here although you'll usually do it from Visual Studio.
您也可以从此处部署应用程序,尽管通常会从Visual Studio中进行部署。
As of the time of this blog post they didn't have WiFi and Bluetooth ready yet but they are updating it often so I am sure we'll see updates soon. Here is a list of devices that work today via USB.
截至撰写本博客之时,他们还没有准备好WiFi和蓝牙,但他们会经常对其进行更新,因此,我相信我们很快就会看到更新。 这是今天可以通过USB工作的设备列表。
There's lots of samples. You can make Background (headless) IoT apps or do ones with a UI since the Raspberry Pi has HDMI built in.
有很多样品。 由于Raspberry Pi内置了HDMI,因此您可以制作背景(无头)物联网应用或使用UI进行操作。
Finally, here's turning on an LED from C# (with comments and defensive code).
最后,在这里打开C#的LED(带有注释和防御代码)。
using Windows.Devices.Gpio;

private void InitGPIO()
{
    var gpio = GpioController.GetDefault();

    // Show an error if there is no GPIO controller
    if (gpio == null)
    {
        pin = null;
        GpioStatus.Text = "There is no GPIO controller on this device.";
        return;
    }

    pin = gpio.OpenPin(LED_PIN);

    // Show an error if the pin wasn't initialized properly
    if (pin == null)
    {
        GpioStatus.Text = "There were problems initializing the GPIO pin.";
        return;
    }

    pin.Write(GpioPinValue.High);
    pin.SetDriveMode(GpioPinDriveMode.Output);

    GpioStatus.Text = "GPIO pin initialized correctly.";
}
从Visual Studio部署 (Deploying from Visual Studio)
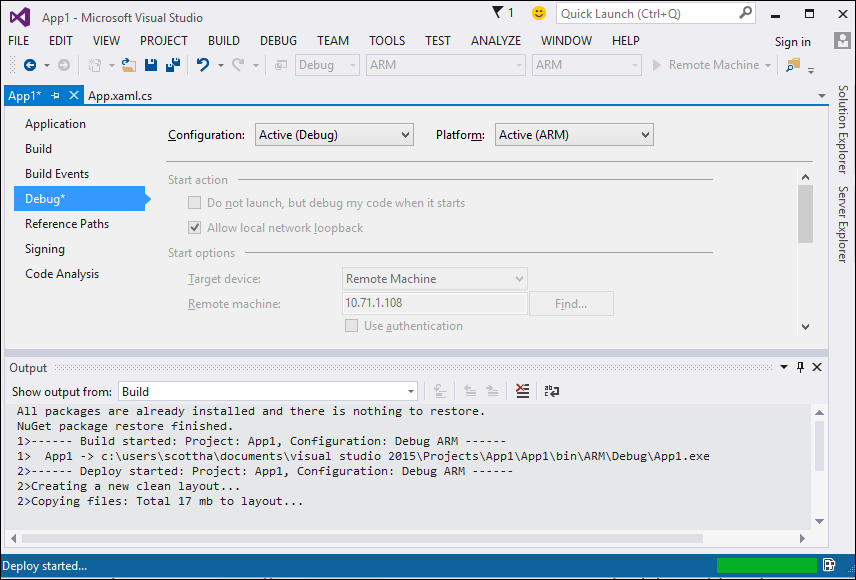
Make sure the remote debugger is running with schtasks /run /tn StartMsVsmon and connect with no authentication while it's running.
确保远程调试器正在使用schtasks / run / tn StartMsVsmon运行,并且在运行时不进行身份验证即可连接。
Now you can deploy a Universal App (with UI!) directly from Visual Studio:
现在,您可以直接从Visual Studio部署通用应用程序(带有UI!):
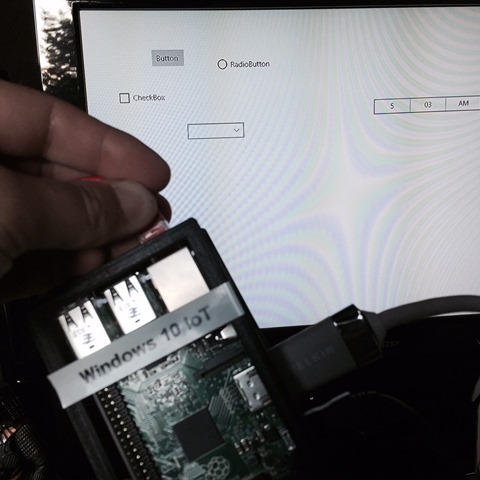
And here is my amazing app. Which is basically just a bunch of controls I threw onto the XAML. But still. Fancy!
这是我惊人的应用程序。 基本上,这只是我投入XAML的一堆控件。 但是还是。 看中!
Windows远程Arduino和虚拟Arduino Shields (Windows Remote Arduino and Virtual Arduino Shields)
A few other cool maker things worth pointing out are Windows Remote Arduino and Virtual Arduino Shields. Remote Arduino lets you talk to your Arduino from your Windows machine using the Firmata protocol. Then you can reach out to an Arduino device and give it commands from a Windows Universal app. The Virtual Arduino Shields lets you use a Windows Phone as a well, just that, virtual shields. Shields for Arduino can add up and when you're prototyping you may not want to shell out for a Gyro or GPS. A cheap phone like a Lumia 530 has like $200 worth of sensors (gps, touch display, gyro, internet, speech, etc) in it that you can exploit.
Windows远程Arduino和虚拟Arduino Shields值得一提。 远程Arduino使您可以使用Firmata协议从Windows机器与Arduino对话。 然后,您可以与Arduino设备联系,并从Windows Universal应用程序向其发出命令。 虚拟Arduino Shields可以让您将Windows Phone用作虚拟屏蔽。 Arduino的Shields可能会加起来,因此当您进行原型设计时,您可能不想为陀螺仪或GPS买单。 像Lumia 530这样的便宜手机中,可以使用价值200美元的传感器(gps,触摸屏,陀螺仪,互联网,语音等)。
It's early days but I'm pretty stoked about all the options that Makers have available. The ASP.NET team is in talks with the IoT folks to see if we can get ASP.NET 5 running on Windows IoT on a Raspberry Pi as well, so stay tuned. Get started here.
这是早期,但我对Makers可用的所有选项感到非常兴奋。 ASP.NET团队正在与IoT人士进行交谈,以了解我们是否也可以在Raspberry Pi的Windows IoT上运行ASP.NET 5,敬请关注。 从这里开始。
相关链接 (Related Links)
翻译自: https://www.hanselman.com/blog/setting-up-windows-10-for-iot-on-your-raspberry-pi-2


 1万+
1万+


 被折叠的 条评论
为什么被折叠?


