


厌倦在繁琐的任务上浪费时间?10个 Python 脚本自动化开始吧!
“自动化不是人类工人的敌人,而是盟友。自动化将工人从苦差事中解放出来,让他有机会做更有创造力和更有价值的工作。
阅读本文后,您将更好地了解许多类型的python脚本,您可以使用这些脚本来自动执行日常无聊的任务。
Python是一种功能强大的语言,广泛用于自动化各种任务。无论您是开发人员、系统管理员,还是只是想通过自动执行日常任务来节省时间的人,Python 都能满足您的需求。
1、文件传输脚本
Python 中的文件传输脚本是一组用 Python 编程语言编写的指令或程序,用于自动执行通过网络或在计算机之间传输文件的过程。
Python 提供了几个可用于创建文件传输脚本的库和模块,例如套接字ftplib、smtplib 和paramiko 等。
下面是 Python 中一个简单的文件传输脚本示例,该脚本使用套接字模块通过网络传输文件:
import socket

# create socket
s = socket.socket()

# bind socket to a address and port
s.bind(('localhost', 12345))

# put the socket into listening mode
s.listen(5)

print('Server listening...')

# forever loop to keep server running
while True:
    # establish connection with client
    client, addr = s.accept()
    print(f'Got connection from {addr}')

    # receive the file name
    file_name = client.recv(1024).decode()

    try:
        # open the file for reading in binary
        with open(file_name, 'rb') as file:
            # read the file in chunks
            while True:
                chunk = file.read(1024)
                if not chunk:
                    break
                # send the chunk to the client
                client.sendall(chunk)

        print(f'File {file_name} sent successfully')
    except FileNotFoundError:
        # if file not found, send appropriate message
        client.sendall(b'File not found')
        print(f'File {file_name} not found')

    # close the client connection
    client.close()
此脚本运行一个服务器,该服务器侦听地址 localhost 和端口 12345 上的传入连接。当客户端连接时,服务器从客户端接收文件名,然后读取文件的内容并将其以块的形式发送到客户端。如果未找到该文件,服务器将向客户端发送相应的消息。
如上所述,还有其他库和模块可用于在python中创建文件传输脚本,例如使用ftp协议连接和传输文件的_ftplib和用于_SFTP/SSH_文件传输协议传输的paramiko_。可以定制脚本以匹配特定要求或方案。
2、系统监控脚本
系统监视脚本是一种 Python 脚本用于监视计算机或网络的性能和状态。
该脚本可用于跟踪各种指标,例如 CPU 使用率、内存使用率、磁盘空间、网络流量和系统正常运行时间。
该脚本还可用于监视某些事件或条件,例如错误的发生或特定服务的可用性。例如:
import psutil

# Get the current CPU usage
cpu_usage = psutil.cpu_percent()

# Get the current memory usage
memory_usage = psutil.virtual_memory().percent

# Get the current disk usage
disk_usage = psutil.disk_usage("/").percent

# Get the network activity
# Get the current input/output data rates for each network interface
io_counters = psutil.net_io_counters(pernic=True)
for interface, counters in io_counters.items():
    print(f"Interface {interface}:")
    print(f"  bytes sent: {counters.bytes_sent}")
    print(f"  bytes received: {counters.bytes_recv}")

# Get a list of active connections
connections = psutil.net_connections()
for connection in connections:
    print(f"{connection.laddr} <-> {connection.raddr} ({connection.status})")

# Print the collected data
print(f"CPU usage: {cpu_usage}%")
print(f"Memory usage: 1.15MB%")
print(f"Disk usage: {disk_usage}%")
此脚本使用psutil模块中的
cpu_percent: CPU 使用率
virtual_memory:内存使用率
disk_usage: 磁盘使用率。
函数分别检索当前:
virtual_memory 函数返回具有各种属性的对象,例如内存总量以及已用内存量和可用内存量。
disk_usage 函数将路径作为参数,并返回具有磁盘上总空间量以及已用空间量和可用空间量等属性的对象。
3、网页抓取脚本最常用
此脚本可用于从网站中提取数据并以结构化格式,如电子表格或数据库存储数据。这对于收集数据进行分析或跟踪网站上的更改非常有用。例如:
import requests
from bs4 import BeautifulSoup

# Fetch a web page
page = requests.get("http://www.example.com")

# Parse the HTML content
soup = BeautifulSoup(page.content, "html.parser")

# Find all the links on the page
links = soup.find_all("a")

# Print the links
for link in links:
    print(link.get("href"))
可以看到_BeautiulSoup_的强大功能。您可以使用此包找到任何类型的 dom 对象,因为我已经展示了如何找到页面上的所有链接。
您可以修改脚本以抓取其他类型的数据,或导航到站点的不同页面。还可以使用 find 方法查找特定元素,或使用带有其他参数的 find_all 方法来筛选结果。
4、电子邮件自动化脚本
此脚本可用于根据特定条件自动发送电子邮件。例如,您可以使用此脚本向团队发送每日报告,或者在重要截止日期临近时向自己发送提醒。下面是如何使用 Python 发送电子邮件的示例:
import smtplib
from email.mime.text import MIMEText

# Set the SMTP server and login credentials
smtp_server = "smtp.gmail.com"
smtp_port = 587
username = "your@email.com"
password = "yourpassword"

# Set the email parameters
recipient = "recipient@email.com"
subject = "Test email from Python"
body = "This is a test email sent from Python."

# Create the email message
msg = MIMEText(body)
msg["Subject"] = subject
msg["To"] = recipient
msg["From"] = username

# Send the email
server = smtplib.SMTP(smtp_server, smtp_port)
server.starttls()
server.login(username, password)
server.send_message(msg)
server.quit()
此脚本使用 smtplib 和电子邮件模块通过简单邮件传输协议 SMTP 发送电子邮件。
来自smtplib模块的SMTP类用于创建SMTP客户端,starttls和登录方法用于建立安全连接,电子邮件模块中的MIMEText类用于创建多用途Internet邮件扩展MIME格式的电子邮件。
MIMEText 构造函数将电子邮件的正文作为参数,您可以使用 setitem 方法来设置电子邮件的主题、收件人和发件人。
创建电子邮件后,SMTP 对象的send_message方法将用于发送电子邮件。然后调用 quit 方法以关闭与 SMTP 服务器的连接。
5、密码管理器脚本:
密码管理器脚本是一种用于安全存储和管理密码的 Python 脚本。该脚本通常包括用于生成随机密码、将哈希密码存储在安全位置如数据库或文件以及在需要时检索密码的函数。
import secrets
import string

# Generate a random password
def generate_password(length=16):
    characters = string.ascii_letters + string.digits + string.punctuation
    password = "".join(secrets.choice(characters) for i in range(length))
    return password

# Store a password in a secure way
def store_password(service, username, password):
    # Use a secure hashing function to store the password
    hashed_password = hash_function(password)

    # Store the hashed password in a database or file
    with open("password_database.txt", "a") as f:
        f.write(f"{service},{username},{hashed_password}\n")

# Retrieve a password
def get_password(service, username):
    # Look up the hashed password in the database or file
    with open("password_database.txt") as f:
        for line in f:
            service_, username_, hashed_password_ = line.strip().split(",")
            if service == service_ and username == username_:
                # Use a secure hashing function to compare the stored password with the provided password
                if hash_function(password) == hashed_password_:
                    return password
        return None
上述示例脚本中的_generate_password_ 函数使用字母、数字和标点字符的组合生成指定长度的随机密码。
_store_password_函数将服务,如网站或应用程序、用户名和密码作为输入,并将散列密码存储在安全位置。
_get_password_函数将服务和用户名作为输入,如果在安全存储位置找到相应的密码,则检索相应的密码。

自动化的 Python 脚本的第 2 部分
欢迎回来!
在上一篇文章中,我们深入研究了 Python 脚本的世界,我们还没有揭开Python脚本的所有奥秘。
在本期中,我们将发现其余五种类型的脚本,这些脚本将让您立即像专业人士一样编码。
6、自动化数据分析:
Python的pandas是数据分析和操作的强大工具。以下脚本演示如何使用它自动执行清理、转换和分析数据集的过程。
import pandas as pd

# Reading a CSV file
df = pd.read_csv("data.csv")

# Cleaning data
df.dropna(inplace=True) # Dropping missing values
df = df[df["column_name"] != "some_value"] # Removing specific rows

# Transforming data
df["column_name"] = df["column_name"].str.lower() # Changing string to lowercase
df["column_name"] = df["column_name"].astype(int) # Changing column datatype

# Analyzing data
print(df["column_name"].value_counts()) # Prints the frequency of unique values in the column

# Saving the cleaned and transformed data to a new CSV file
df.to_csv("cleaned_data.csv", index=False)
上面脚本中的注释对于具有 python 基础知识的人来说非常简单。
该脚本是一个简单的示例,用于演示 pandas 库的强大功能以及如何使用它来自动执行数据清理、转换和分析任务。
但是,脚本是有限的,在实际方案中,数据集可能要大得多,清理、转换和分析操作可能会更复杂。
7、自动化计算机视觉任务:
自动化计算机视觉任务是指使用 Python 及其库自动执行各种图像处理和计算机视觉操作。Python 中最受欢迎的计算机视觉任务库之一是opencv
OpenCV是一个主要针对实时计算机视觉的编程函数库。它提供了广泛的功能,包括图像和视频 I/O、图像处理、视频分析、对象检测和识别等等。例如:
import cv2

# Load the cascade classifier for face detection
face_cascade = cv2.CascadeClassifier("haarcascade_frontalface_default.xml")

# Load the image
img = cv2.imread("image.jpg")
gray = cv2.cvtColor(img, cv2.COLOR_BGR2GRAY)

# Detect faces
faces = face_cascade.detectMultiScale(gray, scaleFactor=1.1, minNeighbors=5)

# Draw rectangles around the faces
for (x, y, w, h) in faces:
    cv2.rectangle(img, (x, y), (x+w, y+h), (255, 0, 0), 2)

# Show the image

cv2.imshow("Faces", img)
cv2.waitKey(0)
cv2.destroyAllWindows()
上面的脚本检测图像中的人脸。它首先加载一个级联分类器用于人脸检测,这个分类器是一个预先训练的模型,可以识别图像中的人脸。
然后它加载图像并使用 cv2.cvtColor()方法将其转换为灰度。然后将图像传递给分类器的 detectMultiScale()方法,该方法检测图像中的人脸。该方法返回检测到的人脸的坐标列表。
然后,该脚本循环遍历坐标列表,并使用 cv2.rectangle()方法在检测到的人脸周围绘制矩形。最后,使用 cv2.imshow()方法在屏幕上显示图像。
这只是OpenCV可以实现的目标的一个基本示例,还有更多可以自动化的功能,例如对象检测,图像处理和视频分析。
OpenCV 是一个非常强大的库,可用于自动执行各种计算机视觉任务,例如面部识别、对象跟踪和图像稳定。
8、自动化数据加密:
自动化数据加密是指使用 Python 及其库自动加密和解密数据和文件。
Python 中最受欢迎的数据加密库之一是密码学。
“密码学”是一个提供加密配方和原语的库。它包括高级配方和常见加密算法(如对称密码、消息摘要和密钥派生函数)的低级接口。以下示例演示了如何使用加密库加密文件:
import os
from cryptography.fernet import Fernet
from cryptography.hazmat.backends import default_backend
from cryptography.hazmat.primitives import hashes
from cryptography.hazmat.primitives.kdf.pbkdf2 import PBKDF2HMAC

password = b"super_secret_password"
salt = os.urandom(16)
kdf = PBKDF2HMAC(
    algorithm=hashes.SHA256,
    iterations=100000,
    length=32,
    salt=salt,
    backend=default_backend()
)
key = base64.urlsafe_b64encode(kdf.derive(password))
cipher = Fernet(key)

# Encrypt the file
with open("file.txt", "rb") as f:
    data = f.read()

cipher_text = cipher.encrypt(data)

with open("file.txt", "wb") as f:
    f.write(cipher_text)
它首先使用 PBKDF2HMAC 密钥派生函数生成密钥,这是一个基于密码的密钥派生函数,使用安全哈希算法 SHA-256 和salt值。
salt 值是使用os.urandom()函数生成的,该函数生成加密安全的随机字节。
然后,它创建一个 Fernet 对象,该对象是对称(也称为“密钥”)身份验证加密的实现。
然后,它读取明文文件,并使用 Fernet 对象的encrypt()方法对其进行加密。最后,它将加密数据写入文件。
请务必注意,用于加密文件的密钥必须保密并安全存储。如果密钥丢失或泄露,加密的数据将无法读取。
9、自动化测试和调试:
自动化测试和调试是指使用 Python 及其库自动运行测试和调试代码。在 Python 中,有几个流行的库用于自动化测试和调试,例如 unittest、pytest、nose 和 doctest。
下面是使用unittest 库自动测试在给定字符串中查找最长回文子字符串的 Python 函数的示例:
def longest_palindrome(s):
    n = len(s)
    ans = ""
    for i in range(n):
        for j in range(i+1, n+1):
            substring = s[i:j]
            if substring == substring[::-1] and len(substring) > len(ans):
                ans = substring
    return ans

class TestLongestPalindrome(unittest.TestCase):
    def test_longest_palindrome(self):
        self.assertEqual(longest_palindrome("babad"), "bab")
        self.assertEqual(longest_palindrome("cbbd"), "bb")
        self.assertEqual(longest_palindrome("a"), "a")
        self.assertEqual(longest_palindrome(""), "")

if __name__ == '__main__':
    unittest.main()
此脚本使用 unittest 库自动测试在给定字符串中查找最长回文子字符串的 Python 函数。
‘longest_palindrome’ 函数将字符串作为输入,并通过遍历所有可能的子字符串并检查它是否是回文并且它的长度大于前一个来返回最长的回文子字符串。
该脚本还定义了一个从 unittest 继承的_“TestLongestPalindrome”_类。测试用例,并包含多种测试方法。
每个测试方法都使用 _assertEqual()_方法来检查 longest_palindrome() 函数的输出是否等于预期的输出。
当脚本运行时,将调用unittest.main()函数,该函数运行TestLongestPalindrome类中的所有测试方法。
如果任何测试失败,即longest_palindrome()函数的输出不等于预期输出,则会打印一条错误消息,指示哪个测试失败以及预期和实际输出是什么。
此脚本是如何使用 unittest 库自动测试 Python 函数的示例。它允许您在将代码部署到生产环境之前轻松测试代码并捕获任何错误或错误。
10、自动化时间序列预测:
自动化时间序列预测是指使用 Python 及其库自动预测时间序列数据的未来值。在Python中,有几个流行的库可以自动化时间序列预测,例如_statsmodels_和_prophet_。
_“prophet”_是由Facebook开发的开源库,它提供了一种简单快捷的方式来执行时间序列预测。
它基于加法模型,其中非线性趋势与每年、每周和每天的季节性以及假日效应相吻合。它最适合具有强烈季节性影响的时间序列和多个季节的历史数据。
下面是使用 prophet 库对每日销售数据执行时间序列预测的示例:
import pandas as pd
from fbprophet import Prophet

# Read in data
df = pd.read_csv("sales_data.csv")

# Create prophet model
model = Prophet()

# Fit model to data
model.fit(df)

# Create future dataframe
future_data = model.make_future_dataframe(periods=365)

# Make predictions
forecast = model.predict(future_data)

# Print forecast dataframe
print(forecast[['ds', 'yhat', 'yhat_lower', 'yhat_upper']])
正如Mr.所说:一张图片胜过千言万语
还可以通过在上面添加以下代码行来包含预测销售额的视觉对象:
# Import visualization library
import matplotlib.pyplot as plt

# Plot predicted values
model.plot(forecast)
plt.show()

# Plot predicted values with uncertainty intervals
model.plot(forecast)
plt.fill_between(forecast['ds'], forecast['yhat_lower'], forecast['yhat_upper'], color='pink')
plt.show()

# Plot component of the forecast
model.plot_components(forecast)
plt.show()
第一个可视化效果
model.plot(forecast)
显示预测值和历史数据,它可以让您大致了解模型拟合数据的程度。
第二个可视化效果:
plt.fill_between(预测['ds'],预测['yhat_lower'],预测['yhat_upper'],color='pink')
显示具有不确定性区间的预测值,这使您可以查看预测中有多少不确定性。
第三个可视化效果
model.plot_components(forecast)
显示预测的组成部分,例如趋势、季节性和节假日。
结论
总之,Python的自动化能力超强并且不断发展,每天都在开发新的库和框架。
使用诸如_pandas,opencv,cryptography,unittest,prophe_t等库,使得以高效和自动化的方式执行这些任务变得更加容易。
题外话
当下这个大数据时代不掌握一门编程语言怎么跟的上脚本呢?当下最火的编程语言Python前景一片光明!如果你也想跟上时代提升自己那么请看一下.

感兴趣的小伙伴,赠送全套Python学习资料,包含面试题、简历资料等具体看下方。

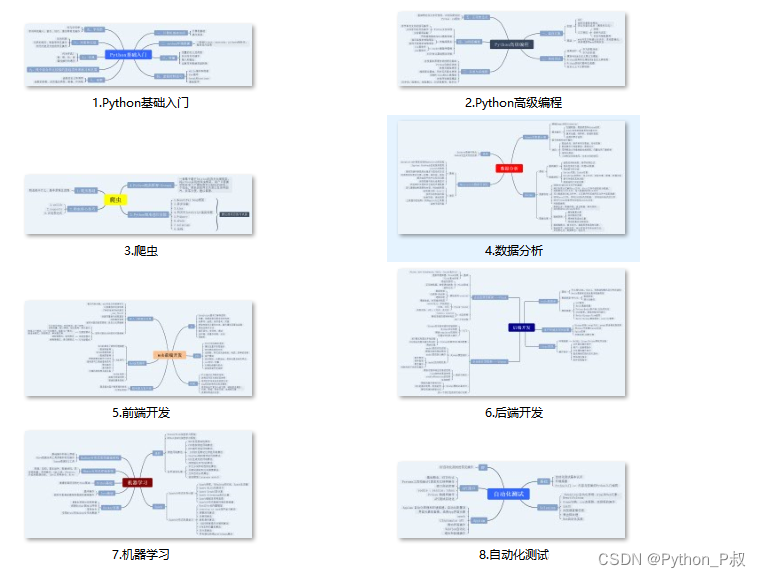
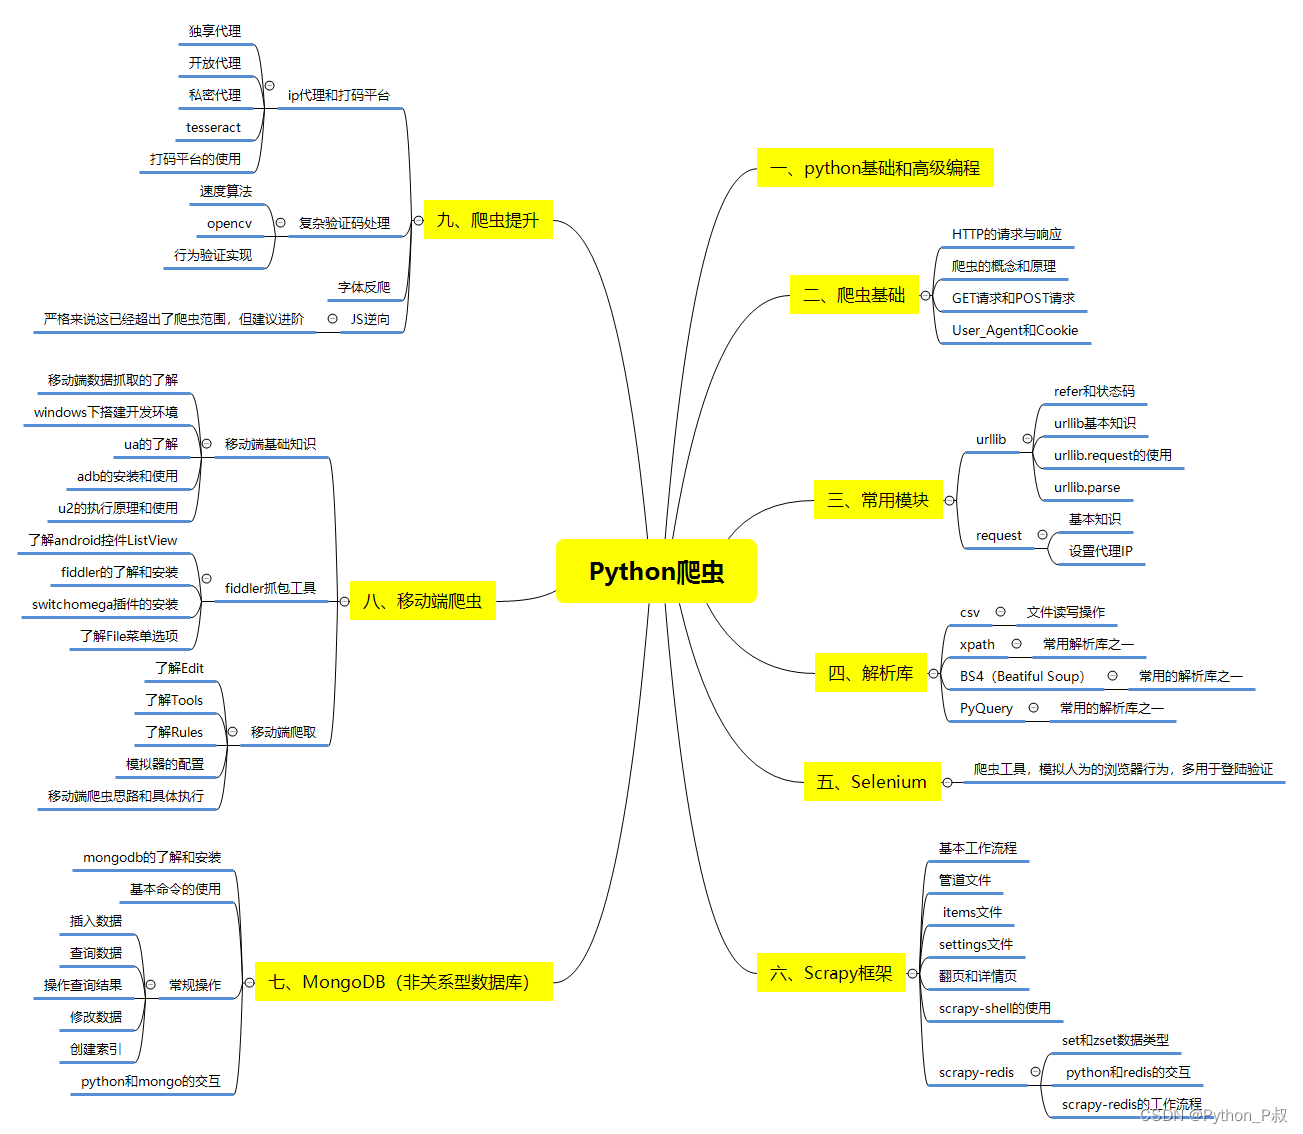
一、Python所有方向的学习路线
Python所有方向的技术点做的整理,形成各个领域的知识点汇总,它的用处就在于,你可以按照下面的知识点去找对应的学习资源,保证自己学得较为全面。
二、Python必备开发工具
工具都帮大家整理好了,安装就可直接上手!
三、最新Python学习笔记
当我学到一定基础,有自己的理解能力的时候,会去阅读一些前辈整理的书籍或者手写的笔记资料,这些笔记详细记载了他们对一些技术点的理解,这些理解是比较独到,可以学到不一样的思路。

四、Python视频合集
观看全面零基础学习视频,看视频学习是最快捷也是最有效果的方式,跟着视频中老师的思路,从基础到深入,还是很容易入门的。

五、实战案例
纸上得来终觉浅,要学会跟着视频一起敲,要动手实操,才能将自己的所学运用到实际当中去,这时候可以搞点实战案例来学习。

六、面试宝典
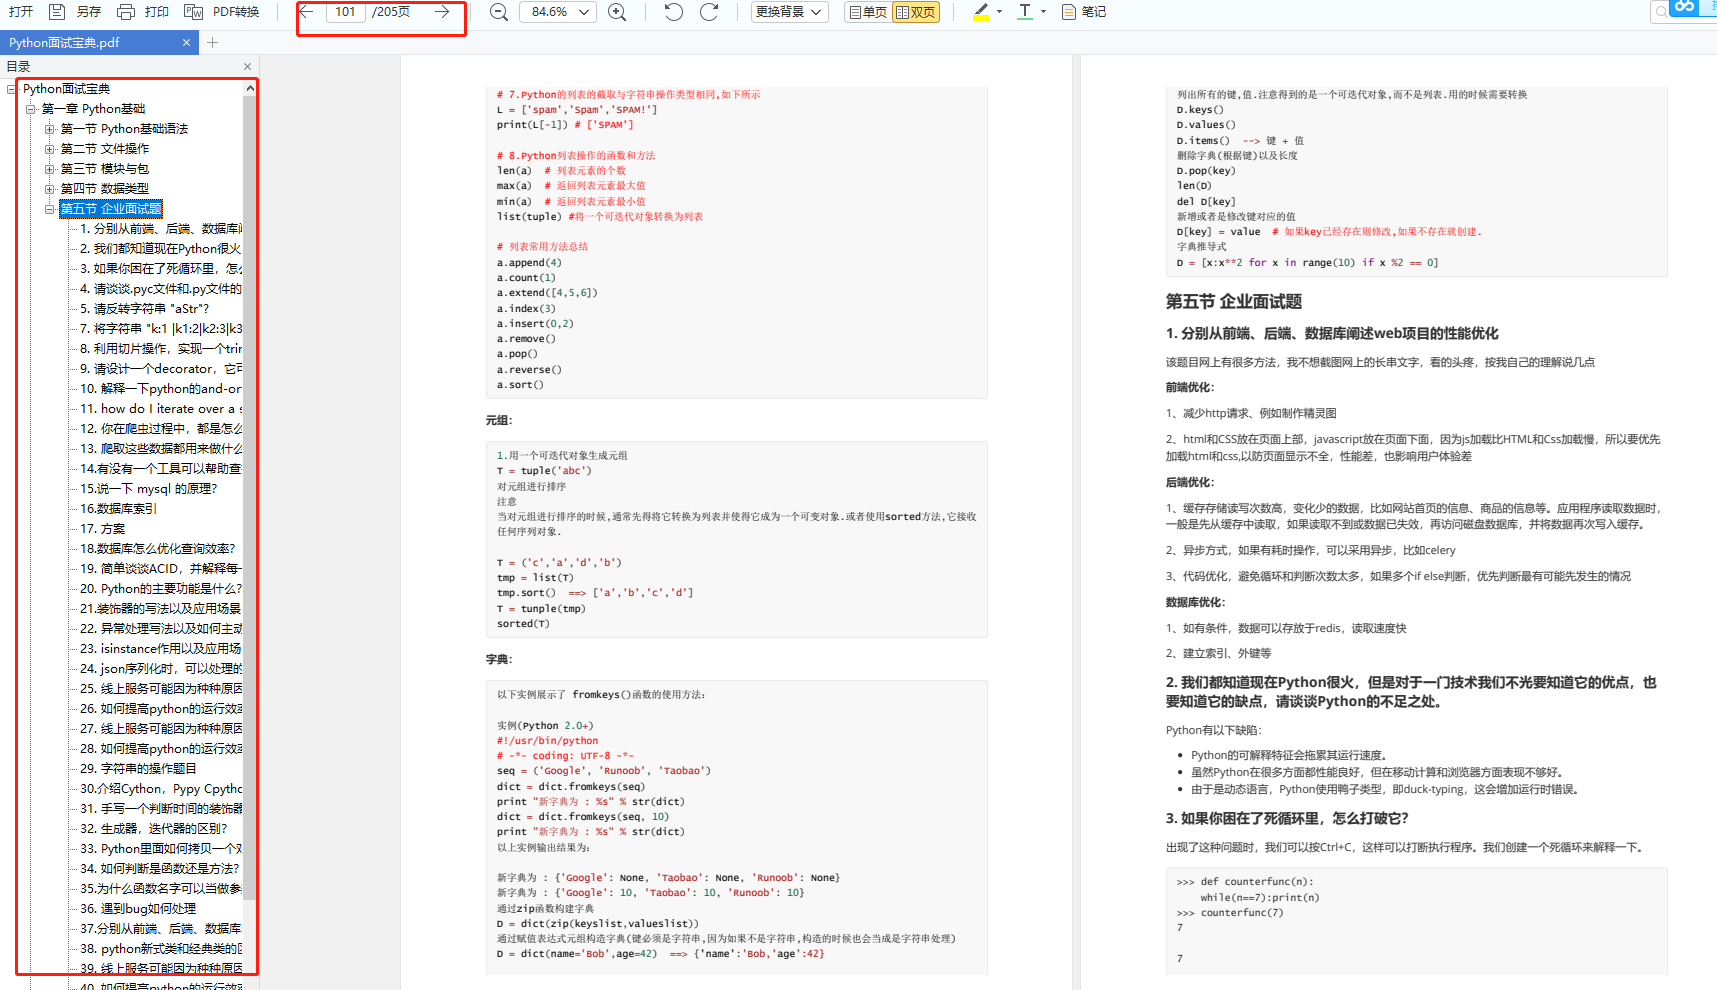

简历模板
若有侵权,请联系删除


 6651
6651

 被折叠的 条评论
为什么被折叠?
被折叠的 条评论
为什么被折叠?
 到【灌水乐园】发言


