


树莓派部署Yolov5-Lite 1.5
一.烧录镜像
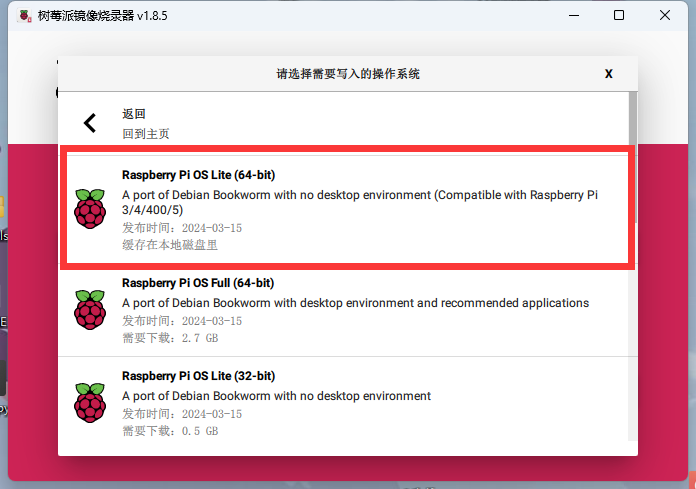
使用树莓派镜像下载软件(rpi-imager)制卡。
这边我使用的是无桌面环境的arrch 64位系统
然后可以配置WIFI,以及用户名。
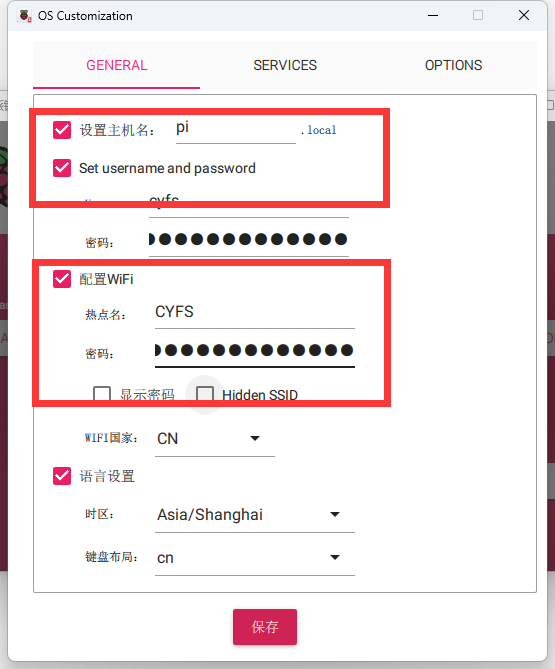
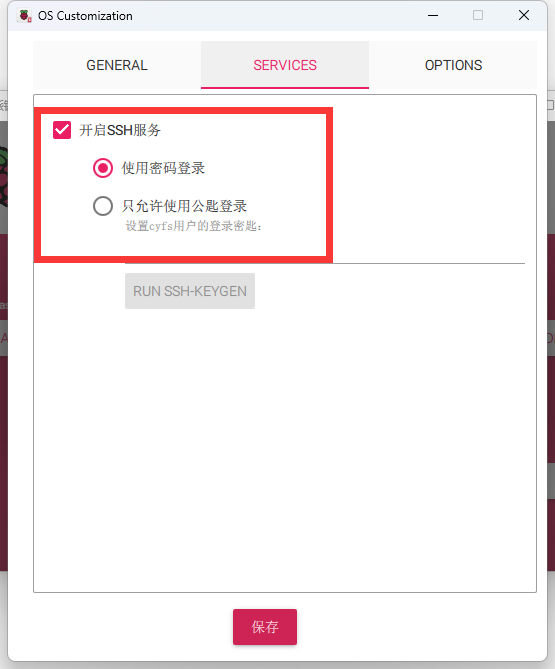
注意要打开SSH连接。
等待制卡完成即可。
二.SHH连接树莓派
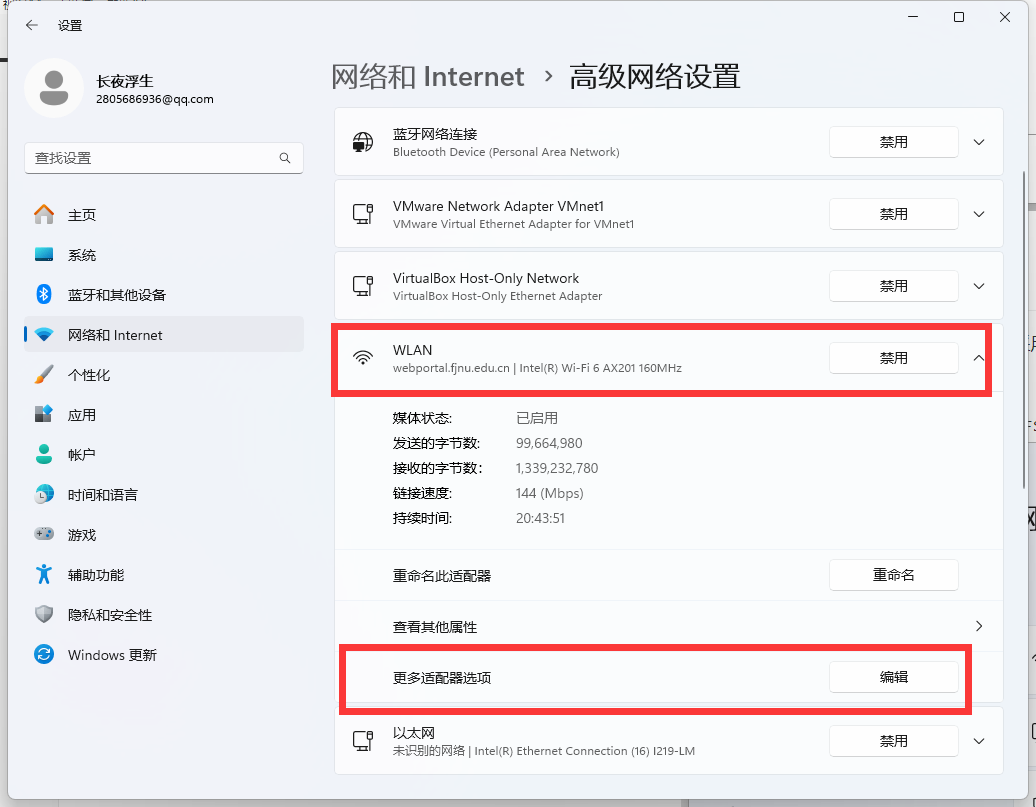
需要将PC和树莓派处于同一个局域网内,这边我采用的是使用PC的网口与树莓派网口相连。
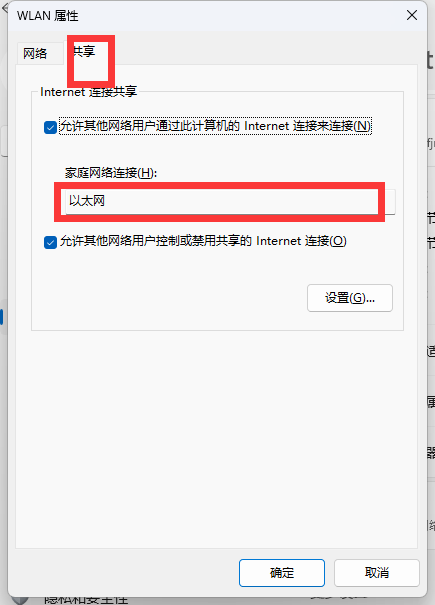
并把PC的网络共享给树莓派。
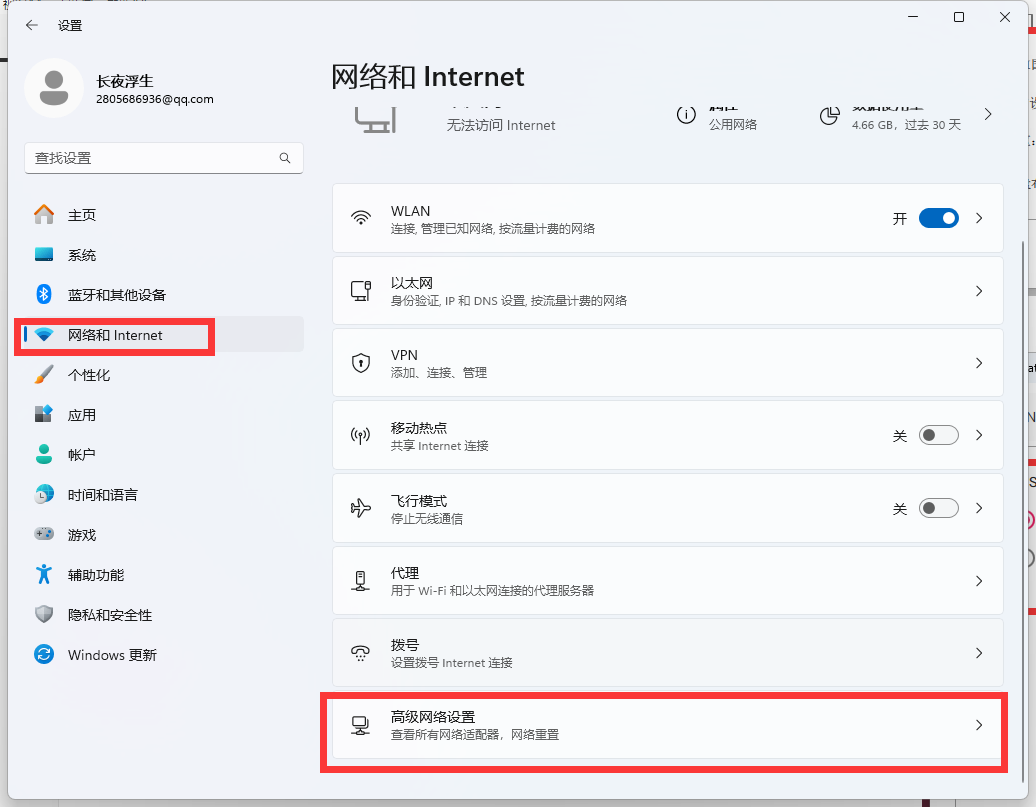
由于我的PC网络是通过网卡连接WIFI,所以我将wifi网络共享给以太网接口。
接下来使用ipscan22,扫描树莓派的ip
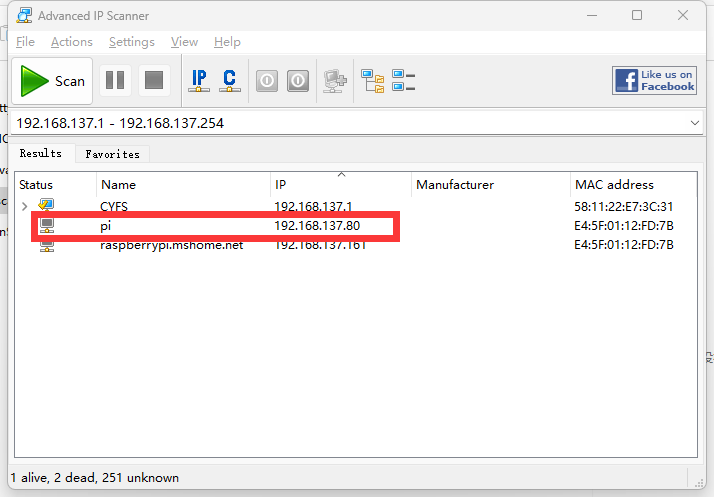
可以看到树莓派的Ip为192.168.137.80
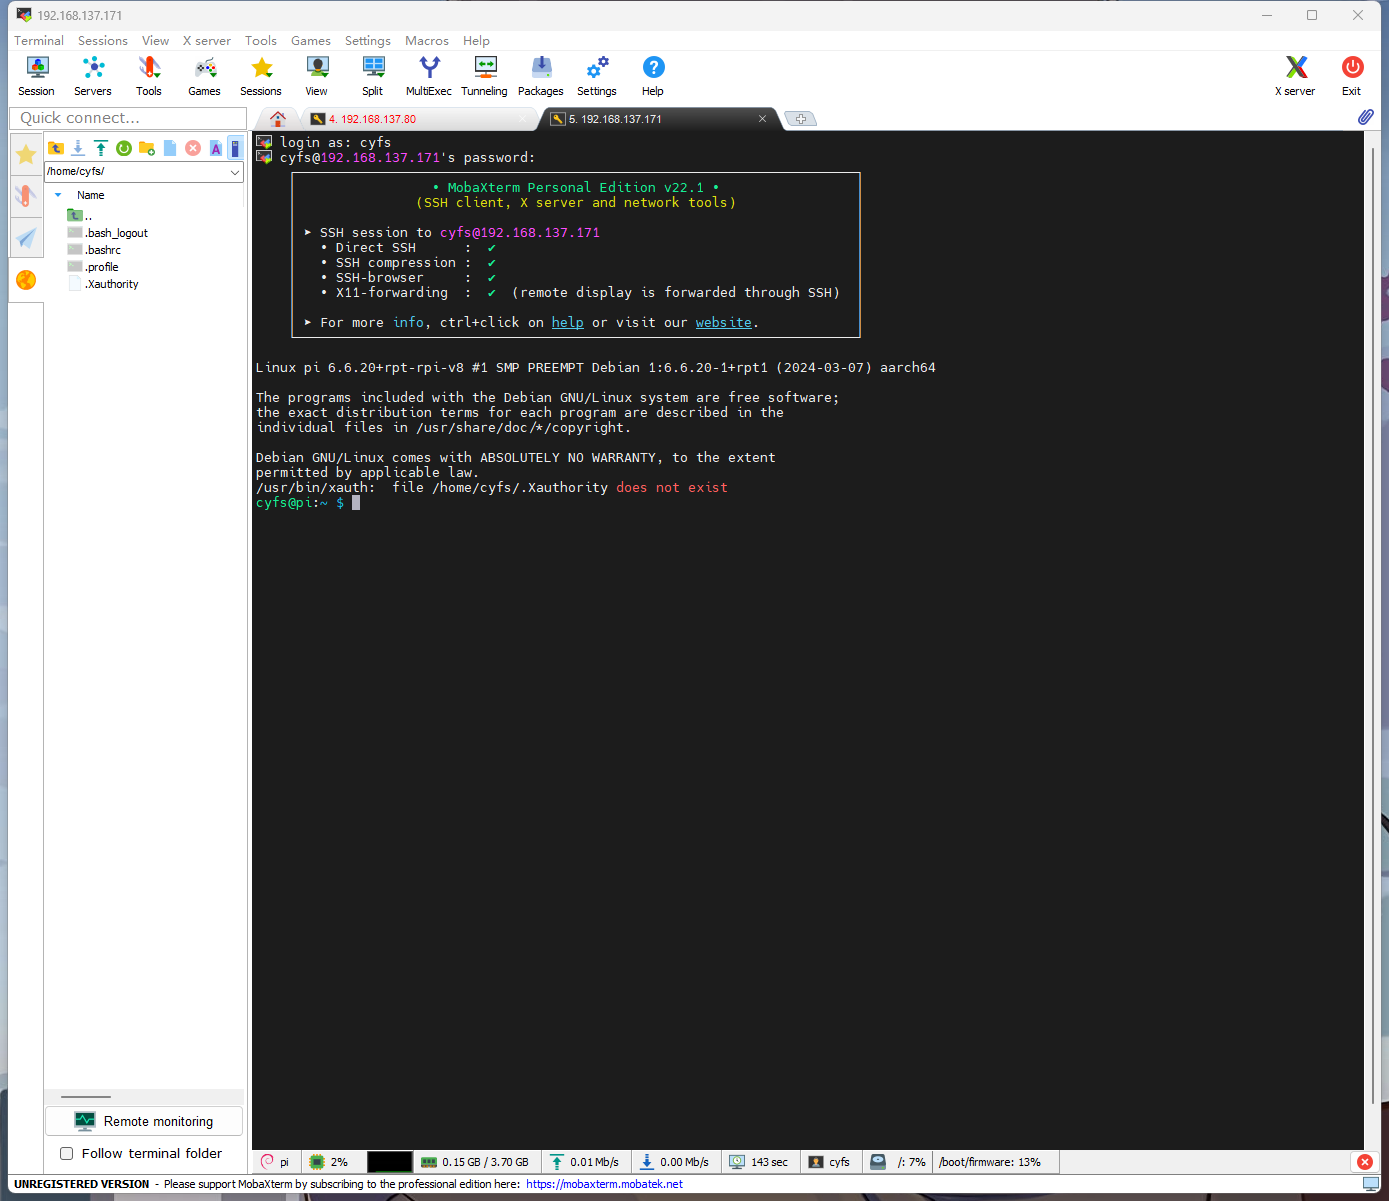
使用MobaXterm创建一个新的SSH会话,填入上面扫描到的树莓派的地址。

输入用户名以及密码。
登录成功。
三、使用Miniforge3创建虚拟环境
Minicon3对aarch64的支持不是很好,所以使用Miniforge3来作为虚拟环境的管理工具。
注意:需要换源或者使用代理
1.安转Miniforge3
https://github.com/conda-forge/miniforge
下载aarch架构的安装包
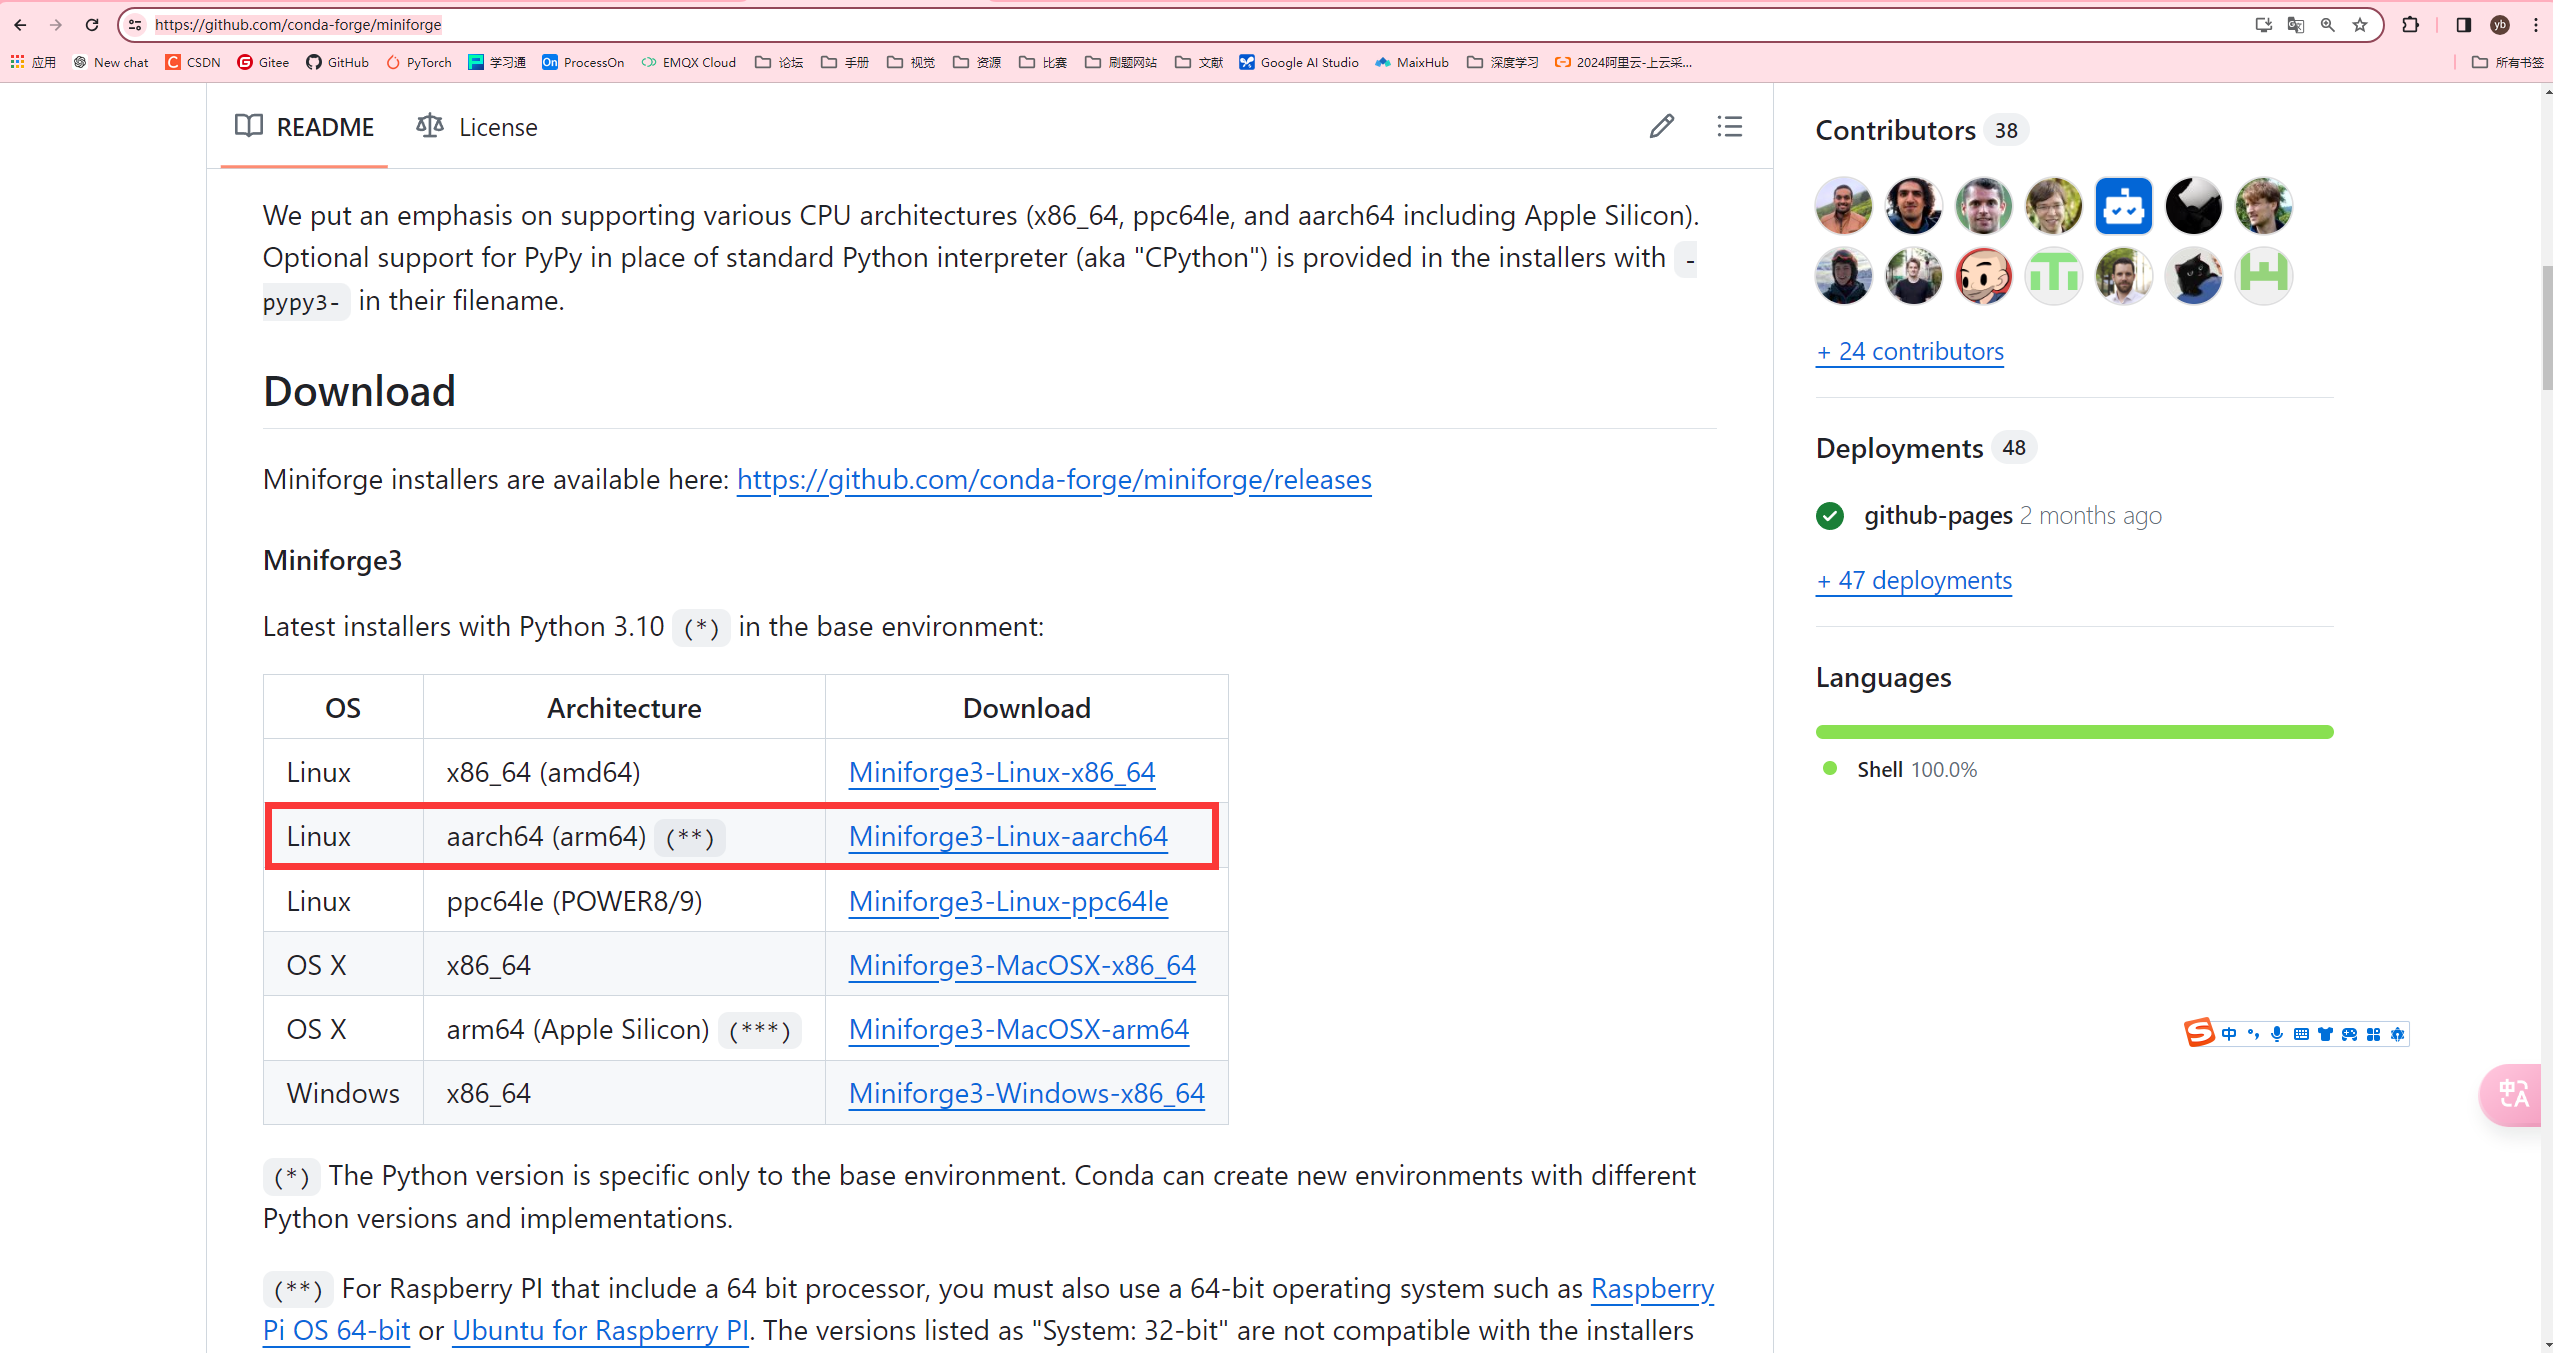
可以复制链接,到树莓派使用wget获取,也可以先在PC端下载,之后使用MobaXterm上传文件。
下面演示使用wget获取
wget https://github.com/conda-forge/miniforge/releases/latest/download/Miniforge3-Linux-aarch64.sh
增加可执行权限,执行安装包
chmod +x Miniforge3-Linux-aarch64.sh
./Miniforge3-Linux-aarch64.sh
安装步骤按提示要求输入即可。
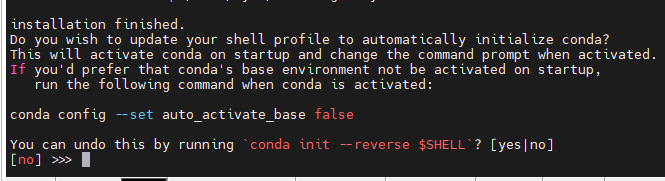
可以输入yes,这样就不用每次激活环境。
然后输入source ~/.bashrc 重新激活bash配置。

可以看到conda的环境被激活了。
2.创建一个新的虚拟环境
使用的py版本为3.7(因为更高版本好像没有cv以及onnxruntime库需要自己编译)
conda create -n onnx python=3.7
激活onnx环境
conda actiavte onnx
安装opencv以及onnxruntime
 pip install opencv-python
 pip install onnxruntime
检验一下cv以及onnxruntime有没有安装成功
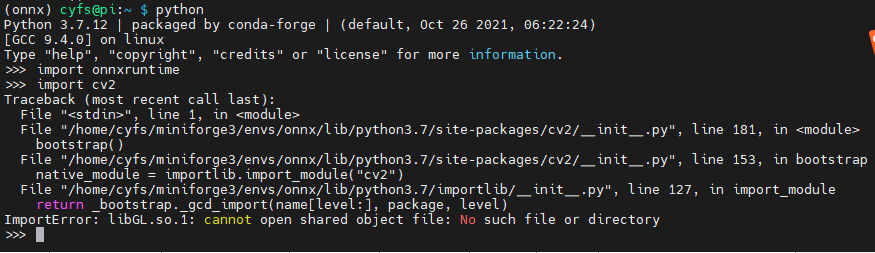
可以看到在导入cv时报错!
ImportError: libGL.so.1: cannot open shared object file: No such file or directory
这个libGL.so.1是openGL的共享库。我们可以通过apt安装
sudo apt-get update
sudo apt-get install -y libgl1-mesa-glx libglib2.0-0
此时在导入cv时就不会报错。

四、准备onnx
1.下载yolov5
可以克隆或者下载yolov5-lite的仓库
https://github.com/ppogg/YOLOv5-Lite
yolov5-lite是由国内大佬ppogg开源的轻量化模型。
2.训练模型
可以参考redme或者网上的其他资料,本文章不做具体的介绍
3. pt转换onnx
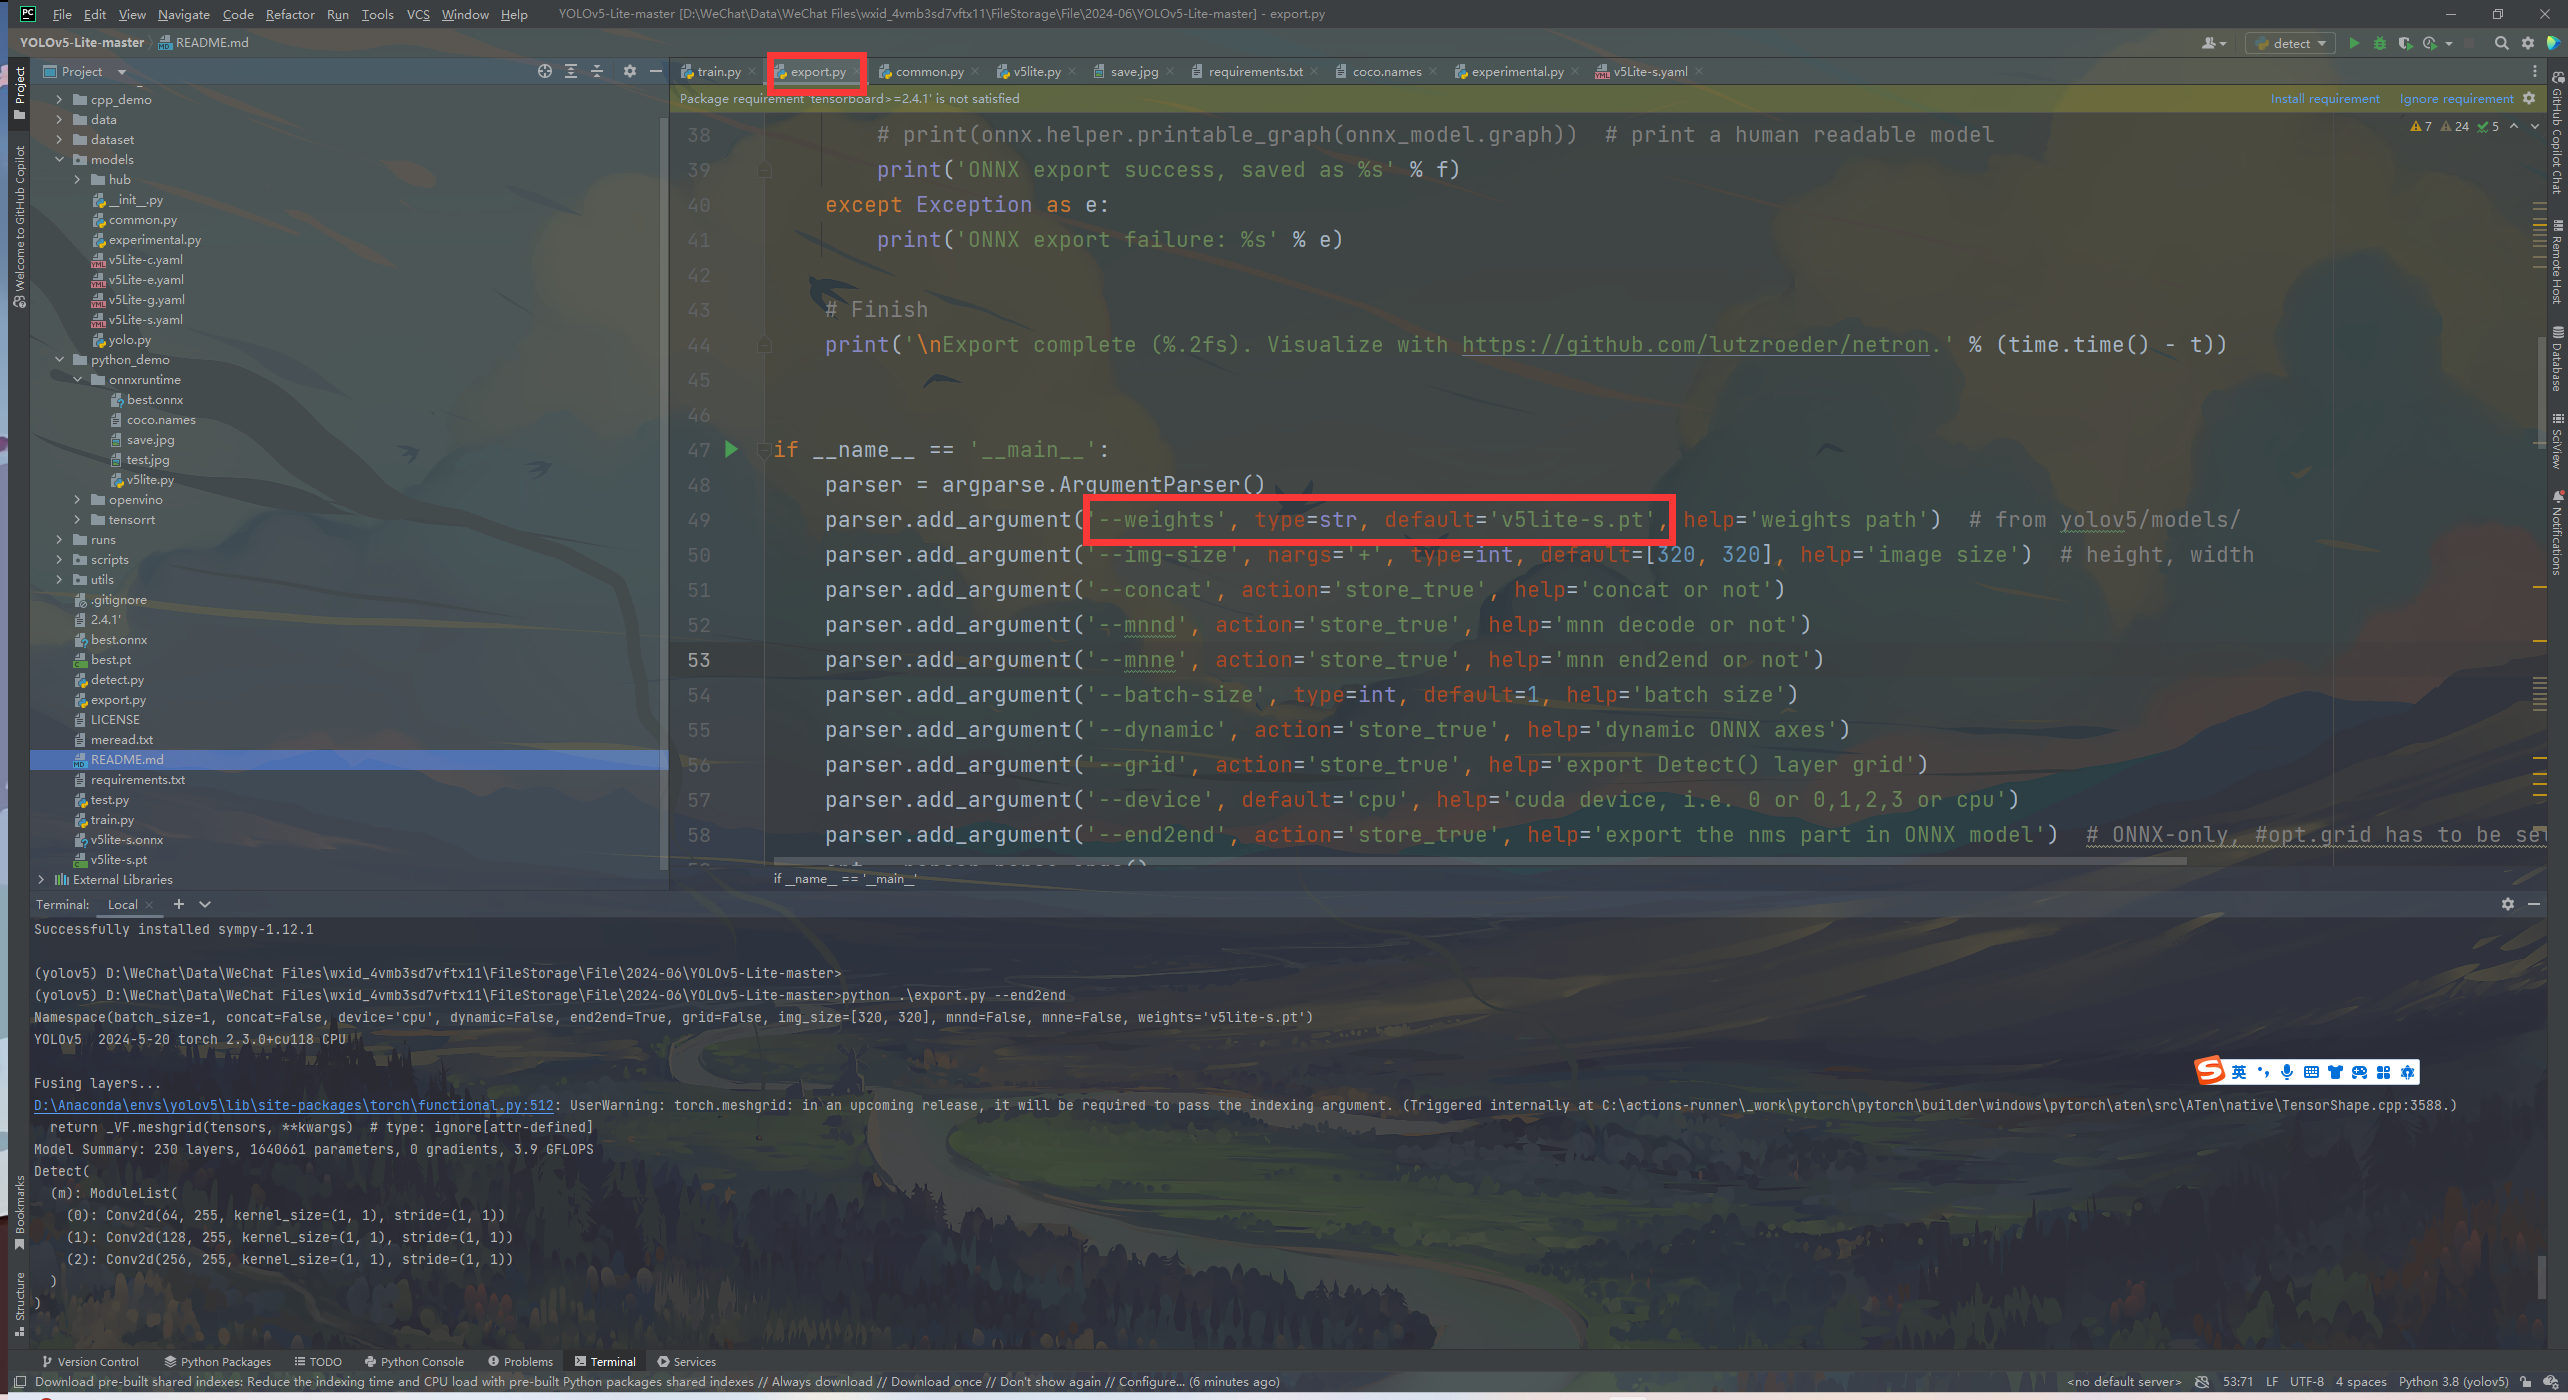
把weights改成自己训练好模型路径
python .\export.py --end2end
使用end2end的作用:
–把后处理写在模型了,推理时就不用写后处理
五、部署到树莓派
通过MobaXterm上传onnx模型
推理代码如下
import argparse

import cv2
import numpy as np
import onnxruntime as ort
import time


class yolov5_lite():
    def __init__(self, model_pb_path, label_path, confThreshold=0.5, nmsThreshold=0.5):
        so = ort.SessionOptions()
        so.log_severity_level = 3
        self.net = ort.InferenceSession(model_pb_path, so)
        self.classes = list(map(lambda x: x.strip(), open(label_path, 'r').readlines()))

        self.confThreshold = confThreshold
        self.nmsThreshold = nmsThreshold
        self.input_shape = (self.net.get_inputs()[0].shape[2], self.net.get_inputs()[0].shape[3])

    def letterBox(self, srcimg, keep_ratio=True):
        top, left, newh, neww = 0, 0, self.input_shape[0], self.input_shape[1]
        if keep_ratio and srcimg.shape[0] != srcimg.shape[1]:
            hw_scale = srcimg.shape[0] / srcimg.shape[1]
            if hw_scale > 1:
                newh, neww = self.input_shape[0], int(self.input_shape[1] / hw_scale)
                img = cv2.resize(srcimg, (neww, newh), interpolation=cv2.INTER_AREA)
                left = int((self.input_shape[1] - neww) * 0.5)
                img = cv2.copyMakeBorder(img, 0, 0, left, self.input_shape[1] - neww - left, cv2.BORDER_CONSTANT,
                                         value=0)  # add border
            else:
                newh, neww = int(self.input_shape[0] * hw_scale), self.input_shape[1]
                img = cv2.resize(srcimg, (neww, newh), interpolation=cv2.INTER_AREA)
                top = int((self.input_shape[0] - newh) * 0.5)
                img = cv2.copyMakeBorder(img, top, self.input_shape[0] - newh - top, 0, 0, cv2.BORDER_CONSTANT, value=0)
        else:
            img = cv2.resize(srcimg, self.input_shape, interpolation=cv2.INTER_AREA)
        return img, newh, neww, top, left

    def postprocess(self, frame, outs, pad_hw):
        newh, neww, padh, padw = pad_hw
        frameHeight = frame.shape[0]
        frameWidth = frame.shape[1]
        ratioh, ratiow = frameHeight / newh, frameWidth / neww
        classIds = []
        confidences = []
        boxes = []
        for detection in outs:
            scores, classId = detection[4], detection[5]
            if scores > self.confThreshold:  # and detection[4] > self.objThreshold:
                x1 = int((detection[0] - padw) * ratiow)
                y1 = int((detection[1] - padh) * ratioh)
                x2 = int((detection[2] - padw) * ratiow)
                y2 = int((detection[3] - padh) * ratioh)
                classIds.append(classId)
                confidences.append(scores)
                boxes.append([x1, y1, x2, y2])

        # # Perform non maximum suppression to eliminate redundant overlapping boxes with
        # # lower confidences.
        indices = cv2.dnn.NMSBoxes(boxes, confidences, self.confThreshold, self.nmsThreshold)

        for ind in indices:
            frame = self.drawPred(frame, classIds[ind], confidences[ind], boxes[ind][0], boxes[ind][1], boxes[ind][2], boxes[ind][3])
        return frame

    def drawPred(self, frame, classId, conf, x1, y1, x2, y2):
        # Draw a bounding box.
        cv2.rectangle(frame, (x1, y1), (x2, y2), (0, 0, 255), thickness=2)

        label = '%.2f' % conf
        text = '%s:%s' % (self.classes[int(classId)], label)

        # Display the label at the top of the bounding box
        labelSize, baseLine = cv2.getTextSize(text, cv2.FONT_HERSHEY_SIMPLEX, 0.5, 1)
        y1 = max(y1, labelSize[1])
        cv2.putText(frame, text, (x1, y1 - 10), cv2.FONT_HERSHEY_TRIPLEX, 0.5, (0, 255, 0), thickness=1)
        return frame

    def detect(self, srcimg):
        img, newh, neww, top, left = self.letterBox(srcimg)
        img = cv2.cvtColor(img, cv2.COLOR_BGR2RGB)
        img = img.astype(np.float32) / 255.0
        blob = np.expand_dims(np.transpose(img, (2, 0, 1)), axis=0)

        t1 = time.time()
        outs = self.net.run(None, {self.net.get_inputs()[0].name: blob})[0]
        cost_time = time.time() - t1
        print(outs.shape)

        srcimg = self.postprocess(srcimg, outs, (newh, neww, top, left))
        infer_time = 'Inference Time: ' + str(int(cost_time * 1000)) + 'ms'
        cv2.putText(srcimg, infer_time, (5, 20), cv2.FONT_HERSHEY_TRIPLEX, 0.5, (0, 0, 0), thickness=1)
        return srcimg


if __name__ == "__main__":

    parser = argparse.ArgumentParser()
    # parser.add_argument('--imgpath', type=str, default='image.jpg', help="image path")
    parser.add_argument('--modelpath', type=str, default='best.onnx', help="onnx filepath")
    parser.add_argument('--classfile', type=str, default='xxx.names', help="classname filepath")
    parser.add_argument('--confThreshold', default=0.5, type=float, help='class confidence')
    parser.add_argument('--nmsThreshold', default=0.6, type=float, help='nms iou thresh')
    args = parser.parse_args()

    net = yolov5_lite(args.modelpath, args.classfile, confThreshold=args.confThreshold, nmsThreshold=args.nmsThreshold)

    #Capture
    video = 0
    cap = cv2.VideoCapture(video)
    flag_det = True
    while True:
        success, img0 = cap.read()
        if success:

            if flag_det:
                t1 = time.time()
                img0 = net.detect(img0.copy())
                t2 = time.time()

                str_FPS = "FPS: %.2f" % (1. / (t2 - t1))

                cv2.putText(img0, str_FPS, (50, 50), cv2.FONT_HERSHEY_COMPLEX, 1, (0, 255, 0), 3)

            cv2.imshow("video", img0)
        key = cv2.waitKey(1) & 0xFF
        if key == ord('q'):

            break
        elif key & 0xFF == ord('s'):
            flag_det = not flag_det
            print(flag_det)

    cap.release()
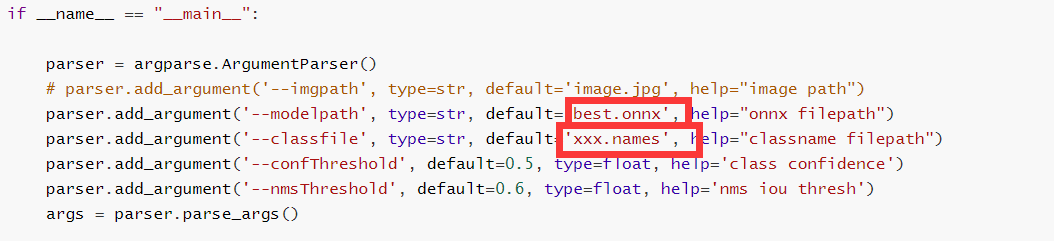
把模型改成自己的模型文件,xxx.names改完自己的标签。
六、树莓派镜像
为了方便大家使用,我将上面所用的的环境以及工具打包了,有需要的自行下载。
FAQ
qt.qpa.plugin: Could not load the Qt platform plugin “xcb” in “/home/cyfs/miniforge3/envs/onnx/lib/python3.7/site-packages/cv2/qt/plugins” even though it was found. This application failed to start because no Qt platform plugin could be initialized. Reinstalling the application may fix this problem. Available platform plugins are: xcb. Aborted
可能会遇到这样的错误,解决方法
把通过pip 下载的opencv卸载,使用conda安装
pip unstall opencv-python
conda install opencv


 1912
1912

 被折叠的 条评论
为什么被折叠?
被折叠的 条评论
为什么被折叠?
 到【灌水乐园】发言


