


 本文介绍了如何使用预训练模型Roberta-wwm-ext对微博通用数据进行情感分类,涵盖六种情感。通过HuggingFace的Transformers库在PyTorch环境中构建模型,并详细展示了数据处理、模型构建、训练与测试的过程。模型在训练集上表现良好,测试精度达到78.02%。
概览:
情感分析是NLP中一大分支,本文尝试使用预训练模型(Roberta-wwm-ext)对微博通用数据进行情感分类,共六种类别(积极、愤怒、悲伤、恐惧、惊奇、无情绪)。数据来源:SMP2020微博情绪分类评测
该评测任务中涉及通用数据和疫情数据,本文只使用通用数据。
本文着重展示利用预训练模型在torch环境下进行情感分析的pipeline,弱化提升模型本身精度的探索。
数据介绍:
训练集:27,768条;测试集:5,000条
下载链接 提取码:q2f8
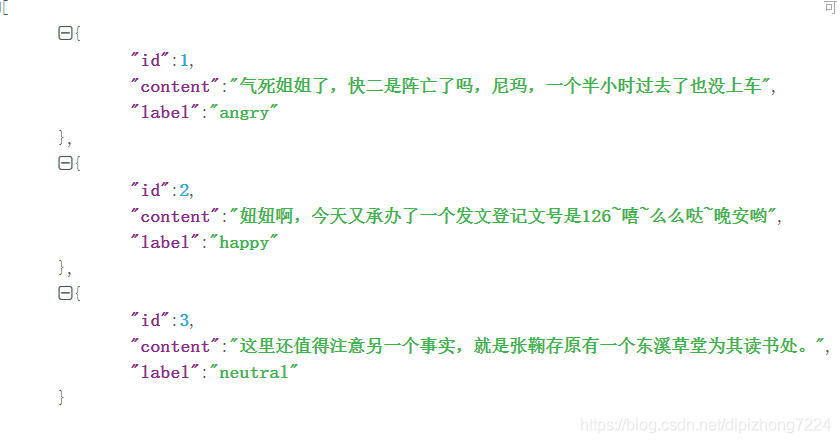
数据格式如下图:id是编号;content为文本内容;label是情绪
模型训练:
本文基于HuggingFace开源的Transformers(Torch版本)实现。
主要库版本:Transformers == 2.2.2 torch == 1.5.0
(1)加载预训练模型(模型:RoBERTa-wwm-ext,下载链接 提取码:369y)
class Model(nn.Module):
    def __init__(self, num_classes):
        super(Model, self).__init__()
        self.bert = BertModel.from_pretrained('chinese_wwm_ext_pytorch')  # /roberta-wwm-ext pretrain/
        for param in self.bert.parameters():
            param.requires_grad = True  # 所有参数求梯度
        self.fc = nn.Linear(768, num_classes)   # 768 -> 6
    def forward(self, x, token_type_ids, attention_mask):
        context = x  # 输入的句子
        types = token_type_ids
        mask = attention_mask  # 对padding部分进行mask,和句子相同size,padding部分用0表示,如:[1, 1, 1, 1, 0, 0]
        _, pooled = self.bert(context, token_type_ids=types, attention_mask=mask)
        out = self.fc(pooled)   # 得到6分类概率
        return out

# 加载模型
MODEL1 = Model(num_classes=6) # 指定分类类别
注意:这里需要额外定义一个Model类对BertModel基类的输出进行处理。原因是原始基类返回的是CLS的hidden向量经过一层dense和activation后得到的向量(本文中使用的维度是768),因此还需要一个全连接层转换成每个分类的输出(本文类别数num_classes=6)
(2)构造训练数据和测试数据
Roberta-wwm-ext模型共需要传入三类向量,一是要分类的文本本身的token;二是表征token type的向量,用来表征该位置的文本token是否是PAD产生,非PAD记为0,PAD记为1;三是表示mask标志的向量,PAD位置的mask标记为0,否则为1。关于这三类向量的概念和意义不在本文中展开讨论,请自行检索相关资料。
构造三类向量
# 数据进行token化处理, seq_length表示接受的句子最大长度
def convert_text_to_token(tokenizer, sentence, seq_length):
    tokens = tokenizer.tokenize(sentence) # 句子转换成token
    tokens = ["[CLS]"] + tokens + ["[SEP]"] # token前后分别加上[CLS]和[SEP]
    # 生成 input_id, seg_id, att_mask
    ids1 = tokenizer.convert_tokens_to_ids(tokens)
    types = [0] * len(ids1)
    masks = [1] * len(ids1)
    # 句子长度统一化处理:截断或补全至seq_length
    if len(ids1) < seq_length: #补全
        ids = ids1 + [0] * (seq_length - len(ids1)) #[0]是因为词表中PAD的索引是0
        types = types + [1] * (seq_length - len(ids1))  # [1]表明该部分为PAD
        masks = masks + [0] * (seq_length - len(ids1)) # PAD部分,attention mask置为[0]
    else: # 截断
        ids = ids1[:seq_length]
        types = types[:seq_length]
        masks = masks[:seq_length]
    assert len(ids) == len(types) == len(masks)
    return ids, types, masks

TOKENIZER = BertTokenizer.from_pretrained("chinese_wwm_ext_pytorch") #模型[roberta-wwm-ext]所在的目录名称
注意:(1)这里的Tokenizer使用BertTokenizer,切勿使用RobertaTokenizer(2)seq_length表示构造的训练数据的长度,长则截断,短则补齐。本文中seq_length = 128
构造训练集和测试集的DataLoader
# 构造训练集和测试集的DataLoader
def genDataLoader(is_train):
    if is_train: # 构造训练集
        path = TRAIN_DATA_PATH
    else: # 构造测试集
        path = TEST_DATA_PATH
    with open(path, encoding='utf8') as f:
        data = json.load(f)
    ids_pool = []
    types_pool = []
    masks_pool = []
    target_pool = []
    count = 0
    # 遍历构造每条数据
    for each in data:
        cur_ids, cur_type, cur_mask = convert_text_to_token(TOKENIZER, each['content'], seq_length = SEQ_LENGTH)
        ids_pool.append(cur_ids)
        types_pool.append(cur_type)
        masks_pool.append(cur_mask)
        cur_target = LABEL_DICT[each['label']]
        target_pool.append([cur_target])
        count += 1
        if count % 1000 == 0:
            print('已处理{}条'.format(count))
            # break
    # 构造loader
    data_gen = TensorDataset(torch.LongTensor(np.array(ids_pool)),
                               torch.LongTensor(np.array(types_pool)),
                               torch.LongTensor(np.array(masks_pool)),
                               torch.LongTensor(np.array(target_pool)))
    # print('shit')
    sampler = RandomSampler(data_gen)
    loader = DataLoader(data_gen, sampler=sampler, batch_size=BATCH_SIZE)
    return loader
构造DataLoader是为了训练时能够小批量训练,即每次只feed batch_size个数据
(3)训练

机器配置:两张V100
batch_size:8
可以看到一个epoch耗时大概6min,这里我只训练了3个epoch
注意:训练时每个epoch完成后需要验证一下结果,保存最佳模型,验证代码如下
def test(model, device, test_loader):    # 测试模型, 得到测试集评估结果
    model.eval()
    test_loss = 0.0
    acc = 0
    for (x1, x2, x3, y) in tqdm(test_loader):
        x1, x2, x3, y = x1.to(device), x2.to(device), x3.to(device), y.to(device)
        with torch.no_grad():
            y_ = model(x1, token_type_ids=x2, attention_mask=x3)
        test_loss += F.cross_entropy(y_, y.squeeze())
        pred = y_.max(-1, keepdim=True)[1]   # .max(): 2输出,分别为最大值和最大值的index
        acc += pred.eq(y.view_as(pred)).sum().item()    # 记得加item()
    test_loss /= len(test_loader)
    print('\nTest set: Average loss: {:.4f}, Accuracy: {}/{} ({:.2f}%)'.format(
          test_loss, acc, len(test_loader.dataset),
          100. * acc / len(test_loader.dataset)))
    return acc / len(test_loader.dataset)
(4)测试
训练完后进行效果测试,测试代码如下
def test(model):
    with open('data/usual_test_labeled.txt', encoding='utf8') as f:
        data = json.load(f)
    res = []
    correct = 0
    count = 0
    for each in data:
        cur_sentence = each['content']
        cur_label = each['label']
        ids = []
        types = []
        masks = []
        cur_ids, cur_type, cur_mask = convert_text_to_token(TOKENIZER, each['content'], seq_length=SEQ_LENGTH)
        ids.append(cur_ids)
        types.append(cur_type)
        masks.append(cur_mask)
        cur_ids, cur_type, cur_mask = torch.LongTensor(np.array(ids)).to(DEVICE), torch.LongTensor(np.array(types)).to(DEVICE), torch.LongTensor(np.array(masks)).to(DEVICE) # 数据构造成tensor形式
        with torch.no_grad():
            y_ = model(cur_ids, token_type_ids=cur_type, attention_mask=cur_mask)
            pred = y_.max(-1, keepdim=True)[1]  # 取最大值
            cur_pre = LABEL_DICT[int(pred[0][0].cuda().data.cpu().numpy())] # 预测的情绪
            if cur_label == cur_pre:
                correct += 1
        cur_res = cur_sentence + '\t' + cur_label + '\t' + cur_pre
        res.append(cur_res)
        count += 1
        if count % 1000 == 0:
            print('已处理{}条'.format(count))
    accu = correct / len(data)
    print('accu是{}'.format(accu))
    with open('test_result.txt', 'w', encoding='utf8') as f:
        for each in res:
            f.write(each+'\n')
注意:测试时需要先加载原始roberta-wwm-ext模型,然后使用load_state_dict方法读入训练3个epoch后的模型参数。
测试结果演示
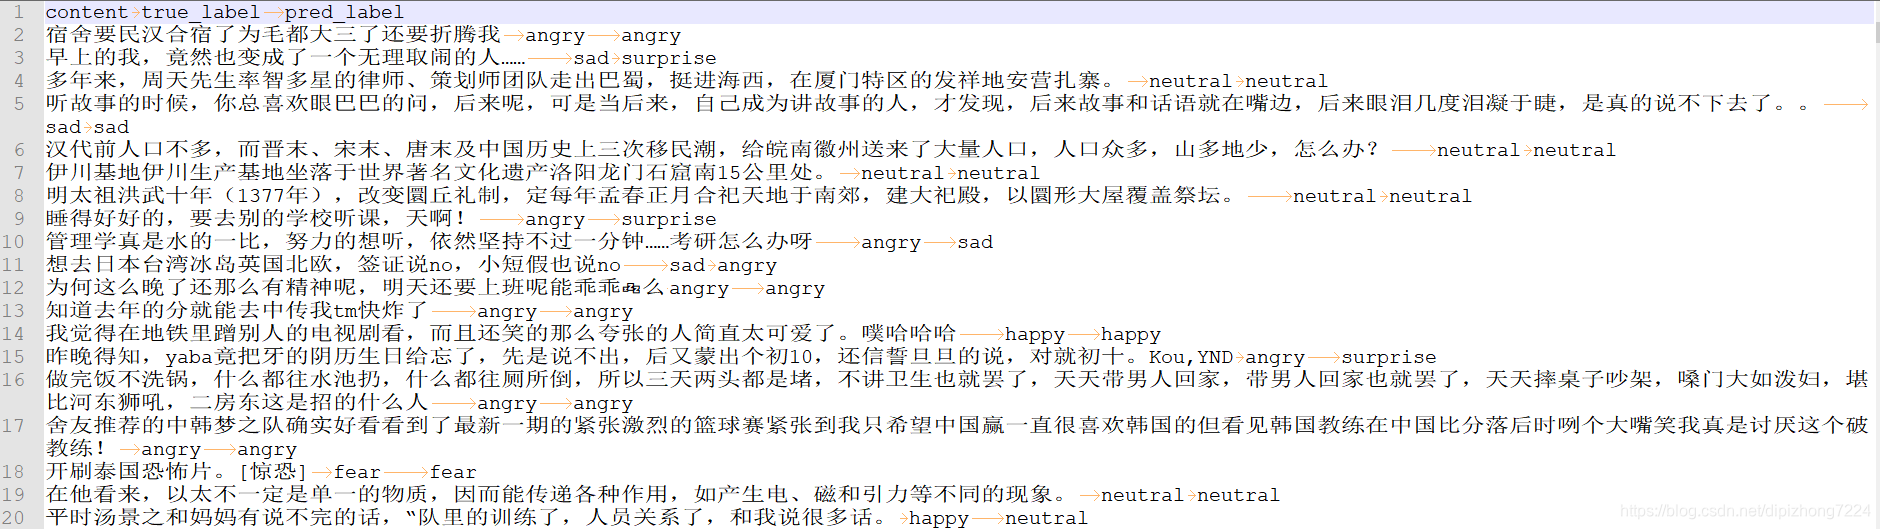
计算后,总体精度为78.02%,这里展示20条测试结果。第一列为待测试内容,第二列是真实的情感标签,第三列是模型预测的情感标签。初步认为这个可以当做一个base模型了。
写在后面:
(1)个人认为HuggingFace开源的Transformers比较成功,作为一个初创公司,值得国内同行学习
(2)完整代码 提取码:lncz
使用方法:
训练: python train.py
测试:python testCase.py
参考文献
(2)https://github.com/ymcui/Chinese-BERT-wwm


 2645
2645

 被折叠的 条评论
为什么被折叠?
被折叠的 条评论
为什么被折叠?
 到【灌水乐园】发言


