


一.仿射变换概念
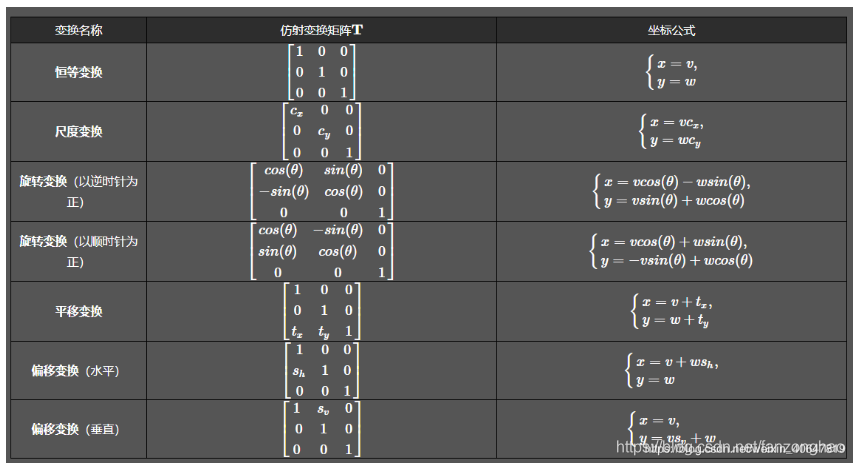
1.下图是一般形式,其中x,y代表原坐标,v,w代表变换后的坐标,T是变换矩阵

其中几种常见的变换形式矩阵为:
2.坐标系变换
再看第二个问题,变换中心,对于缩放、平移可以以图像坐标原点(图像左上角为原点)为中心变换,这不用坐标系变换,直接按照一般形式计算即可。而对于旋转和偏移,一般是以图像中心为原点,那么这就涉及坐标系转换了。
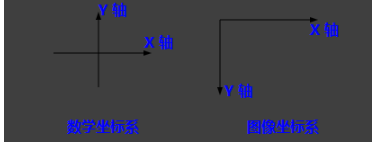
我们都知道,opencv的原点在图像左上角,水平向右为 X 轴,垂直向下为 Y 轴。课本中常见的坐标系是以图像中心为原点,水平向右为 X 轴,垂直向上为 Y 轴,称为笛卡尔坐标系。看下图:
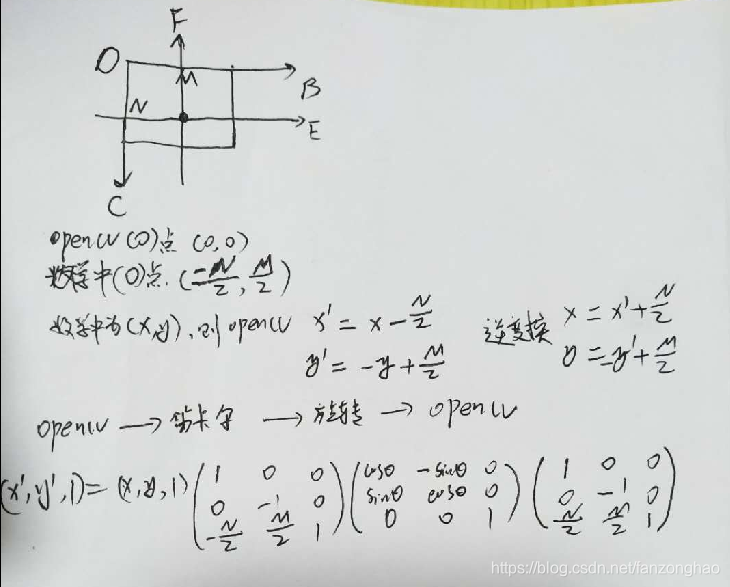
因此,对于旋转和偏移,就需要3步(3次变换):
- 将输入原图图像坐标转换为笛卡尔坐标系;
- 进行顺时针旋转计算。旋转矩阵前面已经给出了;
- 将旋转后的图像的笛卡尔坐标转回图像坐标。
3.示例:(250,0)绕(250,250)旋转120度
import cv2
import numpy as np
from math import cos,sin,pi

def rotate_one(x,y,angle,cx,cy):

    """
    点(x,y) 绕(cx,cy)点顺时针旋转
    """
    angle = angle*pi/180
    x_new = (x-cx)*cos(angle) + (cy-y)*sin(angle)+cx
    y_new = (x-cx)*sin(angle) + (y-cy)*cos(angle)+cy
    return x_new, y_new

def rotate_two(x,y,angle,cx,cy):
    """
       点(x,y) 绕(cx,cy)点顺时针旋转
    """
    angle = angle * pi / 180
    input_matrix = np.array([x, y, 1])
    transform_matrix = np.array([[1, 0, 0],
                                 [0, -1, 0],
                                 [-cx, cy, 1]])
    inv_transform_matrix = np.array([[1, 0, 0],
                                     [0, -1, 0],
                                     [cx, cy, 1]])
    rotate_matrix = np.array([[cos(angle), -sin(angle), 0],
                              [sin(angle), cos(angle), 0],
                              [0,           0,         1]])
    output_matrix = ((input_matrix.dot(transform_matrix)).dot(rotate_matrix)).dot(inv_transform_matrix)
    x_new, y_new, _ = output_matrix
    return x_new, y_new
def test_cv2():

    img=np.zeros((501,501))

    x, y= 250, 0
    cx,cy=250,250
    angle=120
    # x_new, y_new = rotate_one(x,y,angle,cx,cy)
    # cv2.circle(img,(x,y),radius=2,color=(255,255,255),thickness=2)
    # cv2.circle(img, (cx, cy), radius=2, color=(255, 255, 255), thickness=2)
    # cv2.circle(img, (int(x_new), int(y_new)), radius=2, color=(255, 255, 255), thickness=2)
    # cv2.imshow('img', img)
    # cv2.waitKey(0)

    x_new, y_new = rotate_two(x,y,angle,cx,cy)
    cv2.circle(img,(x,y),radius=2,color=(255,255,255),thickness=2)
    cv2.circle(img, (cx, cy), radius=2, color=(255, 255, 255), thickness=2)
    cv2.circle(img, (int(x_new), int(y_new)), radius=2, color=(255, 255, 255), thickness=2)
    cv2.imshow('img', img)
    cv2.waitKey(0)


if __name__ == '__main__':
    test_cv2()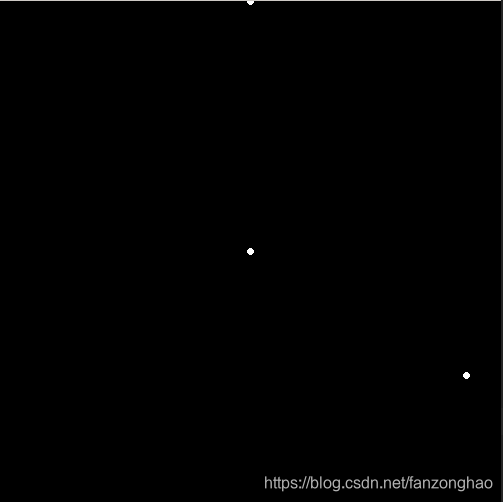
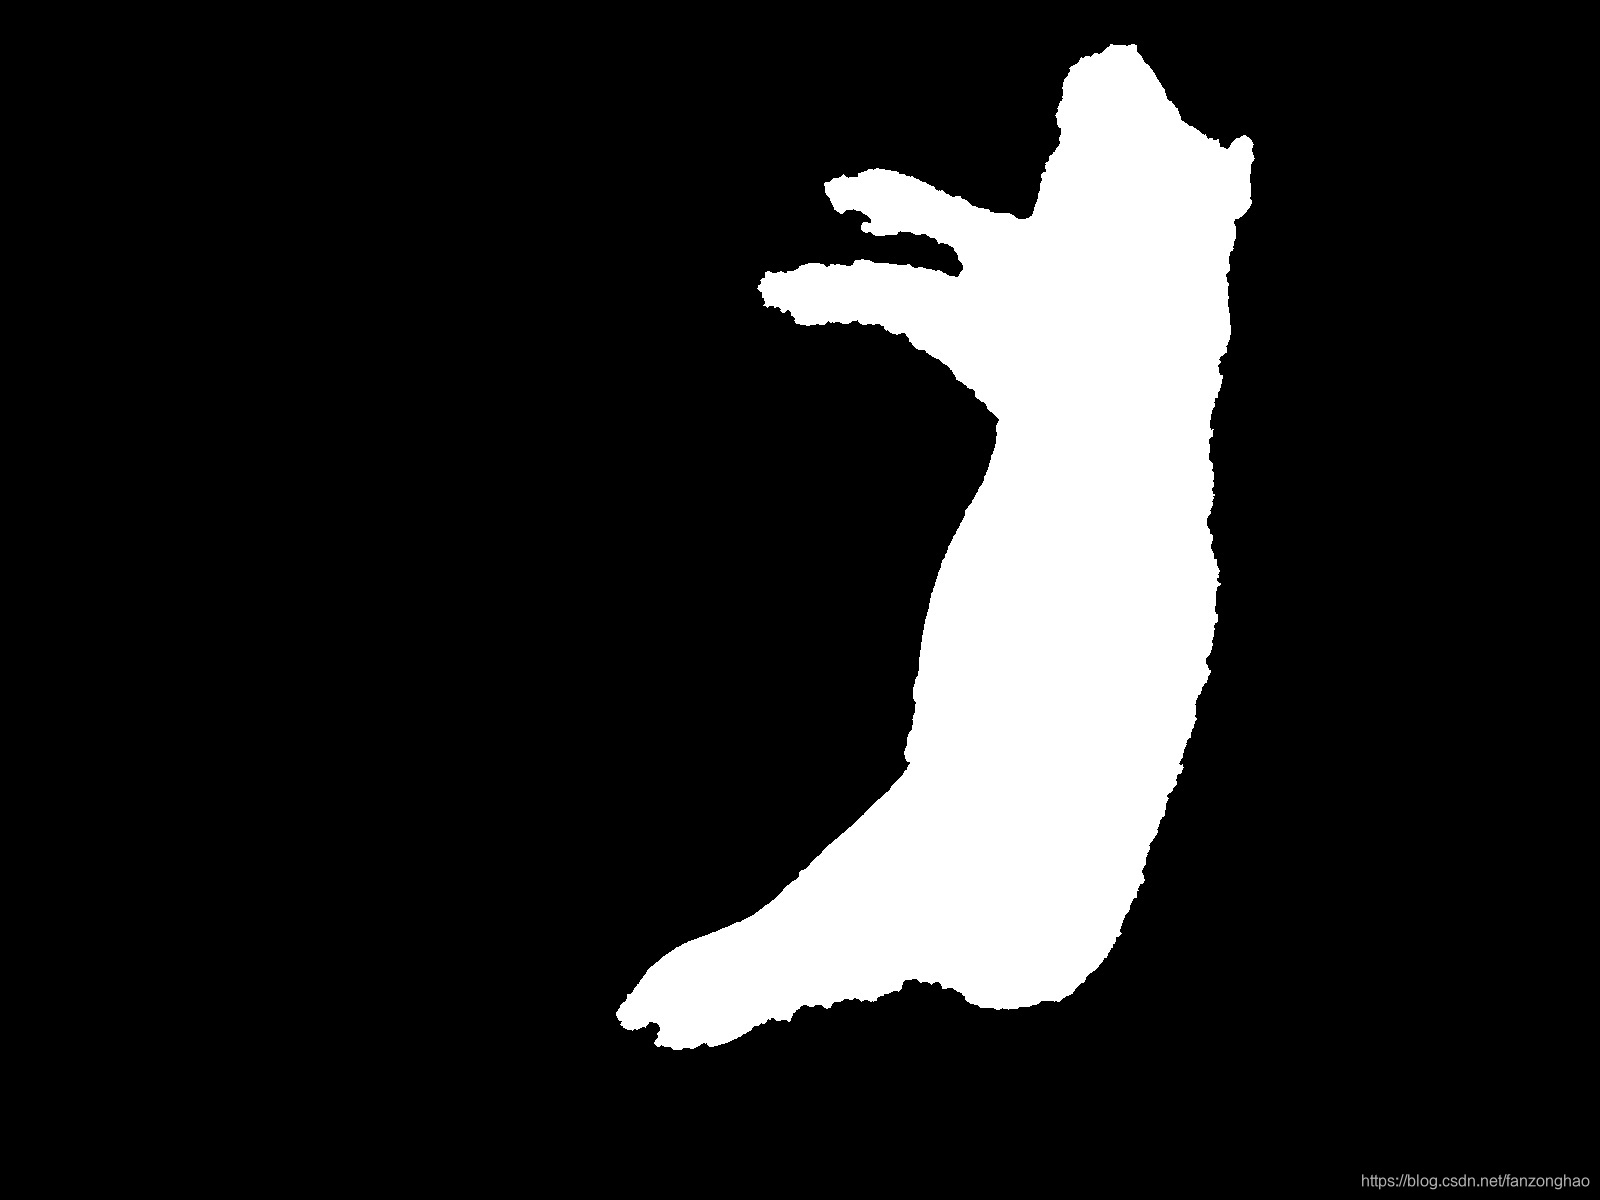
4.代码示例:对图中的最大轮廓猪猪旋转180度
import cv2
import numpy as np
from math import cos,sin,pi
import imutils
from matplotlib import pyplot as plt

def rotate(points, angle, cx, cy):
    """
       点(x,y) 绕(cx,cy)点顺时针旋转
    """
    h, w = points.shape
    one = np.ones((h, 1))
    input_matrix = np.hstack((points,one))
    print(input_matrix.shape)
    print(input_matrix[:2])
    angle = angle * pi / 180

    # input_matrix = np.array([x, y, 1])
    transform_matrix = np.array([[1, 0, 0],
                                 [0, -1, 0],
                                 [-cx, cy, 1]])
    inv_transform_matrix = np.array([[1, 0, 0],
                                     [0, -1, 0],
                                     [cx, cy, 1]])
    rotate_matrix = np.array([[cos(angle), -sin(angle), 0],
                              [sin(angle), cos(angle), 0],
                              [0,           0,         1]])
    output_matrix = ((input_matrix.dot(transform_matrix)).dot(rotate_matrix)).dot(inv_transform_matrix).astype(np.int)
    # print(output_matrix.shape)
    # print(output_matrix[:2])
    # x_new, y_new, _ = output_matrix
    return output_matrix[:, :-1]

def test_pig_rotate():
    path = './20181011234118419.jpeg'
    img = cv2.imread(path)
    gary = cv2.cvtColor(img,cv2.COLOR_BGR2GRAY)
    black=np.zeros([img.shape[0], img.shape[1]])
    #二值化找轮廓
    image_thre = cv2.threshold(gary, 127, 255, cv2.THRESH_BINARY)[1]
    cnts = cv2.findContours(image_thre, cv2.RETR_EXTERNAL, cv2.CHAIN_APPROX_SIMPLE)
    contours = cnts[0] if imutils.is_cv2() else cnts[1]
    c_ = sorted(contours, key=cv2.contourArea, reverse=True)
    points = np.squeeze(c_[0])

    # #debug show
    plt.figure(figsize=(15,15))
    # plt.plot(points[:, 0], points[:, 1])
    # plt.show()

    contour_list = []
    new_points = rotate(points, angle=120, cx=img.shape[1]//2, cy=img.shape[0]//2)
    contour_list.append(new_points[:, np.newaxis, :])

    black = cv2.drawContours(black, contour_list, -1, (255, 255, 255), thickness=-1)
    cv2.imwrite('./3.jpg', black)


if __name__ == '__main__':
    # test_cv2()
    test_pig_rotate()
原图:

顺时针旋转180度:
5.代码示例:对整张图进行旋转
# 旋转图片无黑边
def rotate_image():
    from math import fabs
    from math import sin, cos, radians
    path = './20181011234118419.jpeg'
    img = cv2.imread(path)
    # img=cv2.imread('2018-09-10IMG_8003.jpg')
    height, width = img.shape[:2]

    degree = 90
    # 旋转后的尺寸
    heightNew = int(width * fabs(sin(radians(degree))) + height * fabs(cos(radians(degree))))
    widthNew = int(height * fabs(sin(radians(degree))) + width * fabs(cos(radians(degree))))

    matRotation = cv2.getRotationMatrix2D((width / 2, height / 2), degree, 1)

    # print(matRotation[0, 2])
    # print(matRotation)
    matRotation[0, 2] += (widthNew - width) / 2
    matRotation[1, 2] += (heightNew - height) / 2

    imgRotation = cv2.warpAffine(img, matRotation, (widthNew, heightNew), borderValue=(255, 255, 255))
    #
    # cv2.imshow('img', imgRotation)
    # cv2.waitKey(0)
    cv2.imwrite('img_size_1_ok.jpg', imgRotation)
if __name__ == '__main__':
    rotate_image()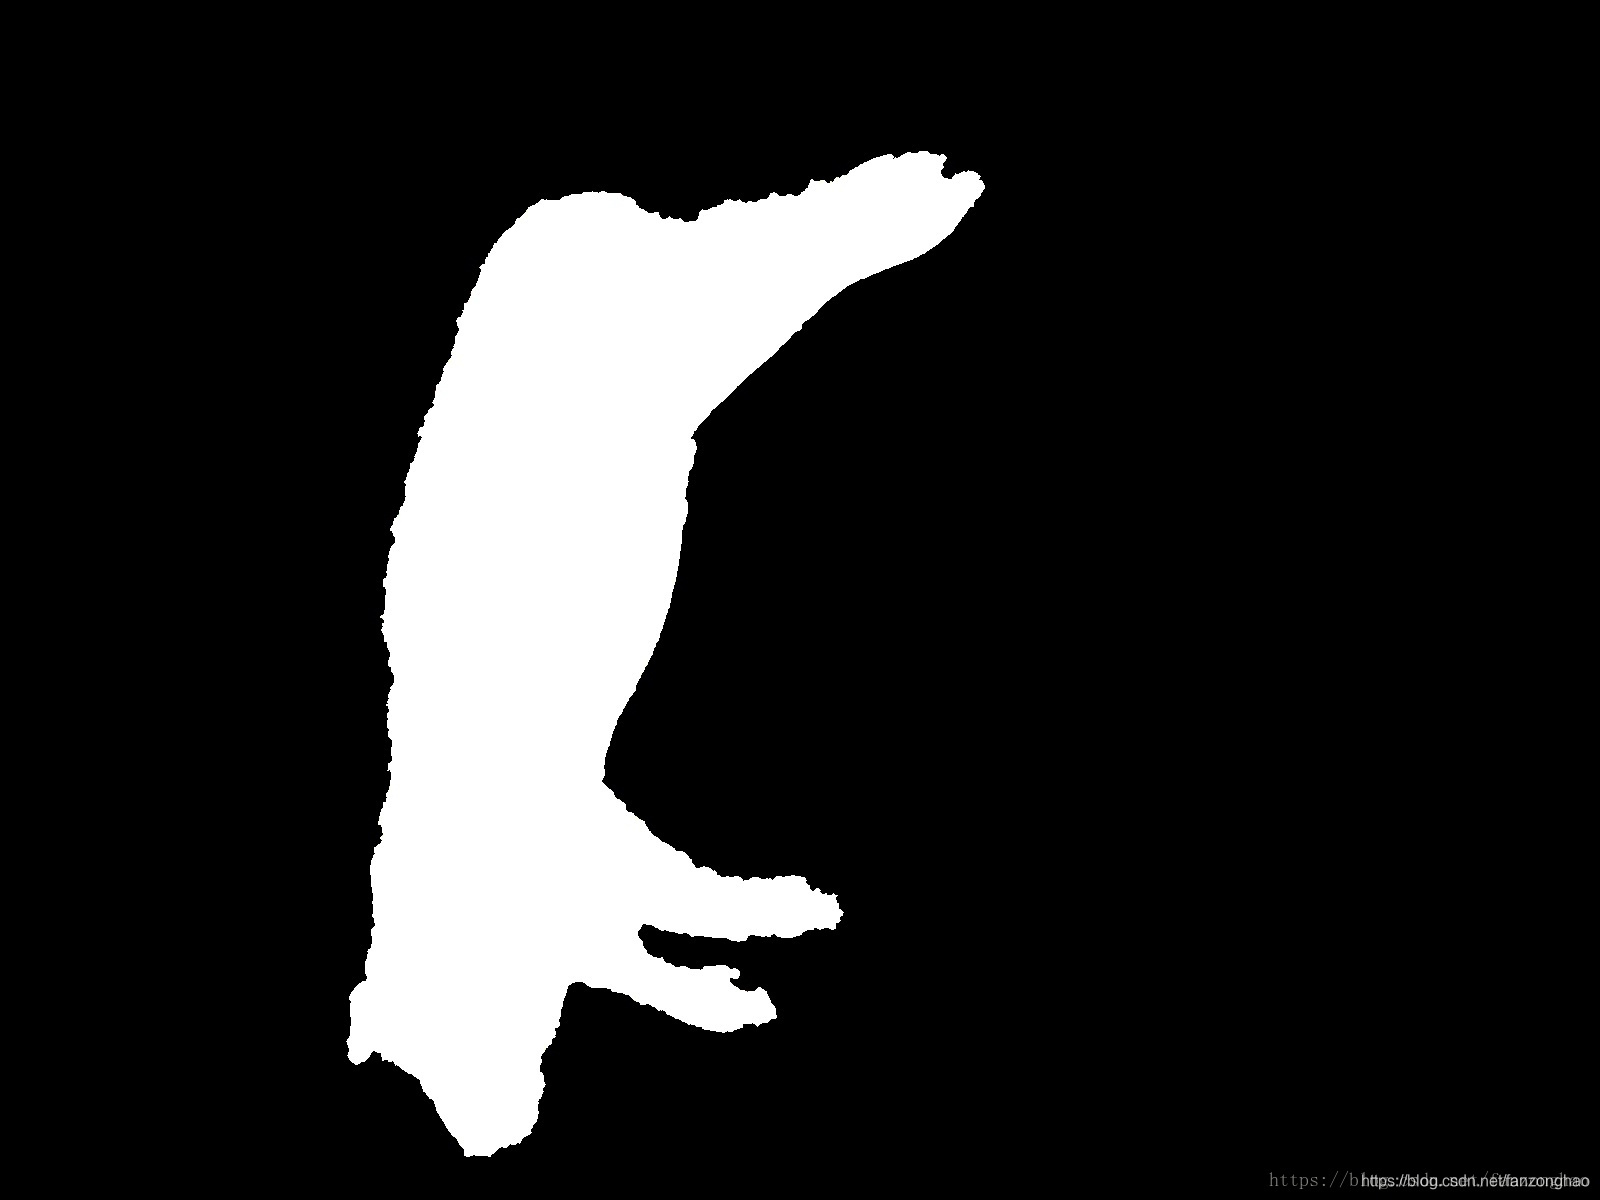
二.变换补充

故theta' = 2pi - theta
所以旋转矩阵为:
案例1: 点的旋转: 旋转矩阵的逆等于旋转矩阵的转置
#图像坐标系是y向下.所以y向上的60度就需要传入360 - 60
matrix = cv2.getRotationMatrix2D((0, 0), 360-60, 1)
print('==matrix:', matrix)
point = np.array([[1],
                 [1]], dtype=np.float32)
rotate_point = np.dot(matrix[:, :2], point)
print('==rotate_point:', rotate_point)
rotate_point_x = np.sqrt(2)*np.cos(75/180*np.pi)
rotate_point_y = np.sqrt(2)*np.sin(75/180*np.pi)

print('==rotate_point_x:', rotate_point_x)
print('==rotate_point_y:', rotate_point_y)

#旋转矩阵的逆 == 旋转矩阵的转置
rotate_matrix = np.array([[np.cos(30/180*np.pi), np.sin(30/180*np.pi)],
                          [-np.sin(30/180*np.pi), np.cos(30/180*np.pi)]], dtype=np.float32)
print('rotate_matrix:\n', rotate_matrix)


print('rotate_matrix.T:\n', rotate_matrix.T)
print('==np.linalg.inv(rotate_matrix):\n', np.linalg.inv(rotate_matrix))


仿射变换:
平移变换:


三步法:


对应公式:

逆变换为:

代码:
origin = np.array([300, 500], dtype=np.float32)
dst = np.array([640, 640], dtype=np.float32)
scale = min(dst / origin)
print('===scale:', scale)
M = np.array([[scale, 0, -scale * origin[0] / 2 + dst[0]/2],
              [0, scale, -scale * origin[1] / 2 + dst[1]/2],
              [0,     0, 1]], dtype=np.float32)
print('==M:\n', M)


M_inv1 = np.linalg.inv(M)
print('==M_inv1:\n', M_inv1)
k = scale
b1 = -scale * origin[0] / 2 + dst[0]/2
b2 = -scale * origin[1] / 2 + dst[1]/2

M_inv2 = np.array([[1/k, 0, -b1/k],
                   [0, 1/k, -b2/k]], dtype=np.float32)
print('==M_inv2:\n', M_inv2)
案例2:图像仿射变换
import cv2

img = cv2.imread('./20210829110603899.png', 0)
h, w = img.shape
new_h = 1000
new_w = 600
scale = min(new_h / h, new_w / w)
print(new_h / h, new_w / w)
factor = np.array([[scale, 0, 0],
                   [0, scale, 0]])
new_img = cv2.warpAffine(img, factor, (new_w, new_h), borderValue=127)
print(new_img.shape)
cv2.imwrite('./new_img1.jpg', new_img)


factor = np.array([[scale, 0, new_w / 2 - scale * w / 2],
                   [0, scale, new_h / 2 - scale * h / 2]])
print('==factor:', factor)
new_img = cv2.warpAffine(img, factor, (new_w, new_h), borderValue=127)
print(new_img.shape)
cv2.imwrite('./new_img2.jpg', new_img)

k = scale
b1 = -scale * w / 2 + new_w / 2
b2 = -scale * h / 2 + new_h / 2

# M_inv2 = np.array([[1/k, 0, -b1/k],
#                    [0, 1/k, -b2/k]], dtype=np.float32)
src_img = cv2.warpAffine(new_img, np.linalg.inv([[scale, 0, new_w / 2 - scale * w / 2],\
                                                 [0, scale, new_h / 2 - scale * h / 2],\
                                                 [0, 0, 1]])[:2, :],
                         img.shape[::-1])
print('==src_img.shape:', src_img.shape)
cv2.imwrite('./src_img.jpg', src_img)
原始图:

缩放图: 缩放+平移:


还原图:

案例3:图像旋转和点的旋转
def wrap_img_point():
    img_path = './crop_img.png'
    points = [[99.13372269417475, 206.6007281553398, 0.4368400573730469],
              [107.84733009708738, 178.28155339805824, 0.522445023059845],
              [111.33276699029126, 150.39805825242718, 0.4364774227142334],
              [105.23325242718447, 131.22815533980582, 0.4626307189464569],
              [102.61917475728156, 119.02912621359222, 0.4411778748035431],
              [74.73566444174757, 124.25728155339806, 0.4173640012741089],
              [67.32911104368932, 89.8385922330097, 0.6194126605987549],
              [59.922557645631066, 70.66868932038835, 0.7654216289520264],
              [49.901926577669904, 49.756067961165044, 0.8425270915031433],
              [60.79391686893204, 135.14927184466018, 0.5157480239868164],
              [59.922557645631066, 109.00849514563106, 0.7123643159866333],
              [82.57789745145631, 115.10800970873785, 0.7019659876823425],
              [98.69804308252426, 129.92111650485435, 0.724751353263855],
              [52.08032463592233, 151.26941747572815, 0.5692143440246582],
              [52.9516838592233, 129.04975728155338, 0.7583293318748474],
              [82.14221783980582, 137.7633495145631, 0.7689758539199829],
              [100.4407615291262, 147.78398058252426, 0.7503147125244141],
              [51.644645024271846, 170.875, 0.6624100208282471],
              [54.25872269417476, 150.83373786407768, 0.7825548648834229],
              [77.34974211165049, 153.0121359223301, 0.6292964220046997],
              [97.39100424757281, 153.88349514563106, 0.6044198870658875]]

    joints_2d = np.array(points)
    print(joints_2d.shape)

    img = cv2.imread(img_path)
    print('==img.shape:', img.shape)
    font = cv2.FONT_HERSHEY_SIMPLEX

    dst_h = 256
    dst_w = 256
    # for j, point2d_ in enumerate(joints_2d):
    #     # if point2d_[-1] > args.keypoint_confidence:
    #     cv2.circle(img, tuple(point2d_[:2].astype(int)), 1, (0, 0, 255), 2)
    #     cv2.putText(img, str(j), tuple(point2d_[:2].astype(int)), font, 0.4, (0, 0, 255), 1)
    # cv2.imwrite('./img_rect.jpg', img)
    fx = random.randint(1, 10)
    fy = random.randint(1, 10)
    matrix = np.array([[1, 0, fx],
                       [0, 1, fy]], dtype=np.float32)
    print('==matrix:', matrix)
    joints_2d[:, 0] = joints_2d[:, 0] * matrix[0][0] + matrix[0][2]
    joints_2d[:, 1] = joints_2d[:, 1] * matrix[1][1] + matrix[1][2]
    img = cv2.warpAffine(img, matrix, (dst_h, dst_w), borderValue=(255, 255, 255))

    random_angel = random.randint(-5, 5)
    rot_matrix = cv2.getRotationMatrix2D((dst_h//2, dst_w//2), random_angel, 1)
    print('==rot_matrix :', rot_matrix)
    # print(rot_matrix[0][2])
    # print(rot_matrix[1][2])
    img = cv2.warpAffine(img, rot_matrix, (dst_h, dst_w), borderValue=(255, 255, 255))
    rotate_joints_2d = np.dot(rot_matrix[:, :2], joints_2d.transpose(1, 0)[:2, :]) + np.array([[rot_matrix[0][2]],
                                                                                               [rot_matrix[1][2]]])
    # import pdb;pdb.set_trace()
    rotate_joints_2d = np.concatenate((rotate_joints_2d.transpose(1, 0), joints_2d[:, -1][:, None]), axis=1)
    for j, point2d_ in enumerate(rotate_joints_2d):
        # if point2d_[-1] > args.keypoint_confidence:
        cv2.circle(img, tuple(point2d_[:2].astype(int)), 1, (0, 0, 255), 2)
        cv2.putText(img, str(j), tuple(point2d_[:2].astype(int)), font, 0.4, (0, 0, 255), 1)
    cv2.imwrite('./wrap_img_rect.jpg', img)
if __name__ == '__main__':
    # get_crop_img_point()
    wrap_img_point()

案例4:透视变换做数据增强
import os
import cv2
import numpy as np


def rotate_img():
    path = "./0.png"
    img_w = 1280
    img_h = 720
    img = cv2.imread(path)
    input_h, input_w, _ = img.shape
    ori_img = cv2.resize(img, (img_w, img_h))
    fx = img_w / input_w
    fy = img_h / input_h

    img_corner_points = np.array([[0,  img_w - 1,  img_w - 1., 0],
                                  [0, 0,  img_h - 1.,  img_h - 1.],
                                  [1, 1, 1, 1]], dtype=np.float32)
    point = np.array([[100, 200]], dtype=np.float32)
    point_input = point.copy()
    point[:, 0] *= fx
    point[:, 1] *= fy
    pitch = -10
    yaw = -10
    roll = -10
    r = np.array([pitch * np.pi / 180, yaw * np.pi / 180, roll * np.pi / 180], dtype=np.float32)
    R, _ = cv2.Rodrigues(r)

    # #zhihuhu
    # K = np.array([[447.90 985736, 0., 961.94125186],
    #               [0., 447.90985736, 559.82074753],
    #               [0., 0., 1.]], dtype=np.float32)
    # A4 oms
    K = np.array([[880.299232, 0, 686.453336],
                  [0, 880.009692, 347.449238],
                  [0., 0., 1.]], dtype=np.float32)
    K1 = np.array([[680.299232, 0, 686.453336],
                   [0, 680.009692, 347.449238],
                   [0., 0., 1.]], dtype=np.float32)
    M = K1.dot(R.dot(np.linalg.inv(K)))

    trans_img_corner_points = M.dot(img_corner_points)
    trans_img_corner_points /= trans_img_corner_points[-1]
    # print(corner_points)
    trans_img_x1 = min(trans_img_corner_points[0])
    trans_img_y1 = min(trans_img_corner_points[1])
    trans_img_x2 = max(trans_img_corner_points[0])
    trans_img_y2 = max(trans_img_corner_points[1])
    trans_img_w = trans_img_x2 - trans_img_x1
    trans_img_h = trans_img_y2 - trans_img_y1
    if (img_h / trans_img_h) < (img_w / trans_img_w):
        ratio = img_h / trans_img_h
    else:
        ratio = img_w / trans_img_w
    K2 = np.array([[ratio, 0, -trans_img_x1 * ratio],
                   [0, ratio, -trans_img_y1 * ratio],
                   [0., 0., 1]], dtype=np.float32)
    M2 = K2.dot(K1.dot(R.dot(np.linalg.inv(K))))
    dst_img = cv2.warpPerspective(ori_img, M2, (img_w, img_h), borderMode=0, borderValue=0)
    # cv2.imwrite('dst_img1.jpg', dst_img)
    dst_img = cv2.resize(dst_img, (input_w, input_h))
    point = np.hstack((point, np.ones(point.shape[0], dtype=np.float32).reshape(-1, 1)))
    point = M2.dot(point.transpose(1, 0))
    point /= point[-1, :]
    point = point.transpose(1, 0)
    point[:, 0] /= fx
    point[:, 1] /= fy
    # print('==M:', M)
    # im_dst = cv2.warpPerspective(img, M, (img_w, img_h), borderMode=0, borderValue=255)
    #
    for point2d_ in point[:, :2]:
        print(point2d_)
        cv2.circle(dst_img, tuple(point2d_.astype(np.int32)), 1, (0, 0, 255), 2)
    cv2.imwrite('dst_img.jpg', dst_img)

    # print('===point_input:', point_input)
    cv2.circle(img, (int(point_input[0][0]), int(point_input[0][1])), 2, (0, 0, 255), 2)
    cv2.imwrite('img.jpg', img)

if __name__ == '__main__':
    rotate_img()


参考:


 1473
1473


 被折叠的 条评论
为什么被折叠?
被折叠的 条评论
为什么被折叠?
 到【灌水乐园】发言


