


前言
研究DPM需要深入阅读下述两篇文献:
《2009 Object Detection with Discriminatively Trained Part Based Models》
《2010 Cascade Object Detection with Deformable Part Models》
github上的两个版本的代码,matlab版本的,win/linux;ffld版本的代码已经安装运行,而且介绍了一款矩阵开源库-eigen;包含了大多数矩阵运算操作,C++实现,很喜欢!只是浅略的运行了两个例程;言归正传,ffld依然只提供了使用已知模型txt进行检测,其提供了检测自行车的模型,没有其他的如行人/车的模型;需要使用matlab版本进行训练;
代码只是浅略的学习了一下,主要算法流程:
训练:
1.计算金字塔图像,hog特征(PCA降维)
2.滑动窗口检测每一块的score,选择最高分的尺度和位置;
3.隐藏参数以及其他的类型,进行区分;
4.提取根区和子区
测试:
1.计算金字塔图像,hog特征
2.分别运行根区和子区滤波至hog特征矩阵,累加计算得分;
3.应用阈值法,最高得分是否超出阈值,从而确定是否为待检测区域;
可见,Latent SVM和坐标下降法/梯度下降法主要用于训练;
1. 测试
1.1 建立工程
安装opencv3.0及opencv_contrib,以opencv_contrib/latentsvm/test下的四个文件
test_latentsvmdetector_cascade.cpp
test_main.cpp
test_precomp.cpp
test_precomp.hpp
建立工程,第一个文件为运行主体;
 std::string img_path_cat = std::string(ts->get_data_path()) + "cat.png";
    std::string img_path_cars = std::string(ts->get_data_path()) + "cars.png";
	std::string img_path_peoples = std::string(ts->get_data_path()) + "four_people_no.jpg";

    std::string model_path_cat = std::string(ts->get_data_path()) + "models_VOC2007_cascade/cat.xml";
    std::string model_path_car = std::string(ts->get_data_path()) + "models_VOC2007_cascade/car.xml";
	std::string model_path_people = std::string(ts->get_data_path()) + "models_VOC2007_cascade/person.xml";

	//不包含people信息
    std::string true_res_path = std::string(ts->get_data_path()) + "results_cascade.xml";

	std::cout << ts->get_data_path() << std::endl;
	std::cout << std::string(ts->get_data_path()) << std::endl;

#ifdef HAVE_TBB
    int numThreads = 2;
#endif

    Mat image_cat = imread( img_path_cat );
    Mat image_cars = imread( img_path_cars );
	Mat image_peoples = imread(img_path_peoples);
	if (image_cat.empty() || image_cars.empty() || image_peoples.empty())
    {
        ts->set_failed_test_info( cvtest::TS::FAIL_INVALID_TEST_DATA );
        return;
    }

    // We will test 2 cases:
    // detector1 - to test case of one class 'cat'
    // detector12 - to test case of two (several) classes 'cat' and car

    // Load detectors
	//推荐单独载入检测xml
    cv::Ptr<lsvm::LSVMDetector> detector1 = lsvm::LSVMDetector::create(std::vector<std::string>(1,model_path_cat));
	cv::Ptr<lsvm::LSVMDetector> detector_people = lsvm::LSVMDetector::create(std::vector<std::string>(1, model_path_people));

    std::vector<std::string> models_pathes(3);
    models_pathes[0] = model_path_cat;
    models_pathes[1] = model_path_car;
	models_pathes[2] = model_path_people;
    cv::Ptr<lsvm::LSVMDetector> detector12 = lsvm::LSVMDetector::create(models_pathes);

    if( detector1->isEmpty() || detector12->isEmpty() || detector12->getClassCount() != 3||
		detector_people->isEmpty())
    {
        ts->set_failed_test_info( cvtest::TS::FAIL_INVALID_TEST_DATA );
        return;
    }

    // 1. Test method detect
    // Run detectors
	std::vector<lsvm::LSVMDetector::ObjectDetection> detections1_cat, detections12_cat, detections12_cars, detections12_people;
    detector1->detect( image_cat, detections1_cat, 0.5);
    detector12->detect( image_cat, detections12_cat, 0.5);
    detector12->detect( image_cars, detections12_cars, 0.5);
	detector_people->detect(image_peoples, detections12_people, 0.5);

	for (int idx_1 = 0; idx_1 < detections1_cat.size() && detections1_cat[idx_1].score>0.5; idx_1++)
	{
		rectangle(image_cat, detections1_cat[idx_1].rect, cv::Scalar(255, 0, 0));
	}
	for (int idx_2 = 0; idx_2 < detections12_cat.size() && detections12_cat[idx_2].score>0.5; idx_2++)
	{
		rectangle(image_cat, detections12_cat[idx_2].rect, cv::Scalar(0, 255, 0));
	}
	for (int idx_3 = 0; idx_3 < detections12_cars.size() && detections12_cars[idx_3].score>0.5; idx_3++)
	{
		rectangle(image_cars, detections12_cars[idx_3].rect, cv::Scalar(0, 0, 255));
	}
	for (int idx_4 = 0; idx_4 < detections12_people.size() && detections12_people[idx_4].score>0.5; idx_4++)
	{
		rectangle(image_peoples, detections12_people[idx_4].rect, cv::Scalar(0, 0, 255));
	}
简单修改test_latentsvmdetector_cascade.cpp,对猫,人,车进行检测,并记录检测的结果;
1.2 设置环境变量
在test_main.cpp中,显示了一种模式测试运行代码的方式,在debug时有很多方便,所以不作修改了。但需要设置一个环境变量
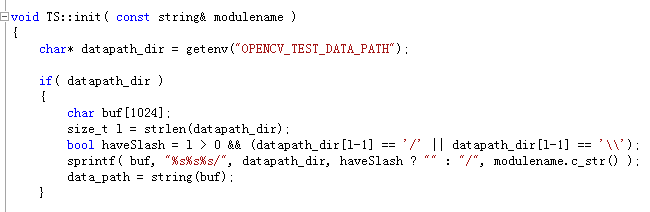
OPENCV_TEST_DATA_PATH
H:/github/opencv/modules/opencv_contrib/modules/latentsvm/testdata
推荐使用路径分割符"/"
2. 运行结果
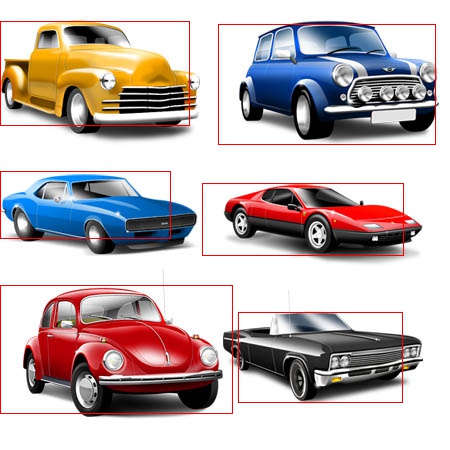
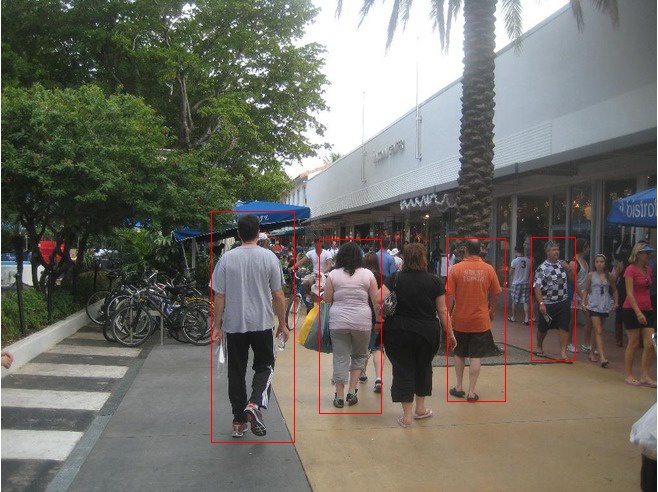
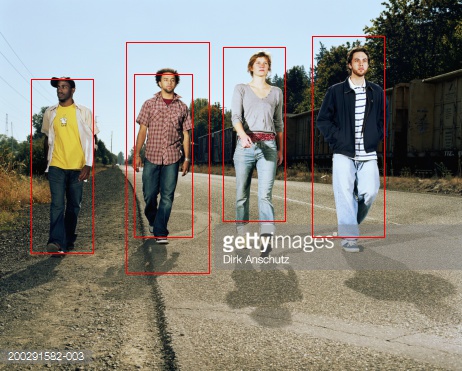
检测效果还是可以接受的。但需要注意检测成绩阈值的设定。
3. 训练
已有的xml可以满足一定的需求,但也许我们更希望训练自己的xml,下述论述可能有些帮助:
The MATLAB implementation of LatSVM by the authors of the paper has a train script called pascal. There is a README with the tarball explaining its usage:
Using the learning code
=======================
1. Download and install the 2006-2011 PASCAL VOC devkit and dataset.
(you should set VOCopts.testset='test' in VOCinit.m)
2. Modify 'voc_config.m' according to your configuration.
3. Start matlab.
4. Run the 'compile' function to compile the helper functions.
(you may need to edit compile.m to use a different convolution
routine depending on your system)
5. Use the 'pascal' script to train and evaluate a model.
example:
>> pascal('bicycle', 3); % train and evaluate a 6 component bicycle model
The learning code saves a number of intermediate models in a model cache directory defined in 'voc_config.m'.
For more information, visit the authors website. The page also contain the paper of this method.
For more information, visit the authors website. The page also contain the paper of this method.


 5025
5025

 被折叠的 条评论
为什么被折叠?
被折叠的 条评论
为什么被折叠?
 到【灌水乐园】发言


