


如何在SVG中使用对话框与用户交互是SVG开发中常见的一个问题,SVG的窗口对象只提供了alert,confirm,prompt窗口方法,如何在SVG中创建和使用其它复杂对话框呢?解决的方法有几种:
1, 使用传统的HTML,其中嵌入SVG对象,使用HTML的窗口对象弹出网页对话框。例如在a.html中:
 <
html
><
head
><
title
>
SVG事件
</
title
>
<
body
>
<
script language
=
"
JavaScript
"
>
function
changeColor()
<
html
><
head
><
title
>
SVG事件
</
title
>
<
body
>
<
script language
=
"
JavaScript
"
>
function
changeColor()
 ...
{
...
{ var SvgMainMapDoc=id1.getSVGDocument(); var obj = new Object(); obj.name="51js"; var ret = window.showModalDialog("c.html",obj,"dialogWidth=300px;dialogHeight=300px"); //alert(ret); var text1=SvgMainMapDoc.getElementById("text1"); text1.setAttribute("stroke",ret);
 }
</
script
>
<
embed name
=
"
id1
"
pluginspage
=
"
http://www.adobe.com/svg/viewer/install/
"
align
=
"
top
"
src
=
"
1.svg
"
height
=
"
200px
"
width
=
"
400px
"
type
=
"
image/svg+xml
"
>
<
input type
=
"
button
"
value
=
"
selectColor
"
name
=
"
color
"
onclick
=
"
changeColor()
"
>
</
body
>
</
html
>
}
</
script
>
<
embed name
=
"
id1
"
pluginspage
=
"
http://www.adobe.com/svg/viewer/install/
"
align
=
"
top
"
src
=
"
1.svg
"
height
=
"
200px
"
width
=
"
400px
"
type
=
"
image/svg+xml
"
>
<
input type
=
"
button
"
value
=
"
selectColor
"
name
=
"
color
"
onclick
=
"
changeColor()
"
>
</
body
>
</
html
>
c.html为要显示的网页对话框,其中也嵌入了SVG对象,这样就可以使用SVG创建对话框界面。在c.html中
<
html
><
head
><
title
>
查询SVG属性
</
title
>
<
body
>
<
script language
=
"
JavaScript
"
>
//
var obj = window.dialogArguments;
//
alert("您传递的参数为:" + obj.name);
//
var svgns = "
http://www.w3.org/2000/svg
";
var ret
=
"
yellow
"
;
//
Default
window.returnValue
=
ret; function setColor(evt)
...
{ var targetshape = evt.getTarget(); ret = targetshape.getAttributeNS(null,"fill"); //alert(ret); window.returnValue=ret; var SvgMainMapDoc=id1.getSVGDocument(); var id="text1"; if(SvgMainMapDoc.getElementById( id ).hasChildNodes() == true) SvgMainMapDoc.getElementById( id ).getFirstChild().setData( ret ); else
 ...{ NewItem = SvgMainMapDoc.createTextNode( ret ) SvgMainMapDoc.getElementById( id ).appendChild(NewItem);
 } self.close() }
</
script
>
<
embed name
=
"
id1
"
pluginspage
=
"
http://www.adobe.com/svg/viewer/install/
"
align
=
"
top
"
src
=
"
3.svg
"
height
=
"
200px
"
width
=
"
400px
"
type
=
"
image/svg+xml
"
>
</
body
>
</
html
>
} self.close() }
</
script
>
<
embed name
=
"
id1
"
pluginspage
=
"
http://www.adobe.com/svg/viewer/install/
"
align
=
"
top
"
src
=
"
3.svg
"
height
=
"
200px
"
width
=
"
400px
"
type
=
"
image/svg+xml
"
>
</
body
>
</
html
>
两个页面都嵌入了SVG,而且SVG可以调用这些Script,并传递和返回参数。
效果如下:
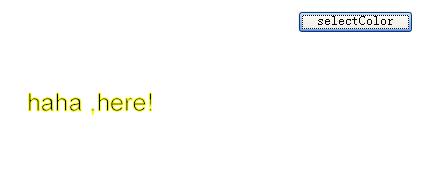
按下按钮后显示选择颜色对话框

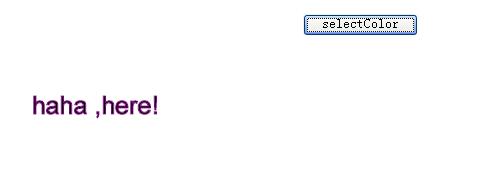
在选择颜色关闭颜色对话框后,文字颜色变化为选择的颜色:
2, 使用SVG中的超级链接到另外一个SVG页面,但数据交互比较麻烦,一个可行的选择是通过剪贴板传递数据。该方法无法模拟使用模式对话框的情况,用户感觉也比较差,所以不推荐使用。
<a xlink:href="b.svg">
<rect fill="black" pointer-events="all" x="60" y="930" width="280" height="40"/>
<text x="70" y="965" font-size="36" stroke="none" fill="white" text-decoration="underline">Back to my blog</text>
</a>
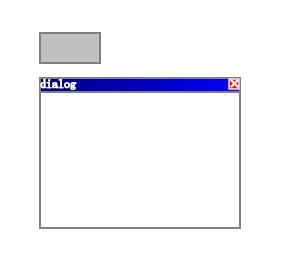
3, 使用SVG创建一个模拟的窗口,这种方法需要一些工作量。模拟窗口风格应当与常用的窗口风格相似,包括标题,标题栏,按钮,状态栏。窗口可以移动,包括一些控件。如果更进一步的化,窗口应当可以改变大小,最大化和最小化,以及一些窗口风格。
下面是一个最简单的对话框的窗口,可以移动和关闭,并放置一些按钮等。
代码如下:
<
svg width
=
"
100%
"
height
=
"
100%
"
xmlns
=
"
http://www.w3.org/2000/svg
"
onload
=
"
Init(evt)
"
onmousedown
=
"
Grab(evt)
"
onmousemove
=
"
Drag(evt)
"
onmouseup
=
"
Drop(evt)
"
>
<
title
>
Dialog
</
title
>
<
desc
>
Model dialog simulation.
</
desc
>
<
script type
=
"
text/javascript
"
><!
[CDATA[ var SVGDocument
=
null
; var SVGRoot
=
null
; var TrueCoords
=
null
; var GrabPoint
=
null
; var caption
=
null
; var diaglog
=
null
; var DragTarget
=
null
; var test
=
null
; var modelDialog
=
false
; function Init(evt)
...
{ SVGDocument = evt.target.ownerDocument; SVGRoot = SVGDocument.documentElement; // these svg points hold x and y values... // very handy, but they do not display on the screen (just so you know) TrueCoords = SVGRoot.createSVGPoint(); GrabPoint = SVGRoot.createSVGPoint(); //Get elements we need caption = SVGDocument.getElementById('winCap'); dialog = SVGDocument.getElementById('dialog'); modal = SVGDocument.getElementById('modal'); }
function Grab(evt)
...
{ // find out which element we moused down on var targetElement = evt.target; // Drag on caption if ( caption == targetElement ) ...{ DragTarget = dialog;//We want drag whole dialog; DragTarget.parentNode.appendChild( DragTarget ); //Show dialog DragTarget.setAttributeNS(null, 'pointer-events', 'none'); var transMatrix = DragTarget.getCTM(); GrabPoint.x = TrueCoords.x - Number(transMatrix.e); GrabPoint.y = TrueCoords.y - Number(transMatrix.f); } }
function Drag(evt)
...
{ // account for zooming and panning GetTrueCoords(evt); // if we don't currently have an element in tow, don't do anything if (DragTarget) ...{ // account for the offset between the element's origin and the // exact place we grabbed it... this way, the drag will look more natural var newX = TrueCoords.x - GrabPoint.x; var newY = TrueCoords.y - GrabPoint.y; // apply a new tranform translation to the dragged element, to display // it in its new location DragTarget.setAttributeNS(null, 'transform', 'translate(' + newX + ',' + newY + ')'); } }
function Drop(evt)
...
{ if ( DragTarget ) ...{ var targetElement = evt.target; // turn the pointer-events back on, so we can grab this item later DragTarget.setAttributeNS(null, 'pointer-events', 'all'); // set the global variable to null, so nothing will be dragged until we // grab the next element DragTarget = null; } }
function GetTrueCoords(evt)
...
{ // find the current zoom level and pan setting, and adjust the reported // mouse position accordingly var newScale = SVGRoot.currentScale; var translation = SVGRoot.currentTranslate; TrueCoords.x = (evt.clientX - translation.x)/newScale; TrueCoords.y = (evt.clientY - translation.y)/newScale; }
function closeDialog(evt)
...
{ dialog.setAttributeNS(null, 'display', 'none'); modelDialog = false; }
function showDialog(evt)
...
{ if( !modelDialog) ...{ modal.setAttributeNS(null, 'transform', 'translate(-200,-200)'); modal.setAttributeNS(null, 'fill-opacity', '0.5'); dialog.setAttributeNS(null, 'transform', 'translate(200,200)'); dialog.setAttributeNS(null, 'display', 'inline'); SVGRoot.appendChild( dialog ); modelDialog = true; //alert("ok"); } }
]]
></
script
>
<
def
>
<
linearGradient id
=
"
linear1
"
>
<
stop offset
=
"
0%
"
stop
-
color
=
"
navy
"
/>
<
stop offset
=
"
100%
"
stop
-
color
=
"
blue
"
/>
</
linearGradient
>
</
def
>
<
rect id
=
'
BackDrop
'
x
=
'
-10%
'
y
=
'
-10%
'
width
=
'
110%
'
height
=
'
110%
'
fill
=
'
none
'
pointer
-
events
=
'
all
'
/>
<
g id
=
"
dialog
"
x
=
"
100
"
y
=
"
100
"
display
=
"
none
"
>
<
rect id
=
"
modal
"
width
=
"
110%
"
height
=
'
110%
'
fill
=
"
white
"
fill
-
opacity
=
"
0
"
/>
<
rect id
=
"
winBody
"
width
=
"
200
"
height
=
'
150
'
stroke
-
width
=
"
2
"
stroke
=
"
gray
"
fill
=
"
white
"
/>
<
g
>
<
rect id
=
"
winCap
"
width
=
"
200
"
height
=
"
14
"
stroke
-
width
=
"
2
"
stroke
=
"
gray
"
fill
=
"
url(#linear1)
"
/>
<
text pointer
-
events
=
"
none
"
transform
=
"
translate(0,10)
"
stroke
=
"
white
"
>
dialog
</
text
>
</
g
>
<
g id
=
"
close
"
onclick
=
"
closeDialog(evt)
"
>
<
a
>
<
rect transform
=
"
translate(189,1)
"
width
=
"
10
"
height
=
'
10
'
stroke
=
"
white
"
fill
=
"
red
"
/>
<
g transform
=
"
translate(191,2)
"
>
<
line x1
=
"
0
"
y1
=
"
0
"
x2
=
"
7
"
y2
=
"
7
"
stroke
-
width
=
"
2
"
stroke
=
"
white
"
/>
<
line x1
=
"
0
"
y1
=
"
7
"
x2
=
"
7
"
y2
=
"
0
"
stroke
-
width
=
"
2
"
stroke
=
"
white
"
/>
</
g
>
</
a
>
</
g
>
</
g
>
<
rect id
=
"
button
"
onclick
=
"
showDialog(evt)
"
x
=
"
100
"
y
=
"
100
"
width
=
"
60
"
height
=
'
30
'
stroke
-
width
=
"
2
"
stroke
=
"
black
"
fill
=
"
gray
"
/>
<
circle cx
=
"
250
"
cy
=
"
250
"
r
=
"
1
"
>
<
animate attributeName
=
"
r
"
from
=
"
1
"
to
=
"
50
"
dur
=
"
5s
"
repeatCount
=
"
indefinite
"
/>
</
circle
>
</
svg
>
4, 使用SVG窗口类
http://www.carto.net 提供了一个交互窗口的脚本,可以生成SVG模拟窗口,我们只需要引入几个必要的脚本,就可以使用该窗口了,窗口除了提供上面描述的界面,还支持窗口消息回调函数,以建立复杂的基于SVG的WEB应用程序。具体的描述和下载地址为
http://www.carto.net/papers/svg/gui/Window/。此外该网站还有很多SVG的控件脚本,例如按钮,列表框等,很多有用的资源。下面是一个使用该窗口脚本的最简单的例子。
<?
xml version
=
"
1.0
"
standalone
=
"
no
"
?>
<!
DOCTYPE svg PUBLIC
"
-//W3C//DTD SVG 1.1//EN
"
"
http://www.w3.org/Graphics/SVG/1.1/DTD/svg11.dtd
"
>
<?
AdobeSVGViewer save
=
"
snapshot
"
?>
<
svg width
=
"
100%
"
height
=
"
100%
"
viewBox
=
"
0 0 1024 700
"
onload
=
"
init(evt)
"
xmlns:batik
=
"
http://xml.apache.org/batik/ext
"
xmlns:attrib
=
"
http://www.carto.net/attrib
"
xmlns:xlink
=
"
http://www.w3.org/1999/xlink
"
xmlns
=
"
http://www.w3.org/2000/svg
"
preserveAspectRatio
=
"
xMidYMid meet
"
zoomAndPan
=
"
magnify
"
>
<
script type
=
"
text/ecmascript
"
xlink:href
=
"
helper_functions.js
"
/>
<
script type
=
"
text/ecmascript
"
xlink:href
=
"
mapApp.js
"
/>
<
script type
=
"
text/ecmascript
"
xlink:href
=
"
timer.js
"
/>
<
script type
=
"
text/ecmascript
"
xlink:href
=
"
Window.js
"
/>
<
script type
=
"
text/ecmascript
"
><!
[CDATA[
//
global variables for map application and navigation
var myMapApp
=
new
mapApp(); function init(evt)
...
{ //start a new window array in myMapApp myMapApp.Windows = new Array(); //first a few styles var winPlaceholderStyles = ...{"fill":"none","stroke":"dimgray","stroke-width":1.5}; var windowStyles = ...{"fill":"aliceblue","stroke":"dimgray","stroke-width":1}; var titlebarStyles = ...{"fill":"gainsboro","stroke":"dimgray","stroke-width":1}; var statusbarStyles = ...{"fill":"aliceblue","stroke":"dimgray","stroke-width":1}; var titletextStyles = ...{"font-family":"Arial,Helvetica","font-size":14,"fill":"dimgray"}; var statustextStyles = ...{"font-family":"Arial,Helvetica","font-size":10,"fill":"dimgray"}; var buttonStyles = ...{"fill":"none","stroke":"dimgray","stroke-width":1}; var titlebarHeight = 25; var statusbarHeight = 13; //create new window instance and add it to the Windows array with the windowId as a key myMapApp.Windows["bigWindow"] = new Window("bigWindow","Windows", 700,500,50,150,true,0,80,1024,700,true, winPlaceholderStyles,windowStyles,3,true,true, "Big Window","This is a big movable window",true,true,true, titlebarStyles,titlebarHeight,statusbarStyles,statusbarHeight, titletextStyles,statustextStyles,buttonStyles,undefined); myMapApp.Windows["smallWindow"] = new Window("smallWindow","bigWindow", 200,180,350,300,true,0,17,700,487,true, winPlaceholderStyles,windowStyles,3,true,true, "Small Window","Callback function is active",true,false,false, titlebarStyles,titlebarHeight,statusbarStyles,statusbarHeight, titletextStyles,statustextStyles,buttonStyles,windowEvents); myMapApp.Windows["bigWindow"].appendContent("button",true); myMapApp.Windows["smallWindow"].appendContent("animate",true); }
function windowEvents(id,evtType)
...
{ }
function openCloseWindow(id)
...
{ if (myMapApp.Windows[id].closed) ...{ myMapApp.Windows[id].open(true); } else ...{ myMapApp.Windows[id].close(true); } }
]]
></
script
>
<
rect id
=
"
button
"
onclick
=
"
openCloseWindow('smallWindow')
"
x
=
"
100
"
y
=
"
100
"
width
=
"
60
"
height
=
'
30
'
stroke
-
width
=
"
2
"
stroke
=
"
black
"
fill
=
"
gray
"
/>
<
circle id
=
"
animate
"
cx
=
"
40
"
cy
=
"
40
"
r
=
"
1
"
>
<
animate attributeName
=
"
r
"
from
=
"
1
"
to
=
"
30
"
dur
=
"
5s
"
repeatCount
=
"
indefinite
"
/>
</
circle
>
</
svg
>
效果如下:


 817
817


 被折叠的 条评论
为什么被折叠?
被折叠的 条评论
为什么被折叠?
 到【灌水乐园】发言


