


文章目录
1、简介
Premake是一个命令行实用程序,它读取软件项目的脚本定义,最常见的是使用它为Visual Studio,Xcode或GNU Make等工具集生成项目文件。

- 什么是构建系统
构建系统(BuildSystem)是用来从源码生成用户可以使用的目标(Targets)的自动化工具。目标可以包括库,可执行文件,或者生成的脚本等等。- 项目模块依赖关系维护 ;
- 目标的可配置化(不同系统:Windows,Mac…;不同平台:Win32,Win64,Amd64…)
- 目标生成的自动化

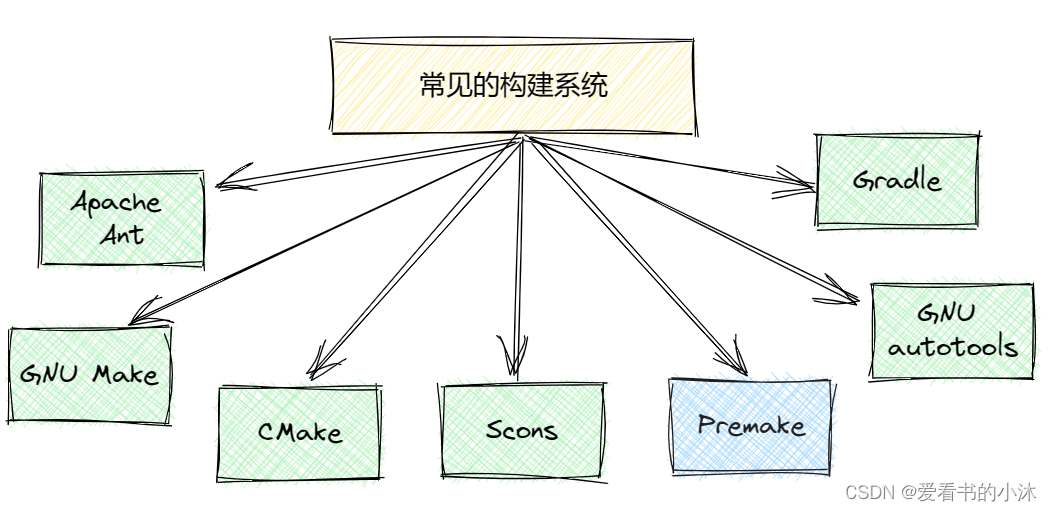
- 常见的构建系统
主流的可以跨平台,支持C++的构建系统- CMake
- Scons
- Premake
- GNU Make
- GNU autotools
- Apache Ant(主要用于Java)
- Gradle(主要用于Java)
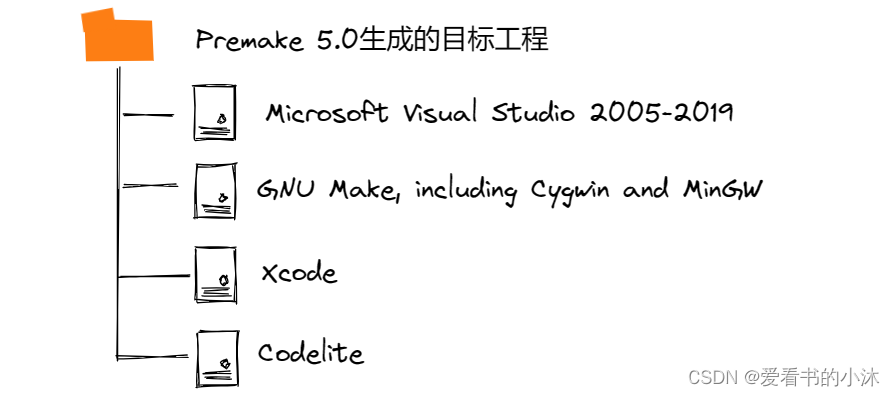
- Premake生成的目标工程
Premake 5.0 的当前开发版本可以生成针对以下目标的 C、C++ 或 C# 项目:- Microsoft Visual Studio 2005-2019
- GNU Make, including Cygwin and MinGW
- Xcode
- Codelite
2、下载和安装
2.1 下载
https://premake.github.io/download
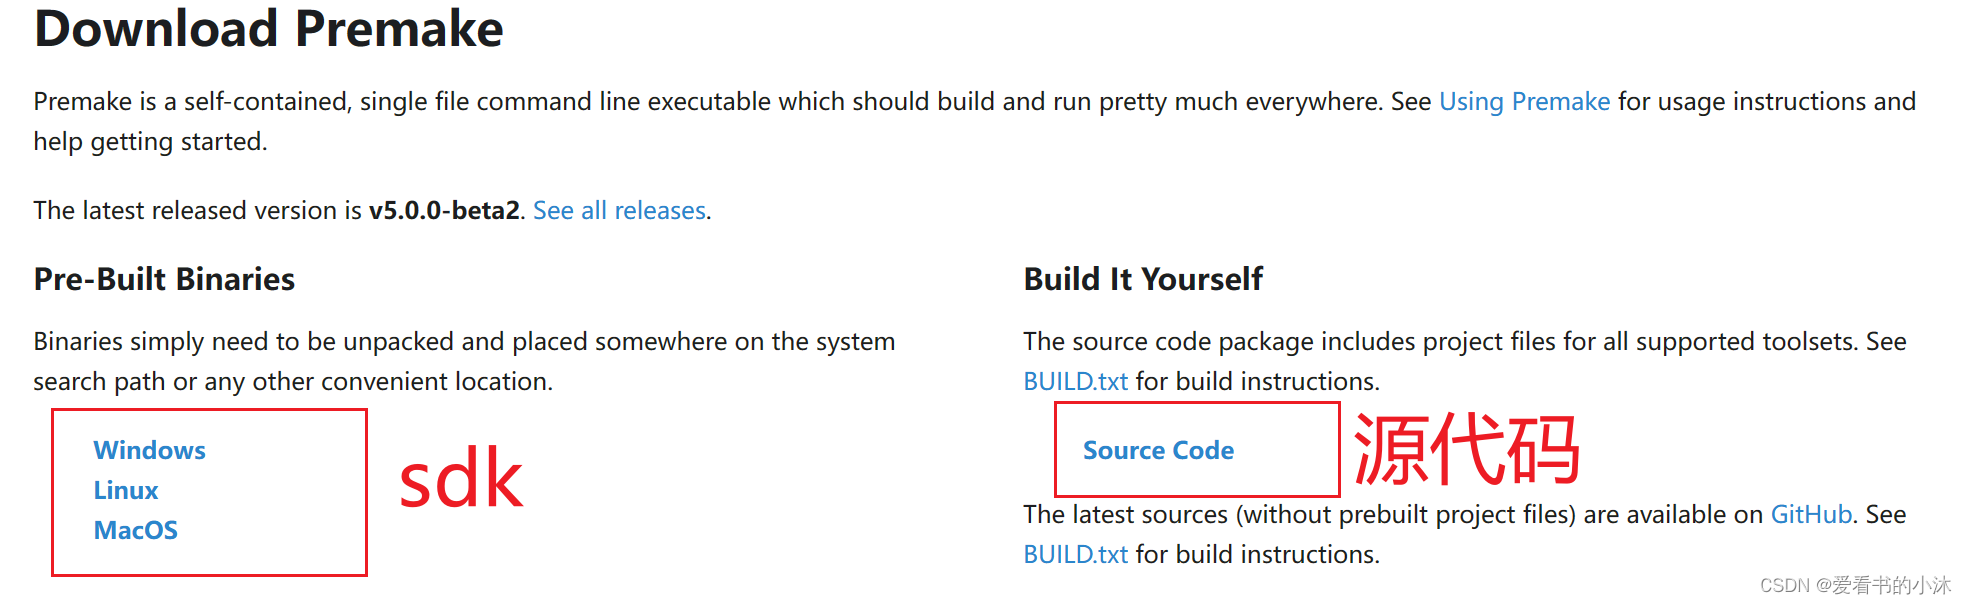
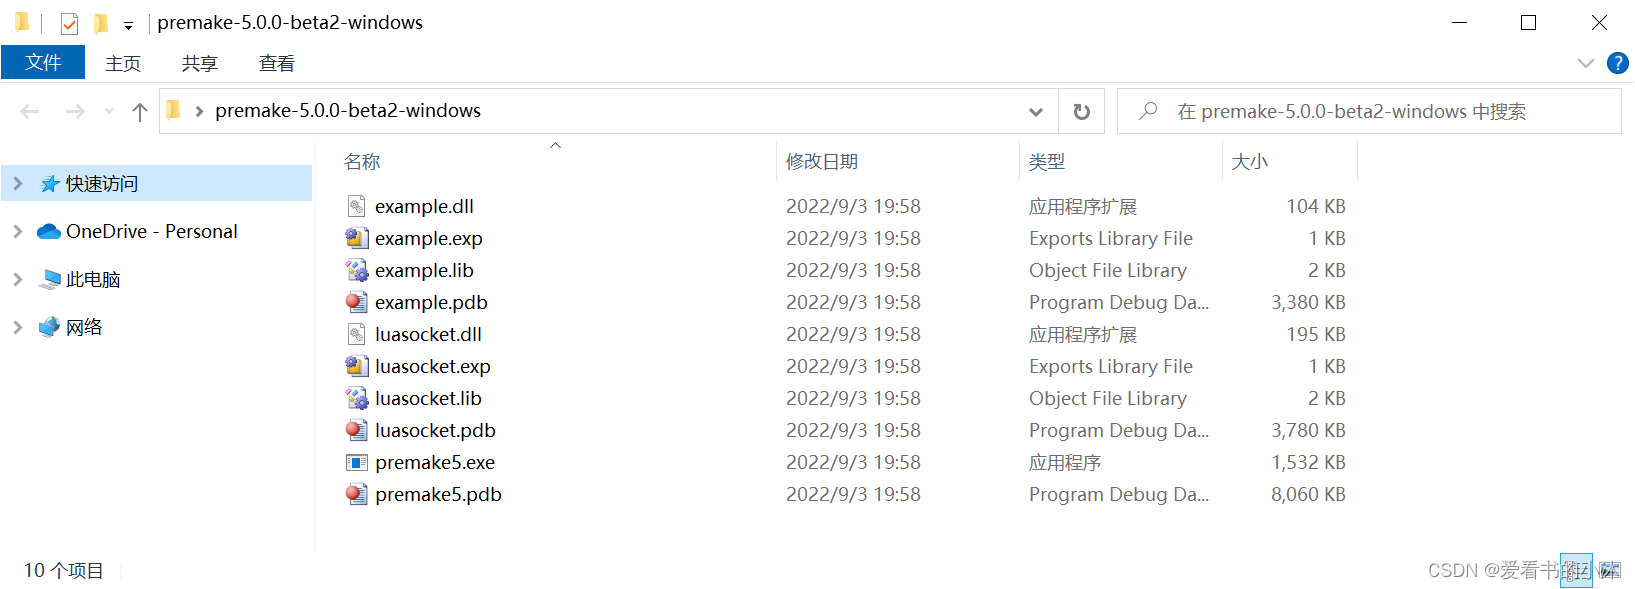
这里我们下载编译好的sdk开发包,解压如下:
2.3 快速入门
- 1、新建测试文件夹test
mkdir test
cd test
- 2、新建构建脚本premake5.lua
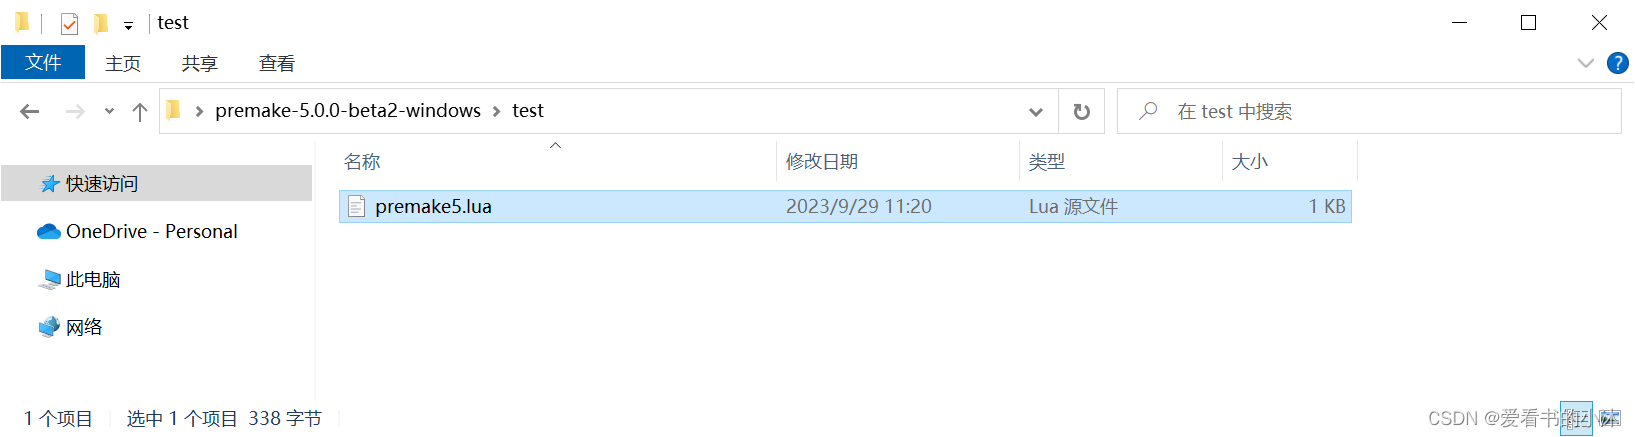
premake5.lua的内容如下:
workspace "XiaomuWorkspace"
   configurations { "Debug", "Release" }

project "XiaomuProject"
   kind "ConsoleApp"
   language "C++"
   files { "**.h", "**.cpp" }

   filter { "configurations:Debug" }
      defines { "DEBUG" }
      symbols "On"

   filter { "configurations:Release" }
      defines { "NDEBUG" }
      optimize "On"
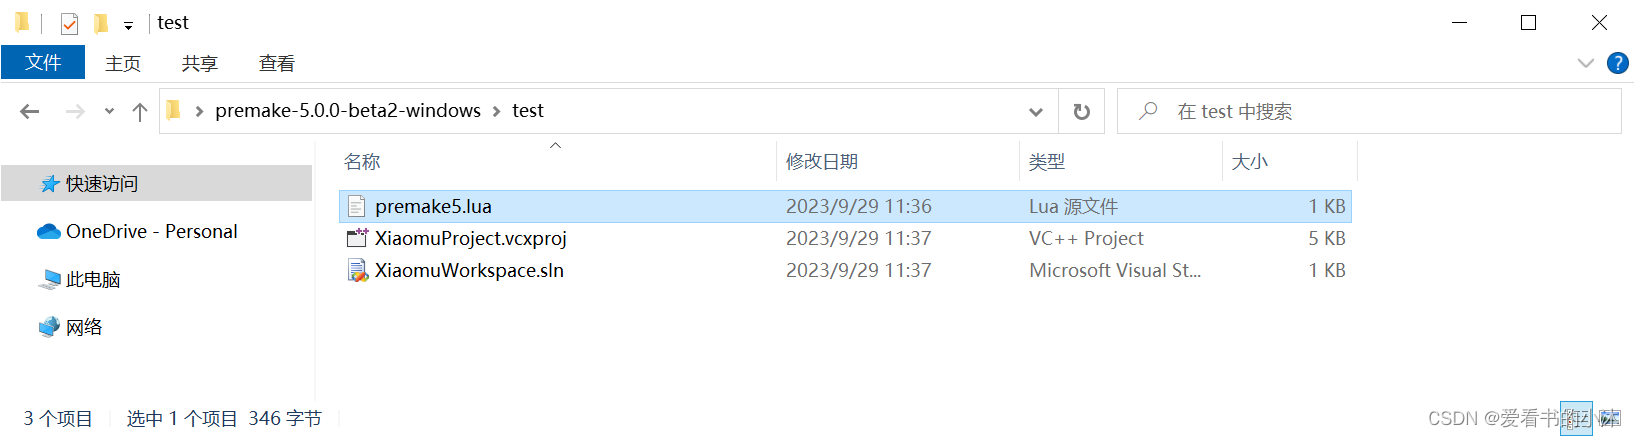
- 3、执行构建命令,生成指定工程
Premake5 vs2017

生成文件如下:
3、使用
3.1 支持的工程文件Project Files
| Action | Description |
|---|---|
| vs2022 | Generate Visual Studio 2022 project files |
| vs2019 | Generate Visual Studio 2019 project files |
| vs2017 | Generate Visual Studio 2017 project files |
| vs2015 | Generate Visual Studio 2015 project files |
| vs2013 | Generate Visual Studio 2013 project files |
| vs2012 | Generate Visual Studio 2012 project files |
| vs2010 | Generate Visual Studio 2010 project files |
| vs2008 | Generate Visual Studio 2008 project files |
| vs2005 | Generate Visual Studio 2005 project files |
| gmake | Generate GNU Makefiles (This generator is deprecated by gmake2) |
| gmake2 | Generate GNU Makefiles (including Cygwin and MinGW) |
| xcode4 | XCode projects |
| codelite | CodeLite projects |
若要生成 Visual Studio 2013 项目文件,请使用以下命令:
premake5 vs2013
3.2 构建设置Build Settings
| 设置名称 | 设置标志 |
|---|---|
| 指定二进制类型(可执行文件、库) | kind |
| 指定源代码文件 | files, removefiles |
| 定义编译器或预处理器符号 | defines |
| 找到包含文件 | includedirs |
| 设置预编译标头 | pchheader, pchsource |
| 链接库、框架或其他项目 | links, libdirs |
| 启用调试信息 | symbols |
| 针对尺寸或速度进行优化 | optimize |
| 添加任意构建标志 | buildoptions, linkoptions |
| 设置已编译目标的名称或位置 | targetname, targetdir |
defines { "DEBUG", "TRACE" }
defines { "CALLSPEC=__dllexport" }
includedirs { "../lua/include", "../zlib" }
includedirs { "../includes/**" }
pchheader "myproject.h"
optimize "Speed"
filter { "system:linux", "action:gmake" }
  buildoptions { "`wx-config --cxxflags`", "-ansi", "-pedantic" }
targetname "mytarget"
3.3 链接Linking
(1)链接到外部库是通过links 功能完成的。
links { "png", "zlib" }
(2)links 指令的位置在project 下面设置。
workspace "MyWorkspace"

   project "MyLibraryProject"
      -- ...project settings here...

   project "MyExecutableProject"
      -- ...project settings here...
      links { "MyLibraryProject" }
(3)而查找库,则使用如下指令。
libdirs { "libs", "../mylibs" }
# or
libdirs { os.findlib("X11") }
3.4 配置Configurations
配置是要应用于构建的设置集合,包括标志和开关、头文件和库搜索目录等。每个工作区定义自己的配置名称列表;大多数 IDE 提供的默认值是“调试”和“发布”。
workspace "MyWorkspace"
   configurations { "Debug", "Release" }
workspace "MyWorkspace"
   configurations { "Debug", "DebugDLL", "Release", "ReleaseDLL" }
workspace "MyWorkspace"
   configurations { "Froobniz", "Fozbat", "Cthulhu" }
workspace "HelloWorld"
   configurations { "Debug", "Release" }

   filter "configurations:Debug"
      defines { "DEBUG" }
      flags { "Symbols" }

   filter "configurations:Release"
      defines { "NDEBUG" }
      optimize "On"
3.5 平台Platforms
“平台”在这里有点用词不当;我再次遵循Visual Studio命名法。实际上,平台只是另一组构建配置名称,提供了另一个方向用于配置项目。
configurations { "Debug", "Release" }
platforms { "Win32", "Win64", "Xbox360" }
configurations { "Debug", "Release" }
platforms { "Win32", "Win64", "Xbox360" }

filter { "platforms:Win32" }
    system "Windows"
    architecture "x86"

filter { "platforms:Win64" }
    system "Windows"
    architecture "x86_64"

filter { "platforms:Xbox360" }
    system "Xbox360"
configurations { "Debug", "Release" }
platforms { "Static", "DLL" }

filter { "platforms:Static" }
    kind "StaticLib"

filter { "platforms:DLL" }
    kind "SharedLib"
    defines { "DLL_EXPORTS" }
3.6 过滤Filters
project "MyProject"

  filter { "configurations:Debug" }
    targetdir "bin/debug"

  filter { "configurations:Release" }
    targetdir "bin/release"
3.7 预设值Tokens
wks.name
wks.location -- (location where the workspace/solution is written, not the premake-wks.lua file)

prj.name
prj.location -- (location where the project is written, not the premake-prj.lua file)
prj.language
prj.group

cfg.longname
cfg.shortname
cfg.kind
cfg.architecture
cfg.platform
cfg.system
cfg.buildcfg
cfg.buildtarget -- (see [target], below)
cfg.linktarget -- (see [target], below)
cfg.objdir

file.path
file.abspath
file.relpath
file.directory
file.reldirectory
file.name
file.basename -- (file part without extension)
file.extension -- (including '.'; eg ".cpp")

-- These values are available on build and link targets
-- Replace [target] with one of "cfg.buildtarget" or "cfg.linktarget"
--   Eg: %{cfg.buildtarget.abspath}
[target].abspath
[target].relpath
[target].directory
[target].name
[target].basename -- (file part without extension)
[target].extension -- (including '.'; eg ".cpp")
[target].bundlename
[target].bundlepath
[target].prefix
[target].suffix
4、测试
4.1 测试1:入门例子
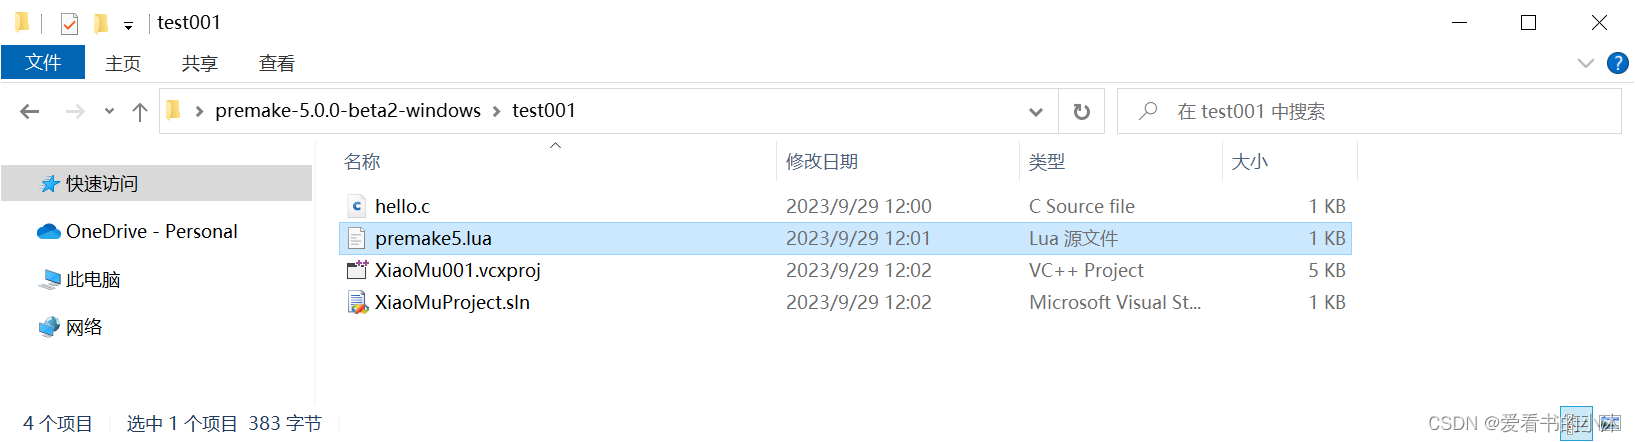
- 新建文件夹test001:
mkdir test001
cd test001
- 新建代码文件hello.c:
/* hello.c */
#include <stdio.h>

int main(void) {
   puts("Hello, world! 爱看书的小沐!");
   return 0;
}
- 新建构建脚本文件premake5.lua:
-- premake5.lua
workspace "XiaoMuProject"
   configurations { "Debug", "Release" }

project "XiaoMu001"
   kind "ConsoleApp"
   language "C"
   targetdir "bin/%{cfg.buildcfg}"

   files { "**.h", "**.c" }

   filter "configurations:Debug"
      defines { "DEBUG" }
      symbols "On"

   filter "configurations:Release"
      defines { "NDEBUG" }
      optimize "On"
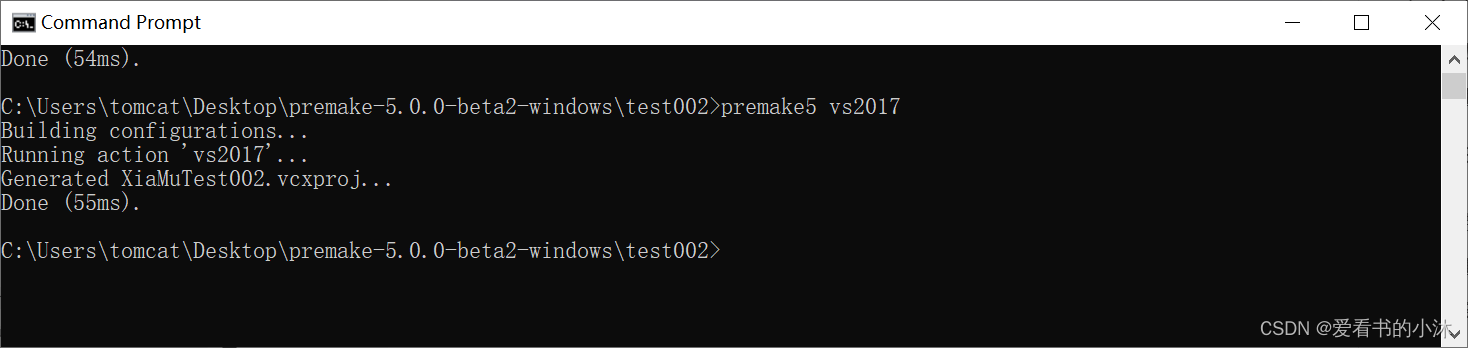
- 执行构建命令如下:
# premake5 --file=MyProjectScript.lua vs2013
premake5 vs2017
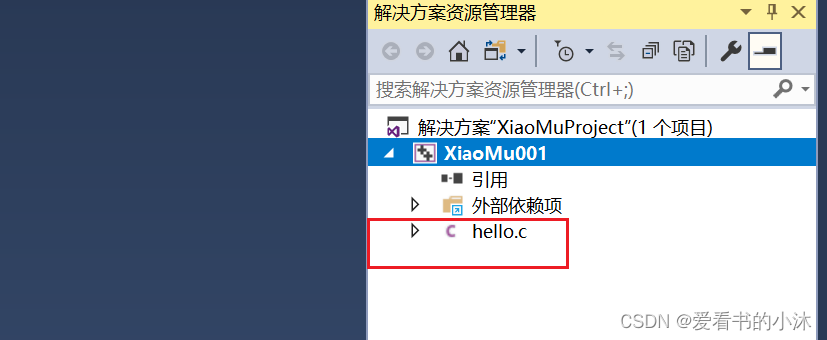
结果如下:
用vs2017打开上面生成的工程文件:

4.2 测试2:入门例子2
- premake5.lua
workspace "XiaMuTest002" -- 解决方案
    startproject "Test" -- 开始项目

    configurations
    {
        "Debug",
        "Release"
    }

    platforms
    {
        "Win32",
        "Win64"
    }

    filter "platforms:Win32"
        system "Windows"
        architecture "x32"

    filter "platforms:Win64"
        system "Windows"
        architecture "x86_64"

outputdir = "%{cfg.platform}/%{cfg.buildcfg}/%{prj.name}"
project "XiaMuTest002"
    kind "ConsoleApp"
    language "C++"

    files
    {
        "./**.cpp",
        "*.c"
    }

	targetdir("../bin/" .. outputdir)
	objdir("../obj/" .. outputdir)
4.3 测试3:glfw例子
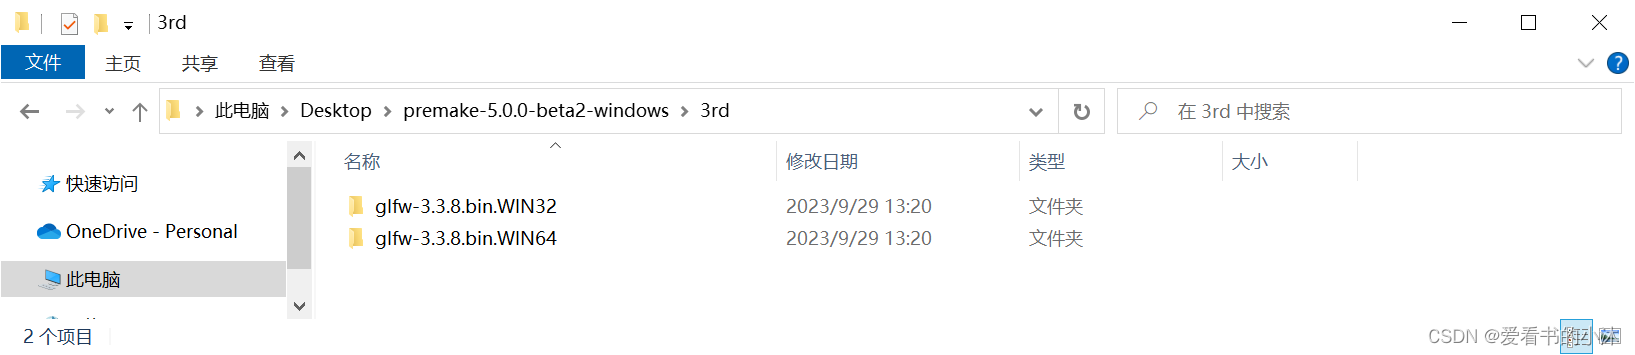
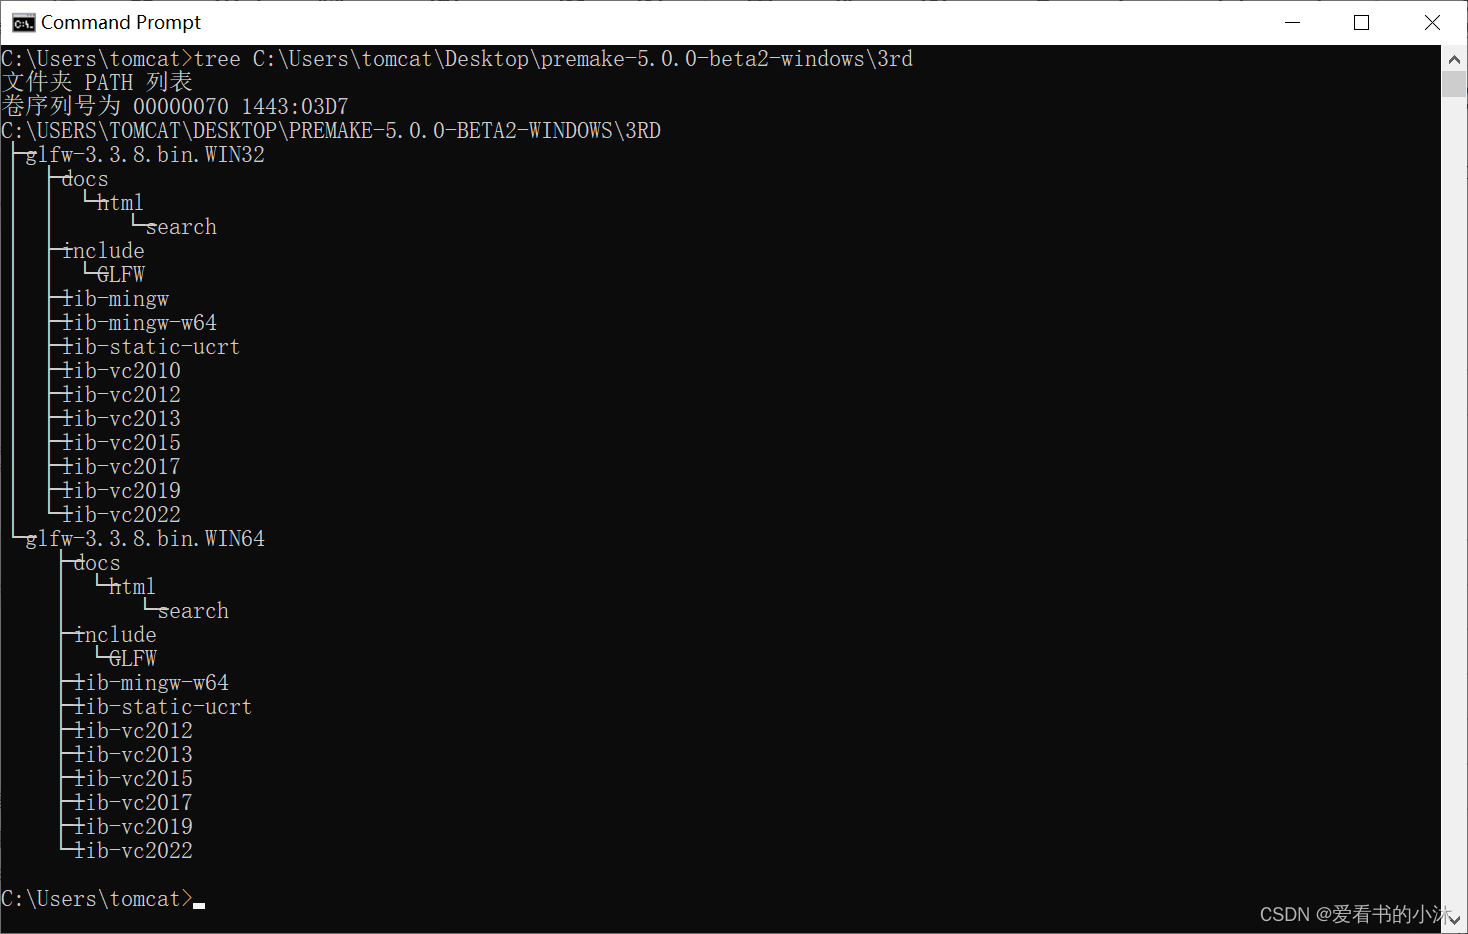
4.3.1 准备第三方库glfw
https://github.com/glfw/glfw/releases
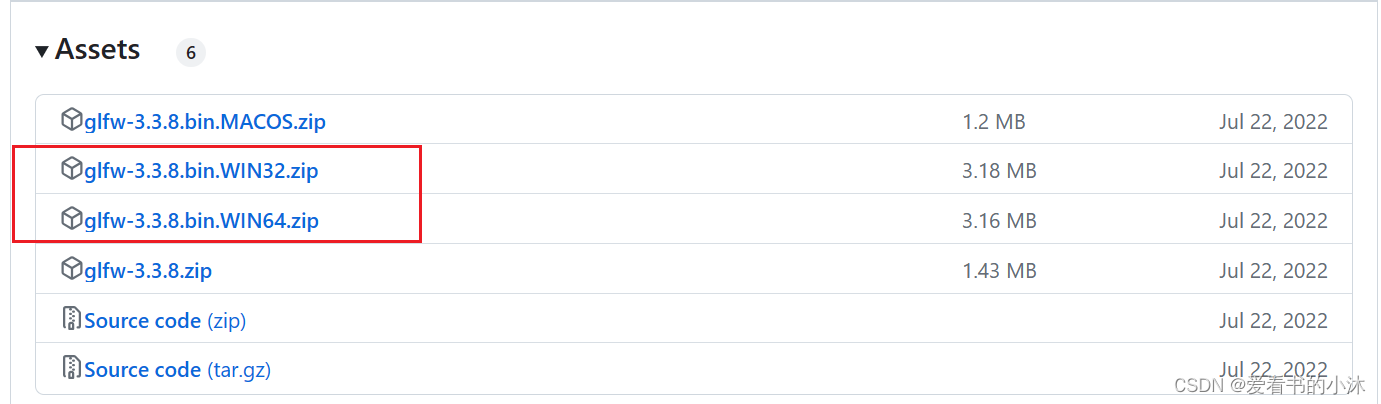
下载完毕之后,解压到文件夹如下:
4.3.2 新建封装库项目ExampleDll
- ExampleDll.h
#ifndef EXAMPLE_DLL_HPP
#define EXAMPLE_DLL_HPP 1

#include <string>
#include <memory>
struct GLFWwindow;

namespace ExDLL
{
	class _declspec(dllexport) Window
	{
	public:
		Window(int width, int  height, const std::string& title);
		~Window();
		bool shouldClose() const noexcept;
		void pollEvents() const noexcept;
		void swapBuffers() const noexcept;
		std::pair<int, int> getWindowSize() const noexcept;
	private:
		GLFWwindow* wnd;
	};
}
#endif
- ExampleDll.cpp
#include "ExampleDll.h"
#include <GLFW/glfw3.h>

namespace ExDLL
{
	Window::Window(int width, int height, const std::string& title)
	{
		glfwInit();
		wnd = glfwCreateWindow(width, height, title.c_str(), nullptr, nullptr);
		glfwMakeContextCurrent(wnd);
	}

	Window::~Window()
	{
		glfwDestroyWindow(wnd);
		glfwTerminate();
	}

	bool Window::shouldClose() const noexcept
	{
		return glfwWindowShouldClose(wnd) != 0;
	}

	void Window::pollEvents() const noexcept
	{
		glfwPollEvents();
	}

	void Window::swapBuffers() const noexcept
	{
		glfwSwapBuffers(wnd);
	}

	std::pair<int, int> Window::getWindowSize() const noexcept
	{
		std::pair<int, int> sz{};
		glfwGetWindowSize(wnd, &sz.first, &sz.second);
		return sz;
	}
}
4.3.3 新建测试项目ExampleTest
- main.cpp
#include <ExampleDll.h>

#if defined _WIN32
	#include <Windows.h>
	#pragma comment(linker,"/subsystem:\"windows\" /entry:\"mainCRTStartup\"")
#endif
#include <gl/GL.h>

//导入ExampleDll中的Window类
class _declspec(dllimport) ExDLL::Window;

int main()
{
	ExDLL::Window window{ 1000, 600, "Hello World! 爱看书的小沐,2023" };
	while (!window.shouldClose())
	{
		// 事件更新
		window.pollEvents();

		// 绘图
		glBegin(GL_TRIANGLES);
			glColor3f(1.0, 0.0, 0.0);
			glVertex2f(-0.5f, -0.5f);

			glColor3f(1.0, 1.0, 0.0);
			glVertex2f(0.5f, -0.5f);

			glColor3f(1.0, 0.0, 1.0);
			glVertex2f(0, 0.5f);
		glEnd();

		// 渲染更新
		window.swapBuffers();
	}
	return 0;
}
4.3.4 新建构建脚本
- premake5.lua
workspace "XiaoMuTest003"
	startproject "ExampleTest" -- 开始项目
	location "vs"
	language "C++"
	architecture "x64"
	configurations {"Debug","Release"}

	filter {"configurations:Debug"}
		symbols "On"
	filter {"configurations:Release"}
		optimize "On"
	-- 重置过滤器的其他设定
	filter {}

	targetdir ("build/target/%{prj.name}/%{cfg.longname}")
	objdir ("build/obj/%{prj.name}/%{cfg.longname}")
	postbuildcommands{
		("{COPY} %{cfg.buildtarget.relpath} \"../bin/\"")
	}

-- 定义函数,包含glfw三方库头文件,可被其他工程调用
function includeGLFW()
	includedirs "../3rd/glfw-3.3.8.bin.WIN64/include"
end

-- 定义函数,链接glfw三方库
function linkGLFW()
	libdirs "../3rd/glfw-3.3.8.bin.WIN64/lib-vc2017"
	links "glfw3dll"
end

-- ExampleDll项目
project "ExampleDll"
	kind "SharedLib"
	files "src/ExampleDll/**"
	includeGLFW()
	linkGLFW()

-- 定义函数,链接ExampleDll动态库
function useExampleDLL()
	includedirs "src/ExampleDll"
	links "ExampleDll"
end

-- App应用程序
project "ExampleTest"
	kind "ConsoleApp"
	files "src/ExampleTest/**"
	useExampleDLL()
	filter "system:windows"
		links {"OpenGL32"}
4.3.5 执行构建命令
最后构建的文件夹和里面存放的文件组织如下:
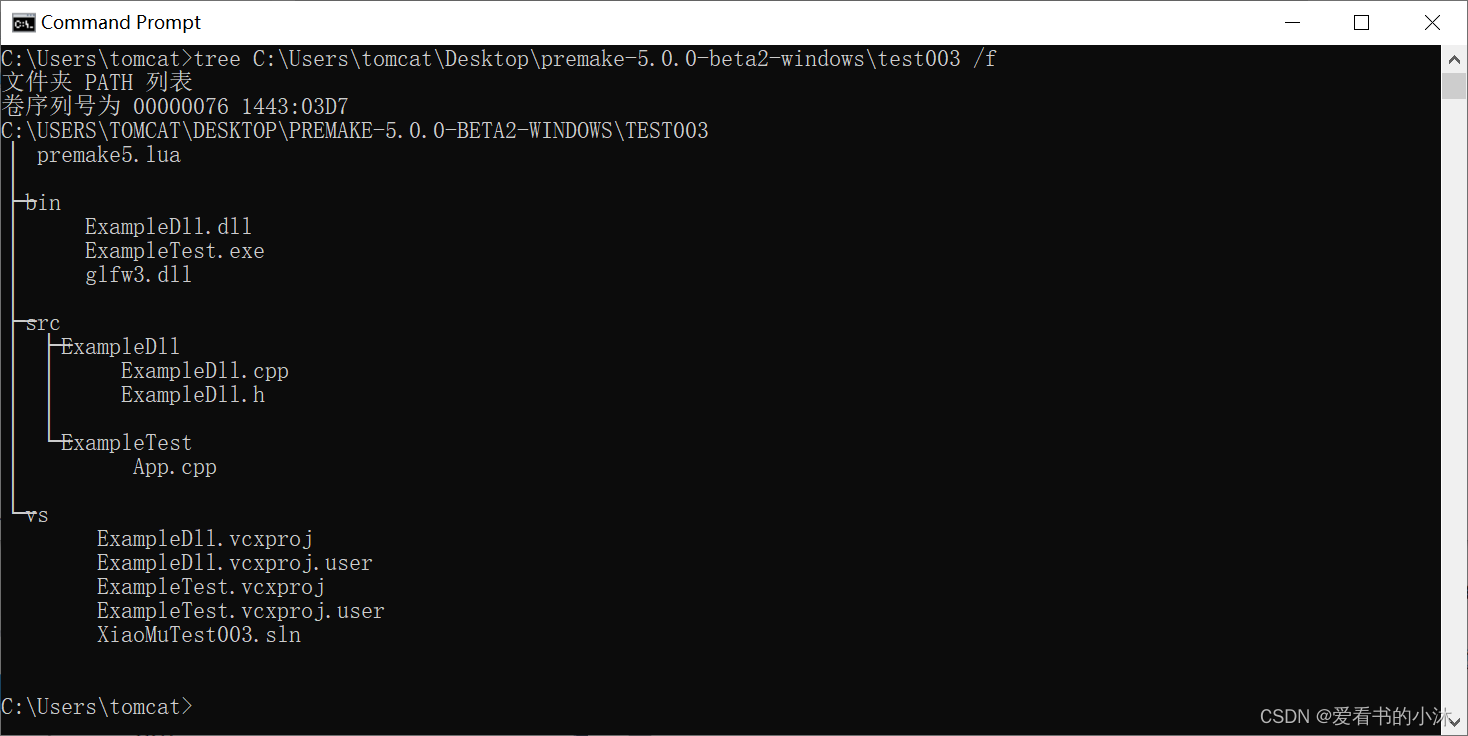
premake5 vs2017

vs2017打开生成的工程文件如下: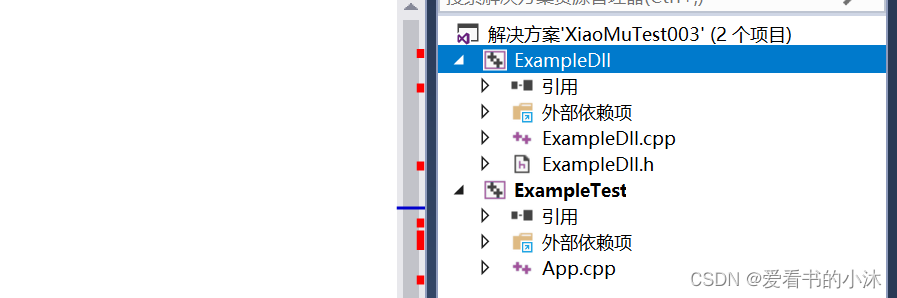
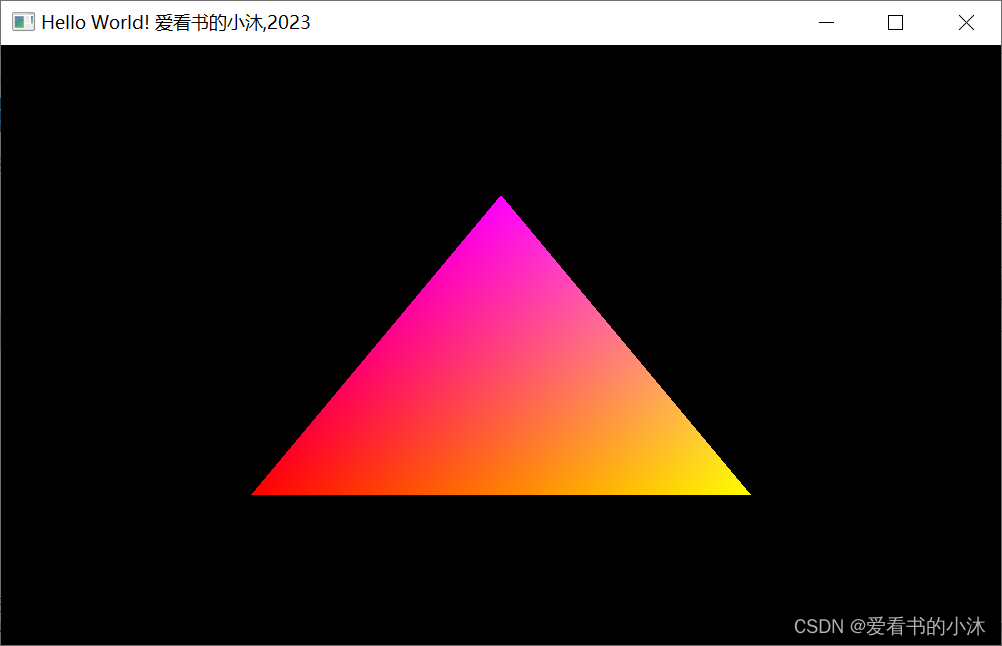
编译和运行后:
结语
如果您觉得该方法或代码有一点点用处,可以给作者点个赞,或打赏杯咖啡;╮( ̄▽ ̄)╭
如果您感觉方法或代码不咋地//(ㄒoㄒ)//,就在评论处留言,作者继续改进;o_O???
如果您需要相关功能的代码定制化开发,可以留言私信作者;(✿◡‿◡)
感谢各位大佬童鞋们的支持!( ´ ▽´ )ノ ( ´ ▽´)っ!!!


 6372
6372


 被折叠的 条评论
为什么被折叠?
被折叠的 条评论
为什么被折叠?
 到【灌水乐园】发言


