


本篇文章主要讲解java项目下使用session进行增删改查等操作的详细代码实例,通过本篇文章您可以快速掌握对session的操作能力。
日期:2024年8月18日
作者:任聪聪
独立博客:https://rccblogs.com/586.html
文章附件:https://download.csdn.net/download/hj960511/89649645 结合文章附件可以更为快速的掌握session的操作编写能力。
一、实际效果:

二、代码实例:
步骤一、创建一个项目并进行构建,导入我们的pom
<?xml version="1.0" encoding="UTF-8"?>
<project xmlns="http://maven.apache.org/POM/4.0.0" xmlns:xsi="http://www.w3.org/2001/XMLSchema-instance"
    xsi:schemaLocation="http://maven.apache.org/POM/4.0.0 https://maven.apache.org/xsd/maven-4.0.0.xsd">
    <modelVersion>4.0.0</modelVersion>
    <groupId>com.sessionDemo</groupId>
    <artifactId>sessionDemo</artifactId>
    <version>0.0.1-SNAPSHOT</version>
    <name>sessionDemo</name>
    <description>Demo project for Spring Boot</description>
    <properties>
        <java.version>11</java.version>
        <project.build.sourceEncoding>UTF-8</project.build.sourceEncoding>
        <project.reporting.outputEncoding>UTF-8</project.reporting.outputEncoding>
        <spring-boot.version>2.6.13</spring-boot.version>
    </properties>
    <dependencies>
        <dependency>
            <groupId>org.springframework.boot</groupId>
            <artifactId>spring-boot-starter-web</artifactId>
        </dependency>
        <dependency>
            <groupId>org.springframework.session</groupId>
            <artifactId>spring-session-core</artifactId>
        </dependency>

        <dependency>
            <groupId>org.springframework.boot</groupId>
            <artifactId>spring-boot-devtools</artifactId>
            <scope>runtime</scope>
            <optional>true</optional>
        </dependency>
        <dependency>
            <groupId>org.projectlombok</groupId>
            <artifactId>lombok</artifactId>
            <optional>true</optional>
        </dependency>
        <dependency>
            <groupId>org.springframework.boot</groupId>
            <artifactId>spring-boot-starter-test</artifactId>
            <scope>test</scope>
        </dependency>
    </dependencies>
    <dependencyManagement>
        <dependencies>
            <dependency>
                <groupId>org.springframework.boot</groupId>
                <artifactId>spring-boot-dependencies</artifactId>
                <version>${spring-boot.version}</version>
                <type>pom</type>
                <scope>import</scope>
            </dependency>
        </dependencies>
    </dependencyManagement>

    <build>
        <plugins>
            <plugin>
                <groupId>org.apache.maven.plugins</groupId>
                <artifactId>maven-compiler-plugin</artifactId>
                <version>3.8.1</version>
                <configuration>
                    <source>11</source>
                    <target>11</target>
                    <encoding>UTF-8</encoding>
                </configuration>
            </plugin>
            <plugin>
                <groupId>org.springframework.boot</groupId>
                <artifactId>spring-boot-maven-plugin</artifactId>
                <version>${spring-boot.version}</version>
                <configuration>
                    <mainClass>com.sessionDemo.sessionDemo.SessionDemoApplication</mainClass>
                    <skip>true</skip>
                </configuration>
                <executions>
                    <execution>
                        <id>repackage</id>
                        <goals>
                            <goal>repackage</goal>
                        </goals>
                    </execution>
                </executions>
            </plugin>
        </plugins>
    </build>

</project>
注意:这里只是对于新项目进行使用,老旧项目可以直接越过此步骤。
步骤二、创建我们的session工具类如下:
目录情况:
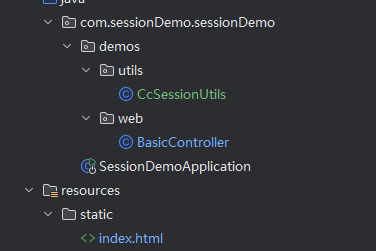
文件内容:
package com.sessionDemo.sessionDemo.demos.utils;

import javax.servlet.http.HttpServletRequest;
import javax.servlet.http.HttpServletResponse;
import javax.servlet.http.HttpSession;

import org.springframework.stereotype.Component;
import org.springframework.web.context.request.RequestContextHolder;
import org.springframework.web.context.request.ServletRequestAttributes;

@Component
public class CcSessionUtils {

    /**
     * 直接获取request对象
     * @return
     */
    public static HttpServletRequest getHttpServletRequest() {
        return ((ServletRequestAttributes) RequestContextHolder.getRequestAttributes()).getRequest();
    }

    /**
     * 直接获取response对象
     * @return
     */
    public static HttpServletResponse getHttpServletResponse() {
        return ((ServletRequestAttributes) RequestContextHolder.getRequestAttributes()).getResponse();
    }

    /**
     * 设置session属性,并指定过期时间
     * @param key 键
     * @param value 值
     * @param maxInactiveInterval 过期时间(秒)
     */
    public static void setSessionAttribute(String key, Object value, int maxInactiveInterval) {
        HttpSession session = getHttpServletRequest().getSession();
        session.setAttribute(key, value);
        session.setMaxInactiveInterval(maxInactiveInterval);
    }

    /**
     * 获取session属性
     * @param key 键
     * @return 属性值
     */
    public static Object getSessionAttribute(String key) {
        HttpSession session = getHttpServletRequest().getSession();
        return session.getAttribute(key);
    }

    /**
     * 删除session属性
     * @param key 键
     */
    public static void removeSessionAttribute(String key) {
        HttpSession session = getHttpServletRequest().getSession();
        session.removeAttribute(key);
    }

    /**
     * 清空一个参数对象
     */
    public void clearSessionAttribute() {
        getHttpServletRequest().getSession().invalidate();
    }

    /**
     * 判断参数是否存在
     * @param key
     * @return
     */
    public boolean existSessionAttribute(String key) {
        return getHttpServletRequest().getSession().getAttribute(key) != null;
    }
}
步骤三、创建控制器并书写我们的测试方法如下:
/*
 * Copyright 2013-2018 the original author or authors.
 *
 * Licensed under the Apache License, Version 2.0 (the "License");
 * you may not use this file except in compliance with the License.
 * You may obtain a copy of the License at
 *
 *      https://www.apache.org/licenses/LICENSE-2.0
 *
 * Unless required by applicable law or agreed to in writing, software
 * distributed under the License is distributed on an "AS IS" BASIS,
 * WITHOUT WARRANTIES OR CONDITIONS OF ANY KIND, either express or implied.
 * See the License for the specific language governing permissions and
 * limitations under the License.
 */

package com.sessionDemo.sessionDemo.demos.web;

import com.sessionDemo.sessionDemo.demos.utils.CcSessionUtils;
import org.springframework.beans.factory.annotation.Autowired;
import org.springframework.stereotype.Controller;
import org.springframework.web.bind.annotation.RequestMapping;
import org.springframework.web.bind.annotation.RequestParam;
import org.springframework.web.bind.annotation.ResponseBody;

import javax.servlet.http.HttpSession;

/**
 * BY RCC: rccblogs.com
 */
@Controller
public class BasicController {

    @Autowired
    private CcSessionUtils ccSessionUtils;

    //设置session
    @RequestMapping("/set")
    @ResponseBody
    public String set(@RequestParam("key") String key, @RequestParam("value") String value, @RequestParam("time_out") int time_out) {
        ccSessionUtils.setSessionAttribute(key, value, time_out);
        return "success";
    }

    //获取session
    @RequestMapping("/get")
    @ResponseBody
    public String get(@RequestParam("key") String key) {
        return ccSessionUtils.existSessionAttribute(key)?ccSessionUtils.getSessionAttribute(key).toString():"数据不存在~";
    }


    //判断session是否存在
    @RequestMapping("/exist")
    @ResponseBody
    public String exist(@RequestParam("key") String key) {
        return ccSessionUtils.existSessionAttribute(key) ? "true" : "false";
    }


    //清空session
    @RequestMapping("/clear")
    @ResponseBody
    public String clear() {
        ccSessionUtils.clearSessionAttribute();
        return "success";
    }

}
步骤四、在static目录下修改我们的html页面内容:
<html>
    <head>
        <title>Session 操作代码实例 </title>
        <meta charset="utf-8">
        <meta name="viewport" content="width=device-width, initial-scale=1.0">
    </head>
    <body>
        <p>Session 操作代码实例</p>
        <a href="/set?key=lucky&value=任聪聪&time_out=666666">/set?key=lucky&value=任聪聪&time_out=666666</a>
        <br>
        <a href="/get?key=lucky">/get?key=lucky</a>
        <br>
        <a href="/exist?key=lucky">/exist?key=lucky  判断是否存在</a>
        <br>
        <a href="/clear">/clear 清空所有session</a>
    </body>
</html>
步骤五、点击我们的入口文件,并点击运行如下图:
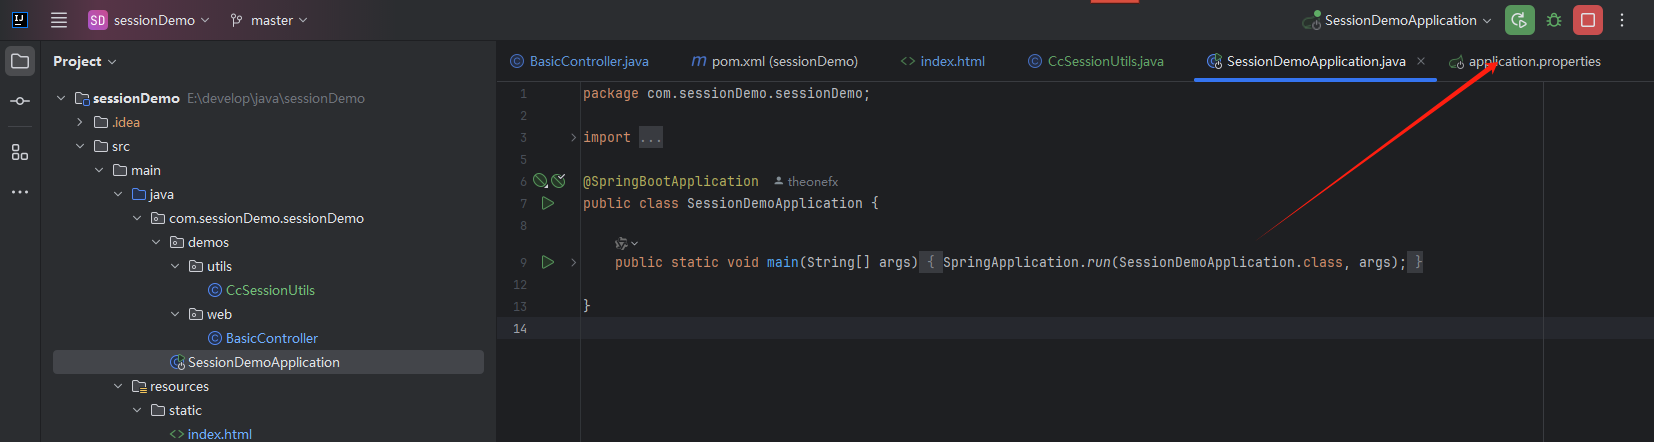
end:运行后输入127.0.0.1:8080即可查看代码运行效果,后续只需调用工具类即可。


 643
643

 被折叠的 条评论
为什么被折叠?
被折叠的 条评论
为什么被折叠?
 到【灌水乐园】发言


