TensorRT系列传送门(不定期更新): 深度框架|TensorRT
楼主曾经在TensorRT(7):python版本使用入门一文中简要记录了python版本是序列化与反序列化加载模型的步骤,但因为环境以及TRT版本不同,API也有相当大的变化,这里重新记录下,在windows下,tensorrt8.2.3.0版本下,调用python的API是如何加载模型的。
实验案例:采用 yolov5的onnx模型,进行FP16量化保存模型。
代码案例均来自 TensorRT提供的sample中。
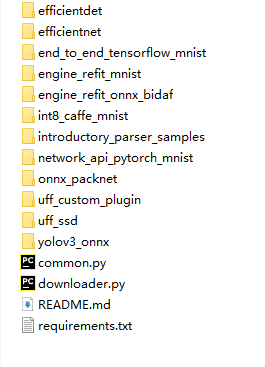
详细可见TensorRT-8.2.3.0\samples\python

一、序列化保存模型
与C++端序列化保存模型的步骤类似
- 1、首先定义个log 文件,然后创建一个runtime
TRT_LOGGER = trt.Logger(trt.Logger.WARNING)
runtime = trt.Runtime(TRT_LOGGER)
- 2、建立builder,设置maxBatchSize参数
builder = trt.Builder(TRT_LOGGER)  # 创建一个builder
builder.max_batch_size = 1
- 3、配置config,如设置fp16等
config = builder.create_builder_config()  # 创建一个congig
config.max_workspace_size = 1 << 20
config.set_flag(trt.BuilderFlag.FP16)
- 4、解析onnx文件,并通过config序列化生成一个network
network = builder.create_network(EXPLICIT_BATCH)  # 创建一个network
parser = trt.OnnxParser(network, TRT_LOGGER)

model = open(onnx_file_path, 'rb')
if not parser.parse(model.read()):
    for error in range(parser.num_errors):
        print(parser.get_error(error))

network.get_input(0).shape = [1, 3, 640, 640]
print('Completed parsing of ONNX file')
print('Building an engine from file {}; this may take a while...'.format(onnx_file_path))
plan = builder.build_serialized_network(network, config)
with open(engine_file_path, "wb") as f:
      f.write(plan)
      print("Completed write Engine")
二、反序列化加载模型
在一中序列化建立好network后,可以调用deserialize_cuda_engine反序列化生成一个 engine
engine = runtime.deserialize_cuda_engine(plan)
print("Completed creating Engine")
如果加载保存在本地的trt模型,可以直接加载engine
 if os.path.exists(engine_file_path):
      # If a serialized engine exists, use it instead of building an engine.
      print("Reading engine from file {}".format(engine_file_path))
      with open(engine_file_path, "rb") as f, trt.Runtime(TRT_LOGGER) as runtime:
          return runtime.deserialize_cuda_engine(f.read())
三、完整代码
完整代码都可在github上的官网samples查询。
onnx_to_tensorrt.py
def get_engine(onnx_file_path, engine_file_path=""):
    """Attempts to load a serialized engine if available, otherwise builds a new TensorRT engine and saves it."""
    def build_engine():
        """Takes an ONNX file and creates a TensorRT engine to run inference with"""
        with trt.Builder(TRT_LOGGER) as builder, builder.create_network(common.EXPLICIT_BATCH) as network, builder.create_builder_config() as config, trt.OnnxParser(network, TRT_LOGGER) as parser, trt.Runtime(TRT_LOGGER) as runtime:
            config.max_workspace_size = 1 << 28 # 256MiB
            builder.max_batch_size = 1
            # Parse model file
            if not os.path.exists(onnx_file_path):
                print('ONNX file {} not found, please run yolov3_to_onnx.py first to generate it.'.format(onnx_file_path))
                exit(0)
            print('Loading ONNX file from path {}...'.format(onnx_file_path))
            with open(onnx_file_path, 'rb') as model:
                print('Beginning ONNX file parsing')
                if not parser.parse(model.read()):
                    print ('ERROR: Failed to parse the ONNX file.')
                    for error in range(parser.num_errors):
                        print (parser.get_error(error))
                    return None
            # The actual yolov3.onnx is generated with batch size 64. Reshape input to batch size 1
            network.get_input(0).shape = [1, 3, 608, 608]
            print('Completed parsing of ONNX file')
            print('Building an engine from file {}; this may take a while...'.format(onnx_file_path))
            plan = builder.build_serialized_network(network, config)
            engine = runtime.deserialize_cuda_engine(plan)
            print("Completed creating Engine")
            with open(engine_file_path, "wb") as f:
                f.write(plan)
            return engine

    if os.path.exists(engine_file_path):
        # If a serialized engine exists, use it instead of building an engine.
        print("Reading engine from file {}".format(engine_file_path))
        with open(engine_file_path, "rb") as f, trt.Runtime(TRT_LOGGER) as runtime:
            return runtime.deserialize_cuda_engine(f.read())
    else:
        return build_engine()


 800
800


 被折叠的 条评论
为什么被折叠?


