


为什么需要LLM
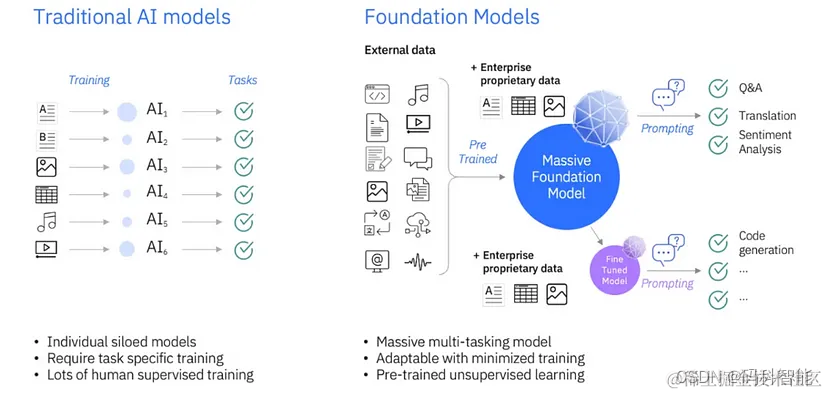
LLM 是一种基础模型,与传统模型不同,在早期模型中基础模型是在大量数据上进行预训练的,然后我们可以直接将它们用于某些任务用例,也可以对其进行微调以适应某些用例。在传统的机器学习模型中,我们必须从头开始为每种情况训练不同的模型,这是昂贵且耗时的。
在这里插入图片描述
预训练的大型语言模型通常被称为基础模型,它们在各种任务上表现良好,我们可以将它们用作目标任务微调的基础。大型语言模型 (LLM) 在客户服务、营销、法律、金融、医疗保健、教育等领域有着广泛的应用,而微调使我们能够使模型适应目标领域和目标任务,这就是 LLM 的微调之处。
低阶自适应参数高效微调 (LoRA) 简介
一些微调的最佳实践包括使用强正则化、使用较小的学习率和少量的epochs。一般来说,像卷积神经网络用于图像分类的神经网络并不完全微调,这样做很昂贵,可能导致灾难性遗忘。我们只微调最后一层或最后几层。
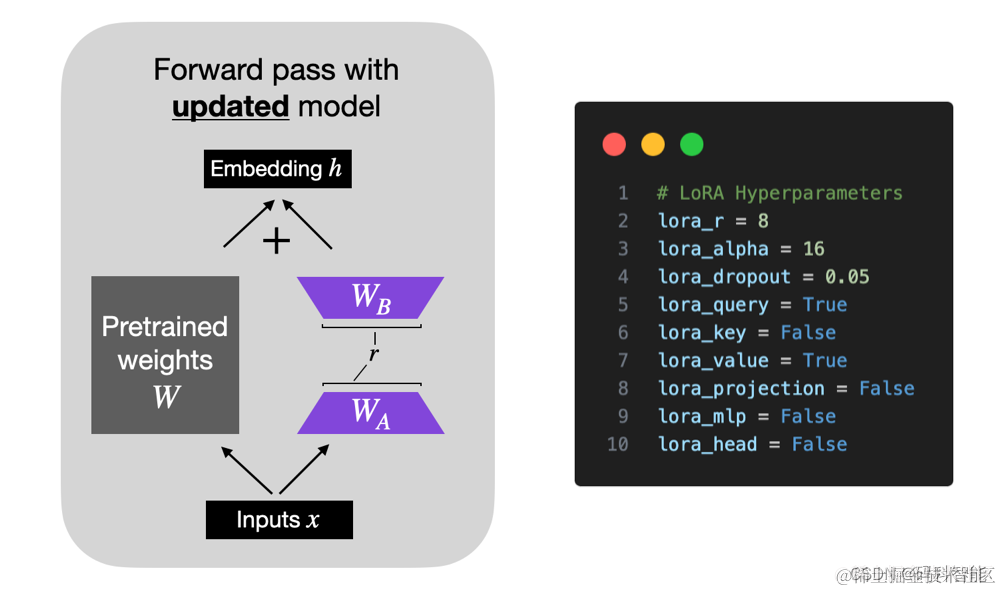
对于LLM,我们使用一种类似的方法,称为参数高效微调(PEFT)。其中一种流行的PEFT方法是低秩适应(LoRA),LoRA 是低秩适应 (Low-Rank Adaptation) 的缩写,其是一种用于微调深度学习模型的新技术,它在模型中添加了少量可训练参数模型,而原始模型参数保持冻结。LoRA 是用于训练定制 LLM 的最广泛使用、参数高效的微调技术之一。
LoRA 可以将可训练参数数量减少 10,000 倍,GPU 内存需求减少 3 倍。尽管可训练参数更少、训练吞吐量更高且无需额外推理,LoRA 在 RoBERTa、DeBERTa、GPT-2 和 GPT-3 上的模型质量表现与微调相当或更好延迟。
LoRA 将权重矩阵分解为两个较小的权重矩阵,如下所示,以更参数有效的方式近似完全监督微调。
在这里插入图片描述
LoRA是怎么去微调适配下游任务的
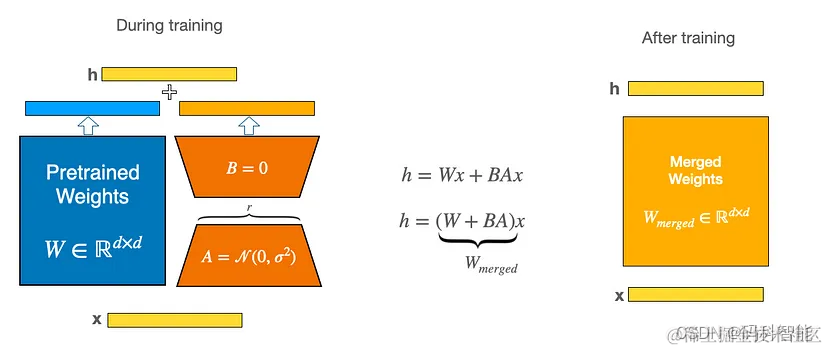
流程很简单,LoRA利用对应下游任务的数据,只通过训练新加部分参数来适配下游任务。而当训练好新的参数后,利用重参的方式,将新参数和老的模型参数合并,这样既能在新任务上到达fine-tune整个模型的效果,又不会在推断的时候增加推断的耗时。
在这里插入图片描述
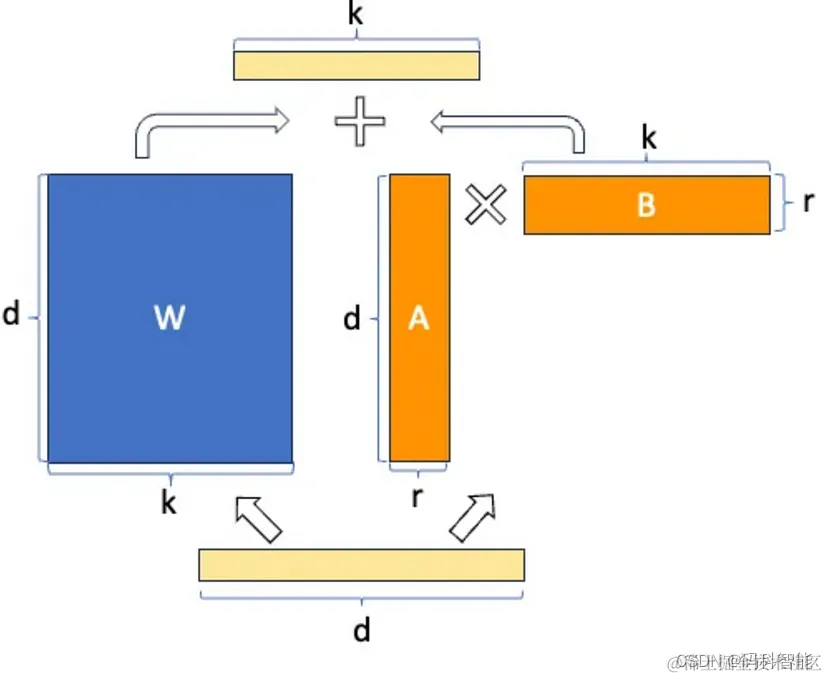
具体思路是,与微调预训练的大型语言模型的权重矩阵(W)中的所有权重相比,微调两个较小的矩阵(A和B),这两个矩阵近似于对原始矩阵的更新。
W0 + ΔW = W0 + BA,其中W0(dk)、A(dr)和B(r*k),r << d、k
这些矩阵构成LoRA适配器。这里的“r”是一个超参数(该论文建议使用1、2、4、8或64,其中4或8在大多数情况下效果最好)。在训练期间,W0被冻结,不接收梯度更新,而A和B包含可训练参数。W0和ΔW = BA与相同的输入进行乘法运算,它们的输出向量在坐标上进行求和。A使用随机高斯初始化,B使用零初始化,因此在训练开始时ΔW = BA为零。
在这里插入图片描述
在推理时,将左右两部分的结果加到一起即可,h=Wx+BAx=(W+BA)x,所以,只要将训练完成的矩阵乘积BA跟原本的权重矩阵W加到一起作为新权重参数替换原始预训练语言模型的W即可,不会增加额外的计算资源。
LoRA 伪代码
LoRA 的实现相对简单。我们可以将其视为 LLM 中全连接层的修改前向传递。在伪代码中,如下所示:
代码语言:javascript
input_dim = 768  # e.g., the hidden size of the pre-trained model
output_dim = 768  # e.g., the output size of the layer
rank = 8  # The rank 'r' for the low-rank adaptation

W = ... # from pretrained network with shape input_dim x output_dim

W_A = nn.Parameter(torch.empty(input_dim, rank)) # LoRA weight A
W_B = nn.Parameter(torch.empty(rank, output_dim)) # LoRA weight B

# Initialization of LoRA weights
nn.init.kaiming_uniform_(W_A, a=math.sqrt(5))
nn.init.zeros_(W_B)

def regular_forward_matmul(x, W):
    h = x @ W
return h

def lora_forward_matmul(x, W, W_A, W_B):
    h = x @ W  # regular matrix multiplication
    h += x @ (W_A @ W_B)*alpha # use scaled LoRA weights
return h
在上面的伪代码中,alpha 是一个缩放因子,用于调整组合结果(原始模型输出加上低秩自适应)的大小。这可以平衡预训练模型的知识和新的特定于任务的适应 - 默认情况下,alpha 通常设置为 1。另请注意,虽然 W A 初始化为小的随机权重,WB 初始化为 0,因此
ΔW = WA WB = 0 < /span> 在训练开始时,意味着我们用原始权重开始训练。
代码部分
在本博客中,我们将使用LaMini-instruction 数据集 作为示例数据集。如果我们有一些自定义企业 QnA 数据集,我们可以使用相同的数据集来微调模型。我们会一步一步地去做——
第 1 步 — 加载 LaMini 指令数据集 使用 Huggingface 中的 load_dataset 第 2 步 — 加载 Dolly Tokenizer并使用 Huggingface 进行建模(再次!) 第 3 步 — 数据准备 — Tokenize, 分割数据集并准备批处理 第 4 步 — 配置 LoRA 并获取 PEFT 模型 第 5 步 — 训练模型并保存 第 6 步 - 使用微调模型进行预测
在此之前,让我们导入必要的包
代码语言:javascript
# mentioning datatypes for better documentation
from typing import Dict, List
from datasets import Dataset, load_dataset, disable_caching
disable_caching() ## disable huggingface cache
from transformers import pipeline, AutoModelForCausalLM, AutoTokenizer
import torch
from torch.utils.data import Dataset
from IPython.display import Markdown
- 数据加载
代码语言:javascript
# Dataset Preparation
dataset = load_dataset("MBZUAI/LaMini-instruction" , split = 'train')
small_dataset = dataset.select([i for i in range(200)])
print(small_dataset)
print(small_dataset[0])

# creating templates
prompt_template = """Below is an instruction that describes a task. Write a response that appropriately completes the request. Instruction: {instruction}\n Response:"""
answer_template = """{response}"""

# creating function to add keys in the dictionary for prompt, answer and whole text
def _add_text(rec):
    instruction = rec["instruction"]
    response = rec["response"]
    # check if both exists, else raise error
    if not instruction:
        raise ValueError(f"Expected an instruction in: {rec}")
    if not response:
        raise ValueError(f"Expected a response in: {rec}")
    rec["prompt"] = prompt_template.format(instruction=instruction)
    rec["answer"] = answer_template.format(response=response)
    rec["text"] = rec["prompt"] + rec["answer"]
    return rec

# running through all samples
small_dataset = small_dataset.map(_add_text)
print(small_dataset[0])
为了微调我们的 LLM,我们需要用提示来装饰我们的指令数据集 — 指令:{指令} 响应:{响应}
- 分词器和模型加载
代码语言:javascript
# loading the tokenizer for dolly model. The tokenizer converts raw text into tokens
model_id = "databricks/dolly-v2-3b"
tokenizer = AutoTokenizer.from_pretrained(model_id)
tokenizer.pad_token = tokenizer.eos_token

#loading the model using AutoModelForCausalLM
model = AutoModelForCausalLM.from_pretrained(
    model_id,
    # use_cache=False,
    device_map="auto", #"balanced",
    load_in_8bit=True,
    torch_dtype=torch.float16
)

# resizes input token embeddings matrix of the model if new_num_tokens != config.vocab_size.
model.resize_token_embeddings(len(tokenizer))
> Embedding(50280, 2560)
- 数据准备
代码语言:javascript
from functools import partial
import copy
from transformers import DataCollatorForSeq2Seq

MAX_LENGTH = 256

# Function to generate token embeddings from text part of batch
def _preprocess_batch(batch: Dict[str, List]):
    model_inputs = tokenizer(batch["text"], max_length=MAX_LENGTH, truncation=True, padding='max_length')
    model_inputs["labels"] = copy.deepcopy(model_inputs['input_ids'])
    return model_inputs

_preprocessing_function = partial(_preprocess_batch)

# apply the preprocessing function to each batch in the dataset
encoded_small_dataset = small_dataset.map(
        _preprocessing_function,
        batched=True,
        remove_columns=["instruction", "response", "prompt", "answer"],
)
processed_dataset = encoded_small_dataset.filter(lambda rec: len(rec["input_ids"]) <= MAX_LENGTH)

# splitting dataset
split_dataset = processed_dataset.train_test_split(test_size=14, seed=0)
print(split_dataset)

# takes a list of samples from a Dataset and collate them into a batch, as a dictionary of PyTorch tensors.
data_collator = DataCollatorForSeq2Seq(
        model = model, tokenizer=tokenizer, max_length=MAX_LENGTH, pad_to_multiple_of=8, padding='max_length')
- 配置LoRA
代码语言:javascript
from peft import LoraConfig, get_peft_model, prepare_model_for_int8_training

LORA_R = 256 # 512
LORA_ALPHA = 512 # 1024
LORA_DROPOUT = 0.05
# Define LoRA Config
lora_config = LoraConfig(
                 r = LORA_R, # the dimension of the low-rank matrices
                 lora_alpha = LORA_ALPHA, # scaling factor for the weight matrices
                 lora_dropout = LORA_DROPOUT, # dropout probability of the LoRA layers
                 bias="none",
                 task_type="CAUSAL_LM",
                 target_modules=["query_key_value"],
)

# Prepare int-8 model for training - utility function that prepares a PyTorch model for int8 quantization training. <https://huggingface.co/docs/peft/task_guides/int8-asr>
model = prepare_model_for_int8_training(model)
# initialize the model with the LoRA framework
model = get_peft_model(model, lora_config)
model.print_trainable_parameters()

> trainable params: 83886080 || all params: 2858972160 || trainable%: 2.9341342029717423
- 模型训练与保存
代码语言:javascript
from transformers import TrainingArguments, Trainer
import bitsandbytes
# define the training arguments first.
EPOCHS = 3
LEARNING_RATE = 1e-4
MODEL_SAVE_FOLDER_NAME = "dolly-3b-lora"
training_args = TrainingArguments(
                    output_dir=MODEL_SAVE_FOLDER_NAME,
                    overwrite_output_dir=True,
                    fp16=True, #converts to float precision 16 using bitsandbytes
                    per_device_train_batch_size=1,
                    per_device_eval_batch_size=1,
                    learning_rate=LEARNING_RATE,
                    num_train_epochs=EPOCHS,
                    logging_strategy="epoch",
                    evaluation_strategy="epoch",
                    save_strategy="epoch",
)
# training the model
trainer = Trainer(
        model=model,
        tokenizer=tokenizer,
        args=training_args,
        train_dataset=split_dataset['train'],
        eval_dataset=split_dataset["test"],
        data_collator=data_collator,
)
model.config.use_cache = False  # silence the warnings. Please re-enable for inference!
trainer.train()
# only saves the incremental 🤗 PEFT weights (adapter_model.bin) that were trained, meaning it is super efficient to store, transfer, and load.
trainer.model.save_pretrained(MODEL_SAVE_FOLDER_NAME)
# save the full model and the training arguments
trainer.save_model(MODEL_SAVE_FOLDER_NAME)
trainer.model.config.save_pretrained(MODEL_SAVE_FOLDER_NAME)
该模型似乎对训练数据过度拟合,这可能是因为训练测试数据集、训练参数的差异,但我们找到了微调 LLM 的关键。
- 使用微调模型进行预测
代码语言:javascript
# Function to format the response and filter out the instruction from the response.
def postprocess(response):
    messages = response.split("Response:")
    if not messages:
        raise ValueError("Invalid template for prompt. The template should include the term 'Response:'")
    return "".join(messages[1:])
# Prompt for prediction
inference_prompt = "List 5 reasons why someone should learn to cook"
# Inference pipeline with the fine-tuned model
inf_pipeline =  pipeline('text-generation', model=trainer.model, tokenizer=tokenizer, max_length=256, trust_remote_code=True)
# Format the prompt using the `prompt_template` and generate response
response = inf_pipeline(prompt_template.format(instruction=inference_prompt))[0]['generated_text']
# postprocess the response
formatted_response = postprocess(response)
formatted_response
如何系统的去学习AI大模型LLM ?
作为一名热心肠的互联网老兵,我意识到有很多经验和知识值得分享给大家,也可以通过我们的能力和经验解答大家在人工智能学习中的很多困惑,所以在工作繁忙的情况下还是坚持各种整理和分享。
但苦于知识传播途径有限,很多互联网行业朋友无法获得正确的资料得到学习提升,故此将并将重要的 AI大模型资料 包括AI大模型入门学习思维导图、精品AI大模型学习书籍手册、视频教程、实战学习等录播视频免费分享出来。
所有资料 ⚡️ ,朋友们如果有需要全套 《LLM大模型入门+进阶学习资源包》,扫码获取~

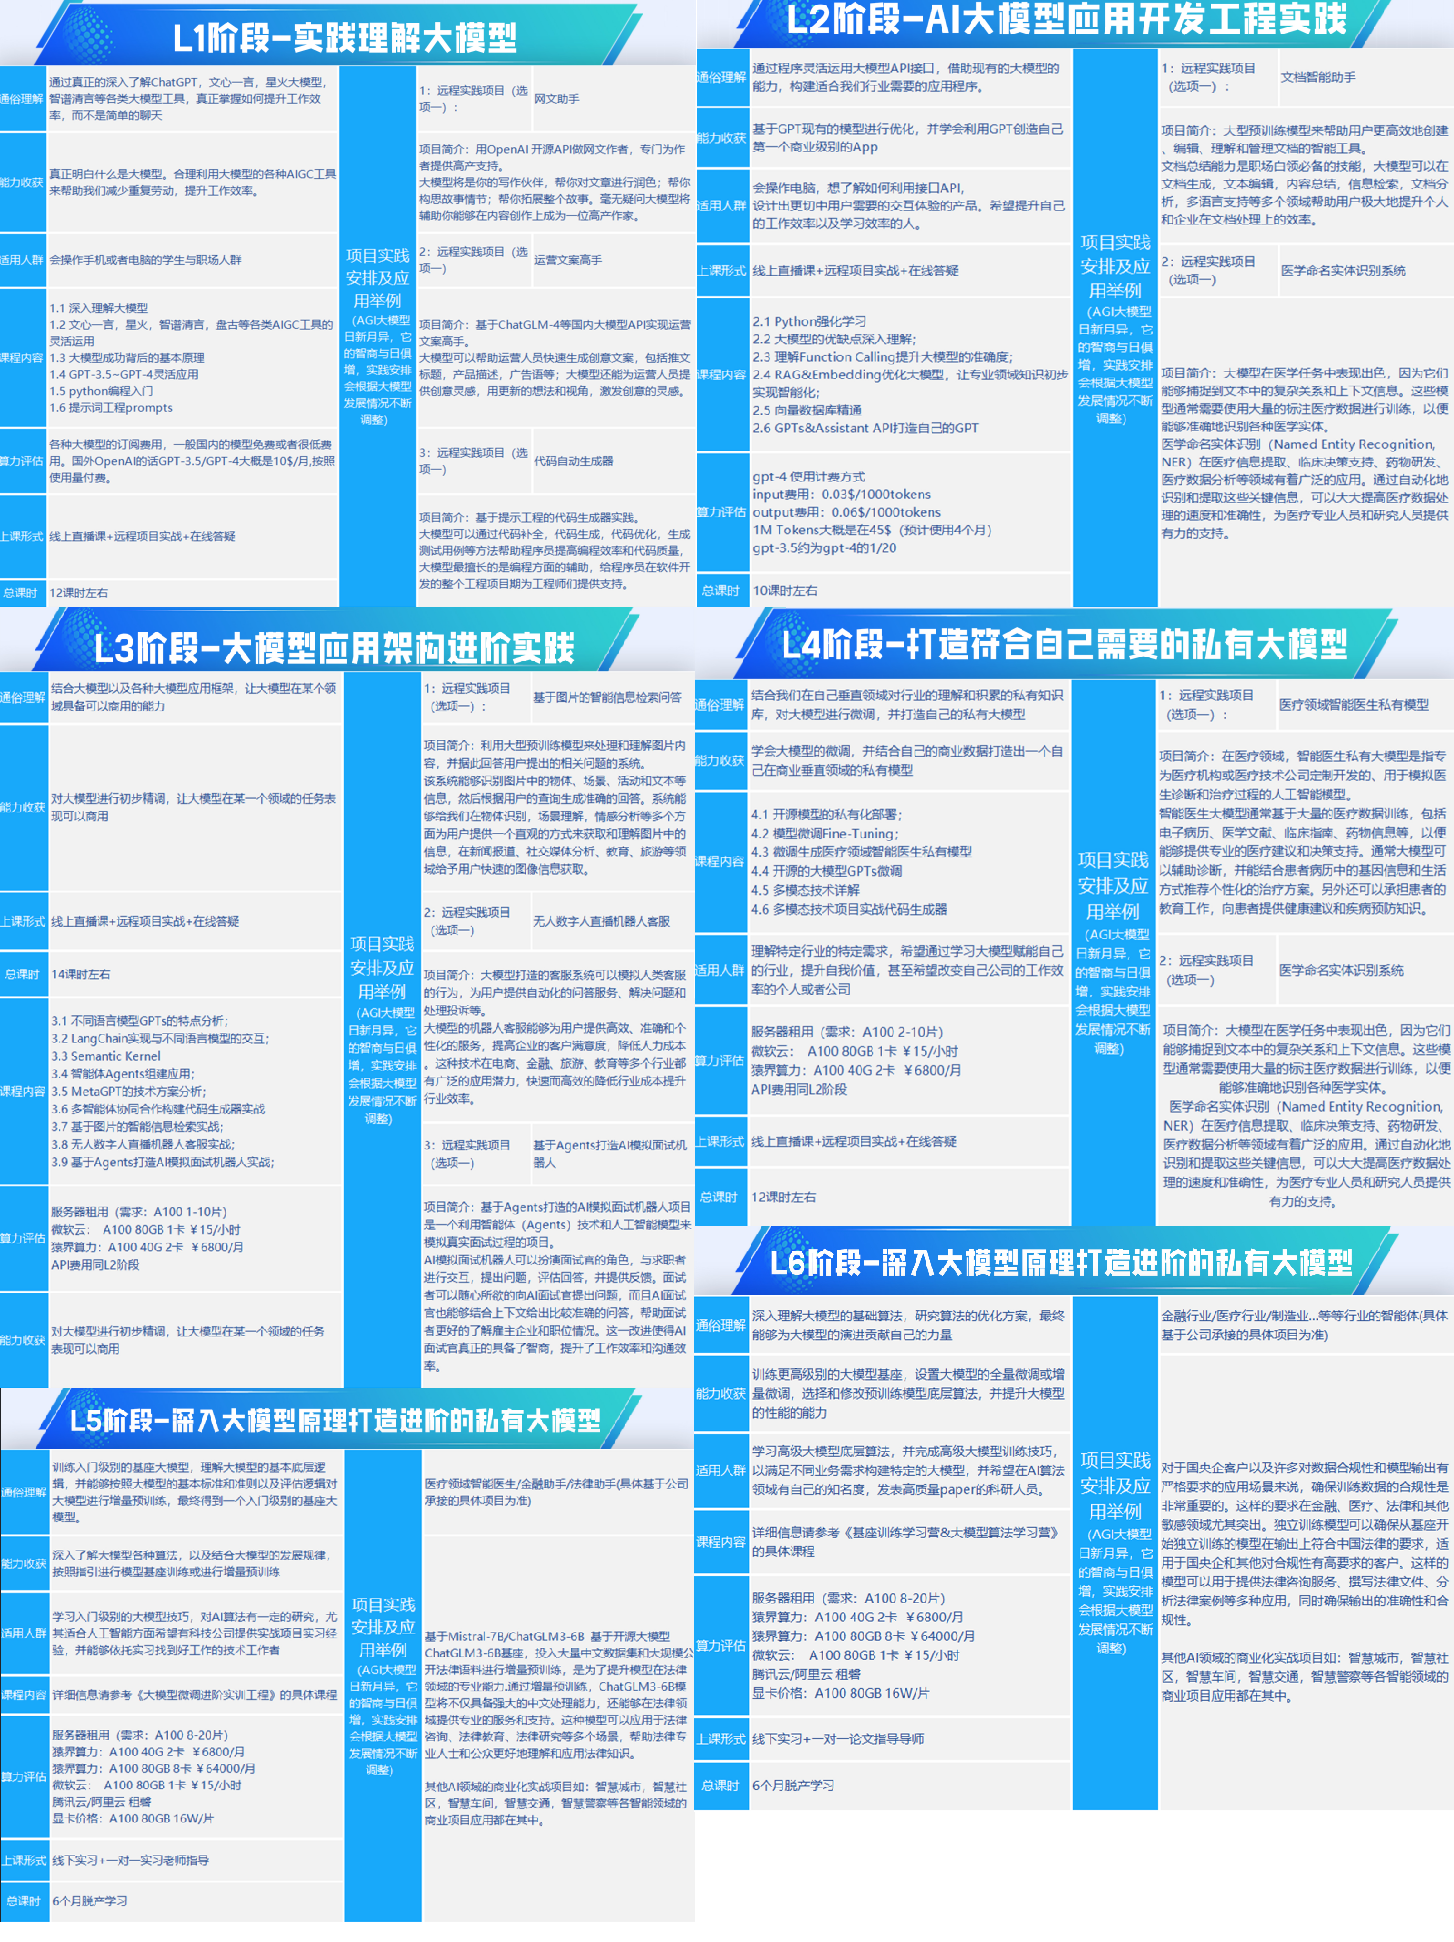
一、全套AGI大模型学习路线
AI大模型时代的学习之旅:从基础到前沿,掌握人工智能的核心技能!
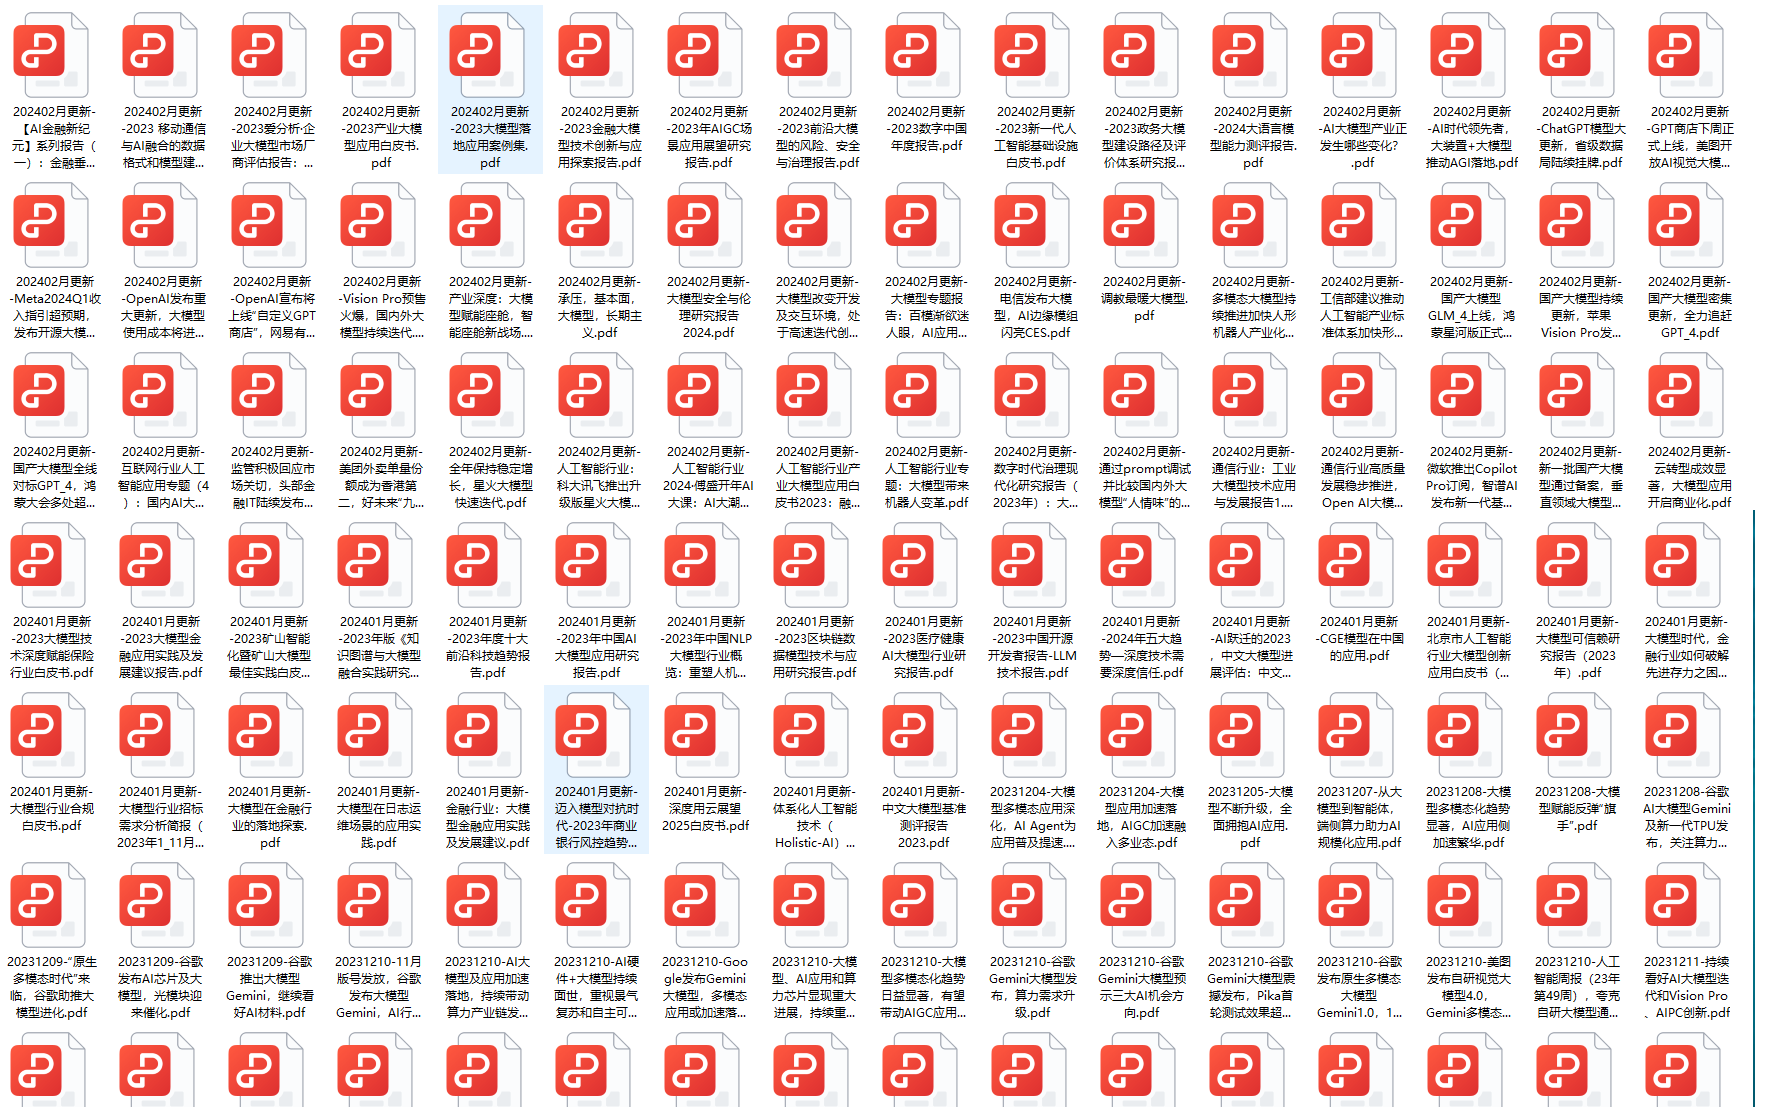
二、640套AI大模型报告合集
这套包含640份报告的合集,涵盖了AI大模型的理论研究、技术实现、行业应用等多个方面。无论您是科研人员、工程师,还是对AI大模型感兴趣的爱好者,这套报告合集都将为您提供宝贵的信息和启示。
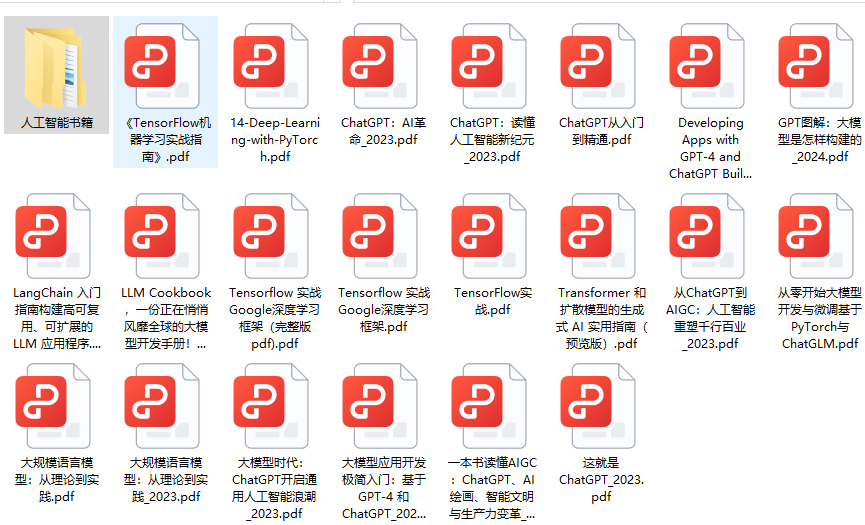
三、AI大模型经典PDF籍
随着人工智能技术的飞速发展,AI大模型已经成为了当今科技领域的一大热点。这些大型预训练模型,如GPT-3、BERT、XLNet等,以其强大的语言理解和生成能力,正在改变我们对人工智能的认识。 那以下这些PDF籍就是非常不错的学习资源。

四、AI大模型商业化落地方案

阶段1:AI大模型时代的基础理解
- 目标:了解AI大模型的基本概念、发展历程和核心原理。
- 内容:
- L1.1 人工智能简述与大模型起源
- L1.2 大模型与通用人工智能
- L1.3 GPT模型的发展历程
- L1.4 模型工程
- L1.4.1 知识大模型
- L1.4.2 生产大模型
- L1.4.3 模型工程方法论
- L1.4.4 模型工程实践 - L1.5 GPT应用案例
阶段2:AI大模型API应用开发工程
- 目标:掌握AI大模型API的使用和开发,以及相关的编程技能。
- 内容:
- L2.1 API接口
- L2.1.1 OpenAI API接口
- L2.1.2 Python接口接入
- L2.1.3 BOT工具类框架
- L2.1.4 代码示例 - L2.2 Prompt框架
- L2.2.1 什么是Prompt
- L2.2.2 Prompt框架应用现状
- L2.2.3 基于GPTAS的Prompt框架
- L2.2.4 Prompt框架与Thought
- L2.2.5 Prompt框架与提示词 - L2.3 流水线工程
- L2.3.1 流水线工程的概念
- L2.3.2 流水线工程的优点
- L2.3.3 流水线工程的应用 - L2.4 总结与展望
- L2.1 API接口
阶段3:AI大模型应用架构实践
- 目标:深入理解AI大模型的应用架构,并能够进行私有化部署。
- 内容:
- L3.1 Agent模型框架
- L3.1.1 Agent模型框架的设计理念
- L3.1.2 Agent模型框架的核心组件
- L3.1.3 Agent模型框架的实现细节 - L3.2 MetaGPT
- L3.2.1 MetaGPT的基本概念
- L3.2.2 MetaGPT的工作原理
- L3.2.3 MetaGPT的应用场景 - L3.3 ChatGLM
- L3.3.1 ChatGLM的特点
- L3.3.2 ChatGLM的开发环境
- L3.3.3 ChatGLM的使用示例 - L3.4 LLAMA
- L3.4.1 LLAMA的特点
- L3.4.2 LLAMA的开发环境
- L3.4.3 LLAMA的使用示例 - L3.5 其他大模型介绍
- L3.1 Agent模型框架
阶段4:AI大模型私有化部署
- 目标:掌握多种AI大模型的私有化部署,包括多模态和特定领域模型。
- 内容:
- L4.1 模型私有化部署概述
- L4.2 模型私有化部署的关键技术
- L4.3 模型私有化部署的实施步骤
- L4.4 模型私有化部署的应用场景
学习计划:
- 阶段1:1-2个月,建立AI大模型的基础知识体系。
- 阶段2:2-3个月,专注于API应用开发能力的提升。
- 阶段3:3-4个月,深入实践AI大模型的应用架构和私有化部署。
- 阶段4:4-5个月,专注于高级模型的应用和部署。
这份完整版的所有 ⚡️ 大模型 LLM 学习资料已经上传CSDN,朋友们如果需要可以微信扫描下方CSDN官方认证二维码免费领取【保证100%免费】
全套 《LLM大模型入门+进阶学习资源包》↓↓↓ 获取~


 2459
2459

 被折叠的 条评论
为什么被折叠?
被折叠的 条评论
为什么被折叠?
 到【灌水乐园】发言


